This anchorless belay relied on bodyweight and broke all the rules in the book, including some that weren't even in there.
The post He Used a Human As the Belay Anchor. Really? (Yes, Really) appeared first on Climbing.
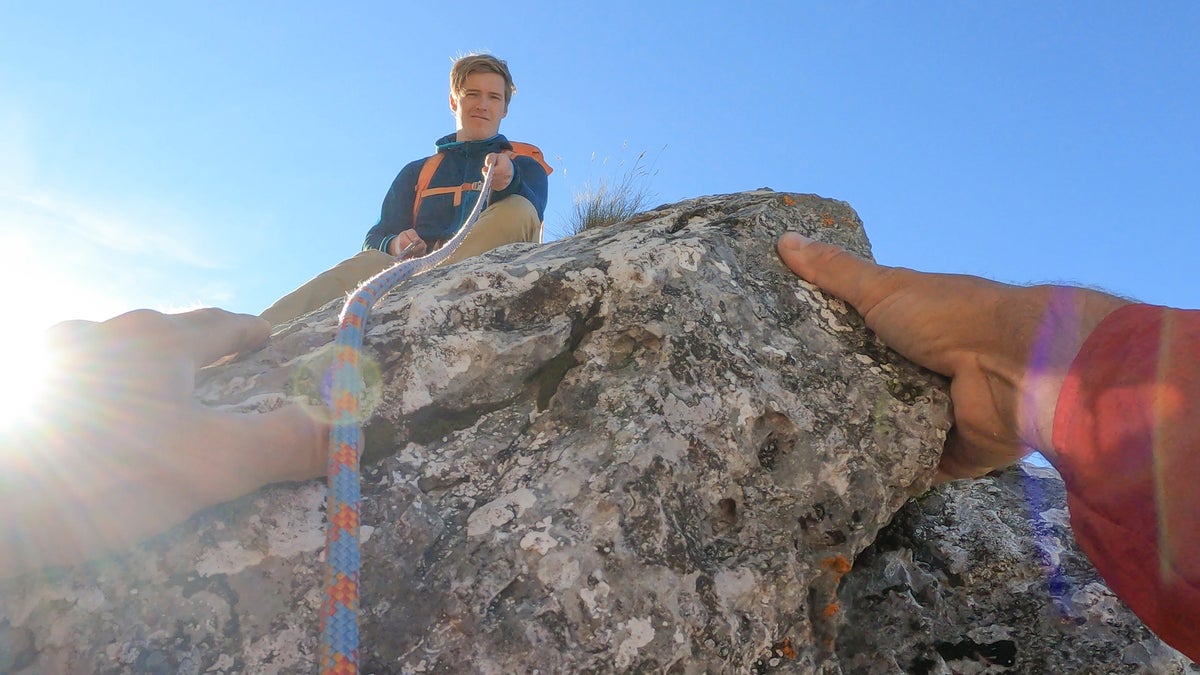
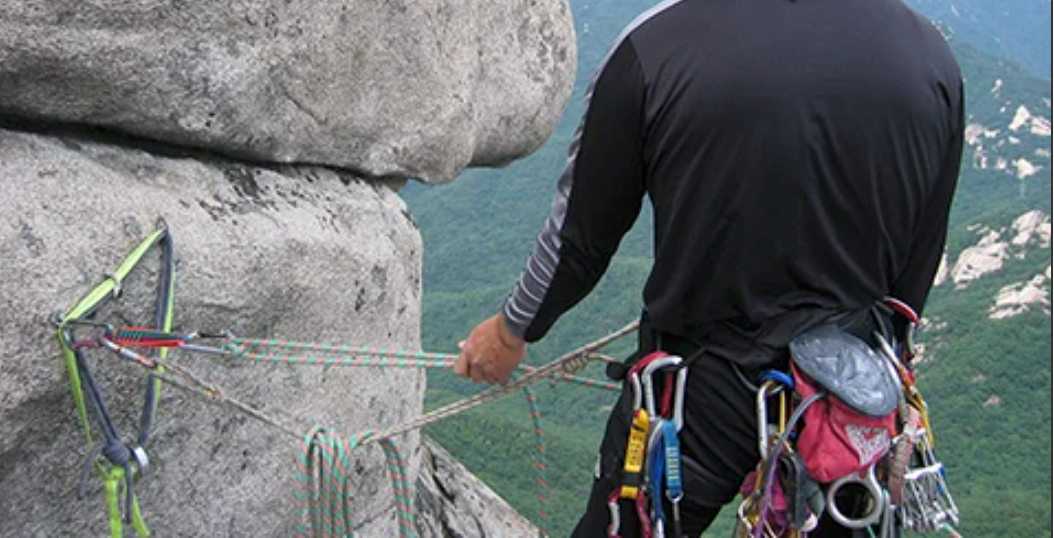
]]>I saw a big guy struggling to rope-solo up a tricky 5.8. He was using an ascender, and he wasn’t taking up slack very well. The real problem was at the top of the cliff. His “anchor” was his smaller buddy, sitting five feet from the edge, holding the rope around his hip. I explained that a fall would’ve yanked them both off the cliff, but got blank stares.
—Submitted by Ed, via Climbing.com
LESSON: Use common sense and think through worst-case scenarios. Nothing about this “meat anchor” is ERNEST (equalized, redundant, no extension, solid, timely), and it put two lives at risk. It actually takes quite a lot to hold someone on a rope, more than you may think. If the “soloist” had fallen he likely would have dragged his buddy off the top of the cliff. Plus, if you have a partner, just have her secure to a proper anchor and belay you. There is no advantage to toprope soloing, and using an ascender for a self-belay device is yet another bad idea. There are numerous devices and techniques that are proven and work better than ascenders. Very likely these two climbers were rank beginners as evidenced, among other things, by using a hip belay. Holding someone on a hip belay takes practice (and heavy clothing, unless you want rope burns) and went out of favor oh, about 50 years ago when belay devices became popular. You would have done well to intervene with a bit of friendly advice. Stepping in like that can be awkward, but not as bad as calling 911 and rendering first aid.
Also Read: Here’s a Dangerous Belayer You Won’t Want To Climb With
A new climber set up a toprope by clipping one quickdraw between two bolts. Not only was the rope unsecured and running against a nylon sling, but the angle between the bolts was about 170°.—Submitted by Cameron Hunt, via Facebook
LESSON: Basic anchor principles aside, two things make this especially dangerous. First, a nylon rope rubbing against a nylon sling under weight will generate a lot of heat. There’s a good chance the sling will melt. Metal should be used between all soft goods. Second, the wide angle would multiply the force generated in a fall. With a 30° angle, each bolt bears 52 percent of the original load. With a 120° angle, each bolt bears 100 percent of the original load—lower loads on the anchor are always better than higher loads. Using longer slings to decrease the angle, decreasing the load is a no brainer.
Climber: “Take!” Belayer: “Hold on. Let me finish texting my mom.”—Submitted by George Terrizzi, via Facebook
LESSON: Put the phone away and pay strict attention to your climber. “Take” is a serious command that warrants an immediate response. You can tell your mom you love her when you get home.
Want more? Check out more installments in our ever-growing hall of dangerous behavior:
Climbed On Webbing Instead of Rope
Used Hands for Belay … No Device
Actually used a Grappling Hook for Climbing
Belay Device Somehow Unclipped Itself, And Leader Fell
They Used Parachute Cord For Slings
No belay Anchor on Multi Pitch, and Leader Falls
Lucky He Didn’t Die. Lowered From a Toy Carabiner
Unfortunate Groundfall, Fortunate Landing
Leader Decks When Experienced Climber Bungles the Belay
Saw Through Someone Else’s Rope
Belayed With Hands Only—No Device!
Smoke Brick Weed and Go Climbing
Belay With a Knife In Your Hand
The post He Used a Human As the Belay Anchor. Really? (Yes, Really) appeared first on Climbing.
]]>
It's a fantastical, unbelievable story, but the unbelievable really happened.
The post Belay Device Unclipped Itself … And Leader Fell appeared first on Climbing.
]]>

We were climbing at Chuckwalla in southern Utah when we witnessed a belay accident. My partner had just reached the top of his route. As I started to lower him, I heard a rope zipping freely. I looked to my left, and a climber was in a free fall about 60 feet up. Then he stopped suddenly. His belayer looked astonished. His belay device had somehow come off his harness and was now jammed into the first quickdraw. It was the only thing holding the climber. We quickly had someone put the climber back on belay and removed the jammed device from the rope. The worst part is that the belayer had no idea how it happened.
—Eric Freiberg, via email
LESSON: This one does sound a bit fantastic—how did the quickdraw lock the rope?—but crazy stuff happens all the time, so on that note… Unless the belayer’s harness broke, there’s really only one way this can happen. The belay carabiner had to unclip itself from the harness. That’s only possible if it wasn’t locked. Always check that your belay carabiner is locked, and then have your partner double-check before she starts climbing. For added assurance, use an auto-locking carabiner so it can’t unscrew itself during the climb, and choose an anti-cross-loading design that keeps the harness and carabiner in the proper orientation such as the Metolius Gatekeeper.
Want more? Check out more installments in our ever-growing hall of dangerous behavior:
They Used Parachute Cord For Slings
No belay Anchor on Multi Pitch, and Leader Falls
Lucky He Didn’t Die. Lowered From a Toy Carabiner
Unfortunate Groundfall, Fortunate Landing
Leader Decks When Experienced Climber Bungles the Belay
Saw Through Someone Else’s Rope
Belayed With Hands Only—No Device!
Smoke Brick Weed and Go Climbing
Belay With a Knife In Your Hand
Don’t Let a Clueless Dad Take a Kid Climbing
She Got Frustrated and Untied—On Lead
The post Belay Device Unclipped Itself … And Leader Fell appeared first on Climbing.
]]>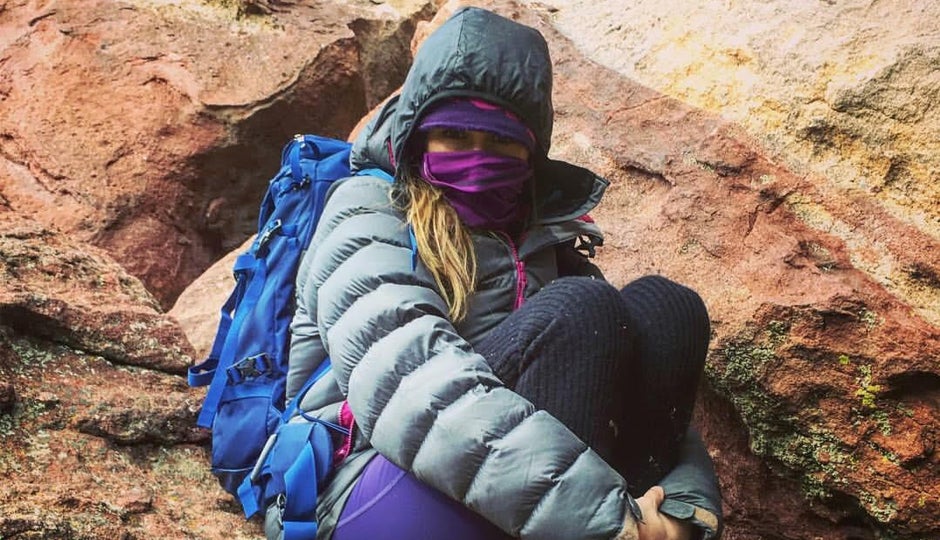
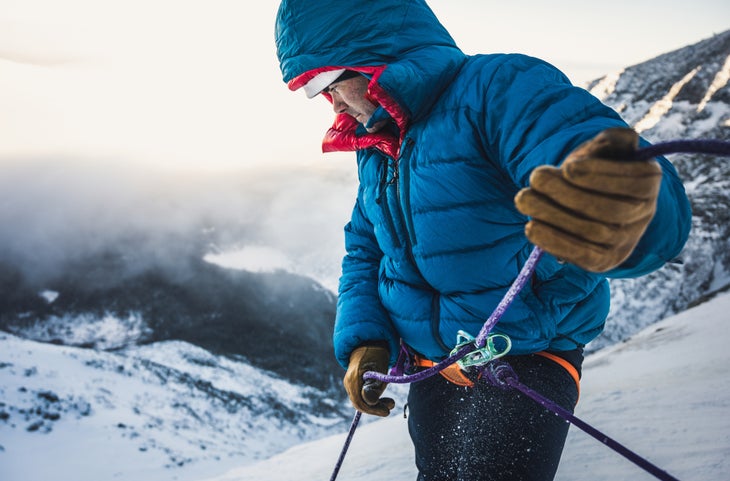
How do you climb in the cold and how do you stay warm belaying? Heather Weidner shares four strategies.
The post Winter is Here: How to Make the Most of—and Even Enjoy—Cold-Weather Climbing appeared first on Climbing.
]]>Some of my coldest days climbing were not spent ice climbing or in the mountains. The most frozen I’ve ever been was sport climbing on the side of a highway at the Virgin River Gorge in Arizona. Hunkered down in a puffy above I-15, with semi-trucks roaring by so loudly you couldn’t hear your climber, I’d belay my partners for hours on their projects, unable to move while perched on a slab, in the shade with gusty winds, in the middle of the high-desert winter.
Why suffer through this kind of cold? Conditions at the VRG are tricky, and friction on this particular rock, as at many venues, is better when it’s colder. With conditions like these—air temperatures in the 50s and 60s, with the rock in the shade—once you get moving on the stone you’re usually not cold, but belaying can be brutal. And if you stay cold too long, you may feel like a tin-person once it’s your time to climb, with tendons ready to snap like a frosty tree limb and muscles that don’t respond to basic commands.
So, how do you climb in the cold and how do you stay warm belaying? I’ve come up with a few strategies.
Layering
First of all, proper layering is essential. Make sure you have a base-layer, mid-layer, and puffy jacket. Much of the heat generated in your body is lost through your head, so wear a beanie or a headband, and make sure you have warm socks and gloves for those digits. One of the most overlooked layers in climbing is a second layer of pants. I prefer to wear leg warmers over my lightweight climbing pants, for ease of slipping on a kneepad when needed (and don’t worry, it’s not just for the ladies—my husband has leg-warmers, too!). While belaying, I like to put on a pair of puffy pants as soon as I get down from my climb to help keep me warm. It’s amazing how much warmer you’ll feel with an extra layer for your legs.
Chemical Warmers
Another trick to keep warm on the chilliest of days is to use a heated chalk bag or chemical warmers. I always have a hand warmer in my chalk bag so that I can get feeling back in my fingers from the frozen rock, but I’ll also strap a body warmer (basically, a bigger version of a hand warmer; I like Grabber’s “Peel N Stick” body warmer) to my chest near my heart to keep my core toasty. By keeping your heart warm, you’re warming all the blood being pumped to your extremities. Just don’t put the body warmer directly on your skin because it can burn you. I put mine on the outside of my sports bra, and, boys, you can put it on the outside of your base layer (it has a sticky backing so it shouldn’t fall off).
Calisthenics
Right before I’m ready to climb, I’ll do “the penguin,” a maneuver in which you force your arms and hands down quickly by your sides, flicking the wrists and extending the fingers all in one motion. This helps increase blood flow to your extremities. I’ll also do jumping jacks to help get the blood pumping and increase my core temp. I like to make sure my hands are warm before I start, so I’ll rub them together quickly, creating heat through friction, just before getting on the wall.
Numb Out to Improve Circulation Later
When climbing on these frozen days, many times you’ll “numb out” on your first pitch of the day. This is commonly followed by the painful “screaming barfies” phenomenon in which the warm blood returns to your frozen fingers as soon as you stop climbing. It’s a painful process, but surprisingly, this usually only happens once a day. (You can even—if you know the rock is going to be chilly—deliberately do your numbing out on the ground, using snow, a stream, or a cold rock to chill your hands, then rewarm them before you climb.) So, expect this discomfort and bear through it for the sake that it likely won’t happen again—you’re going to be able to feel those holds on your redpoint burn. And after all, it can be a cold world out there: No pain, no gain, right?
Learn more from Heather in her ‘Intro to Sport Climbing’ course.
The post Winter is Here: How to Make the Most of—and Even Enjoy—Cold-Weather Climbing appeared first on Climbing.
]]>
This guy's cheapness brought danger to a new level.
The post Lucky He Didn’t Die: Lowered From A Toy Carabiner appeared first on Climbing.
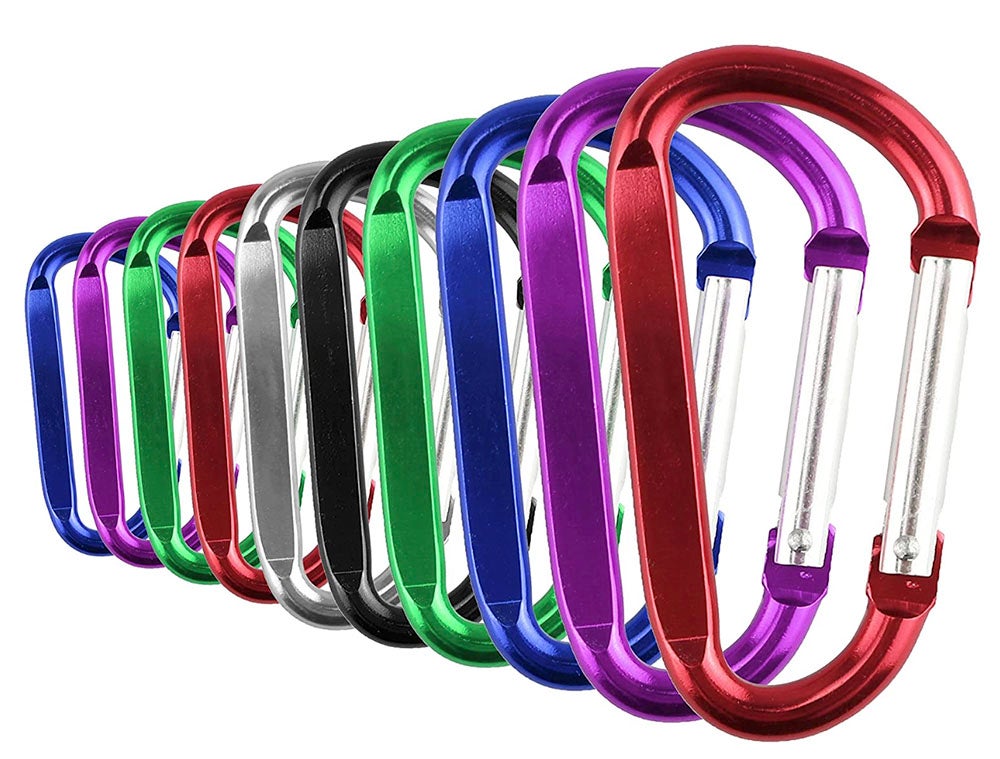
]]>I watched a guy try his first sport lead outside. He bailed after the fourth bolt. None of his friends wanted to try the route, so an older climber instructed him to thread the rope directly through the bolt hanger so he wouldn’t have to leave a bail carabiner. Then the older gentleman proudly recounted a story of how he was two pitches up on a route and couldn’t finish it. Instead of leaving a real carabiner behind, he used a toy carabiner because it was cheaper. He said, “Those things only hold 500 lbs. or so, but I was just too cheap to leave a real carabiner.”—Kevin Kuo, via email
LESSON: There are many ways to safely bail off a sport route. Threading the rope directly through a bolt hanger is usually not one of them. Take a gander at the methods in the linked article and be sure to carry a couple bail carabiners or quick links in case you need to go down because you can no longer go up. Though slightly more expensive (really only a couple bucks), it’s more polite to leave carabiners. At best, quick links are hard to remove for the next person that leads the route. At worst, they can rust shut and become very hard to remove. Keep in mind that you may be able to retrieve gear by walking to the top of the cliff and rappelling, climbing the next route over, or asking a stronger friend to climb the route.
Toy carabiners usually have something like “Not for climbing” or “Not load bearing” printed right on them, because they’re not load bearing. 500 lbs is a very generous estimate. They’re intended to hold a set of keys or maybe a waterbottle. Absolutely not a person. If your life is worth so little to you that you’re willing to risk it instead of leaving behind gear that costs roughly the price of a hamburger, then I can’t help you. You’ll get better advice from a therapist.
Want more? Check out more installments in our ever-growing hall of shame:
Leader Decks When Experienced Climber Bungles the Belay
Saw Through Someone Else’s Rope
Belayed With Hands Only—No Device!
Smoke Brick Weed and Go Climbing
Belay With a Knife In Your Hand
Don’t Let a Clueless Dad Take a Kid Climbing
She Got Frustrated and Untied—On Lead
The post Lucky He Didn’t Die: Lowered From A Toy Carabiner appeared first on Climbing.
]]>
We chatted with a few industry experts to better understand the strengths and weaknesses of each product.
The post Is the GriGri Superior to the ATC Guide? Experts Weigh In. appeared first on Climbing.
]]>I was in the South the first time a fellow climber told me that they didn’t want to learn how to use a Petzl GriGri. Without ever using the device, several people were quick to write it off, and I started to wonder why. When I was learning how to use the GriGri, my main hang up was that it seemed easier to short-rope a lead climber. But in many other ways it seemed safer than the standard ATC I learned to climb with. (Black Diamond’s ATC—or “Air Traffic Controller”—is their model of the classic tube-style belay device.) So, I started asking questions. Was the GriGri in the dog house because of its high cost? Did rappelling on a single strand give climbers the creeps? Or were there things the ATC could do that the GriGri couldn’t? I chatted with a few industry experts to better understand the strengths and weaknesses of each product.
Assisted Braking Devices vs. Manual Braking Devices in a Teaching Environment
Manual braking belay devices like the ATC require the belayer to be at the top of their game, never removing their hand from the brake line while in use. Assisted braking devices like the GriGri are designed to clamp down on the rope to help the belayer arrest a fall, which can add a layer of security but some argue that the device can make the belayer complacent. And, to be clear, the GriGri is also not intended to be a hands-free device.
Jason Antin, a Colorado-based AMGA Rock and Alpine guide, stated that in a teaching environment, he starts with the ATC: “For beginners [the ATC] gives them a very good foundation for how to belay. Once they’ve got the fundamental level, I think there’s no reason why you shouldn’t integrate some kind of assisted braking device.” Once the belayer has mastered the basics of belaying, learning how to use a device that locks like the GriGri can offer additional protection for the climber, and make projecting a route easier for the belayer.
Karsten Delap, a North Carolina-based IFMGA Mountain Guide and professional climber, states that, for him, the number one factor is application. If cost is a factor, he’ll teach the ATC first. If it’s someone who’s preparing to climb the Grand Teton, he’ll grab the ATC. But for standard climbers, “We’ll talk about the GriGri on the first day, and move to the ATC for rappelling. Then when we’re getting weight conscious, we’ll think about whether the GriGri is something we need or not. Everything on our harness is something we think about before we go into the mountains.”
The Best Device for Rappelling
The GriGris biggest hangup for Axel Kochendörfer, a Germany-based mountain rescuer, is its inability to offer a two-strand rappel. While the ATC easily accommodates two rope strands for belays, the GriGri requires a bit more finesse to handle such an environment.
Delap often uses the GriGri in a rappelling environment, but he notes that doing so wears your ropes down faster. And you’re putting a lot more stress on a shorter amount of rope:
“I am doing a lot of rappelling on a GriGri…that’s why I’ve coreshot so many ropes.” He added, “There are caveats to rappelling with a GriGri. The GriGri is going to heat up more than the ATC generally.”
The GriGri can also put a lot more weight on the rope: “For the general public…what they want to do is a [single rope] rappel, which puts four times the amount of weight on half as much rope,” said Delap. But it can be an appealing belay device because it offers a smoother, faster descent.
The Best Device to Use in a Pinch
Most guides carry both the GriGri and the ATC, but in a pinch, they may rely on one device over the other. Although Kochendörfer prefers an ATC or an alternative device to the GriGri, he admits that there are some situations in which the GriGri excels: “The only occasion where we use GriGri-like devices is for tree rescue and lift rescue.”
Antin noted that there are additional high-stress areas in which the GriGri excels: “The GriGri offers faster change of modalities. For example, if you want to lower your climber very quickly, it’s very quick. The ATC takes a secondary set of skills to lower someone [while belaying] from a long distance from above.” Both devices are capable of accommodating high-risk situations, but the GriGri is more likely to switch between uses at a faster rate, which can be essential in extreme or life-or-death situations.
The Lightest Device
Historically, many die-hard ATC users pointed to the weight savings that the device provides. GriGris are known for their bulk, while ATCs provide a lightweight, affordable alternative. But over the years, manufacturers have substantially cut down on the weight of the GriGri. The GriGri+ weighs 7 ounces (198g), while most ATC guides weigh about 2.5 ounces (71g). But in order to provide the assisted-braking feature that makes the ATC competitive with the GriGri, users must carry two carabiners. One could argue that they’d be carrying the carabiners anyways, in which case the ATC would be quite a bit lighter. But if they carry two extra carabiners for the ATC, the weight ends up being about the same as the GriGri+.
The Softest Catch
Another significant debate among climbers revolves around the belay device’s ability to deliver a soft catch. Those who are extra concerned about this issue often look to the ATC to operate with a little bit more give. Antin weighed in: “The GriGri bites the rope as soon as it reaches that velocity point. The only play in the rope is based on the belayer. They may allow the weight to pull them off the ground a little bit…A softer catch can be achieved with an ATC.” This could also mean that, during pitches with poor protection, the ATC is slightly less likely to cause gear failure.
Does the GriGri Fail?
One of the most common arguments that anti-GriGri climbers make is that the device “fails.” But most of the existing reports about failing GriGris point to improper use rather than a true device failure.
When asked if he knows of any incidents where active GriGri devices failed, Delap was adamant: “[GriGris] don’t fail.…It’s human error.” Threading the GriGri backwards could cause a “failure,” but this can easily be avoided by testing the device beforehand. Improper use of the cam—like holding the lever all the way open—might also present a dangerous situation. In some cases, climbers view the GriGri as an auto-locking device as opposed to an assisted-braking device, which might cause the belayer to go hands free. But these issues cannot be considered device failure.
However, a dilemma that climbers occasionally face while using the GriGri is ice build up in winter environments. Sometimes ice will melt, build up inside the GriGri, and then re-freeze, which can make it difficult to manage. The ATC isn’t immune to this issue, but tube-style devices tend to be easier to operate when build up does occur. Delap notes: “One way to fix the ice problem is the Freino Carabiner (the $45 carabiner that keeps the GriGri in a position that’s better loaded). You clip the rope into it so it starts to de-sheath the ice off of the rope.” He added that he often uses the Munter Hitch when conditions are so bad that they cause internal device build up.
Belay Device Cost
When it comes to cost, the ATC has a leg up on the GriGri. Climbers can usually find an ATC Guide for about $30, while the GriGri costs $100 to $140. When asked if Delap thinks that cost is a factor in belay device preference, he stated: “Yeah. The cost is a thing. We see it all the time. What did you buy first? I bought an ATC first because the GriGri was expensive and it looked scary. So, I do agree that anything that’s cheaper, especially by five times, is going to be more popular.”
The Verdict
Both the GriGri and the ATC have strengths and weaknesses, and an experienced climber should be able to use them nearly interchangeably. Some climbers prefer the ATC because the GriGri favors right-handed belayers. Others can’t get over the idea of rappelling with a GriGri. But when it comes down to convenience and redundancy, the GriGri seems to take the cake. Antin stated: “I want a GriGri because I want the weight on my harness instead of my hand.” It’s overall a less energy-intensive device that allows you to belay someone who’s a lot heavier without taxing yourself.
Delap noted that climbing gear is constantly changing, and that the device he uses is situationally dependent: “Application is everything. Terrain is everything. Understanding the device you’re using and the positives and negatives of that [matters]. And being open minded to new things that come out is important.”
The post Is the GriGri Superior to the ATC Guide? Experts Weigh In. appeared first on Climbing.
]]>
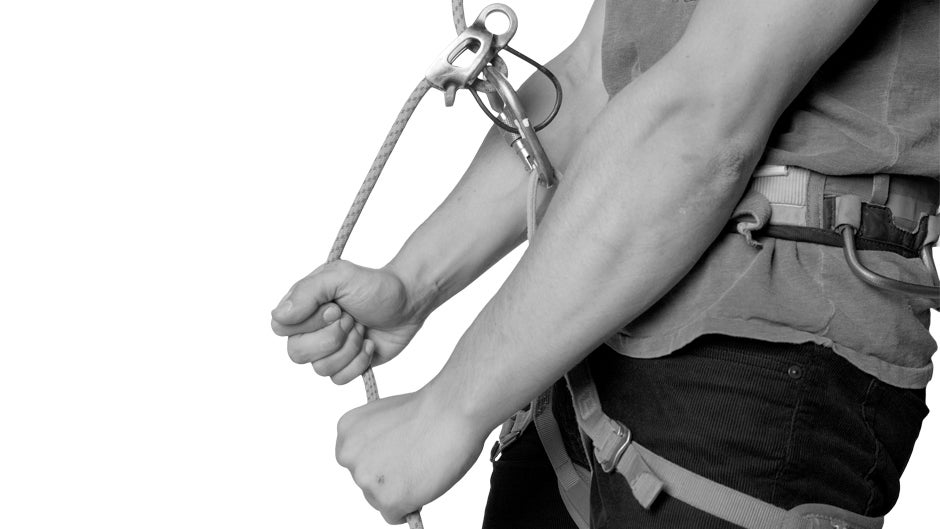
The belay had three bolts yet he only clipped one, and didn't use a single locking carabiner.
The post This Belayer Made Nearly Every Mistake In The Book appeared first on Climbing.
]]>The beauty of this anchor is in the simplicity.—Michael, via email

LESSON
Indeed, Michael. This anchor is simple to a fault. Most climbers use an acronym like SERENE to evaluate multipitch anchors. SRENE stands for Strong, Equalized, Redundant, Efficient, and No Extension. The problem, in this case, is that the acronym assumes you’re using more than one anchor point. This anchor is so simple I’m not sure it qualifies as an anchor at all.
So we’re all on the same page, here’s what I see in this photo: It appears that this climber is belaying a second up with a Munter hitch from one quickdraw clipped to one bolt. The belayer is direct on the “anchor” via another carabiner. None of the carabiners are lockers.
Every single piece of this system depends on one bolt. Bolts are extremely strong, but they do fail on occasion. Sometimes the wrong metal is chosen for the environment. Sometimes they’re installed poorly. Sometimes the rock breaks. This is why we like our anchors to be redundant. There’s another bolt 12 inches away, so there’s no reason not to include it in the anchor. The other major failing is that no locking carabiners were used. Any time lives depend on a single carabiner, it should be a locker or two opposite and opposed carabiners. The belay carabiner especially should always be a locker.
A best practices version of this anchor would look something like this
- A locking carabiner would be clipped to each bolt and locked. (Two opposite and opposed carabiners don’t fit well on one bolt.)
- A cordelette, webbing, or the climbing rope would be clipped to each locking carabiner then tied to form a masterpoint. There are many ways to accomplish this. This method is fairly straight forward. Though that article is written for toprope anchors, the technique is very similar. The equalette and double figure eight methods are also easy and effective.
- Instead of a Munter hitch, which can put twists in the rope, the follower would be belayed with a tube-style belay device in guide mode. The belay device would be attached to the master point with a locking carabiner, and the rope would be attached to the belay device with another locking carabiner. Note that it’s acceptable to belay with a Munter hitch, and it’s a great skill to have in your bag of tricks (here are a few tips), but a belay device makes things easier.
- To put himself direct on the anchor, the belayer would use the anchor shelf to keep everything nice and tidy. Again, he would be attached with a locker or two opposite and opposed non lockers.
- These are all complicated skills and I recommend learning them on the ground with an experienced partner or guide. Keep in mind that this article isn’t comprehensive and merely provides an overview. Some of these techniques have their own limitations and may not be right for every situation. For example, lowering a climber with a belay device in guide mode isn’t as straightforward as it may seem. Do your research before embarking on any multipitch adventures or you may end up in this column (or worse).
Want more? Check out these additional installments
Thought Home Depot Rope Was Fine For Climbing
The post This Belayer Made Nearly Every Mistake In The Book appeared first on Climbing.
]]>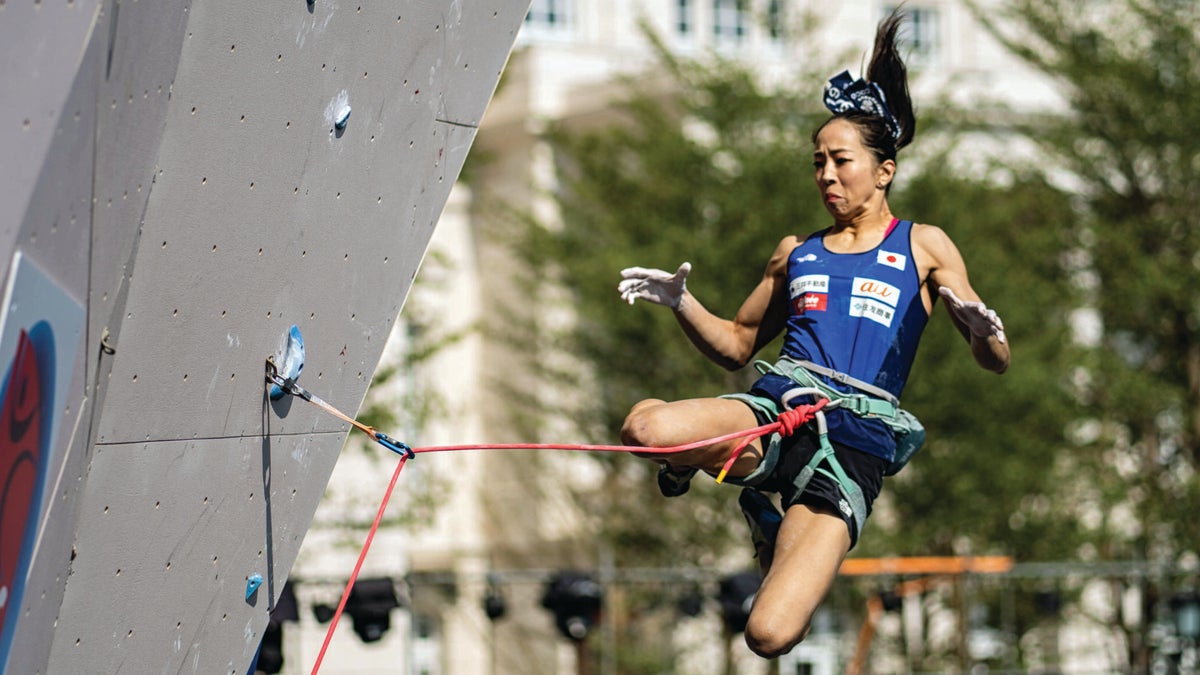
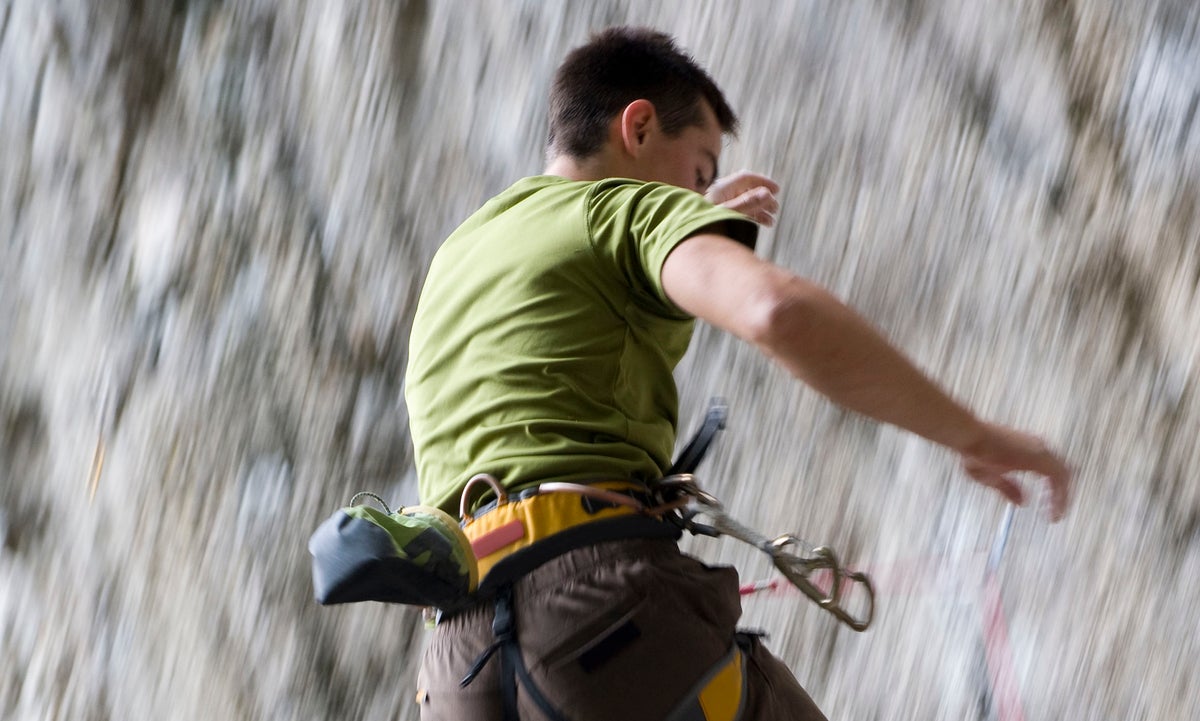
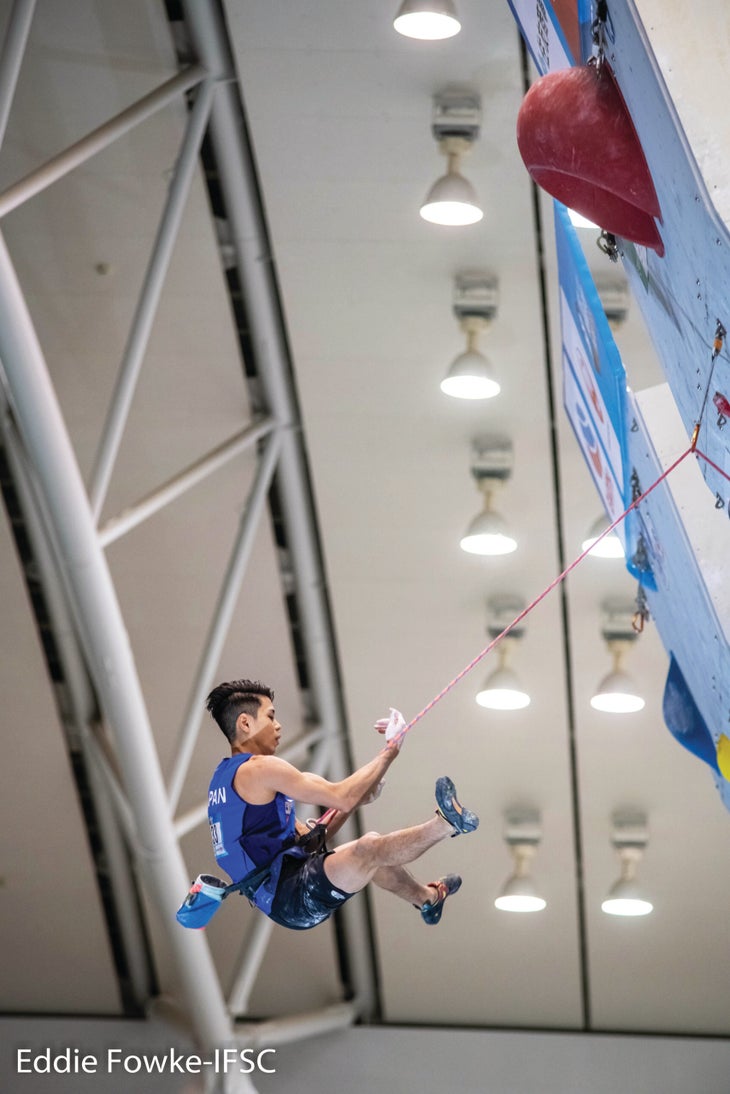
Seven tips—to work on now and continually—for mastering the nuances of falling and catching falls.
The post Looking to Lead Climb? Here’s How to Take and Catch Falls appeared first on Climbing.
]]>
Even an experienced climber might feel a few nerves during a belay test, and many have tales of blowing it and being denied the coveted certificate. But, you passed! End goal? Far from it. There’s belaying, and then there’s catching falls. And falling.
Every climbing facility has its baseline requirements to lead climb and belay. Yet passing a belay check should be the first of many steps in gaining experience and honing your safety skills.
Lead climbing and belaying effectively involve many nuances. Below is a brief list of things we can (and should) constantly work on to become better climbers, belayers and partners.
Falling while on Lead
As a lead climber, you need to be prepared for a fall at any moment. Here are two things you can control, even after peeling off that sloper or missing your deadpoint to the next jug:
Eyes
Your eyes dictate the movements of your body. If you barn-door off the wall and look over your shoulder while rotating away from the wall, your body is likely to follow. Instead, when you fall, look down between your legs at the wall, which will help orient your body in a position better suited to a soft landing.
Body Position
After you fall, your goal should be to end up in a sitting position. When you come in contact with the wall, your feet are ideally planted a little more than hips-width apart, knees bent to absorb the impact. Hands may be up in front of your face to protect it against large holds or roofs, but should otherwise not be involved in bracing the fall.
Lead Belayers
Priority number one, of course, is keeping your climber off the ground, but an experienced belayer knows many other skills are involved in giving a solid lead belay.
Dynamic Belaying
On any busy evening in the gym, look around at the lead belayers and note how many have their feet planted and are stationary for the duration of their partners’ climbs. While a static belay is appropriate for top-roping, when lead belaying you want to be mobile and give a dynamic belay. Everything about the lead-climbing system is dynamic; from the ropes to falls, and your belaying should align.
Choosing to be close to the wall with less slack out while your leader is low to the ground dramatically reduces the chance of a groundfall, while taking a step back when the climber is higher up allows you more freedom of movement. Stepping towards or away from the wall while belaying can help you to feed the rope efficiently and securely and to take up slack with minimal effort and less work moving rope through a belay device unnecessarily. A good rule of thumb is to stand within a body length of the wall at any time while lead belaying.
Finally, making micro adjustments is key to giving a dynamic belay. From anticipating a clip and preparing to step in and feed out slack to quickly taking in a few inches after the climber clips, great belayers are constantly moving and looking for ways to be more dynamic.
How to Give a Soft Catch

Please stop spiking your climber. We’ve all been climbing when all of a sudden, with a loud THUD, a climber slams into the wall nearby. I cringe every time I hear that sound, because I know from experience how unpleasant a hard catch can be. Not only are they painful, hard catches can lead to broken or sprained ankles.
A common misconception is that more slack equals a softer catch. Yet in that scenario the climber usually free falls until the rope comes tight, then abruptly stops at the end of the rope.
Here are some guidelines to giving a softer catch: If you are lighter than your climber, focus on having minimal slack, and be prepared to be pulled up into the wall. Don’t resist! Even being 50 pounds lighter is not enough to pull against the catch. If you are a comparable weight to your climber (+/- 15 pounds) be prepared with minimal slack and “go with” or give a slight jump when the rope comes taut. This will help decelerate your climber slowly, instead of abruptly stopping the person. If you are heavier than your climber (>20 pounds) you should introduce slightly more slack and you MUST jump when the rope comes taut.
Slightly more slack gives you the time necessary to react and jump at the appropriate moment when you feel the tug on your belay loop from your rope tightening. If the timing of your jump is off, the catch will not be as soft as it could be.
Communicate Better
Climbing communication goes well beyond verbal climbing commands.
Whenever you belay, another climber is literally putting their life in your hands. Take this responsibility seriously. Focus 110 percent on the climber. That conversation with the next group over regarding post-send beers can wait. Be vigilant in belaying, and anticipate the climber’s needs. Beforehand, ask your partner if they anticipate any difficult sections. There are numerous different ways to communicate, and it is your job as the belayer to support your climber in the best ways possible.
There is always more for all of us to learn. We should continually seek to increase our knowledge and refine our skills to be better (and safer) lead climbers and belayers.
Brent Smith is Assistant Director of Instruction, Earth Treks and Planet Granite, AMGA Single-Pitch Instructor
The post Looking to Lead Climb? Here’s How to Take and Catch Falls appeared first on Climbing.
]]>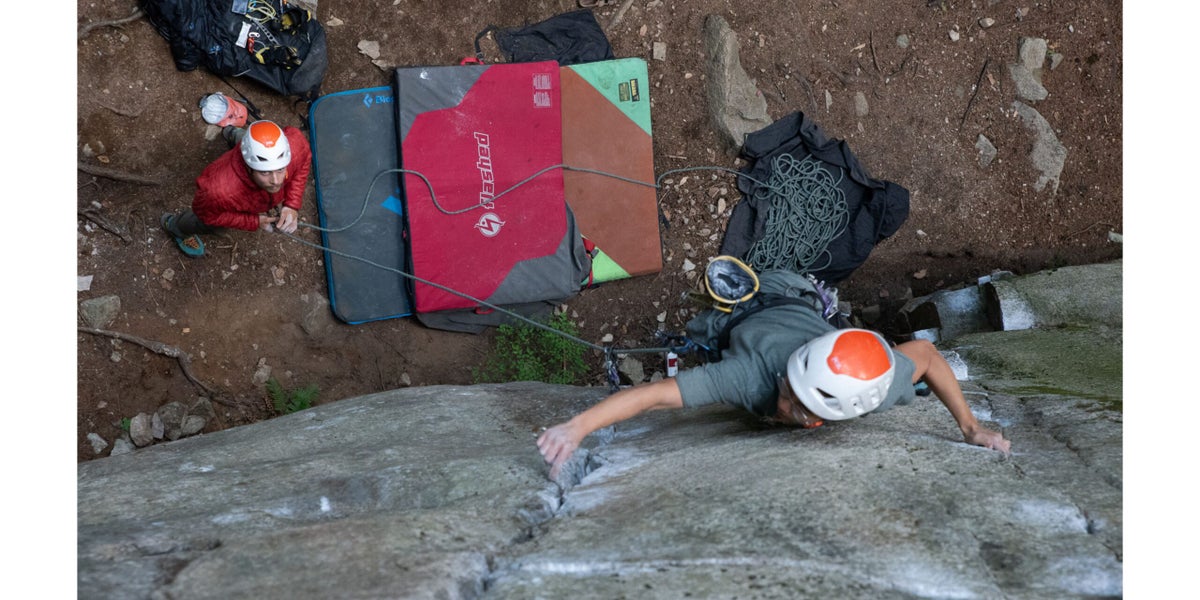
Uneven stances, hanging belays, anchors, roots and rocks your rope can snag on...belaying outside is full of hazards that aren't replicated in the gym. Here are some strategies to keep both the climber and belayer safe and secure.
The post Belaying Outside is Different From Belaying in a Gym. You’d Better Know the Difference. appeared first on Climbing.
]]>When the weather’s good and the rock is calling, it’s easy to tie in and rush into climbing. But first, think about the belay. If your belayer’s not safe or stable, neither are you—whether you’re sport, trad, single-, or multi-pitch climbing. No matter who’s holding the rope—total newbie or hardened vet—setting up the belayer to deliver a secure, safe, reliable catch will not only prevent leader and belayer injury, it will also help the leader move faster and more efficiently.

Cragging with a flat base
To keep the belayer from slipping and potentially pulling the leader off, examine the route’s base. If it’s flat, the belayer should stand underneath the first piece, letting the rope run smoothly, without any jerking or short-roping that could pull off the leader. If there is a significant weight difference and the leader could fall, consider anchoring the belayer down (see “Catching the Climber”).
Cragging on uneven terrain
If the belay is uneven and the leader is solid on the terrain, the belayer could find somewhere comfortable to sit—a stable belayer is less likely to slip and pull the leader off, and less likely to lose control of the rope if a fall pulls him toward the wall. If the leader might fall, then the belayer should be upright and bracing in whatever body position. You can also build a mini-anchor using nuts, cams, or bolts above the belayer to prevent her from slipping and accidentally pulling off the leader; the belayer then ties into the bottom end of the rope and clove-hitches to the anchor.
- Want to learn to trad climb? Internationally certified mountain guides Rob Coppolillo and Marc Chauvin will teach you the fundamentals of trad climbing in our 8-week online course: Intro to Trad Climbing. From placing/removing gear and proper belay techniques, to how to make an anchor and manage a stuck rope, Intro to Trad Climbing takes the guesswork out of exploring traditionally protected climbs.
Climbing off the ground
When in fourth-class terrain, high off the ground, or on a multi-pitch route, climbers should always have a solid anchor. Add comfort to the belay by placing the anchor above the belayer—this allows the belayer to weight the anchor and brace for leader falls. To protect the belayer and minimize the chances of a factor 2 fall—a high-force fall directly onto the anchor—the leader should place protection early on the pitch. However, note that any fall with minimal rope in the system will be violent and hard to catch—i.e., try to avoid falling with little rope out, even with gear in. As the leader climbs, she should be placing additional gear to prevent a long, higher-force fall, as well as to protect against landing on the belayer. If there’s a chance the leader could hit the belayer, consider adding a catastrophe knot (see “Backing up the Belayer”) or relocating the belay.
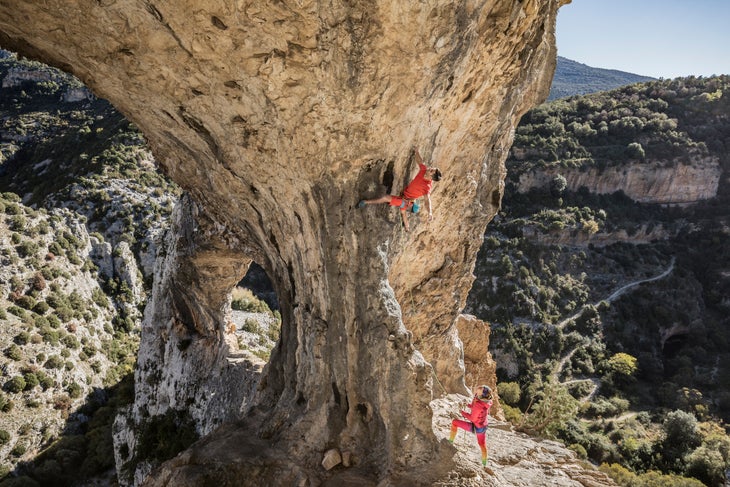
Catching the climber

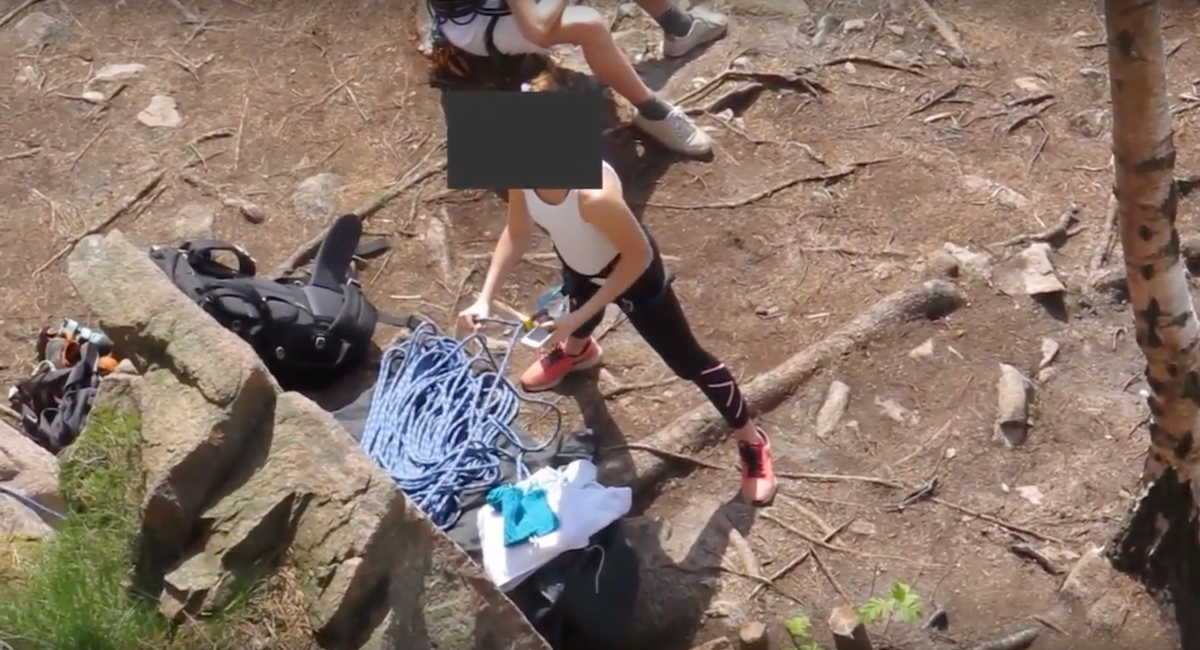
Whether at the base or belaying from a stance, think about how the belayer will catch the climber. If there is a substantial weight difference, the belayer will likely be pulled up and into the wall. You can prevent this a few ways: First, have the belayer take a braced stance, such as an outstretched foot on a rock and a closer position to the wall, even leaning against it. For further protection, place a piece below and behind the belayer. Consider the orientation of the placement. If the leader whips, the belayer will be pulled up and the piece will act as a pivot point. You should thus avoid placing a piece in front of the belayer, as it could force him into the rock in a fall. (Note that the photo above shows the piece in front of the belayer solely to illustrate the tethering principle. She has simply stepped back from where she’d usually stand, for the photo.)
Think ABC—Anchor, Belayer, Climber—to keep the anchor, belayer, and climber/leader in as straight a line as possible, with or without a piece anchoring her down. This minimizes the chances of a lead fall pulling the belayer in at an awkward angle. Have no slack in the system, and keep your brake hand on the same side as your anchor attachment if using a piece beside you.
Backing up the belayer
One way to add more security to the belay is to use a “catastrophe knot.” First, estimate how much rope the leader will need to get through the hard climbing at hand, then tie an overhand on a bight that far down the brake strand. This catastrophe knot will jam into the belay device in case of belayer failure. After the leader climbs through the hard section and places gear, the belayer should undo the knot.
We’ve all been strung out on the sharp end for one reason or another. By setting a solid position for our belayer, making sure she can catch us well, and backing everything up, the leader and the belayer become safer. The sting of the sharp end dulls a little when the leader knows he’ll receive a reliable catch.
Get dialed
Safe belaying requires forethought, so your belayer can focus.
- If there’s any potential for rock- or icefall, position the belay in a protected spot—off to the side or with a natural protective feature. He should also wear a helmet.
- Belay gloves guard against rope burns and make it less likely that the belayer will accidentally let go of the rope.
- Keep ponytails, pack straps, slings, and dangly stuff away from your belay device—in a fall, these can get sucked in.
- Keep the rope organized and tangle-free.
Rob Coppolillo and Marc Chauvin, both internationally licensed mountain guides, are co-authors of The Mountain Guide Manual ($25, Falcon Guides, 2017). For a more in-depth introduction to trad climbing, check out their 8-week Intro to Trad Climbing online course.
Also Read:
The post Belaying Outside is Different From Belaying in a Gym. You’d Better Know the Difference. appeared first on Climbing.
]]>
Parents love their kids and will do anything for them, including taking them toprope climbing when they don't have a clue.
The post For Safety’s Sake Don’t Do This: Let Parents Belay Through A Bolt Hanger appeared first on Climbing.
]]>The Incident
I was climbing at Clear Creek Canyon, Colorado. After our first route, we moved to another next to a family that was toprope climbing. My partner pointed out that they were toproping off a single bolt in the middle of the route. We quietly shared a grimace. When I was halfway up our route, I noticed that their toprope was actually running directly through the bolt hanger with no other gear. One of their pre-teen kids was climbing the route.—Will, via email
The Lesson
There are two major issues here. First, bolt hangers are not designed for the rope to run directly through them. Some companies do make big, fat, rounded hangers that you can lower or rappel through, such as the Metolius rap hanger, but these would only be found at the top of a route. The angular metal edges of a typical hanger will not be friendly to your rope as it grates and stretches across them. The amount of wear from a group climbing up, lowering down, and taking toprope falls over and over will surely knock months off the life of your rope at best.
Furthermore, bolts can and do break sometimes, so you should not depend on just one. Notably, a climber died while rope soloing a route last year because he was only attached to one bolt and it failed. Bolts are very strong, but sometimes things do go wrong, which is why it’s important for anchors to be redundant. Just climb to the top of the route and build a redundant anchor on two bolts. This is sport route, after all. Sport climbing is an entire discipline that was designed to make things less sketchy. And toproping should be even less sketchy than that. I shudder to think of how this person even went about threading a rope through a bolt hanger mid-route. I hope the climber was standing on a massive ledge.
Also Read
- Weekend Whipper: Ice Climber Decks In Spite of Dad’s Advice
- When a Climber Dies on K2 is Anyone to Blame?
- Remembering Tom Hornbein, Visionary Everest Pioneer
The post For Safety’s Sake Don’t Do This: Let Parents Belay Through A Bolt Hanger appeared first on Climbing.
]]>
"Her son was still on the wall, suspended about 20 feet up. The only thing holding him up was a Grigri chained to the floor."
The post Gym Mom Puts Kid in a 20-Foot High Time Out appeared first on Climbing.
]]>I saw a mother and son climbing at the gym. They were speaking in another language, but it sounded like they were angry with each other. It seemed like the kid didn’t want to climb and the mother was telling him to keep going. An hour later I heard a staff member yelling at the mother. She was sitting in a chair 50 feet from the wall. Her son was still on the wall, suspended about 20 feet up. The only thing holding him up was a Grigri chained to the floor. (The gym makes people belay off Grigris anchored to the floor if they haven’t passed a belay test.)
—Brian Lockwood, via email
LESSON: This mom isn’t likely to win Parent of the Year. Don’t abandon any climber on the wall, no matter what device you’re belaying with. It’s only OK to stop belaying someone if they call “off belay.” In order to have the piece of mind necessary to do something scary like rock climbing, you need to have absolute trust in your belayer. If your belayer does anything to breach that trust, you shouldn’t climb with them. Even if they’re your mom and they might ground you for disobeying them. Yes, a Grigri will lock and hold a climber, but it’s an assisted-braking device, meaning there still needs to be an attentive belayer present.
READ MORE:
Parents Belay Family Through Bolt Hanger
Saw Through Someone Else’s Rope
Smoke Brick Weed and Go Climbing
Belay With a Knife In Your Hand
The post Gym Mom Puts Kid in a 20-Foot High Time Out appeared first on Climbing.
]]>
Might as well be soloing with this belayer completely out to lunch.
The post She Forgot That Climbing Can Be Deadly And Texted While Belaying appeared first on Climbing.
]]>We spent a long weekend at Bohuslän, one of south Sweden’s best trad destinations. We saw a young climber, 15 or 16 years old, running up a route next to us. He placed little to no protection. He stopped for a quick chat, and we learned it was his first time trad climbing.
The next day, we met him again. I was at the belay above the first pitch, 20 meters from the ground. The young climber was on an adjacent route. His younger sister belayed. I looked down to see her with a cell phone in one hand. The next time I looked down she had no hands on the rope. I kindly let her know that what she was doing wasn’t the best practice. Her brother on lead overheard and started screaming down. She replied along the lines of, “You were looking solid.”
—Jonas, via email
LESSON: So so cringeworthy. She is literally texting and belaying at the same time.
This is a topic that comes up time and time again in this column. Usually, when belayers blatantly disregard the safety of their climber like this, they defend themselves by pointing out that they’re using an assisted braking belay device. That’s still not ideal, but the video you showed me in this instance clearly shows a tube style belay device. If that climber slipped, if a hold broke, if anything went wrong, he was hitting the ground. The belayer should always be prepared for anything, even if the climber looks solid. That’s why we have belayers. I might be solid on a route, but that doesn’t mean I want to free solo it.
It seems like the real problem here is that the belayer isn’t treating climbing with the respect it deserves. Climbing is fun. Climbing is a sport. But climbing can kill you. It’s not like baseball where the players can pay less attention than the spectators and still do OK. Climbing is serious. You don’t belay between text messages. You give your partner your full attention. If you’re not willing to do that, then don’t climb.
Want more? Check out more installments in our ever-growing hall of shame:
These Kids Used Parachute Cord For Slings …. Said They Learned It From The Boy Scouts
Lucky He Didn’t Die. Lowered From a Toy Carabiner
Unfortunate Groundfall, Fortunate Landing
Leader Decks When Experienced Climber Bungles the Belay
Saw Through Someone Else’s Rope
Belayed With Hands Only—No Device!
Smoke Brick Weed and Go Climbing
Belay With a Knife In Your Hand
Don’t Let a Clueless Dad Take a Kid Climbing
She Got Frustrated and Untied—On Lead
The post She Forgot That Climbing Can Be Deadly And Texted While Belaying appeared first on Climbing.
]]>
Get the safest method and helpful tips for giving the best toprope belay, whether you're using an ATC or a grigri.
The post How to Toprope Belay appeared first on Climbing.
]]>Belaying a climber on toprope—where the rope runs from the belay device up through an anchor at the top of the climb and back down to the climber’s harness—is as straightforward as it gets. The climber doesn’t have to clip bolts or place gear as they move up the wall. With the rope secured overhead, any falls are usually short and safe, as long as you have an attentive belayer. If you’re a newer climber, learning how to give a safe and proper toprope belay will also make you a much more desirable climbing partner.
Here are some tips and the best method for giving a good toprope belay, whether you’re using a tube device like an ATC or a brake-assisted belay device like the grigri.
Universal Belay Advice: Pay Attention
This is the most important part of any type of belaying. You must be aware of where your climber is and what they are doing at all times. It can be challenging to ignore the many distractions of a climbing gym or crowded crag—music, other climbers, conversations—but paying attention is absolutely vital to being a good belayer. Watch your climber closely when they’re on the wall and communicate clearly and effectively when necessary.
Load and Lock: Putting a Climber on Belay
With a tube-style belay device (e.g., ATC or Reverso), thread a bight of the rope through either slot in the device. (Some devices have grooves on one side that make braking easier, so ensure the brake strand is coming out on that side.) For a brake-assisted device like a grigri, thread the bight of rope through the groove, ensuring the correct end leads up to the climber. For either device, clip a locking carabiner through the rope and device, then through the belay loop on your harness. Lock the carabiner.
With toprope belaying, the part of the rope that goes up to the anchor is the climber’s end. The other part coming out of the device is called the brake strand. Orient your belay device correctly so that the brake strand comes out away from your harness or to the same side as your brake hand (typically your dominant hand).
Double-Check Your System
You and your partner should visually inspect each other’s knots and belay setup before starting a climb. Make sure both harnesses are worn correctly with all appropriate buckles doubled-back. The belayer should make sure the climber’s knot is threaded through both tie-in points, tied correctly, and dressed properly (no crossed strands).
The climber should make sure the belayer’s device is set up properly: The rope is threaded through everything, and the carabiner is locked. Test the system by pulling on both strands of rope coming out of the belay device. If it pulls the belayer via the harness belay loop, you’re good to go.
Do this double-check every single time either person is about to climb, meaning you might go through this process a few dozen times in one climbing session. These double-checks are vital for preventing mistakes.
[Also Read: Common Belay Screw-ups and What To Do About Them]
Toprope Belay Method: PBUS
Pull, Brake, Under, Slide
A universal rule for belaying is that your brake hand, which is palm down on the brake strand of the rope, should never come off the rope. The PBUS method—which stands for pull, brake, under, slide—is a tried and true technique that will ensure your hand never leaves the brake strand, while providing a safe belay.

1. Pull: Pull down on the climber’s rope with your guide hand—which is the hand on the climber’s end of the rope, and usually your non-dominant hand—to remove slack as the climber moves up. At the same time, pull out with the brake hand to get the slack through the belay device.

2. Brake: Put the brake strand in the brake position, which is down in front of you. This puts a bend in the rope at the belay device that will keep the rope from moving through it.

3. Under: Take your guide hand off the climber’s strand and place it on the brake strand under your brake hand, meaning it’s lower on the rope.

4. Slide: With your guide hand now tightly grasping the brake strand, slide your brake hand up the brake strand (without removing it from the rope) so it’s a few inches away from the belay device. Then put your guide hand back up on the climber’s strand.
Repeat
You’ll keep doing this PBUS motion each time the climber moves up and creates slack in the rope. Once you do it a few times, it will become muscle memory and you should be able to do it without thinking.
Take and Brake
When the climber reaches the top, falls, or needs to sit on the rope to rest, take in all the slack and put the rope into a solid braking position. Pull the brake strand down in front of you. Use two hands on the brake strand if the climber wants to hang for a while, or consider wrapping the brake strand around your hip and slightly under your bum with only your brake hand on it. The friction and weight from your body will help reduce the force needed from your hand to hold the rope in place.
[Also Read: Why Dynamic Belays Can Matter]
Lowering a Climber
When your partner is ready to come down, take in as much slack through the belay device as possible and put the rope in a brake position down and in front of you. Wait until the climber is comfortably weighting the harness and the rope.
For a tube-style device, put both hands on the brake strand and slightly raise the strand to lessen the angle between it and the device. Use the top hand to feed rope through the device while the bottom hand controls the speed. For a brake assisted-device, carefully pull the lever up slightly to allow rope to feed through the device, keeping your brake hand on the brake strand at all times. Keep the lever only partially raised and use your brake hand to control the speed at which you lower the climber.
Be very careful to stay in control. If at any time the climber is moving down too fast, immediately move the rope down away from the device into a strong braking position. If you’re using a brake-assisted device, close or depress the lever to slow the lowering rate.
More Toprope Belay Tips
- Little movements are better than big ones. Instead of waiting to take a bunch of slack in at once, constantly take in any slack in the line. This will make any potential fall much smaller.
- When the climber first starts off the ground or when they are right above a big ledge, keep the belay tight so that a fall and the resulting rope stretch won’t result in them hitting the ground or ledge.
- When first learning to belay, it’s crucial to use a backup belayer, or someone who is also holding the brake strand in case you don’t catch a fall. Not only can a backup belayer provide important pointers as you’re belaying, but they also provide a third person to double-check everyone’s belay and tie-in setups.
- Always have a certified instructor or experienced climber show you this technique and watch you practice it before doing it on your own.
The post How to Toprope Belay appeared first on Climbing.
]]>