The fine art of sending your dream routes without really trying.
The post Topropers Unite! How to Convince Others to Haul You Up appeared first on Climbing.
]]>I suck. After 25 years of climbing, I have elevated passionate mediocrity to an art form. I have never even considered climbing the Nose, never led a pitch of ice, and barely pierced the ceiling of 5.12a sport routes. I boulder like a wounded walrus. There is no real excuse for being this terrible. During the past quarter-century, climbing has been an important part of my life. I have climbed as part of my job teaching at a boarding school for much of that time and my wife gives me ample hall passes. My scarecrow-like physique favors climbing; there have been few serious injuries in my life, and no detours to locales with no rock. Still, I’m just not that good.
I have charged through 25 years with unwavering enthusiasm and the misguided belief that enough daydreaming and obsessive guidebook-reading in the bathroom would improve my climbing. My hopes of breaking into the inner circle of climbing bro-dom remained unrealized. Yearly I watched climbers with a fraction of my experience climb harder, longer, tougher routes. A student I had taught to climb fired a 5.13d. Another student climbed the Nose on El Cap and the Supercanaleta on Fitz Roy. It was time to stop talkin’ and start chalkin’. The problem was getting up a résumé route without risking my neck.
I worked all my usual tricks for a select classic in Rocky Mountain National Park: stronger partner, sequencing to land the easy pitches, plenty of excuses ready if I failed. However, karma caught up with me. We were three pitches up Spearhead when my lead petered out in a smooth slab with TCUs behind crispy flakes for pro. I noodled up and down searching for a way out. This was the moment when gravity met ego. The problem was that I had taught my partner to climb. Even though he now climbed grades harder than I, I had hoped to retain some of the old master aura. But every time the crystals crumbled under my feet the coward in me counseled retreat. I finally threw in a belay at the end of the crack. As my partner approached I tossed down the words of contrition that generally mark the end of a climbing partnership: “I don’t think I can lead the next pitch. It’s all you.”
At the moment of shame, as I handed off the rack, the unexpected happened. Instead of heaping scorn upon me, my partner smiled.
“It’s all good,” he said. “You’ve got a family, I’ll take this one.” Then he glided across some of the hardest runout climbing I’ve ever seen. That simple exchange shook me out of my self-pity and offered redemption. Getting a tow up the hard pitches was not sleazy; it was a proud act of cunning that required years of experience. It was time to embrace the idea that I was happier on toprope.
I also realized that I was not alone. Rather than being a useless poser, I was actually a member of a unique subset of the climbing community. Now it was time to spread the gospel and say, “Topropers Unite!” (TRU for short.)
“What the hell is so great about toproping?” you ask. After all, almost every one of us initially began climbing on toprope. You can, however, elevate the toproping game to the point where you achieve goals as well as TRU climbing status. The key is stealth. It’s critical to fool other climbers into thinking that you really are a “true” climber, not just a leech. Avoid clanking hexes, long underwear topped with shorts, and tube socks tucked into Fires. Most of my best routes have been done with climbers of far superior abilities, hauling my skinny butt up real routes that I could then namedrop.
My inspiration comes from a few of the patron saints of the TRU crew. The first is Edward Whymper, who achieved lasting fame getting hauled up the Matterhorn by guides who climbed circles around his tweediness. However, his accomplishment was marred by having to pay those guides. The real hero has to be Chongo, who scammed rides up numerous El Cap routes, “hitchhiking” his way to the top. I don’t have the scratch to hire a guide to haul me up climbs I could brag about. I also lack the cajones to live in the dirt and trade canned food for the right to jug fixed lines like Chongo. I am left to rely on wits, flattery and guile.
I present a few tips so that you, too, may get up the climbs of your dreams without too much heavy lifting.
1. RATIO
The key to attaining TRU status is to climb a lot, while also avoiding the dreaded sharp end as much as possible. Lounging in the gym with autobelays is not going to cut it. Get out to the crags and tie in. Just find a way to get on stacks of routes without leading. When really pressed, you must be prepared to lead to avoid sinking to boot-licking subman-ship. Aim for a camouflaging ratio of one route led for every four routes on toprope.
2. MRG
The best possible way to crank out a ton of routes without too much leading is finding a Magnanimous Rope Gun (MRG). The MRG is large-hearted, stoked to climb, and leading about three number grades harder than you. Generally the MRG is so psyched to climb that he or she won’t even notice that you aren’t leading any of the pitches. Alternatively these people may be so kind that they just charge along without pointing out that you haven’t led anything all day. They may even hand you creampuff pitches on worthy routes to keep your self-respect intact. MRGs are hard to find since they tend to be ideal partners for “true” climbers also. If you can’t find an MRG you may resort to a few of the following techniques.
3. THE STALL
Needed for when you are climbing with someone who has mistaken you for a “true” climber and expects you to lead half the pitches. This technique involves taking so long to shoe up at the sport crag that your partner can’t avoid being ready to go first. As you glance up from tightening your laces for the 11th time you note with some surprise that your partner has stacked the rope, racked the draws, tied in and is snorting with impatience at the bottom of the route. “You look ready,” you say mildly. “Why don’t you lead this one?” Your partner shoots away and your first toprope of the day is secure. Now you need to keep the momentum. You need sequencing.
4. THE SEQUENCE
This does not refer to remembering the mind-numbing beta that better climbers recite all day. No, this refers to finessing the flow of the climbing day. Now that your partner has led the first route, you are descending “tired” from the TR lap. Shake your forearms vigorously and mumble, “Nice lead. My forearms are blown right now. Why don’t you start the next one while I rest?” With any luck this sequence can get you through four or five routes before your partner really is blown from doing all the real climbing. When you hit the end of the line and your partner calls your bluff you need …
5. LOCAL KNOWLEDGE
Even if you aren’t really a local, having the goods from all those hours spent poring over the guidebook will pay dividends here. Casually mention the “classic” 5.8 just around the corner that you could lead. The key is to fire up something easily with a minimum of risk. When you’re finished your partner will probably want to get on something harder. Here the tried-and-true line, “Since I picked the last route, why don’t you lead this one?” often works. If your partner is insistent that you do your share on the sharp end, resort to point 6.
6. EXCUSES
You don’t need the overworked “hung-over” or “too reachy” or “tweaked finger/ jacked shoulder” type of excuses. These are so transparent any self-respecting “true” climber would know you were a total weenie dodging your duty. No, you need the bulletproof excuse, something like, “My kids were up all night vomiting with the flu.” The best excuses not only slip you off the hook, but elicit sympathy from your partner and any nearby onlookers. “Wow, you looked pretty good on that considering you didn’t get any sleep.” When you run out of excuses you may have to actually climb. If this happens, by all means step up and maintain your dignity and cover.
After all these years of walking the line between revealing my TRU gumby status and remaining included by “actual” climbers I have decided to come out of the shadows, though I suggest other TRU climbers keep a low profile to scam rides on the rock. Now if I could just get them to post a website with a TRU scorecard I could finally be a leader in something.
The post Topropers Unite! How to Convince Others to Haul You Up appeared first on Climbing.
]]>
Climbing gyms make fantastic training and learning environments, but they differ greatly from real rock outdoors.
The post Transitioning From Gym to Crag is Tricky—But It Can Also Be Fun With These 5 Tips appeared first on Climbing.
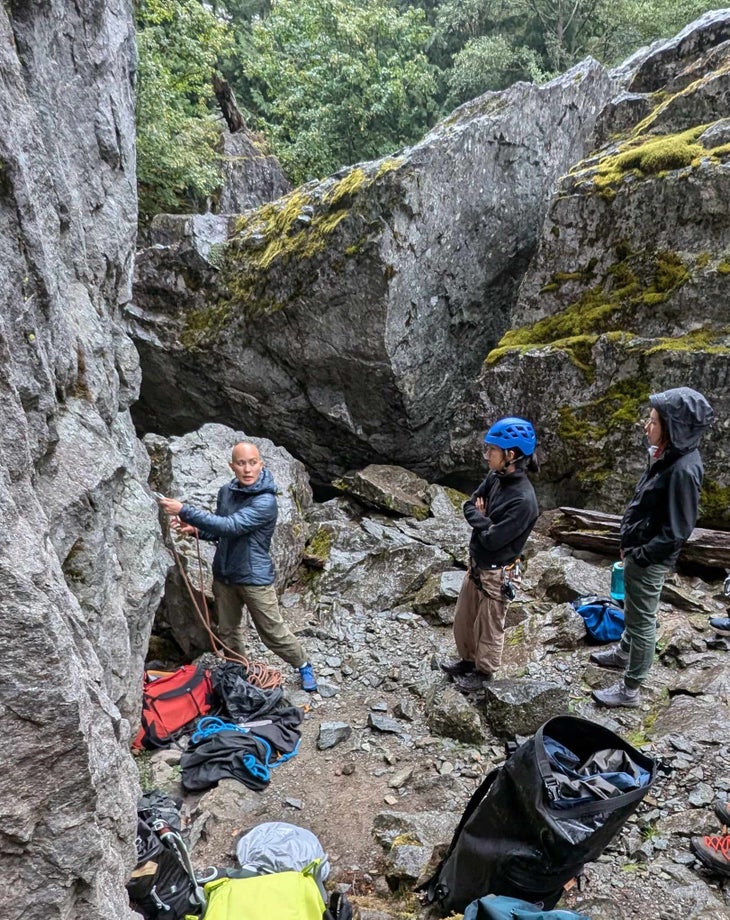
]]>We’re full bore into a climbing gym boom. There are more gyms than ever, and that’s great for the sport. What we’re also seeing is a mass migration of first-timers from the indoors to outside crags. After a few recent visits to classic crags in the Northwest, my head was spinning from all the incorrect procedures bred from the gym. Although these plastic paradises make fantastic training and practice environments, they also facilitate or even reward some bad habits that can hold you back or be downright unsafe outside.
We all start off as clueless gumbies. But we don’t have to—and shouldn’t—stay that way. Observe, ask, and emulate the habits of more experienced climbers. Their practices are produced by years of experience and hundreds of days climbing outside, but you can jump-start your transition to outdoor master by avoiding these five common mistakes.
1. Don’t lead belay while standing far away from the base of the wall
This “stand back and observe” habit is a function of wanting to view the entire pitch while belaying, and some gyms require that belayers anchor themselves into the floor, typically 10 to 15 feet from the base of the wall. At the crag, stand adjacent to the wall, directly beneath the first bolt or piece of protection and slightly to the side of the climber, moving around if you have to. In the event of a fall, you want to be pulled up, not slammed forward into the wall. As the climber moves up a few bolts, you can step back just a bit, but you should remain relatively close to the first bolt. You’ll spend more than half your climbing time belaying, so it’s important to develop your safe-catch skills as much as you develop your climbing technique. For an array of intermediate and advanced tips on becoming a more proficient belayer, check out “5 Tips for Safer Belaying.”
For a demonstration of what happens when the belayer stands too far from the wall when catching a trad fall, watch this weekend whipper.
2. Don’t anchor yourself in at the base of the wall when belaying single-pitch routes
Unless the route begins off a narrow ledge or your climber massively outweighs you, it’s better to be mobile and able to step side to side or be lifted up off the ground in the event of a large fall, which gives your climber a softer, more comfortable catch. This mobility will help you avoid small falling rocks and ensure low-impact catches on marginal gear, two considerations that don’t come into play when gym climbing.
3. Do spot your climber before they have the first bolt clipped
Gym floors are covered by huge mats of soft foam while crags are strewn with sharp talus and tree roots. Falling from the start of a route outside, even just a couple feet up, can have devastating consequences, especially if the climber isn’t wearing a helmet. Until the first bolt or piece of gear has been clipped, don’t consider yourself a belayer, consider yourself a spotter. Ensure that the belay device is rigged correctly and then feed out more than enough slack to allow the climber to reach and clip the first piece of protection. (The rope is useless until it’s clipped to something.) As the climber begins the climb, take both hands off the rope and belay device and focus on spotting the climber. Your goal is not to catch them if they fall, it’s to minimize the consequences. As she’s clipping the first piece, get into proper belay position.
For advice about how to spot effectively outside, check out “Everything You Need to Know to Boulder Safely”
4. Don’t walk around in climbing shoes
Rather than walking around on (relatively) clean cloth floors as you are in the gym, when you’re outside you’ll be walking across gravel, mud, grass, desiccated guano, you name it. Your climbing shoes rely on pure contact between the rubber and the rock, so even a super-thin layer of dirt in between will reduce the friction. Furthermore, that dirt will over time damage your shoes and the rock (it coats the first few holds of the route in whatever you just stood in before starting up the wall, which not only makes holds slippery, but is also pretty bad etiquette).
5. Do ditch all of those “not for climbing” accessory carabiners
This might seem too cautious, but I’ve seen multiple novice climbers accidentally grab a plastic toy carabiner (which for some inexplicable reason is clipped to their harness) when they meant to grab a full-strength piece of gear. Leave those fake ones for your keychain, and if you must clip your shoes, water bottle, or chalkbag to your harness make sure you use a fully strength-rated carabiner.
The post Transitioning From Gym to Crag is Tricky—But It Can Also Be Fun With These 5 Tips appeared first on Climbing.
]]>
Whether your project is four bolts or forty, you’ve got to be able to hang on for the ride.
The post The Best Way to Gain Endurance for Sport Climbing appeared first on Climbing.
]]>This article is the final in a series of four. Read articles one, two, and three to get up to speed.
Over the course of this series I discussed all manners of training, from learning about our bodies’ three bioenergetic systems, to identifying weaknesses while projecting, to training the two factions of our anaerobic system (power endurance). Perhaps most important for sport climbers, however, is learning how not to get pumped silly while questing up sustained, overhanging pitches. Whether your project is four bolts or forty, you’ve got to be able to hang on for the ride.
The importance of aerobic training as a sport climber
Before I get into training for endurance, let me underline that aerobic training, in some climbing-specific form, must be done year-round. Our bodies’ are frustratingly slow to adapt to a higher aerobic threshold (think: years), but can lose those gains in a matter of weeks without training. Aerobic training should be seen as a career-long quest, that you can always improve upon, no matter how old—or how fit—you may be.
If you are serious about your aerobic growth as a climber, I recommend you perform at least one climbing-specific aerobic capacity workout per week throughout the year. (That is, unless you are injured, have a planned rest week, or have other extenuating circumstances.) Nonetheless, I cannot over emphasize the importance of building a wide aerobic base as a sport climber, regularly, throughout the course of your climbing career.
I recommend completing one of the following workouts below per week, year round, to effectively stress the climbing-specific aerobic (oxidative) energy pathway. Now, onto some training!
Aerobic capacity workouts
Spray wall endurance circuit: 2’ on, 4’ off, 4’ on, 6’ off, 6’ on, 4’’ off, 4’ on, 2’ off, 2’ on. (Keep pump underneath 6 or 7 out of 10 to focus on the aerobic system) Climbing intensity light-moderate.
This spray wall session is essentially a variation of an ARCing circuit that effectively targets the oxidative pathways in your climbing muscles. The climbing and rest periods are relatively short to begin, slowly grow, and subside over the course of the circuits. The key to this workout is to slowly build your pump to a moderate level, and maintain it. If at any point during the circuit you feel your pump reach a redline state, you should stop and rest on a jug or move to larger holds until you are back in that moderate zone.
Sport climbing for volume: Complete about 12 sub maximal climbs on your gym’s lead wall (three grades below your limit). Focus on flowing like a route climber and climb on terrain that brings you to a moderate level of pump as you ascend higher over the course of each climb. This session is also not intended to provide a blistering pump. Move to an easier route if this becomes the case at any point during your session. Rest approximately 10-15 minutes between each route.
Climbing “Double Laps”: The name of the game for this workout is to climb many routes a few grades below your projecting level. This workout is a more complex version of the above exercise, and involves more “time under tension .” Complete each route in your session twice (or one route and then a slightly easier route next to it for your second lap). Sport climbing “doubles” should look like: climb a route, and as soon as you lower, have your belayer pull the rope and then proceed to repeat the route again. The second lap should be aimed at managing your existing pump, and potentially even resting in positions you may not have needed to on your first. Rest 15-20 minutes between each round of double laps and aim to complete at least 6 rounds.
Aerobic capacity training in a bouldering gym
8 boulder circuit: Choose 8 boulders in the gym that are at 30-40 percent of your limit. Do each boulder with 20’’ of rest in between. After all 8 are completed, rest 20 minutes and repeat. Do 2-3 rounds in total. This climbing workout workout is great if your local gym does not contain sport climbing or if you couldn’t find someone to belay you.
Closing Thoughts
After reading this series, you now have a heightened understanding of your body’s three energy systems and how they pertain to different factions of your climbing game. Learning to effectively self assess your strengths and weaknesses as a climber (articles 1 & 2), and apply effective training to build upon these weaknesses (articles 3 & 4) should be a career-long endeavor if you want to maximize your potential for growth within your climbing. I hope to see you all during future training articles, but in the meantime please reach out to me with questions, comments, or concerns you may have when you take these concepts and apply them into your own training.
Until next time, stay psyched and climb on!
The post The Best Way to Gain Endurance for Sport Climbing appeared first on Climbing.
]]>
How do you figure out impossible moves? Is there a strategic way to rest? How much should you be warming up? It's all here.
The post Alannah Yip’s Top 4 Tips for Sport Projecting appeared first on Climbing.
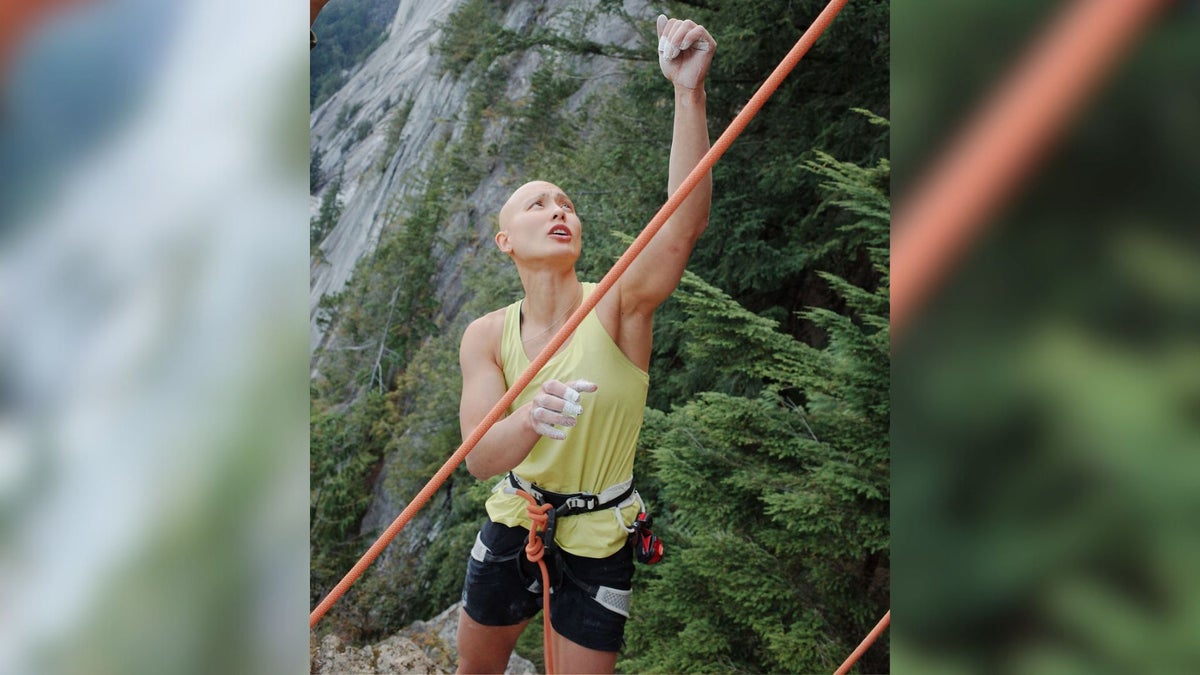
]]>Alannah Yip is one of Canada’s most decorated climbers—indoors or out. Not only was she the sole female to represent Canada at the Tokyo Olympics, she’s also sent Pulse (5.14a) and Room Service (V12) in Squamish, B.C. I recently interviewed Yip at the Arc’teryx Climbing Academy, where we talked about her illustrious (and recently finished) comp career, her hair loss due to Alopecia, mental training, and her transition to full-time rock climbing. You can read our conversation here.
The next day, Yip gave a sport climbing clinic which I eagerly attended. She dropped a lot of knowledge beneath Squamish’s famous granite crags, but four things stuck out to me for projecting sport routes at your limit:
-
- On figuring out impossible moves: Stick clip up and ask for a take so you can get weight off your arms, and feel all the available holds and test all possible body positions. Consider working down from key holds or rests, rather than solely working up.
- Warm up: It’s not just about injury prevention. Yip can’t climb her hardest without a proper, full-body warm up including shoulders, fingers, and hips. She does 10-15 minutes of ground warm up before doing her first pitch. On that first warm-up pitch, the goal is to warm up—not send! Yip has taken on 5.9 before if she get confused. She stresses: Do not get pumped on the warm up. If she’s doing a 5.14a project, for example, she’d warm up on an 5.11+ and then a 5.12+/13-, and then do finger-specific warm up on a hangboard.
- Be efficient when resting: It’s easy to get impatient at rests, and leave them before you’ve milked them for all they’re worth. Yip likes to decide how long she needs to be at that rest beforehand, and then have her belayer set a timer to hold her accountable.
- On big projects, set smaller linking goals: We all need smaller victories on the way to clipping the chains. Before giving redpoint attempts, Yip will make a goal of linking from the ground to the end of the crux. Then she’ll try to link from the beginning of the crux to the chains. These overlapping links help mentally, too. She will make more mini-goals the longer term the project is.
The post Alannah Yip’s Top 4 Tips for Sport Projecting appeared first on Climbing.
]]>
When working on limit projects, it’s too easy for “failure” to feel “safe.” To maximize his performance, Brian Stevens decided to try adding stakes.
The post Want to Send Your Project? Be Willing to Walk Away. appeared first on Climbing.
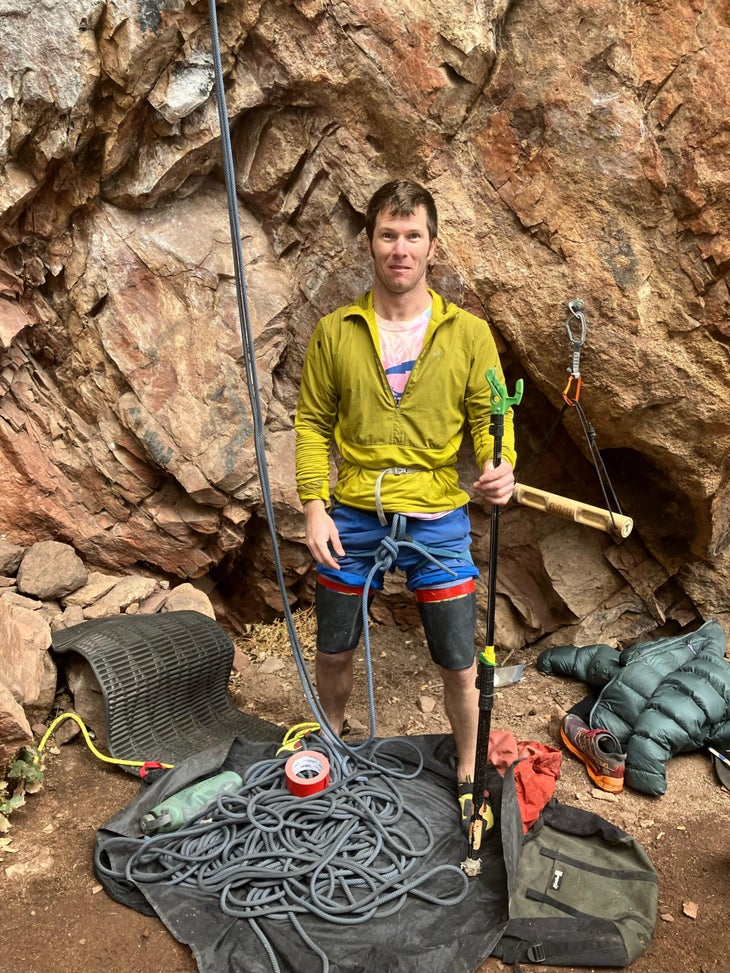
]]>The Project Wall in Rifle Mountain Park becomes an acquired taste—or an acquired masochism—by mid-October. The nearly north-facing wall sees just a few hours of sun in the summer months, with climbers queuing up for their projects early in the morning to capitalize on good conditions. However, as October rolls around, and nighttime temperatures in the canyon plummet below freezing, a shadowy, cold reality sets in. The once-enthusiastic early birds now procrastinate, hoping for a few hours of just-warm-enough sending conditions before the impending snow shuts the canyon down for the season. And so there I was again, last October, doing the exact same routine as the week before, and the week before that, and the week before that: right kneepad, left kneepad, right shoe, left shoe, duct tape, chalk bag. My belayer, comfortably dressed in multiple layers and puffy pants, inspected his belay device and my knot while I, shivering in shorts and a t-shirt, straddled the fine line between stoke and an almost existential question: am I truly psyched, or am I just desperate?
Sport climbing—or, more specifically, mega projecting sport climbs—is a strange activity even to those of us who do it, so from an outside perspective, it must seem even more odd. Go climb on the same route over and over again, sometimes for multiple seasons or years, hoping to go from the bottom to the top without falling. Of course, there’s more to the story. We whittle the route down and employ certain tactics that help us make it a flawless choreography. We refine the beta. We work on overlapping links. We start from below the crux and attempt to climb to the chains. We climb the crux two, three, even four times in a row to ensure mastery while tired. We strive for the one-hang to let us know the send is close. But despite the training and tactics, we still show up day after day, hoping that, on one of those days, something will be different.
I thought about this a lot during my fall season of 2023. I was deep in the pit of despair with my Rifle project, Let It Burn (5.13d). The route is a 35-meter, rope-stretching endurance marathon on the left side of the Project Wall. A variation, it climbs the first half of the classic Sometimes Always (5.13c) before moving left, avoiding that route’s notorious technical stem-crux in exchange for two sustained crux sections. While the first half of the route consists of big holds peppered with standard Rifle knee crawling, the second half is very different. The rock becomes less blocky and the holds are smaller. The climbing is straightforward, but there’s little room for “trickery” like that found below. You’re either fit enough when you get there or you aren’t.
There was nothing at stake. I could always try again. And that, as it turns out, was a bit of a problem.
Every time I tied in, I found myself one-hanging the route. The conditions didn’t matter. How I felt didn’t matter. I was falling at the left-hand undercling at the 9th bolt, more than halfway up the route. I’d rest, pull back on, sometimes lower down for an overlap, and then head to the chains. The weeks were blending together like my own personal Groundhog Day. Every Thursday I’d rush home and pack the car. I’d clean the kitchen, and spend time with my wife, who was “88% okay” with me being gone every weekend. On Friday, I’d speed off on the 3.5-hour drive to Rifle, music blasting. In my sleeping bag in the back of my minivan at camp, I’d re-watch episodes of Emily in Paris. I’d warm up on the same routes in the morning. I’d wait for the wind to pick up and tie in for a redpoint go. But just like the Emily in Paris reruns, I knew the ending.
I’d been to this self-created hell before. I fell at the final bolt of No Philter (5.13d) at Seal Rock in the Flatirons fifteen times before sending it in the spring of 2023. But the route was close to my house—I could see it from my damn porch, taunting me!—and easy enough to get to that I could give burns after work. The thought of giving up never occurred to me, despite dreaded rinse-and-repeat monotony. There was nothing at stake. I could always try again. And that, as it turns out, was a bit of a problem. Since the process was easy and fun, there was no pressure to finish, which—I eventually realized—kept me from summoning the maximum, last-go, best-go effort we sometimes need to do our hardest routes.
Finding myself in this position once more with Let It Burn, I wondered if there was a way to arbitrarily increase the stakes? Sure, it was still a 3.5 hour drive, but how could I— a weekend warrior, armed with an 8a.nu scorecard, a penchant for grade-chasing, and seemingly all the time in the world—further ramp up the pressure to potentially increase my performance?
Several summers ago, I met Ben Gilkison while on a trip in Ten Sleep, Wyoming. He was road tripping with his wife and two young daughters. While his family supported him at the crag, his familial needs limited his time. He couldn’t drag his family back to the same crag and to the same route over and over again, so his motto was “One try, no second chances,” and on that try he tried hard—like, really hard. And it worked for him. His daughters cheered him on while he onsighted Shake ’n Bake (5.13b), climbing like it was the last route he’d ever climb in his life. I also watched him on Name of the Game (5.13a): he nailed every sequence up until the final move, where he fell. “I wanted it bad,” he said as he lowered to the ground. There was no excuse. He took the wins and the losses in stride. But he played his best.
As a kid, I struggled with the win/lose mentality. While my teammates shed tears over lost Lacrosse games, I’d suck on the post-game orange slices and reflect on my individual performance. Did I play well? If so, I didn’t care about the outcome. This, of course, is antithetical to most competitive sports; the football teams in the Super Bowl go out ready to do battle, because they may never get this chance ever again. My lackadaisical attitude seemed to work quite well in climbing until Ben’s ability to simulate a high-pressure situation showed me otherwise.
But of course, Ben’s “one try, no second chances” model couldn’t work for me on a route like Let It Burn. It took me a full season just to figure out all the moves! It was at my limit and demanded time. But I still needed to find a way to incorporate that sense of urgency into my climbing in order to escape from the dreaded one-hang purgatory.
That’s the answer, I thought after listening to the Power Company’s podcast episode “Failure: How Quitting More Leads to Bigger Sends,” in which Kris Hampton and Annie Duke talk about how we tend to stick to our goals instead of looking to other things that could make us happy or help us reach bigger goals. When things go wrong—when we get to one-hang purgatory—we tend to get more invested in our original plan, arguing that we’ve already invested too much time or resources to give up now. It can be hard to remember that climbing the same route over and over again—even if it’s at your limit—doesn’t make you a better climber, it just makes you better at that specific route.
Hampton and Duke suggest creating “kill criteria,” which is a literal checklist that prevents us from getting bogged down. If we can check certain items off, we can continue projecting our route. If we can’t, we need to re-examine our goal or quit. The important part of this kill criteria is including a condition and date. By adding a deadline and a specific benchmark to our goal, we avoid continuing with no direction. A simple example could be if I haven’t one-hung the route by X date, I need to move on. We are forced to maximize our effort because we’ve created a limit on how long we can continue. If we aren’t meeting our goals, then we move on to other more attainable ones, with the option to return to this one later. However, we want to avoid having our goals be so attainable that we always meet our kill criteria.
Hearing this, I worried at first that there would emotional downsides to forcing myself to perform under pressure—the idea that I might have to win or lose with various rock climbs—but, after some reflection, I realized that I’m not unfamiliar with the process of using kill criteria, and that some of the most satisfying climbing experiences of my life were the result of these types of scenarios.
As teachers, my wife and I travel during school breaks. When visiting a new location, I tend to explore the area and climb routes I can easily do. But on the few occasions when I’ve decided to try closer to my limit, there’s a natural kill criteria built into my relationship with each climb: the end of the trip. In El Salto, Mexico, in 2019, I dedicated the entire two weeks to Camino del Chino (5.13b). On the last try of the last day, when I was forced to perform at my best, I sent. In that instance, the trip was successful because I put myself in a situation without guaranteed success and I rose to the occasion.
But I’ve also walked away without the send. In Kalymnos, in 2022, I fell on the final hard move of Marci Marc (5.13a) on the final day of our trip. The conditions were great, I tried my hardest, but I couldn’t get it done. We spent the rest of the day at the beach and then caught our flight home the next day. When two teams play, there’s a winner and a loser. Yet even though I was the loser on that trip, I wouldn’t define the trip as a failure; I still put myself in a situation without guaranteed success—and just knowing that I’d tried hard was enough to be satisfying.
Still, experiences like these were anomalies. In general, I avoided situations like that on Camino del Chino or Marci Marc. Maybe that’s what was initially so attractive to me about projecting: I rarely exposed myself to failure, pressure, or the need to “turn it on” and try my hardest. Instead, I’d pick something so hard that success was only a distant option—which made the process more comfortable.
In the same failure episode, Kris Hampton suggests practicing failure by intentionally putting ourselves in situations in our training where success isn’t guaranteed and we may have to walk away with no tangible results. The key is to normalize failure and quitting, viewing them as opportunities for learning rather than negatives. In the gym, for instance, you might give yourself three attempts on a hard boulder problem or try to onsight a difficult route. If you can’t do it in the alloted time, then move on for that session, or altogether. This forces a more significant up-front effort, and it also helps us practice working through little mistakes. With limits, we create a win-loss paradigm similar to many sports, where the outcome is final.
It had been almost a month since I met my last kill criteria on Let It Burn. I had one-hung the route by the end of August 2023. I had started from the good rest a few bolts below the crux and gone to the chains by mid-September. The final kill criteria was to send. I set the date for a long weekend in mid-October as my last chance of the season. Not, “Oooh, next weekend looks pretty nice, I’ll go give it another shot.” No. Done. That weekend would decide whether I’d “win” or “lose” this season.
-
Related: Alex Megos talks about how his Olympic disappointment helped him send two of his hardest routes
That final weekend was no different from any other. My friend Jacob and I stood below Let It Burn. The summer-camp crowds had dissipated. Those that remained bemoaned the coming winter. Fallen leaves adorned the ground, and the sun struggled to reach the canyon floor. Jacob, offering his customary encouragement, urged me to “try hard” and “let the big dog out.”
I felt terrible as I made it to the meager rest before the move on which I had fallen twenty times. My body was fatigued, forearms pumped, and the shallow right kneebar was slipping. Switching to the less restful left knee, I shook my right hand hard. Without much thought, I started the crux, anticipating another fall. To my surprise, my left hand stuck the undercling, and I stood tall, hitting the next crimp as my body seemed to drift away from the wall. A moment of pause, and, like a scene from Bill & Ted’s Excellent Adventure, I uttered, “Whoa.”
As I latched that crimp on Let It Burn, doubt entered my mind. Cool, I’ve done the move I hadn’t been able to do, I thought. But I feel pretty bad. Maybe I’ll take here and try tomorrow.
But then I remembered that there was no tomorrow—not for Let it Burn. I had only this one chance to succeed and define the season. Suddenly—and with friends cheering below in the autumn sunshine—I realized I had been afraid of this moment. I had been scared to find myself in a position where I would have to try as hard as I could and know I could still fail. But I pushed, and I pushed, and a few minutes later I was clipping the chains.
As I drove out of the canyon that evening, leaves swirled into the open windows of my car. I thought of something a Norwegian climber said to me years ago:“You Americans are so funny, driving around in your silly vans, posting on Instagram about how you sent on the last try of the day. Of course you sent on the last try; after you send, you aren’t going back to try again!”
Perhaps we need to give ourselves a last try—a real last try—more often to unleash our competitive athlete and “let the big dog out.”
Also by Brian Stevens: Stop Using “Redpoint Mode” As An Excuse to Skip the Line
The post Want to Send Your Project? Be Willing to Walk Away. appeared first on Climbing.
]]>
Coach and elite climber Cameron Hörst explains how sport climbers in the 5.10-5.13 range should train for the crag.
The post A Simple Guide to Sport Climbing Harder appeared first on Climbing.
]]>This article is the final in a series of four. Read parts one, two, and three.
After last week’s focus on training for bouldering, now it’s time to focus on a sport climber’s differing needs. This training program will be a good fit for most folks climbing between 5.10-5.13 and addresses only the physical aspects of training—how to increase your strength, power, and endurance—but does not address the vital aspects of climbing technique, mental game, and nutrition.
Balancing Training Around Your Life
To improve as a sport climber, you will likely need to spend more time in the gym (or on the wall) than your bouldering counterparts. It is common for high-end sport climbers to spend a combined 10-20 hours per week training indoors and climbing outside. Finding this kind of time to commit to climbing—amidst a busy work, family, and social schedule—demands disciplined planning and execution.
Energy System Training for Sport Climbers
Under the tutelage of my father, Eric Hörst, I learned to schedule my training thoughtfully, rather than making it up on the go as many folks do. Here’s a quick overview of what my father taught me:
ATP (or adenosine triphosphate) is our muscles’ energy currency, and there are three bioenergetic systems that produce ATP for climbing.
- Anaerobic alactic: Provides instant power for brief near-maximum intensity movements up to 10 seconds.
- Anaerobic lactic (a.k.a glycolytic): Provides a rapid supply of ATP to sustain high-intensity movements, between 45-60 seconds, before a rapid power down and “pump” begins to develop.
- Aerobic (oxidative phosphorylation): The aerobic energy system takes over as the primary source of ATP production about 60 seconds into sustained exercise or climbing—and can continue for hours. The aerobic energy system is the motherlode of enduring power that gets you through very long boulders, sport routes, and multi-pitch climbs, and supports faster recovery too.
Training for Sport Climbing: It’s Complex & Time Consuming!
Training for sport climbing is complex because, unlike bouldering, you cannot simply try moves at your limit, hangboard, and strength train and expect to bump up your redpoint grade.
In sport climbing, all three energy systems come into play—but to different extents depending on a climb’s nature. A short, steep three-bolt route will be far more anaerobic than a 100-foot resistance climb, which pulls from the aerobic energy system. Ultimately, to excel in sport climbing, you need to train all three energy systems so they are on call for the demands of any given route: Powerful individual moves will be powered by the alactic system, the anaerobic lactic system ensures you connect pumpy sequences together, and the aerobic energy system will help you recover mid route.
Most sport climbers are comparatively weak in one of the three energy systems compared to the other two. To decipher which one is your limiting constraint, ask yourself: Do I struggle most with individual hard moves (anaerobic alactic), linking longer crux sequences (anaerobic lactic), or connecting the full route together (aerobic)? If you identify a disproportionately weak energy system, then be sure to target it twice per week during your dedicated gym-training weeks.
Scheduling Your Weekly Workouts
I recommend doing one alactic workout (limit bouldering and near-limit exercises), one anaerobic lactic workout (power-endurance climbing and exercises), and two aerobic system sessions (sub-maximal route climbing) each week. This Daily Undulating Periodization (DUP) schedule could be executed like this:
- Tuesday: Alactic workout
- Wednesday: Aerobic climbing workout
- Thursday: Rest
- Friday: Rest or generalized training (antagonist exercises, running, and core)
- Saturday: Anaerobic lactic workout
- Sunday: Aerobic climbing workout
- Monday: Rest or generalized training
The tenets of DUP training are that you never train the same energy system on consecutive days and, if you are doing two-a-day training (common among more advanced climbers), you must separate the training of the two different energy systems by at least six hours. For example, you might perform a limit bouldering session (alactic) in the morning or midday, then in the evening engage in either a power-endurance (lactic) or capacity climbing (aerobic) session.
Assuming sound day-to-day nutrition and recovery practices, you might be able to repeat this DUP program for up to eight weeks, before taking a deload week or tapering your training ahead of a road trip.
Now, let’s get into some training!
The Workouts
Following are three distinctly different workouts, designed to target a specific energy system. They are each standalone workouts, so do not combine them in a single session.
Limit Bouldering & Strength/Power Workout (Anaerobic alactic focus)
- Progressive Warm-up
- Engage in at least 20 minutes of warm-up activities, including dynamic stretching of major muscle groups, some bodyweight pull-ups and push-ups, TRX trainer Y’s, I’s, and T’s and/or rotator cuff dumbbell exercises, and then conclude with a few fingerboard hangs (5-10’’ body weight hangs on a 20mm edge). If you are a more advanced climber, you should finish the warm up by conducting one set of up-and-down laddering on a campus board.
- Limit Bouldering Pyramid
- Sport climbers should focus on building the capacity to do several near-limit boulders (and anaerobic alactic recovery) rather than projecting a boulder at their maximum difficulty. Here’s how to do it.
- Whatever your current “session limit” boulder grade is, begin the pyramid four V grades below it. For example, if you can climb V8 in one session, begin this pyramid with three V4s.
- Next do two V5s, two V6s, and then one V7 (give it a few tries, then continue on).
- The top of the pyramid is V8, so spend 10-15 minutes projecting one V8.
- After 15 minutes on the V8, begin your journey back down the pyramid by climbing one more V7 (~3 tries), one V6, one V5s, two V4s, and finally two V3s.
- Rest 3 minutes between each boulder, and attempt, and this entire pyramid will take about 90 minutes.
- Max Hangboard Training
- Do two sets of weighted near-limit hangs using the seven second on/53 seconds off x three-hang protocol:
- Do a 7-second weighted hang on a feature that you can barely hold for 10 seconds with near-maximum effort (select added weight appropriately). I recommend using 14-20mm edges and a half-crimp or open-crimp grip. Rest for exactly 53 seconds, so that each hang-rest couplet takes exactly one minute. Do two more hangs following the above protocol. Each hang should be near maximal, but not quite take you to failure…except, perhaps, on the third hang of a set. After doing the first set of three hangs, rest for five minutes before doing a second set of three hangs. Increase the added weight as needed to keep this exercise “near limit.” Note: If the bouldering pyramid left you exhausted or with achy fingers, then you must skip this exercise.
- Do two sets of weighted near-limit hangs using the seven second on/53 seconds off x three-hang protocol:
- Pull-Up: 5×5 Protocol
- Do five sets of five pull-ups with a 3-5-minute rest between sets. Add enough weight to make each set challenging.
- Core Training
- Perform three core exercises that target different aspects of the large torso muscles (e.g. Deadlift (three sets of five reps), Front Lever, and Windshield Wipers).
Power-Endurance Workout (Anaerobic lactic focus)
- Progressive Warm-up
- Engage in at least 20 minutes of warm-up activities, including dynamic stretching of major muscle groups, some bodyweight pull-ups and push-ups, TRX trainer Y’s, I’s, and T’s and/or rotator cuff dumbbell exercises, and then conclude with a few fingerboard hangs and, for the more advanced climbers, one set of up-and-down laddering on a campus board.
- Power-Endurance Interval Training
- Perform only one of the following interval training protocols:
- Bouldering 4x4s: Select a moderate boulder problem and climb it four times in four minutes. The ideal boulder would take 30 seconds to climb followed by a 30-second rest. After sending it four times, take a five-minute rest. Next, select a second problem and climb it four times using the same protocol. Continue in this manner, decreasing the difficulty if needed, until you’ve climbed four different boulders a total of four times each. Note: A more advanced climber could take a 20-minute rest and then repeat the 4×4 protocol a second time.
- 30s/30s Intervals: Perform these intervals on a spray wall or treadmill, not on established boulders. You are going to climb intuitively with the hardest movements you can manage (without falling or reaching premature failure) for 30 seconds. Rest exactly 30 seconds, before launching into your next all-out 30-second climbing interval. Continue for a total of six 30/30 intervals. One set will take six minutes if you time your intervals precisely. Now rest for 10-15 minutes before performing a second set of 30/30 intervals. Advanced climbers can do up to four sets (a total of 24 intervals). Note: Each interval should be “all out.” Use small holds and bigger moves when you’re fresh, then move to better holds and easier moves as fatigue grows.
- Perform only one of the following interval training protocols:
- Route Projecting
- Partner up and take turns projecting gym routes near your limit for up to two hours. Strive to make high-quality efforts with each go ending with either a fall or clipping the chains. Rest 10-20 minutes between each attempt or send. By its nature, this near-limit route climbing is very lactic (pumpy) but also draws heavily on the aerobic energy system.
- “Frenchie” Pull-ups
- Using a pull-up bar (palms-away grip), pull your chin above the bar and lock-off with your hands against your chest for a four-second count. Lower yourself to a straight-armed position, and then immediately pull up to the top position again. This time, lower yourself only halfway and lock-off at a 90-degree angle. Hold this position for four seconds, then lower yourself to the bottom. Pull up a third time, and lower yourself about two-thirds of the way (elbow angle of 120 degrees) and hold here for another four-second lock-off. Lower to the bottom position to complete the first cycle. But don’t stop here—immediately begin a second cycle of Frenchies: pulling up three more times with four-second lock-offs in each of the three positions. Continue through a third and fourth cycle, if you’re able. Stop when you can no longer perform a full pull-up or hold the lock-off. Rest for five minutes, then perform a second set of Frenchies.
Climbing Capacity Training (Aerobic system training)
- Warm-up
- Complete 15 minutes of warm-up activities, including 5-10 minutes of generalized aerobic warm-up activity (treadmill, rowing, stationary bike), a set of bodyweight pull-ups and push-ups, and a bit of dynamic stretching or other mobility work.
- Submaximal High-Volume Route Climbing
- The goal is to climb as many routes (or aggregate feet) as possible over 1-2 hours without falling. Therefore, the climbing must be very submaximal with nothing more than a mild to moderate forearm pump. Select routes between 1-3 full number grades below your redpoint limit. For example, if 5.12 is your redpoint limit, then climb routes mainly between 5.9 and mid-range 5.11. If climbing on an auto-belay, rest for 5 minutes between climbs. Otherwise, partner up and take alternating turns at lead climbing. To get the intensity right, think of this climbing workout as the equivalent of going for a “zone 2” run. Your effort should be steady, but moderate—never approaching “try hard” territory. Begin by climbing around 400 feet of wall in a session, but build towards 800 feet or more over a year of training.
- Plank Core Circuit
- Do two sets with a 10-minute rest in between.
The post A Simple Guide to Sport Climbing Harder appeared first on Climbing.
]]>
Unless, of course, you're literally about to blitz up the route in a matter of minutes.
The post Stop Using “Redpoint Mode” As An Excuse to Skip the Line appeared first on Climbing.
]]>Redpoint Mode (n):
The state of being close to sending. See Redpoint.
I first heard the term redpoint mode misused at The Dog House in Clear Creek Canyon, Colorado, an often crowded sport crag. Because of my trad-dad roots, my buddy Andy and I had gotten an early start and were the first at the wall. We warmed up on Hot Dog (5.11b) and made our way to the goal for the day, the popular Big Dog (5.12b). As we geared up, we noticed four guys approaching up the hill and beelining straight for us. Out of breath, the leader of the pack asked, “Are you guys getting on Big Dog?”
“We are,” I said, with a bit of sarcasm. Was our neatly flaked rope at the base of the route not an obvious enough sign?
“Have you been on it before?” He asked, seeming desperate.
“No, neither of us have.”
“Oh, ok, cool, cool,” he continued, with a sigh of relief. “Well, I’m in total redpoint mode on this rig, so would you mind if I cut in and give it a quick burn? I’ll be really quick, and you can see some beta.”
Andy and I looked at each other, eyes rolling. There wasn’t a rush, we had all day. This would give us some time to have a quick snack and gather some beta, making our burns more efficient.
As Andy and I lounged and snacked, basking in the warm winter sun, it was clear that really quick and redpoint mode weren’t that at all. Not only did it take him almost 30 minutes to get ready, fussing with his shoes, taping a finger, fondling his stick clip, but he then hung at the first bolt, and the second, and the third…
Climbing jargon can be like another language if you’re not in the know. I suddenly felt like Inigo Montoya in The Princess Bride; “You keep using that word, I do not think it means what you think it means.”
**
Turn-Taking at the Crag
A few summers back, my wife and I explored the climbing scene in Germany’s Frankenjura. While the climbing was amazing, we were most struck by the country’s remarkable efficiency. In Nuremberg on rest days, we admired the escalator etiquette. People stood on the right, leaving the left free for those walking briskly. Driving on the autobahn reinforced the concept of sticking to the right lane. If you didn’t, an Audi passing at 90 mph would turn you into bratwurst.
Efficiency isn’t always widespread. Yet, you’ve likely experienced a similar situation at a busy intersection. There, a considerate driver breaks the deadlock by signaling for you to proceed. It’s a testament to unspoken coordination in high-traffic scenarios. You might even have found yourself being the kind person, gesturing for others to go ahead!
Over the years, I’ve noticed a similar trend in sport climbing areas around the US and abroad. Climbers collaborate at bustling crags, attempting to establish some semblance of order. While the ethos of “first come, first served” prevails, there’s also a mindset of giving way to someone more prepared.
When you’re trying a route at your limit for the first time, it can be a major endeavor. It’s possible, and likely, that a first-time beta burn can take anywhere from 30 minutes to an hour. To minimize inconvenience, I’ve always strived to try a route for the first time at off-peak hours. I’ll climb early in the morning when it’s too cold for those trying to send. I’ll sweat it out in the afternoon heat when others are taking their siestas, waiting for the cool evening temps. If those options aren’t viable and I’ll be monopolizing prime climbing conditions, I make it a point to ask, “Is anyone in redpoint mode?”
Aside from my encounter in Clear Creek Canyon, I’ve found that climbers are usually honest about their attempts. Redpoint mode, for me and most climbers, translates to, I’m likely to send, but if I fall, I’m coming straight down. Perhaps they’ll rehearse the crux sequence after a fall. More often than not, their attempt is quicker than tying your shoes. Most people have embraced this ideology. It’s even found in guidebooks when discussing crag etiquette. Dave Pegg wrote in his 2013 Rifle Mountain Park, “If you are at the humble stage of working a route, which in Rifle can easily eat up an hour-long session, it is considered good form to ‘give way’ to a climber trying to redpoint the route.”
Whether it’s due to dishonesty, competition, or ambition, there’s always one or two people who don’t quite get it. What these people view as redpoint mode seems to be 15 minutes of prepping, followed by an epic working burn. If their lengthy turn had been communicated and agreed upon, it’d be fine. But the person who is in redpoint mode loses their warm up, and instead inadvertently sits around in their tight shoes and duct-taped kneepads like a dope, because they were ready. Everyone has the right to climb what they want, but we need to be honest about our efforts. This way, we can all adjust and prepare accordingly.
I’ve earned a reputation from friends as a bit of a diva when getting ready for my burns. It’s a routine: a sip of water, a nervous pee, a handful of sour patch kids, another sip of water, a quick swipe of chapstick, kneepads on, shoes on, discover a rock in my shoe, shoes off and on again…
I’ve also been referred to by others, not so affectionately, as “The Crag Warden.” I have 15 years of experience as a middle school science teacher. I interact with hormonal, defiant, and sometimes smelly teenagers every day. Maintaining order at a crowded crag isn’t much different than an 8th grade classroom. Over the years, I’ve learned that my turn starts as soon as the person before me touches the ground. I try to do all my primping and prepping before my clock starts ticking. Time, and the route, are things we all share, so it’s important to respect that.
I also try to be honest about my plans. If I’m in redpoint mode, I’ll check with the others in line. If I know my burn is going to take a long time, I’ll be honest about it and try to let a more prepared climber go first. Plus there’s the added bonus of gathering the perfect beta for the move that’s been shutting me down!
**
In climbing, as in driving, we share a common space. Sometimes you’ll hear someone grumbling about how much they hate traffic. It’s as if they think everyone else loves sitting around, breathing in exhaust fumes, and arriving late. This is likely the same person who shows up at a popular crag, complaining about how crowded it is.
Climbing is not only an individual challenge; it’s a collective experience. Much like the rules of the highway, a day at the crag involves signaling our intentions. Everyone’s trying to get to their destination. Let’s be a community where honesty, efficiency, and a shared appreciation for the rock are the norm. This can enhance everyone’s experience. We’re all part of the same traffic figuring out the best way to navigate and share the joy of sending.
Also Read:
The post Stop Using “Redpoint Mode” As An Excuse to Skip the Line appeared first on Climbing.
]]>
Learn how to extend your draws to minimize rope drag and rope abrasion while making falls less dangerous.
The post Why, How, and When to Extend Your Draws appeared first on Climbing.
]]>Every beginning trad climber learns the basics of “extension”—using slings or quickdraws to create more space between the rope and a piece of gear. (Check out Extension Basics for a quick refresher course.) There are three main reasons behind extension—reducing rope drag, keeping pro in its proper place, and preventing the rope from running over sharp edges—and there are plenty of subtleties that can make you a fast, smooth, and expert extender. These tips aren’t just for trad climbers. Bolt-clippers can improve their safety and sending success with these techniques as well.
The Tools
Quickdraws, single-length slings (sometimes called full-length), double-length slings, and carabiners are essential parts of any trad climber’s standard kit. (You’ll also hear slings called runners, which is short for “running belay,” meaning any protection point between stationary belay stances.) With a combination of these four main components, you can extend pieces from three inches to four feet.
Quickdraws are the go-to tool for clipping fixed gear and making short extensions. Draws vary widely in cosmetics and price, but more importantly they vary in their designated purpose. For sport climbing, you want full-size, wear-resistant biners on stiff, beefy slings (think Petzl Express or Trango Smooth draw). For trad, however, much lighter draws work better—featherweight biners on thin, supple slings to reduce bulk and weight and provide a more flexible attachment to nuts (think Black Diamond Oz). For sport and trad, carry at least two different lengths of draws, so you have options if a bolt or gear placement pinches the rope against an edge or leaves a carabiner levering over it. The number of bolts (plus two for the anchor and at least one extra for insurance) will determine how many draws to carry for a sport route, but on trad routes, six to eight dedicated draws is typically about right. If there are any “must-hold” clips (e.g., the first bolt or a piece above a ledge) consider putting a lightweight locker on the rope end of the draw.
Single-length slings should be the mainstay of your sling collection. They’re sized to fit neatly over one shoulder and give approximately 24 inches of extension when clipped with a biner on each end. Standard slings are 48-inch sewn loops, but individual runners can vary a few inches, to better fit larger- or smaller-chested climbers. For versatility, try to mix it up a bit when racking—a few inches of difference in length can come in handy when trying to equalize two placements, and different materials have different uses. Sewn 3/8” (or 10mm) tape is a good standard width for slings, but consider hand-tying a few with a simple water knot, so they can be undone for threading bolts or pitons during unplanned rappels. For even more versatility, tie these slings with 5 to 7mm cord, so they can double as prusiks if necessary or be used as pro when threading narrow holes or slinging chickenheads and knobs. (If your tied slings have been used for a while, make sure you can still get the knots undone before you leave the ground.) Bring at least six single-length slings total, and up to twice that for complex terrain with lengthy pitches, or on long routes if an unplanned retreat seems possible.
Double-length slings provide a whopping four feet of extension and are more useful for rigging and anchors than for extending a single piece of pro. If you extend a piece four feet, you’ve added eight feet to your fall, which is a bit much for safe travel on most blocky trad terrain. However, doubles come into their own when building belay anchors, when slinging cliff-top trees, as mini cordelettes for equalizing placements, and for using in rap anchors (or when creating a mini belay seat, see p. 41). Carry two or three double-length slings, more if you might have to bail.
Carabiners that are loose and not designated for a certain piece of gear are crucial, so carry an assortment to employ during extension. These can be carried a variety of ways: Some people prefer to stack them in sets of five on a gear sling or loop of their harness (clip one biner to the sling or loop and the other biners to that first one), while others prefer to clip a single biner to each sling over the shoulder.
The Rabbit Runner
An efficient alternative to the double-length sling is the Rabbit Runner, a 1970s Bill Forrest (legendary Colorado climber who made several major innovations in climbing equipment) design that’s still available from Metolius. A Rabbit uses the same amount of material as a single-length sling, but instead of being sewn into a closed loop, each end has its own small loop to clip a carabiner. Thus, you can use a Rabbit as a normal single-length sling, by clipping it doubled, or extend it single-strand for twice as much extension. Just adding one of these to your standard rack can greatly increase your placement, anchor, and rapping possibilities.
Don’t Over- or Under-Extend

Below roofs, before and after significant traverses, placements deep inside a wide crack—all of these situations demand full-length slings. Cams placed in a splitter crack seldom even need a quickdraw, but delicate nut placements in that same situation are best fitted with a flexible draw to keep the rope from dislodging the nut. When learning, I used long runners on almost everything. Now, I use them sparingly. Look below and above your chosen placement to imagine the rope’s path after you clip your piece with a draw or a sling. Is the extension serving a purpose? If not, don’t extend. Adding four feet to your potential fall might mean the difference between a harmless slip and an injury. Sometimes you’ll place a “critical” sling—a single point that protects the second on a traverse or keeps the rope from a razor-sharp edge. In these cases, use two opposite and opposed biners or a locker on the rope, and double up the pro if possible.
Sling Configurations

Most of the time you can just clip your chosen sling to the piece of gear and the rope (fig. 6), but there are a few other options if you need to gain or lose a few more inches. If you’re short on biners, try girth-hitching a cam’s sling (fig. 5, but don’t do this with a wired nut; the cinching action of the girth-hitch can cut the sling in a fall). By doubling the runner through the cam’s sling (fig. 3, this works for wires, too) you’ll shorten the extension. Pick just the extension you need and no more. For long routes, speed of placement and re-racking is important. To move fast, add a few extra biners to the rack and nix all girth-hitching. Likewise, when quickdrawing a cam, leave the cam’s biner on the gear. It wastes a biner, but saves time when the gear is re-racked. Small savings add up over the course of a dozen pitches. A standby for rigging full-length slings is the “alpine quickdraw.” If you end up with a wrap around one of the biners, take the time to fix it. The wrap can work its way onto the gate, increasing the chances of cross-loading or unclipping. You can improvise a draw by clipping biners to both ends of a wired nut or corded pro, such as hexes.
Carrying
How many times have you needed a sling, only to find it inaccessibly draped over your wedged shoulder or hopelessly tangled with six other slings and biners? Rack smart to avoid such bondage. The alpine draw setup works well for a few of your full-length slings, but carrying them all that way consumes valuable harness space. The simplest option is over one shoulder—in my opinion, best done without biners, which promote tangles. Another alternative is to carry one “runner runner” over your shoulder, then double the rest of your single-length runners over that runner so they hang on your side, clipping both ends of each hanging runner with a carabiner. To deploy one-handed, simply unclip from one strand and pull. (Check out Learn This: The Runner-Runner a quick demo.) When swapping leads with a partner, I’ll often rack all the quickdraws on a dedicated shoulder sling to speed up changeovers. Since I seldom use my double-length slings except at belays, I carry them tripled, knotted, and clipped to a biner on a rear harness loop.
The post Why, How, and When to Extend Your Draws appeared first on Climbing.
]]>
They figured they knew enough about climbing to wing it, but took a dangerous risk that could have cost them.
The post They Climbed On a Home Depot Rope—Thought A Real Rope Was Too Expensive appeared first on Climbing.
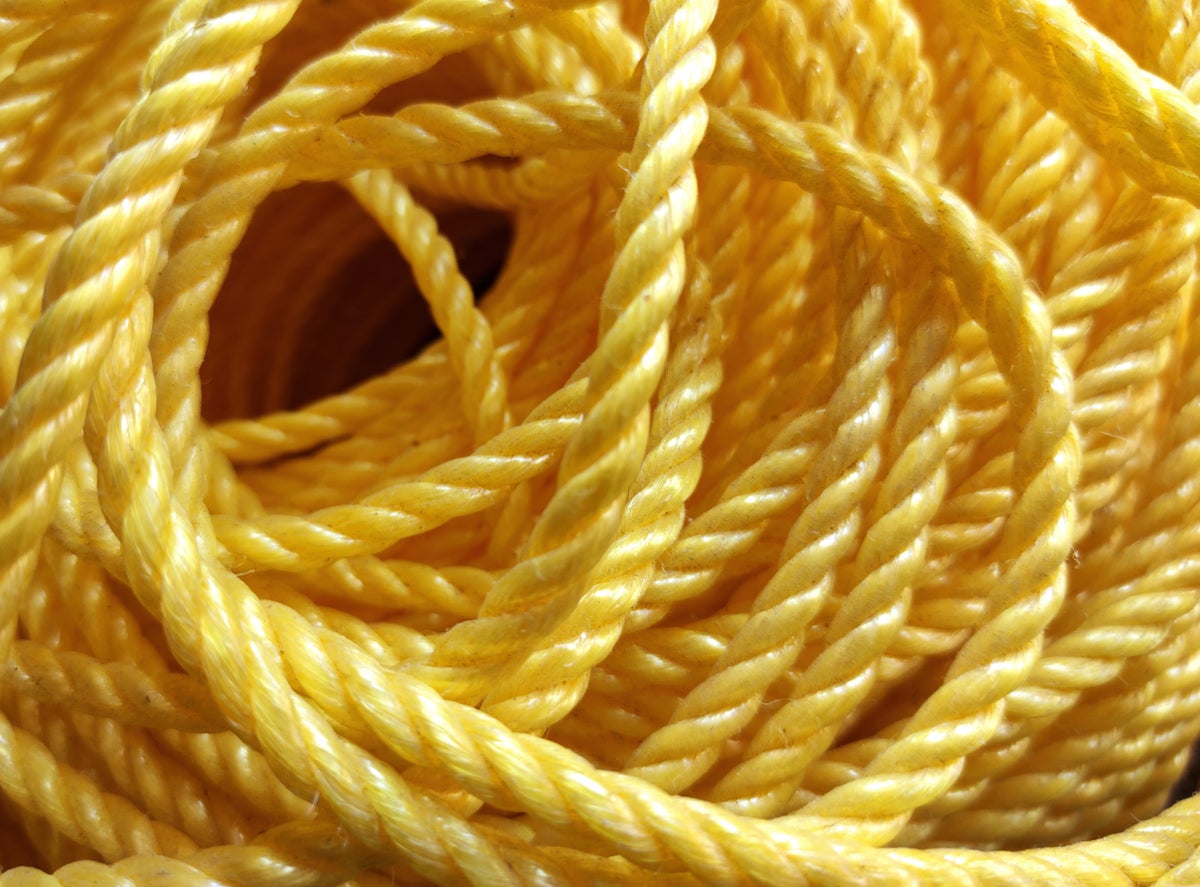
]]>During my senior year of high school, my friends and I were bored. We decided we collectively knew enough about climbing for it to be safe. We went to the local outfitter and bought harnesses, carabiners, and belay devices, but we scoffed at the price of a rope. It was way outside our budget. Instead, we went to Home Depot and bought 100 feet of poly cord that was rated for 200 pounds. We climbed on that rope all day, just easy 5.3 climbing on toprope. I’ve included a couple photos. It wasn’t until I was lowering at the end of the day that I realized what a mistake I’d made. The 100-foot rope had stretched to about 200 feet, shrinking to the size of 8mm cord. I bought a real climbing rope the following week. Wanted to share because we are all new at some point and even with the best intentions mistakes are made. We should collectively work together to improve safety across the sport. I wish someone would have stopped us from climbing on that poly rope.
—Kyle Harris, via email
 —
—
LESSON: Modern climbing ropes include a number of climber-friendly features. They can hold thousands of pounds of force. They have durable sheaths that prevent abrasion and cutting. They have the ideal amount of stretch to catch a fall softly, and then bounce back to their original length and diameter. They’re supple and easy to tie and untie. They’re tested to meet rigorous safety standards. And they work great with modern belay devices. A random hardware store rope is not designed with any of these goals in mind, and can’t be expected to meet them. Always use proper climbing gear designed and rated for climbing.
Want more? Check out more installments in our ever-growing hall of shame:
Lucky He Didn’t Die. Lowered From a Toy Carabiner
Unfortunate Groundfall, Fortunate Landing
Leader Decks When Experienced Climber Bungles the Belay
Saw Through Someone Else’s Rope
Belayed With Hands Only—No Device!
Smoke Brick Weed and Go Climbing
Belay With a Knife In Your Hand
Don’t Let a Clueless Dad Take a Kid Climbing
The post They Climbed On a Home Depot Rope—Thought A Real Rope Was Too Expensive appeared first on Climbing.
]]>
Increase your odds of sending with this advice from someone who's made the mistakes so you don't have to.
The post Four Big Mistakes You Make At The Crag And How To Fix Them appeared first on Climbing.
]]>When I was 17, I set out to “climb” my first 5.13. It was my first day in Boulder, Colorado, where I’d stopped to pick up my friend Mark en route to the City of Rocks, Idaho. The year was 1989, and Boulder was already a climbing center thanks to Eldorado Canyon, Rocky Mountain National Park, and the first-generation sport climbs in the Flatirons, with their dark sandstone and vibrant-green lichen patches, and which appeared in magazine articles and La Sportiva shoe ads being sent by famous, sponsored climbers. An overstoked kid from backwater New Mexico, I was ready to fling myself at these iconic routes in the hopes of likewise becoming a lithic demigod.
The reality: I had only two years of climbing experience; I could barely get up 5.12 on a good day; my footwork was shit and I often climbed myself up into a corner, with no plan for self-extrication other than keep thrashing upward and hope; and it was mid-July on the Front Range, when daytime highs are in the 90s and the rock oozes sweat and despair.
Never mind all that: I was going to send Eldo’s Rainbow Wall, Colorado’s first 5.13. So it was that Mark and I set out, midday in the depths of July. Buzzing with impatience, I ran straight to Rainbow Wall, a flat orange face of river-washed sandstone blazing in the sun above South Boulder Creek. I expected to find pro climbers there, photographers, perhaps a talent agent waiting to sign up this “promising” kid from New Mexico for some lucrative sponsorship deals. But there was nobody; just heat smacking off the rock and insects droning in the underbrush.
“Rainbow Wall is so sick!” I told Mark, who, being a few years older than me did not share my puppyish enthusiasm. “I can’t wait to jump on it.”
“Don’t you want to warm up first?” he asked.
“Warm up? What?! Hell no! That takes too much time.”
“It’s also in the sun,” he said. “You might want to wait and try it later.”
“Why would I do that?” I asked. “It looks fine to me.”
Mark sighed. “OK. I’ll belay you.” And belay me he did, though of course there was little point. I skitched up the unprotected 5.9 opening slab, popped a cam in a flake (fortunately, one of the three cams I owned fit the placement), clipped the first two ring bolts protecting the opening crux, and immediately slid off the sloping underclings and greasy smears, my swollen feet throbbing in my tight, board-lasted rock shoes as sweat stung my eyes. I halfheartedly tried the moves a few more times before I left a bail carabiner and lowered, my unrealistic hopes revealed for that which they’d always been.
“You might want to plan better next time,” Mark said when I was back on the ground. “You may have had a shot.” He was being kind, but I knew in my heart of hearts that I had no business on Rainbow Wall that day. And I knew that, if I was ever to get better at climbing, I needed some strategy.
It’s a lesson I’ve had to continually learn, and something we’re all working on. But with more climbers than ever out there, and so many coming out of the gym pipeline, I see more of this unconsidered behavior at the rock. For example: climbers trying routes in obviously poor conditions when they could easily time their efforts to synch up with sun/shade; climbers sketching on clips close to the ground, pulling up rope and dropping it again, over and over, until they take giant, out-of-control whippers; climbers hogging routes, individually or in groups, while waiting climbers in redpoint mode lose their warmup and shot at a send; climbers not brushing off their chalk or tick marks; and so on. Just, poor (or no) planning and no situational or self-awareness.
I’m sure you’ve seen it all too. Any time we’re not self-aware or tuned in to what’s going on around us, we become part of the problem. Along those lines, here are the four biggest logistical mistakes I see climbers making, with ideas about how to address them.
1) No plan for the day or the crag. All too often, climbers show up with no real plan for how the day’s climbing will flow, having not researched the options for warming up, onsighting, projecting, maximizing conditions, etc. Instead the mentality becomes, “Let’s just climb—on whatever, whenever.” This works fine in a gym where you can go from route to route and have the same net experience. But at the rock, there are more variables.
I look at it this way: You made a plan to get to the cliff, so what did you think—or hope—was going to happen today? Instead of just going in blind, do some research. If I’m at a new crag, I’ll look at a guidebook, the Mountain Project, and notes about specific climbs on 8a.nu to get an idea of quality and consensus difficulty. And if I have a project, I damn well make sure that I’m timing my efforts for perfect conditions, checking the forecast up to and even on the day of. Yeah, my behavior is nerdy and obsessive, but it usually yields results, or at least minimizes frustration.
2) Lack of basic safety awareness. There are the fundamentals—harness on correctly, knot tied correctly, belay device rigged correctly—we must all get right all the time. But there are other, second-tier safety considerations that go overlooked. These include awareness of the belay box—are there hazards you could impact if you were yanked up abruptly by a falling climber?—and awareness of how safe a climb, even a sport route, actually is.
One thing I’ve seen climbers be cavalier about is clips near the ground, in particular the third bolt, which is high enough to get you injured or even killed if you were to lob with clipping-slack out. No matter what, always have a plan for clipping—especially the third bolt. If you think you’re too pumped, grab the draw by the dogbone and slap the rope in; if that’s not working, downclimb as far as possible, give your belayer a heads-up, and jump off. And never, ever be afraid to stick-clip, either to a high bolt to get you through difficult opening climbing or up on a route in situations where you’re not comfortable falling; or, on trad climbs, to double or even triple up on protection before cruxes. Don’t let the naysayers—or even the little voice in your head—call you out. It’s better to be safe and smart than unquestioningly, macho-ly, stupidly “bold.”
3) Lack of humility. This manifests in the form of spray and cocky declarations about what you will be climbing that day or have recently climbed. But the thing to remember is, whatever route you’re getting on, whether it’s your or someone else’s project, someone else could onsight it. So while you might feel like a big dog with all the attendant bragging rights for getting on that notorious 5.13 at the crag, Alex Megos or Margo Hayes could come along and onsight it as a warmup, barely remember the climb, and move on before you’ve even blinked an eye. Better to be quiet and humble and focus on the process of climbing than to be ostentatious and loud about your goals.
4). Lack of social awareness—i.e., not sharing. Permadraws and the gym mentality have changed the landscape, and l routinely see climbers “project shopping” and/or checking out routes leagues harder than their hardest send because the fixed draws let them jump on with no commitment. If no one’s waiting for a route, go for it—knock yourself out; head on up and flail. You only get an idea for what hard climbing is and where your limits are by seeing what these routes are all about. But on the flip side, climbs are a shared resource—in particular the classics. You need to weigh your own personal agenda against what your situational awareness is telling you, invoking the social etiquette of understanding, are you going to spend 1.5 hours working out the moves, and if so, might it be worthwhile asking around to see if anyone else is waiting, particularly climbers in redpoint mode whose efforts will take way less time than your own?
As for me, I’m still figuring this all out—I’m far from perfect and I’ve certainly been guilty of the behaviors listed above. We all have. And for the record, I did go back and get on Rainbow Wall again, a couple of years ago. It went about the same as back in 1989, only this time it was too cold. The bolts were also the same ones I’d clipped 30 years earlier, which did not inspire confidence. So I bailed. Perhaps I’ll come back in another three decades, and finally get the damned thing done. Perhaps …
Matt Samet is a freelance writer and editor based in Boulder, Colorado.
Also Read
More Great Stories By Matt Samet
- Matt’s Guide To Quitting Climbing
- Long Warmups and Why Double Rest Days Suck: Matt Samet on Turning 50
- The Most Dangerous Thing About Bouldering (Isn’t What You Think)
- The Truth About Lying About Climbs
- Why First Ascensionists Aren’t Heroes
- How To Be Happy With Climbing Seems Unhappy
- Pro Climbing Is Neither
- It’s Time To Retire These 5 Cliche Climber Quotes—Now!
- When Hopelessness Helps You Send
- Do Climbers Have Expiration Dates? A Lifer Contemplates His Old Age
- Does Your Ticklist Matter When You’re Dead?
- Confessions Of The World’s Worst Belayer
- Are you a Gumby, a Regular Joe/Jane, or an Elite Climber? Take Our Quiz and Find Out
- Living With Bratfingers, The Good, The Bad, The Ugly
- How to Use Seven Neglected Body Parts
- Did A Friend Die Night Buildering—Or Was It Something Darker?
- “Bad” Day at the Crag? You Can Turn That Around If You Want
- My Biggest Mistake, Ever. Try Not To Repeat It.
- A Reluctant Free Soloist Rescued On Her Lucky Day
10 Dumb Climbing Terms We Need To Retire For 2022 - Do you speak “Climber”? Take this quiz and find out
- I’m No Janja. Confessions of the World’s Worst Comp Climber
- The Saddest “Day” in American Rock Climbing
- How the Worst Crag Dog Saved My Life
The post Four Big Mistakes You Make At The Crag And How To Fix Them appeared first on Climbing.
]]>