If you’re serious about climbing harder grades with reduced fatigue, then improving your footwork will help you accomplish your goals—and send your projects. Climbing Magazine and pro climber Paige Claassen have teamed up to create Precision Footwork, a 7-week online course which focuses solely on footwork, one of the most crucial—but all too often overlooked—aspects … Continued
The post Getting Pumped? Making Mistakes? You Should Train Your Muscle Memory. appeared first on Climbing.
]]>If you’re serious about climbing harder grades with reduced fatigue, then improving your footwork will help you accomplish your goals—and send your projects. Climbing Magazine and pro climber Paige Claassen have teamed up to create Precision Footwork, a 7-week online course which focuses solely on footwork, one of the most crucial—but all too often overlooked—aspects of rock climbing. Learn more and sign up here.
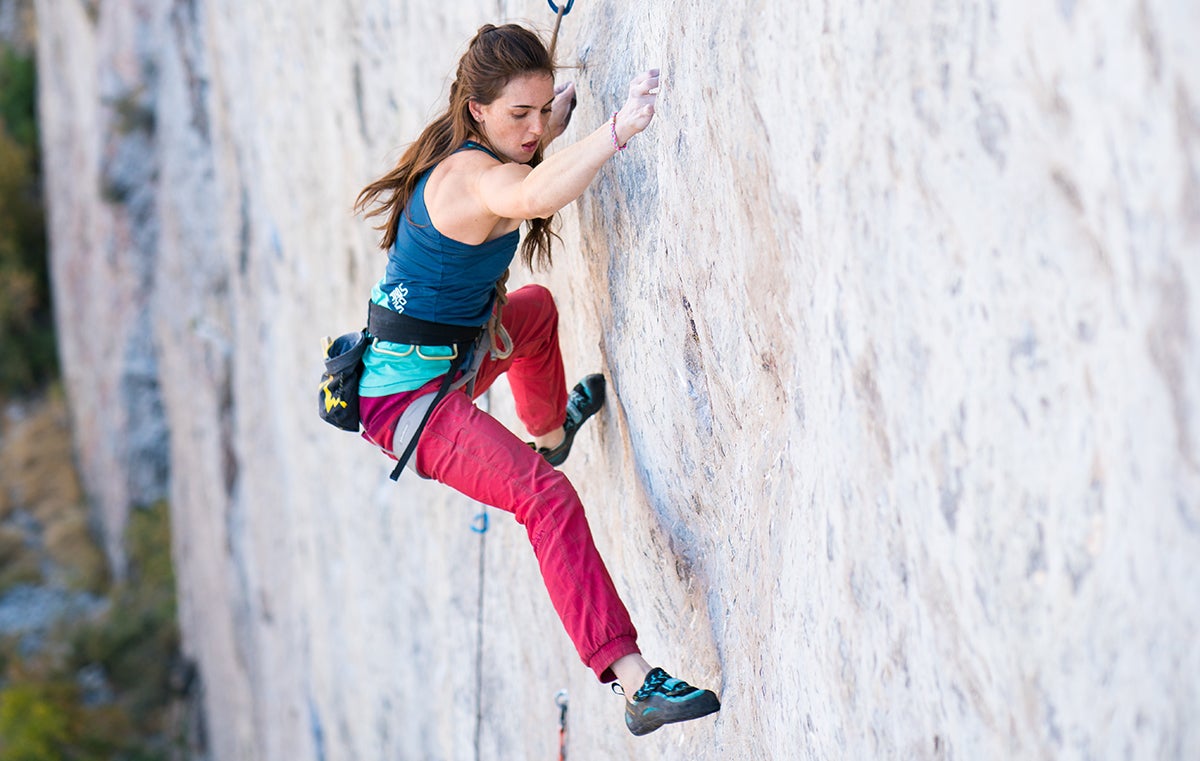
Towards the end of September, I drove home from another two-day trip to Rifle with my friend Neely. We were revelling in the perfect autumn temps and consistent breezes that had helped us both make serious progress on our respective projects. After burning through my power attempting Shadow Boxing (5.14d), my primary project, I’d given Apocalypse Now, a textbook Rifle 5.13c a whirl. Neely looked over to me on the drive. “It’s interesting, at the beginning of Apocalypse, you found a sequence that worked really well for you, and on your next try, you did the sequence the exact same way, without hesitating,” she remarked. I didn’t even remember the holds she described, let alone the sequence. My body just “remembered.”
In fact, muscle memory is somewhat of a misnomer. Some studies theorize that muscle cells don’t disappear, even when muscles shrink. This could be why picking a sport back up after years away is never as difficult as learning from scratch. However, as it applies to the shorter timeline of climbing, say the few weeks that you’re trying your project, muscle memory is a process that occurs in the brain. Through repetition, our brain fine tunes the information sent to the muscles. Memory for skills, such as an intricate body position on a climb, is a distinct system. Skill memory is stored differently than fact memory, for example, your knowledge that the earth is round and climate change is real. This could explain why I was able to repeat my beta on Apocalypse Now without recalling the holds or sequence.
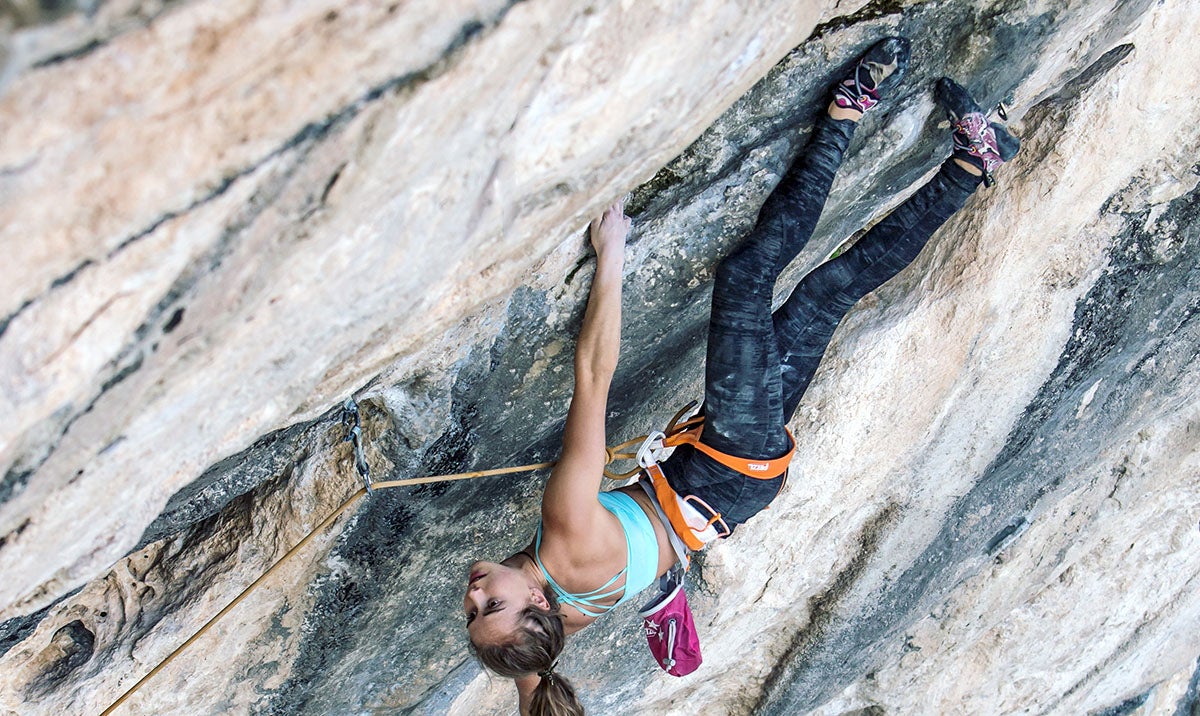
In practical terms, muscle memory acts as a beta log stored deep in the brain. I find muscle memory is most important for foot movements, which are often the crux of a route. On Shadow Boxing, for example, it’s relatively obvious where your hands should go, but not the feet. On this route, there aren’t many footholds, which leaves me the option of smearing. The problem with smearing is that you can smear pretty much anywhere, although nowhere is very good. So how do I remember where to smear? Muscle memory. When I find a smear that works, I’ll put a small chalk tick on that spot before rehearsing the move over and over. My body learns the move, and next time I know exactly where to put my foot, even though the tick is gone.
Through repetition, I’m fine tuning my beta log. I want my beta log to be as accurate and specific as possible, and I’m sure you do too. Here are a few practical tips to consciously enhance and reinforce our subconscious muscle memory.
1. Learn
First, take the time to find good beta. Sounds simple enough, right? One of the biggest mistakes I make on projects is to ignore the “easier” parts of a route and only focus on how I’m going to get through the tough sections. Unfortunately, I’m wearing down my reserves on the mellower terrain because I didn’t take the time to find the path of least resistance. Instead, aim to find the easiest beta for each section of the route, no matter the difficulty. Once you’ve decided on a sequence, stick to it. Make it a point to learn the sequence correctly. In this way, you’re training your brain to send the correct signal to your muscles down the road. While this may take more legwork up front, your muscles will thank you down the road when you’re giving redpoint burns.
A word of warning, muscle memory can act against us, too. Repeat the wrong beta too many times, and you’ll have to invest considerable energy to replace your incorrect muscle memory with your new sequence. For this reason, I follow an unusual doctrine when working a project. If I’m not fresh enough to complete moves in good form, I won’t give another burn that day. Even though another attempt could help build my stamina, the risk of learning moves incorrectly is too high. I only try my project once or twice a day. I give 110% on those burns, leaving me drained when I lower to the ground. But I won’t try again when I’m tired. Instead, I’ll let my muscles soak in those bits of beta I rehearsed when I was still fresh and use my last dregs of energy for a different, easier route.
2. Rehearse
Next, when you get down from the wall, rehearse what you learned. I almost never return to the ground without learning something new about the route I was on. In Rifle, Neely encouraged me to record my recap of the new beta I learned on my phone. At home, during the week, I can listen to those voice memos and remember, “oh yeah, I found that new divot in the wall that allowed me to bump my foot up an inch, making the clip easier.” Rehearsing beta in our heads can reinforce the muscle memory we developed on the wall. It’s all in the brain after all, remember?
Another trick I’ve utilized over the years is to draw beta maps of my projects. I was an eager student, but there weren’t many Econ lectures I sat through without drawing beta maps of Grand Ol’ Opry (5.14b) in my notebook. This exercise forces the brain to recall each hold, foot placement, clip, and body position, and then write it down. It also gives you a resource to look back on if you have to step away from a project for an extended period of time. Plus, you never know how many friends will ask to use that beta map (hint, it’s a lot).
3. Execute
Each of these strategies will help you return to the rock more prepared than you left it. The beta is fresh in your mind, your muscles have rehearsed the moves, and you’re ready to execute. At this point, I recommend deep, loud breathing to distract the mind while you’re on the wall. Your muscles know what to do, because your subconscious brain is giving orders based on repetition. Now you just need to calm down the anxious thoughts, and let your body do what it’s been trained for.
Next week, from the time of writing, I’m headed back to Rifle. Once I’ve exhausted myself on my main project, I’ll hop back on Apocalypse Now in hopes that my brain will send my muscles the correct messages to trigger my muscle memory.
If you’re serious about climbing harder grades with reduced fatigue, then improving your footwork will help you accomplish your goals—and send your projects. Climbing Magazine and pro climber Paige Claassen have teamed up to create Precision Footwork, a 7-week online course which focuses solely on footwork, one of the most crucial—but all too often overlooked—aspects of rock climbing. Learn more and sign up here.
The post Getting Pumped? Making Mistakes? You Should Train Your Muscle Memory. appeared first on Climbing.
]]>
Why risk a severe road rash by climbing slabs? Simple: it will make you a better climber.
The post New England’s Finest (and Sandbagged) Friction Slabs appeared first on Climbing.
]]>The bold slabs of New England
It was late afternoon on a bluebird day in February 1986, and 17-year-old Jim Surette had climbed into the worst kind of dead end. Poised on a sloping foothold 200 feet up New Hampshire’s Whitehorse Ledge, Surette had just pulled a balancey and committing 5.11c move around an arête. He was feeling inspired, in the way you only can when you’re young and ropeless—until he looked up and realized that the next pitch was soaking wet.
Surette watched in horror as water dribbled down the wall and doused the crux moves he’d just pulled. “At this point, my unwavering confidence fully melted away,” he recounts. But, despite his youth, Surette was already one of the most talented climbers in the country, and he knew how to keep his balance. He considered yelling for help, but back in those days, the town of Hales Location hadn’t yet been built below the crag, nor had the White Mountain Hotel—Whitehorse Ledge was a lot more remote than it is today.
Sussing out his options, Surette spied a line of face holds that cut diagonally across the steep, blank wall to his left. It wasn’t an established route, but he was pretty much up a creek without a paddle. He took a deep breath and made an iron-cross move between widely spaced edges, his shoes pedaling on the blank face. Bearing down, Surette prayed that holds would keep appearing. He was soon able to reach a ledge, where he traversed off the face. When Surette got back to his house that evening, his parents asked how his day had been, and he simply said, “fine,” leaving out the details of his botched winter solo.

Surette was one of the leading proponents of what might be called the Golden Age of ground-up, traditional climbing in New England. The basic idea, which peaked during the 1980s, was to preserve the rock. If a patch of stone could not be reached by climbing from the ground up, it was left untouched. The obvious cracks were picked off during the 1970s, so by the 1980s most of the last great problems were slabs and faces, which often necessitated the use of bolts. But if a bolt was needed, the first ascensionist had to figure out a way to drill it on lead, whether by balancing precariously at a no-hands stance or using aid off a hook. This was before the day of power drills; quarter-inch bolts were placed with hand drills, whose bits were notorious for breaking. It was not uncommon to crack two or three bits per hole, which often meant balancing on delicate smears for an hour or more to create a single piece of protection.
Today, with countless steep sport climbing crags across the country, the art of delicate slab climbing on sweeping faces, with its emphasis on balance, smearing, and precise footwork, has somewhat lost its allure with the mainstream. So why risk a severe road rash by climbing slabs? Simple: it will make you a better climber. Slab climbing will teach you how to stand on your feet like never before, and as Surette explains, “When you’re using your feet really well, you don’t have to pull that hard.”
So if you’re curious how good your footwork really is, see the following pages for some of New England’s most classic balance climbs. With your latest sticky rubber, they should be a piece of cake, right?
Whitehorse Ledge, N.H.
“The interest of Whitehorse Ledge lies in the peculiar type of climbing that must be employed. The slabs are literally hold-less throughout much of their extent, and the ascent is possible only by relying of the soles and hands on the rock together with a well considered distribution of weight.” —Robert Underhill, 1920s climbing legend; Rock Climbs in the White Mountains of New Hampshire, by Ed Webster
Modern climbers can be thankful for the foresight of some North Conway, New Hampshire, residents who purchased Cathedral and Whitehorse Ledges in the 1890s to protect them from quarrying. Both cliffs and nearby Echo Lake were deeded to the state and are now the crown jewels of Echo Lake State Park, which boasts some of the best climbing east of the Rockies. Whitehorse in particular is one of the premier friction climbing areas in the country, with glacier-polished slabs up to 800 feet high. The cliff also has a distinctly steeper section called the South Buttress, which features adventurous, multi-pitch face climbs from 5.8 to 5.12.
Regardless of your skill level, it makes sense to run up the easy classics, like Standard Route (5.5) and Beginners Route (5.5), at the Whitehorse Slabs before moving onto more challenging objectives. And before you scoff at the fledgling grade, remember that these routes were established from the ground up by fanatics who barely used protection. Beginners Route has 50-foot runouts, and the first pitch of Standard Route follows an R-rated 5.3 slab, with one or two Tricam placements in a full rope length. And as you balance precariously across the polished and devious “Brown Spot” on Standard’s fourth pitch, tip your hat to Leland Pollock, who led this pitch onsight in 1933 wearing tennis shoes, and without any protection. Most climbers today find the Brown Spot a bit spicy with its one bolt, and the 5.5 grade is questionable, even if you read the sequence perfectly. If you’re new to slab climbing, Standard Route is where you’ll learn to find that perfect balance point that encourages your shoes to stick. You might also experiment with using your hands like feet, relying on mantellike pressure to keep your palms glued to the rock.

After balancing up one of those classics, try the nearby Sliding Board. At 5.7, the crux at the start of the second pitch will undoubtedly grab your full attention. The key is to maintain upward momentum while not flubbing the sequence. If you handle that without a problem, don’t worry about the third pitch (5.4), which has one lonely bolt near the top.
As you turn the corner from the slabs, the cliff rears back into a stunning 700-foot headwall known as the South Buttress. Here you’ll find many classic single-pitch routes like Seventh Seal (5.10a) and Ethereal Crack (5.10d). These routes’ thin finger cracks require delicate footwork on the polished smears alongside the cracks—brute strength won’t get you anywhere.
A little further along the base you’ll find the cliff’s signature 5.9, the three-pitch Children’s Crusade. This steep face and friction climb has just enough bolts to make it safe. Like a lot of these routes, the crux is a mantel onto a sloping foothold, and it’s difficult to clip the next bolt until you’ve completed the move. If you cruise the first few pitches and are looking for a greater challenge, the 5.11a direct finish takes a corner through the tiered roof system that looms above. It goes more easily than it appears, and has just enough fixed pins to make it feel reasonable for the grade.
Looking for a taste of steep 5.11 slab without the runouts? The first pitch of Total Recall is a wellbolted and user-friendly introduction to the grade at Whitehorse. It can also be easily toproped from the first anchor of Children’s Crusade.
If there’s one absolute must-do route on the South Buttress, it’s The Last Unicorn, a three-pitch 5.10 face climb with a mix of bolts and traditional gear. The route actually starts halfway up the cliff, so it’s a bit of an adventure finding your way to the base. Word of warning: The first pitch has lost some holds and is extremely taxing for the 5.10- it gets in the book. Suffice it to say your stemming and smearing skills will be put to the test.
If you’ve fired everything else, try the first pitch of Future Shock (5.11c). This 60-foot climb follows a rising, slopey foot traverse on a slippery dike, and is the quintessential study of your smearing ability. Most of the way, you only use your hands for balance.
Guidebook: Rock Climbs in the White Mountains of New Hampshire, 3rd edition (East Volume), by Ed Webster (amazon.com); North Conway Rock Climbs, by Jerry Handren (northconwayrockclimbs.com)

Quincy Quarries, MA
“When you climb at the Quarries, you get good at slab climbing or you leave.” —John Strand
In 1825, a hilltop site in Quincy was chosen to provide granite for the Bunker Hill Monument in Boston. A railroad was built to extract the stone, and for the next 140 years, chunks of the immaculate rock were quarried and shipped all over the country. Local Boston climbers first began exploring the quarries’ climbing potential in the 1920s.
The quarries, with their slick, fine-grained face and slab climbing, soon became a training ground for local legends like Robert and Miriam Underhill, Ken Henderson, and Lincoln O’Brien—who used the skills gained on the quarry walls to make the first ascents of all of New Hampshire’s major cliffs during the late 1920s and early ’30s.
After the quarries closed in the 1960s, they filled with rainwater and became a mecca for cliff jumping. The city of Boston purchased the quarries in the mid-1980s, but so many people were dying from cliff jumping that the city shut them down. It wasn’t until Boston’s “Big Dig” highway project started in the early 1990s that a solution was found: 700,000 tons of dirt from the giant hole dug downtown was dumped into several of the quarries, including the Railway Crag, which had 200-foot cliffs. Today, the Quarries remain an afterwork training ground for many Boston climbers, who still venture north on weekends to ply their slab skills in the White Mountains.
Located just off Boston’s Southeast Expressway, Quincy Quarries’ biggest selling point is its three-minute approach; its biggest negative is the shocking graffiti that covers the bottom of most walls. The guidebook Boston Rocks describes hundreds of routes on more than 20 “craglets,” which range from 20 to 90 feet tall. Most of the routes at Quincy Quarries have been led, but for the average mortal this is primarily a toprope area, with some reasonable leads sprinkled here and there. Landscaped trails with stone staircases lead to the tops of virtually every crag, where you’ll often find fixed anchors.
Most agree that the 40-foot J-Face is one of the best crags, with a host of topropes from 5.4 to 5.11. Lurch (5.7) is a great introduction to the quarries’ slick, granite face climbing. It may also be your first time climbing on paint, which, as you can imagine, has about as much friction as glass. (The graffiti usually ends a body length above the ground.) When you’re warmed up, don’t miss Ladder Line, a thin climb that requires balance, precise footwork, and a refined smearing technique. Ladder Line is rated 5.10 in the guidebook, but this grade was attached back in the late ’60s when it was first climbed by Kevin Bein— most call it 5.11 now.
The slabbiest wall at the quarries is the C Wall, which has a host of moderates on a 70-degree face. Don’t miss Ripple (5.10), established in 1967 by Pete Cleveland. Beware of a sandbag: Cleveland was one of the best free climbers in the country in the 1960s, establishing the 5.12d grade at Devil’s Lake, Wisconsin in 1969. Success on Ripple will require an ability to stand on microscopic smears, which will come in extremely handy on the nearby Temple of Doom (5.12+), the quarries’ ultimate slab testpiece, led by John Strand in 1988. The footholds at the crux are virtually nonexistent, so be prepared to bend your fingertips backwards on the sharp, thin crimps.

More great New England face climbs
Cathedral Ledge, New Hampshire
The heart of New England traditional climbing, Cathedral Ledge rises just to the north of Whitehorse and hosts a variety of climbing styles, including plenty of slab and thin-face climbs on cliffs like the Lower Left Wall, the Thin Air Face, and the Airation Buttress. Start on Bombardment (5.8), with a clean slab leading to a perfect hand crack. Start on the same slab to reach Ventilator (5.10a), one of the first rap-bolted lines at the cliff. To the left is the incomparable and runout Western Lady (5.11), which John Bouchard soloed in the late 1980s. Or push your limits on Once Upon a Climb (5.11c), with delicate smearing and small crimps, or the well-protected Ego Trip (5.11c), where crisp temperatures are crucial for friction on the dime edges. Or head to the classic four-pitch face Thin Air (5.6) or two 5.10a pitches up clean, white slabs: Freedom or Windfall.
Guidebook: Rock Climbs in the White Mountains of New Hampshire; North Conway Rock Climbs
Cannon Cliff, New Hampshire
Your slab climbing apprenticeship won’t be complete without an ascent at Cannon Cliff, a 1,000-foot dome of exfoliating granite. Many of Cannon’s best routes are cracks, but the far right side of the cliff has some classic slab routes that should not be missed, like Wiessner’s Buttress (5.6), Consolation Prize (5.8), Odyssey of an Artichoke (5.10), and Condescender (5.11a). Feeling cocky? Take a burn on Stretched on Your Grave, a 5.13- slab done on toprope by Strand and the late John Mallmen in 1988. Strand said he climbed “thousands of feet” of 5.12/5.13 slab in Quincy Quarries to prepare for it. Never bolted, it could be one of the hardest slab routes in the country.
Guidebook: Secrets of the Notch: A Guide to Rock & Ice Climbing on Cannon Cliff and the Crags of Franconia Notch, by Jon Sykes
Big Chick, Clifton Crags, Maine
Located just outside the thriving metropolis of Bangor, Big Chick offers the best slab climbing in Maine. This 250-foot dome is reminiscent of Tuolumne, its slabs peppered with crystals, knobs, and chickenheads of all shapes and sizes. The rock is mainly lowangled and extremely coarse-grained, so plan to lose a fair amount of skin if you fall. The majority of the routes are 5.8 to 5.11, but don’t miss the first-rate My Time (5.6), a three-pitch moderate that ends with a long slab. Some call it one of the best multi-pitches in the state.

Slab attack: New England isn’t the only area with great slab climbing—let’s not forget the following calf-straining crags.
Glacier Point Apron, Yosemite National Park, California
A short approach combined with high-quality granite makes this a do-not-miss destination. The massive face has some of the best moderate slab climbs in the park, but beware: There is occasional severe rockfall.
Recommended routes: Monday Morning Slab, Harry Daley Route (5.8), Point Beyond (5.8), Goodrich Pinnacle, Right Side (5.9), Angel’s Approach (5.9)
Laurel Knob, North Carolina
This isn’t a place for beginners, but this 1,200-foot dome has some of the best and tallest slab climbing in the East. The trademarks are grooved water streaks, runouts, and exposure.
Recommended routes: Groover (5.8), Seconds (5.8+), Fathom (5.10a), Have and Not Need (5.10c), Stranger than Fiction (5.11)
Flatirons, Boulder, Colorado
It’s hard to mention Boulder without picturing the Flatirons, jutting proudly from the foothills. It’s common to see climbers trotting up the classic sandstone slabs on nice days with only rock shoes and a chalkbag.
Recommended routes: Bulges (5.2 R), The Slab, Direct Route (5.6 R), First Flatiron, Freeway (5.0), Second Flatiron, East Face (aka Standard Route, 5.4), Third Flatiron
Enchanted Rock, Texas
One of the largest pink granite batholiths in the U.S., the Main Dome area in Texas’ Enchanted Rock State Natural Area sports more than 40 routes, from multi-pitch slabs to singlepitch cracks.
Recommended routes: Harder Than it Looks (5.6), Devil’s Slide, Mark of the Beast (5.8+), Devil’s Slide, Ripple (5.9+), Cheap Wine Wall, Bold Talk for a One-Eyed Fat Man (5.10d R), The Shield
Little Cottonwood Canyon, Utah
This U-shaped canyon near the Alta and Snowbird ski resorts is well known for fun face climbs on granite. If you tire of friction climbing, there are plenty of jam cracks and incut edges to pull on.
Recommended routes: Pentapitch (5.8), The Viewing (5.10a), The Dorsal Fin (5.10d), Neuromancer (5.11a)
Chapel Pond, Adirondacks, New York
Chapel Pond is celebrated for its long, enjoyable, and moderate slab routes, breathtaking views, and short approach. Beware: There is no fixed protection here.
Recommended routes: Empress (5.5 X), Regular Route (5.5), Greensleeves (5.6), Thanksgiving (5.7 R)
AlsoRead
- The Visionary Appeal of Fontainebleau’s Bouldering Circuits
- Saved by a Trail Line! Lessons Learned from a Rappelling Mishap and a 150-foot Fall
- I was a doubter. Now the MoonBoard is My Go-to Training Tool.
The post New England’s Finest (and Sandbagged) Friction Slabs appeared first on Climbing.
]]>
Good footwork is a skill that must be carefully cultivated. While it’s not always the most fun or flashy technique to develop, it is arguably the most helpful to upping your climbing game.
The post Stop Stomping! Six Tips For Better Footwork appeared first on Climbing.
]]>As a climber of over 13 years (and a coach on and off throughout), I’ve developed a very visceral reaction to the sight of bad footwork. Honestly, I hate watching a climber stomp their way up a route using the sides of their feet and waddling side to side like a penguin. Every athlete has heard a coach or two yell, “Stay on your toes!” Why do people treat climbing differently?
Good footwork is a skill that must be carefully cultivated. While it’s not always the most fun or flashy technique to develop, it is arguably the most helpful to upping your climbing game. You may be able to do muscle-ups and dead hang on crimps, but if you can’t stand on your feet, your project will remain unsent.
Here are six tips you can use to develop better footwork.
01
Don’t stand on the sides of your feet—like almost never do it. If you’re just starting out, then your big toe should be your main contact point. For more advanced climbers, there are cases when your weight may shift to your pinky toe or the side of your big toe, like while backstepping or inside- flagging, but you have to know the rules to understand when to break ’em. Staying on your big toe will allow you to pull yourself into the wall or pivot when necessary. You will also be able to match or switch feet on small footholds.
—> If using the sides of your feet proves to be a hard habit to break, try this trick: cut a tennis ball in half and, without covering the toe box, tape each half to the end of your shoes. With the tennis ball halves attached, climbing with the sides of your feet will be impossible. Sounds silly, but it’s effective. I know, because I had the kids I coached do this exercise.
02
For steep climbs, pull with your toes. The muscles you would use to draw a line in the sand are the same muscles that should be utilized while climbing, especially on high-angle climbs.
—> To develop this skill, try attaching resistance bands to the back part of your shoe. Have a partner grab each resistance band while you’re climbing and see if they can pull your feet off. This exercise will help you learn how to better engage the muscles needed to keep your feet on the wall.
03
For volumes and slabs, try dropping your heels and spreading your toes. This will allow you to get more surface area on to the terrain.
—> Practice on volumes or flat jibs to develop this skill, or outside on slabs. Remember to keep your hips into the wall to prevent yourself from slipping out. Once you’ve got a sense for it, try going no-hands!
04
Use “quiet feet.” Quiet feet means you’re intentional and delicate with your foot movements. One of the biggest mistakes new climbers make is looking up before they’ve actually placed their foot down, and so their foot scrapes the wall before it lands on the hold. Tracking your foot movement with your eyes all the way to the foothold will ensure you don’t miss, slip or stomp.
—> If quiet feet proves to be a challenge, try adding poker chips to footholds and see if you can climb without knocking the chips off. Don’t have poker chips? Use bottle caps, coins or corks. This exercise will force intentionality.
05
Fit your shoes correctly. It’s always important to bring the right weaponry to the battlefield. Wearing terrain-appropriate shoes will help you make precise foot movements and improve self-confidence.
—> Check out the article here for tips about picking the right shoe. Also, though it may seem tempting, don’t wear socks with your climbing shoes. Climbing shoes are designed to help you feel the holds and wall surfaces!
06
Find the best part of the hold. All climbers feel around for the best part of a handhold, but many just plop their foot down on a hold. Especially if it’s a volume or a larger hold, think about the specific part of the hold you are going to stand on and why.
—> Even when using quiet feet, it’s possible for new climbers to miss the exact spot they were aiming for. Try “squishing the bug,” with the bug being the foothold, to ensure your toes are ideally positioned.
Also Read:
- Utah Climber Rescues Base Jumper Who Crashed into Cliff
- Answering Climbing’s Oldest Question
- Soft Stone, Rigid Ethics: The History of Europe’s Boldest Climbing Area
The post Stop Stomping! Six Tips For Better Footwork appeared first on Climbing.
]]>
Nothing is more frustrating than falling because your foot slipped. Here's how to avoid it.
The post How Kevin Jorgeson Practices Perfect Footwork appeared first on Climbing.
]]>Nothing is more frustrating than falling because your foot slipped. It’s not frustrating because you passed the crux, were still fresh, or had just one move to finish your project. No, it’s frustrating because it’s preventable.
I started climbing in 1998 and, before long, climbed five days a week. My first coach was Andrew Wallach, a local strongman and the head routesetter at Vertex Climbing Center, in Santa Rosa, California. Whether Wallach’s “Silent Feet” drill was simply a new way to torture Team Vertex is debatable. What’s not, however, were the results. As a young competition climber, I learned to pare away slop and inefficiency.
Wallach’s exercise was simple: if your foot squeaked or smedged audibly when you placed it, punishment ensued for me, this was a 200-foot gym traverse. Choose your own torture, but the key is to have someone nearby call you out. (Thanks to hollow indoor-climbing surfaces, making this call should be easy. And if you’re climbing outside and clomping like Lord of the Dance, this drill is for you.)
As your main points of weighted contact, your feet matter. Placing them silently forces you to be deliberate and aware with your choice, placement, and movement onto and off each foothold. Here’s how:
Shoe Design
First, let this key principle marinate: climbing shoes are designed to focus power into your big toe, making it the main fulcrum around which your body rotates. The strongest part of your forefoot, your big toe sticks out the farthest (usually), forcing the other piggies to follow its lead: whether smearing, edging, or bearing down on an overhang, it’s the action point for translating tension through your core. Thus, if you don’t stand (and rotate) over your big toe, your shoe will either pivot you off like a dreidel spun on its side or force you to reset your foot, increasing fatigue while you dither.
The Only Foot Placements You’ll Ever Need
- Frontstep: This is the simplest, most stable position. Point your foot into the wall and place your big toe directly on the hold (left foot in photo below), resulting in a squared-off stance. You can also use a frontstep in conjunction with a backstep to increase stability, also pictured below.
- Silent Feet Frontstep Method: First, straighten your arms, hanging in a rest position on your skeleton to survey your foothold options. The key to Silent Feet is slowly and simultaneously to contact the wall’s vertical plane and the foothold’s horizontal aspect so visually track the movement. Imagine the rock has wet paint on it will your foot leave lines or dots? You want to leave the smallest imprint possible: a microdot.
- Instep: The instep uses your shoe’s inside edge, still standing directly on your big toe. The resulting position if instepping with both feet is the “frogleg”; it’s crucial to highstepping, as with this slab move on the Bishop highball Footprints (right).
- Silent Feet Instep Method: Lean out from the wall and spot your foothold. The key is to weight your attached foot, giving you the freedom slowly and precisely to place the hovering foot. Externally rotate your hip, allowing you to use your big toe’s inside edge. As you make contact, relax your foot, allowing it to absorb weight. Noisy, sloppy footwork stems in part from a rigid ankle joint.
- Backstep: Learning to backstep (drop-knee) is quite possibly the most important technique for overhanging rock. Like a row of dominoes, it creates a “wave of extension” that lengthens your body: the pivoting of your toe into a backstep drops your knee, which in turn elevates your hips, driving movement upward. The backstep, or outside edge of the shoe, is also often used when stepping through. This move on Bishop’s Secrets of the Beehive (right) requires a classic backstep.
- Silent Feet Backstep Method: Set up as if initiating a frontstep or instep: arms straight, weight primarily on your attached leg. This time, internally rotate your hip, exposing your shoe’s outside edge to the hold. As your foot makes slow, deliberate contact, point your toe down, raising your ankle and driving the movement upward from the power point of your big toe.
Footwork Drills
Learning to use and place your big toe effectively and precisely is the goal. Here, three Silent Feet drills to hone your skills:
- Team up. If your feet make a sound, you must repeat the boulder problem or route. Don’t move on (or let your buddy move on) until you feel you’ve climbed as cleanly as possible. Never settle for slop.
- Extend a strip of electrical or painter’s tape laterally across the bottom of your shoe, from just under your big toe to the pinky toe. If you step anywhere other than your big toe, you’ll quickly feel a difference in friction and have to make the necessary adjustment.
- Do different moves such as reversible drop-knees during a traverse off the same set/s of footholds. This will test your foot placements as you pivot between body positions. If you’re using your big toes correctly, you should have no problem keeping your feet on.

Kevin Jorgeson still uses Silent Feet, ensuring precision footwork when it counts . . . like 40 feet off the ground on the FA of Ambrosia (5.14 X) and, of course, the Dawn Wall.
The post How Kevin Jorgeson Practices Perfect Footwork appeared first on Climbing.
]]>
Knowing the tricks and training techniques for toe hooking can be a game changer.
The post Unlock The Secret Power of Toe Hooks To Elevate Your Climbing appeared first on Climbing.
]]>You’re powering through a roof and you see that jug, forget about your feet, launch for it at full-stretch, then suddenly you’re stranded and staring headlong at a massive swing. Page one of overhanging climbing is to keep your feet on and toe-hooks may serve a similar function to heel-hooks for lightening the load. There will be some situations where both toe-hooks or heel-hooks are viable and others when only one or the other will work. The classic toe-hook only scenario is on a roof when there’s a large undercut flake below you that you can snag with a toe to prevent your feet from swinging off. Toe-hooks also have broad applications on less-steep, featured terrain, such as ramps, arêtes and the sides of boulders. Toe hooks are one of those techniques that climbers either love or hate and many will develop chronic toe-hook phobias and settle for alternatives that are way less efficient. Fundamentally, as with heel-hooks, the most common mistake with toe hooks is to miss chances to use them because they lie outside the field of vision, for example, around the sides of boulders. Not only do you have to be skillful to use toe hooks, but you need to keep the radar on too!
Toe-hooks on overhangs
It’s not just your arms and fingers you’ll be saving by toe-hooking on an overhang, you will massively reduce the amount of core tension that is required. Before making a reach, scan below you for undercuts or features that will lend themselves to a toe-hook, then engage the toe with total conviction, flex the foot and maintain constant tension by pulling with your shin muscle. The key part is to force the toe to stick willfully. If you are the slightest bit tentative then your foot will creep open and it will slip out. The more sloping the feature you are toe-hooking, the harder you will have to pull with your shin muscles to get it to stick. Many climbers find that their shin muscles aren’t strong enough to hold single toe-hooks and in which case, the double toe-hook can be a great option on large features or when two undercut holds are available.
Releasing toe-hooks
A key tactic is planning how you’re going to take the toe out in order to avoid cutting loose,nd the answer usually comes from trying to build your feet in small steps, rather than making big ones. It takes experience to get this right on the flash, and you may need to experiment by working different sequences. In some cases, having used a toe-hook there will be no option other than to cut loose, simply because there are no alternative footholds. If this is the case then try taking one foot off first, dangling it below you and then to tensing all your core muscles in order to deaden the swing.
Learn the Secrets Of Heel Hooks (For Beginners To Intermediates)
Clamping
Clamping is when you stand on the top of the foothold you’re toe hooking with the other foot and then squeeze to maintain contact. In many cases, this will make it easier to keep the toe-hook in place (as it places less demands on shin strength). It also provides a fantastic option to assist releasing from a toe-hook and also to move between multiple toe-hooks in a roof. Clamping may only be possible on larger holds, with a more incut and positive topside. It can be tricky to decide which toe to place under the foothold and which to place on top. With your feet one way round on a clamp, the reach may feel easier but the release will feel harder, whereas if you place your feet the other way round, the opposite will be the case. On easier clamp moves, it’s unlikely to be a deal breaker but on harder moves this line of investigation may makes all the difference, so be sure to try both options. With frequent practice, the technique becomes more intuitive as you gain a better understanding of the mechanics.
Turning the lip
When crossing a large roof it often pays to invert and go out feet first. Snag a high toe hook round the lip and then track your body back round. The purpose of this is to lighten the load on your arms and avoid the problems associated with your feet swinging off which occur when you go out hands first. Clearly there’s scope for getting in a tangle so practice before using this on a trad route or in a comp!
Heel-toe camming
A further refinement is to cam your heel against the vertical wall below a toe-hook in the back of a roof, in order to partly jam-in the toe. Clearly this requires the target hold to be positioned in exactly the right place, but it’s one of those techniques that can save the day.
Toe-hooks on less steep terrain
The classic use for toe-hooks on less-steep terrain is when following a sloping ramp in order to reduce the load on your arms and make it feel easier to hold. Simply swing the toe up onto the feature and ‘track’ it along as you shuffle your hands up, resisting the temptation to get stretched out too far. Many will default to heel-hooking but a toe-hook may provide a superior option. Another application is to avoid barn-dooring on arêtes and a well-placed toe-hook may enable you to pause and clip or chalk-up in a position, where otherwise you would have been completely off-balance.
Compression toe-hooking
Sometimes a toe-hook can be used to assist progression on arêtes or rounded prows, as opposed to merely using them for balance or releasing a hand. This technique involves pulling hard on the toe and yarding up into the move, while compressing (pulling inwards) with the opposing arm. When toe-hooking on a tiny or sloping feature this will require that extra level of accuracy, not to mention extra pull from the shin muscle and overall body tension.
Shoe notes
Enlarged rubber toe-patches have become a standard on modern bouldering shoes and are essential for gaining purchase on a marginal or sloping features. For clamping, a down-turned shoe may offer superior performance to a flat shoe.
Supportive training and drills
Some people seem to have disproportionately weak shin muscles, whereas others appear to have been born with wire cables in their shins. Genetics and sporting background both play a role but the good news is that anyone can strengthen their shins with supportive training. Simply hang from a bar with your toes, using a hand for support if necessary. For example, do 3 or 4 sets of 6 to 15 seconds, but make sure you use a crash-pad and right yourself before the point of failure, and have a spotter!
While strengthening exercises are useful, the best training is always to practice toe-hooking on the wall. A good drill is to climb around on a roof on a bouldering wall using any holds and to see how many toe-hooks you can find and how long you can hold them for. Toe-hooking is one of those techniques that suddenly switches on, so keep the faith and keep trying!
Get Better, Now. Six Essential Lessons To Go To The Next Level.
The post Unlock The Secret Power of Toe Hooks To Elevate Your Climbing appeared first on Climbing.
]]>
The best climbers aren't always the strongest, they have the best technique. In this first installment of our new Quick Hits series, pro coach Neil Gresham teaches maximizing footholds.
The post Quit Floundering—Turn Your Feet Into Precision Instruments With These 10 Tips appeared first on Climbing.
]]>TECHNIQUE QUICK HITS
PART 1: MAXIMIZING THE TOE
Thankfully there is so much more to climbing than pure strength. While we see endless videos displaying incredible feats of climbing strength, the best climbers aren’t always the strongest. The case in point being Adam Ondra, who was unable to do a one-arm lock-off when he onsighted his first 5.14c (8c+). That’s because strong climbers have a habit of draining the tank too quickly, while the climber with better technique will nearly always shine through.
In this “Quick Hits” series—the first of which you are reading now— we’re going to examine different components of technique under the microscope. The articles will work individually for trouble-shooting weaknesses, or comprehensively as a guide to the full range of climbing techniques. We’re starting with footwork and will move on to look at handholds, then movement skills and specific techniques for slabs, vertical walls and overhangs. If you’re climbing between V2 and V6 (or 5.9 to 5.12a) then you stand to benefit. While some of the tips may be revision, if you can plug one knowledge gap then this could turn a key and unlock a major weakness.
10 Key Toe Moves
1) Edging
Every climber knows this basic technique, but do you always edge correctly? The classic mistake is to stand on the rounded, middle part of your shoe edge (ie: closer to the instep) and not the front, toe part. Edging off the middle is less stable and you won’t be able to stand-up on point to gain extra reach. For beginners this fault will be obvious, but for intermediates it may be subtle. Try to line the edge of the shoe up to the profile of the foothold, like a ruler; however, beware placing your foot parallel to the wall, so that your ankle makes contact. In general, your foot should make a 45-degree angle with the wall. If the rock edge is pointing diagonally downward then bring your foot high over it and point your toe aggressively downward, or if it points diagonally upward then drop your heel. A stiffer shoe will benefit beginners or those who need support for long, sustained edging routes. However, for bouldering, a softer, high-tension shoe may suffice.
2) Outside edging
You often use the outside edge of your shoe when lay-backing, utilizing side-pulls or when stepping through on an on an overhang to obtain balance. We’ll look at the required body-positions in a separate article, but here, looking purely at footwork, again, the key is to use the front/toe part of the edge of your shoe, rather than the side/middle part. Again, this requires you to turn your heel outward slightly as you step through to create a 45-degree angle to the wall, rather than presenting your foot parallel. Many climbers get this right when inside-edging but wrong when outside-edging!
3) Smearing
Smearing is all about developing trust in your feet as well as understanding when to do it and when to avoid it. Many climbers view smearing as a last resort and will always try to stand on a positive foothold in preference; however, this may facilitate an off-balance or strenuous move. The dilemma is always whether to smear in the best position or on the best (or most in-cut) part of a feature. There’s no fixed rule here, but you should always consider both options. Be super-accurate when aiming for tiny blemishes. If your foot is a millimetre out, this may make the difference between success and failure.
Keep the heel low and avoid or minimize testing foot placements, as this can develop into a nervous habit. Maintain constant, even pressure as you move. and focus on transferring your weight smoothly from foot-to-foot. It is counter-intuitive to press hard on a tiny smear but if you are too tentative you will lose crucial friction. Several small steps are usually preferable to one big one. Beware the temptation to lean in too far for perceived security, or to stand up on point for extra reach. Soft shoes with a high-tension rand will combine optimum support with a good level of feel and sensitivity.
4) Smedging
For tiny edges that barely constitute footholds, and which are irregular in profile, the best technique is to use the front part of the toe and to half-smear-half-edge. The aim is to compress the rubber so it adapts to the contours of the hold. Compared to standard edging, the smedging foot will usually be more perpendicular to the wall and the heel may be a fraction lower. This tactic can be useful on the smallest screw-on holds, or for tiny polished features on rock.
5) Pockets and slots
With pockets, avoid simply poking your toe in at the angle that feels easiest. Lean back to scan the hold then rotate your foot and point your toe aggressively into the deepest part. This always feels harder when a pocket or slot is far out to the side, but your toe may ping out if you don’t make the effort. With larger pockets and breaks it may be tempting to cram your entire foot in for security, but this may restrict your movement and a toe’s-worth should be more than sufficient. Down-turned shoes with pointed toes will work well and go for something stiffer if the climbing requires prolonged support.
6) Drilling the toe on overhangs
When you use small, poor footholds on a steep overhang, it’s not enough just to stand passively. Instead, you must tense your hamstrings, glutes, abs and lower back to create tension in your entire body to drive the foot onto the hold. Imagine yourself drilling your toe through the wall. Our instinct is often to focus too much on catching the target handhold, whereas for success, we must focus simultaneously on making the foot stick. Down-turned shoes will help you maintain tension and use your feet like claws.
7) Paddling with the feet
If we spy a large foothold out to the side then this may allow us to pull our body in closer to the wall or steer ourselves in the required direction. On volumes or large features, the entire sole of the foot can be placed flat, and on smaller holds, the tip of the toe will be used. The key is to engage the hamstring and pull. Down-turned shoes will provide an advantage.
8) Pivoting
Pivoting on your feet will facilitate a freer, more fluid climbing style, especially when traversing, swapping feet, back-stepping, or performing drop-knees. Of course, you can simply remove your foot and replace it using the outside edge, but this is never as neat or efficient. Try to anticipate the pivot and save sufficient space on the foothold by standing on the near side, so that you can swivel onto your outside edge. If you don’t do this then you’ll spin off the far side.
9) Swapping feet
Aim to avoid swapping-feet excessively, however, sometimes this technique provides the best option, especially when footholds are limited. Don’t jump-and-clump and instead turn the move into a smooth, precise and controlled operation using one of two popular methods. The pivot method is to roll one foot off the side of the foothold and slide the other foot from the side into the free space. The ballerina method is to adopt a dancers’ pliet position, with knees turned out, then to hover your toe, pointing downward over the weighted foot, and then quickly but carefully, to roll this out and make the switch. Be quick and accurate at the point when you make the switch to minimise the time you spend with less weight on your feet. On larger footholds, get into the habit of saving space on the inside corner, in case you need to make a foot-change; however, don’t do this on small footholds.
10) Back-stepping
A great tip to avoid foot-swapping or generally getting your feet tangled is to step back around (or outside) your weighted foot. To do this well, you will need to pivot on one or both feet in order to make fluid transitions from foot to foot. This can be a useful technique to use to obtain balance when shaking out and transferring weight from arm to arm.
Summary
The toe should always be regarded as a precision instrument and not a battering ram! The key to improving any aspect of technique is to perform regular practice drills on easy ground, for example during warm-ups, where you focus on specific details, and then to attempt to maintain form on harder terrain.
The post Quit Floundering—Turn Your Feet Into Precision Instruments With These 10 Tips appeared first on Climbing.
]]>
Expert instruction on how to get started on the rock—in the gym.
The post Learn To Rock Climb: Basic Techniques From Handholds to Footwork and Drop Knees appeared first on Climbing.
]]>Learning to free climb—to pull and step on only the rock’s natural holds, never using equipment as an aid—is liberating and exhilarating. When you discover how to bear down on edges, stick to slopers or relax in a handjam, you’ll be stoked. Though no text could ever substitute for experience, here is an outline of basic movement techniques to help you get going. Learning to free climb is as natural as climbing a tree, but doing it well is a long process. Learn to move efficiently in the vertical realm and you will be rewarded with a lifetime of challenges.
You can broadly divide free climbing into two categories, face and crack climbing, although you will often use combinations of both. Cracks are the most obvious lines of weakness on cliffs, but the techniques to climb them are not as evident as in face climbing. Climbing technique comes down to linking basic foot, hand and body positions into a flowing, upward motion. The basic positions are easily outlined, but the infinite number of permutations complicates the free-climbing experience. Each climb is a Rubik’s Cube with an infinite number of ways to be unlocked, which is why climbing is so beautiful, interesting and addictive.
CLIMBING FOOTWORK
Foot technique is your most useful (and the most misunderstood) tool. Whether you’re on an overhang or a low-angle slab, the idea is to keep your weight pressed onto your feet. Beginners tend to hug the rock and/or grope too high for out-of-reach holds, making it hard for them to see and use their feet. An erect, athletic, in-balance posture is the ticket. Remember that your legs are stronger than your arms—take advantage of that. Practice your footwork and get used to lifting your weight with your lower body.
Any foothold you’ll encounter requires precision. If you just slap your shoes onto holds you’ll never hit the sweet spot and your feet will forever be slipping and slopping. It’s best to practice on easy routes, but always strive for precise and coordinated foot placements. Foot technique can be broken down into three basic positions:
Edges are flat or semi-flat ridge-like holds. Step on any edge with the front part of your foot, the ball-to-toe portion, using the inside edge of your shoe. You can also edge off the outside of your shoe, either to rest your foot or simply because that foot position offers you the best balance. In all cases, think like a ballerina. Be precise and light on your feet.


Hooking There are two basic types of hooks: heel hooks and toe hooks. Both are advantageous because when you pull with a foot, you take weight off your arms. To heel-hook, place your heel on a hold, usually above or level with your upper body. Snug shoes with stiff heels help greatly. Set your heel, then pull with your foot. It’s as simple as that and the nuances of the technique will come naturally. Toe-hooking is more rare, but useful, especially for keeping your body parallel to the wall on overhanging terrain. To toe- hook, wrap the top of your foot around a corner, above a lip or in an “undercling” position. Toe-hooking gives you a few more inches than heel-hooking. When you see an arête or edge that could be heel-hooked, but you can’t quite reach it, try using the top of your foot or even the instep, to hold your body in place.


Smearing This is the next technique to master; it’s harder than edging because you can’t necessarily “see” a smear. Depending on your body position, almost any hold, even a seemingly blank place on an overhanging wall, can be smeared. Smearing utilizes friction and doesn’t depend on having an edge to weight. The key to smearing is to maximize rubber-to-rock contact, using the upper ball of your foot and toes to press hard on indentations, dishes, bulges, and other angle changes within the sloping hold. In general, if a smear starts to slip, fight your instinct and weight it more—additional pressure will increase the friction. Difficult smears don’t tolerate foot slop, so place your shoe precisely, then keep it still. A good way to practice smearing outside is to find a low-angle, smooth boulder and smear up it without using your hands. To practice inside, find a route in the gym with big handholds and practice smearing up the route using the blank wall, instead of standing on the footholds.
CLIMBING HANDHOLDS

Climbers have about as many words to describe shapes in the rock and how we grip them as ace-climber Adam Ondra has screams. The numerous positions we can contort our fingers and hands over various rock shapes is astounding. Efficient rock climbers use their hands for stability, not just to haul themselves up a climb. Using your bulging biceps to muscle through a tricky section is sometimes unavoidable, but remember that footless climbing is called “campusing,” and should be done only when necessary, which is rare. Grip holds with slightly bent arms, using your feet to push you up. Here are the general types of holds that you, the apprentice grimper, should know:
Jugs Ahhh jugs, aka buckets, aka the biggest, easiest holds around are named after “jug handles.” Your first route will likely be covered in jugs, and while they may feel easy, there’s definitely technique to jug climbing. Grab jugs (and, in fact, this goes for every type of hold) using as little energy as possible. Learning to conserve strength by not over-gripping is fundamental, and you should learn this technique on holds that are easy to hang onto. Don’t pull the jug close to your chest in order to scope the next move, but scout from a restful, hanging position. Jugs are also great places to shake out, chalk up, place gear and compose your mind.
Crimpers These are fingertip-sized edges that you’ll either grip in a crimp or open-hand position. For the crimp, place your fingers on an edge and curl them such that your finger joints are bent up, then wrap your thumb over your index finger. This is the most powerful position for tiny holds, but also the most injury-prone as it places high stress on tendons.


The open-hand crimp is usually for easier holds that you hang onto with more relaxed fingers, but you can grip most crimp holds with an open hand, and that is actually preferred. The open-hand grip places less stress on your fingers, and builds finger strength.
It’s tempting to jump onto the fingerboard, campus board or system board at the gym when you want to practice your crimping. But, the pros who do single-finger crimper pull-ups on YouTube didn’t start with those routines, and neither should you. Tendons, ligaments and bones take about two years to adjust to the serious strain that training boards put on them— crimping up a climb is fine, but wait those 730 days before you jump on crimp-trainers at the gym.

Pockets Pretty much every gym has an abundance of these holds, and you’ll need to know how to use pockets to climb limestone. Using a pocket is as simple as getting as much finger meat as possible into the hole, then gripping the inside of the hole and pulling. Be careful: as with crimps, putting so much weight onto a single finger, or even a few, is a recipe for injury when you’re new to climbing. Search around inside the pocket for the sweet spot, which is sometimes hidden toward the back, the side or even at the top. Get as many fingers as possible into a pocket, which can mean stacking your fingers by placing digits on top of digits. Experiment with fingers, too: some people find their ring fingers are stronger than their index fingers, and prefer to use them when a pocket will only take three or fewer fingers.
Pinches This technique utilizes that important digit that separates us from most animals: the opposable thumb. The classic pinch is a protrusion that you can squeeze. Pinches, however, can be angled in any direction, so be open-minded. Pinches are often easier to hold onto than crimpers, therefore look for thumb indentations near crimpers that can turn an unusable edge into a bomber pinch.
 Find the sweet spot, which might be a slight flat place. 2) Pull down, not out, and activate your core. 3) Engage your thumb; don’t just set it on the hold. 4) Think positively—holding a tough sloper is as much a mental as physical challenge.")
Slopers To hang onto big, rounded and poorly angled holds, aka slopers, you rely solely on friction, so chalk up. Slopers, since they are so inobvious and difficult to use, require more technique than most holds—weight distribution and correct body position is paramount. Place your hand onto a sloper and keep your fingers closer together for added strength. Try to get your body under a sloper as much as possible. Keep your arms straight and forearms close to the rock. Bear in mind that once you have a solid hand position on a sloper and are leveraging upward, it may be easiest to rotate your hand sideways, thumb toward the wall, to maintain a frog-like stance and keep yourself from losing purchase and teetering outward. Most slopers have a spot that is less sloping than everywhere else. Feel for that and take advantage of it. Slopers are also temperature dependent: a sloping hold that seems impossible to use when it is warm can feel easy when it is cooler.
Underclings and sidepulls Two variants of the same idea, underclings (upside-down holds) and sidepulls (vertically oriented grips) are holds that are only good when you find the right body position. To best use underclings, you’ll want your feet high so you can pull up on your fingers and press down on your feet. Sidepulls operate similarly, and become useable when your feet and legs are used in opposition with your hands. Maintain a straight arm on the sidepull, leaning hard away from the hold.
BODY POSITION
Climbing is about balance, movement and efficiency of motion. Sure, the power to do a one-arm, fingertip pull-up may help you in some situations, but it won’t help you on a balancy, slab move. Good body position is key. The following is a list of common techniques with suggestions on how to tackle different terrain and features. Read on with this caveat in mind: there are no rules. Each climb calls for different technique. Don’t over-focus on the way it “should” be done. Use your intuition.
FOOTWORK IN THE GYM
Delicate footwork is the key to pow- erful climbing. When you practice in the gym, try and step on each foothold so daintily that your shoe is silent on contact. Start your training with the “simple” footholds: edging and smearing. Practice these on long toprope routes so you won’t be leery of falling, and, so you can cram as many foot placements into a route as possible. Get to the bouldering gym to practice your hooking techniques: Rope routes usually won’t have many hooking opportunities, and if they do the difficulty will seem somewhere around 5.Ondra for a beginner.
Think of yourself as a tripod and keep three points of contact with the rock whenever possible. In other words, move only one limb at a time. Use your legs to push you up, and minimize reliance on your arms. A common mistake newcomers make is to always search for that perfect, secure handhold, when they should instead look down for footholds. Climbing involves pushing and pulling with the whole body, not just hands and feet, and focusing on your “center.”
Manteling This technique involves pressing down, using your arm and shoulder muscles to drive holds to, or below, waist level, as if you’re getting out of a swimming pool. The mantle is generally used to gain a ledge, large or small, where there are no reachable handholds above. This technique requires strong shoulders and triceps, good balance and the flexibility to “match” (when two appendages use the same hold) your foot and hand, often using a heel-hook.
Slabs won’t pump you, although it is surprising how strenuous a hard slab can be, because although the angle is less than vertical, the holds can be micro. Slab climbing is a footwork and balance game. Strong feet and legs are assets. Moving quickly is not as important as linking holds with correct positions. Use your arms to push yourself out from the slab so that all your weight is centered over your feet. Try not to get too stretched out, as this causes feet to slip.
Overhangs On overhanging sections, you’ll need to conserve energy. Moving quickly is one way, but moving efficiently is better. Hang relaxed and avoid over-gripping. If you’re getting pumped, look for good footholds to stand on, rather than searching for a jug. Correctly dealing with inflamed arms is a mental game: instead of mindlessly groping for holds when you become tired, relax and focus on your breathing.
Climbing well on overhanging rock requires milking the feet and legs for all they’re worth. Keep both feet on the rock or wall as much as possible—overhangs are not for campusing. If your feet pop, get them back on the wall asap. Rests can be found almost anywhere— ever see someone hang upsidedown (aka “bat hang”) from a kneebar? Look ahead and break the route down into smaller, manageable sections, moving from rest to rest. Unless your fingers are drenched with Nile-like rivulets of sweat, do not bother chalking up on extreme overhangs; you’ll just tire yourself out.

Stemming This is pressing your feet against two opposing planes, bridging the gap to take weight off your arms. Gyms usually have a handful of corners or opposing holds to stem on, while outside stems typically follow dihedrals or corners, and can be gear protected because the corner usually forms a crack. Stemming is an excellent technique to master because it provides stability and security when your arms are pumped.
The master stemmer can find rests where most people cannot. When you stem, walk your feet up one at a time by weighting your arms and one foot, while sliding the other foot upward. You’ll often press your palms against either side of the dihedral, looking for good “palm smears.” When you stem with your arms, you’ll likely be using holds at your waist that you can press down on. Stemming is in no way limited to dihedrals. Look for opposing footholds, even on vertical planes of rock that allow you to get weight off your hands and onto your feet.
Layback The layback is a position of opposition, where your feet push against the wall while using consecutive sidepull handholds, usually a long crack, facing the opposite direction. This solid, but strenuous technique usually requires a shuffling rhythm—hand, hand, foot, foot. Keep your arms straight and your feet high. The closer your feet are to your hands, the more strenuous the position, but the more locked on you are; the smoother and steeper the rock, the higher your feet must go.
Laybacks are often found on splitter cracks, flakes, or in dihedrals with cracks. Stopping in the midst of a layback to place gear is strenuous. Sometimes it’s better to just climb until you can find a stemming rest to place gear, or, throw a handjam and hang from this while you set pro. When you are laybacking a dihedral, jam your lower, inside foot into the crack, big toe up, and smear and edge your outside foot against the rock. Usually, you can friction off your shoulder and side, taking some of the weight off your arms.
 to drive up the wall. On rock, you will typically layback in a dihedral, and climbers who don’t know how to jam may try to layback up a crack, an exhausting technique.")
 lets you rotate into the rock and use your hips to push you up, rather than rely entirely on your arms. A dropknee can be just the trick for getting extra reach, but it can also wrench your knee. Use with caution.")
Dropknee Here’s a fancy way to get your hips close to the wall and utilize footholds that are otherwise unusable. To dropknee, place the outside edge of your foot onto a hold, and swing your knee downward. Dropknees are a great way to get your weight close to the wall on overhanging routes. Dropknee footholds are mostly found away from the body. Stretch your leg to the hold using the front point of your toe and then twist your knee toward the wall. Be careful: dropknees can irritate the cartilage in your patella and/or blow out your knee tendons and ligaments.
Dropknees are especially useful when climbing overhanging sections. Lock off with one arm, drop- knee on the opposite side of your body, and then reach for a distant handhold with your free hand; this is called a “twistlock.” The twistlock is great for increasing your reach on overhangs where you would otherwise need to lunge, which usually pops your feet off the wall.

Kneebar This technique allows you to bridge the “shank” of your leg, from your toe to your knee, between two areas of rock. Place your foot onto the foothold and brace your knee against a suitably positioned hold, which can be large or inobvious and small. Solid kneebars provide “hands-off” rests that you can literally hang from for minutes.
Dyno/Deadpoint moves rely on momentum, and are often less strenuous than static reaches. The most dramatic dynamic move is the dyno, where the climber jumps for a hold, sometimes completely detaching from the rock. During a dyno, a climber springs up, driving with his feet and directing his trajectory with a low hand that may (or may not) remain clamped to the rock.
A deadpoint is more a quick hand movement, or hop, than a jump. To perform a deadpoint, push with your feet and pull with your hands simultaneously, holding on with both hands and throwing your center of gravity toward your target, concentrating like a laser on the hold you want to catch. Time the moment you grab the next hold with the apex of your body’s trajectory, that moment your body becomes weightless (the “deadpoint”).
Backstepping is used to elongate your reach. When you edge a foothold with the outside edge of your shoe, turning your hip so that the outside of it faces into the wall, you have some extra reach with the hand on that same side. Backstepping is especially important on overhung sections where you need every extra inch of reach, and shifting your body weight several times would quickly tire you out.

Flagging is sticking one of your legs out to either side as a counterweight against the rest of your body. This technique is often used to prevent “barn dooring,” which is when your body swings away from the rock. Flagging is also great for when you have to reach far out for a handhold and need some weight on your opposite side to counterbalance yourself. To flag, simply find a juggy climb and practice balancing on wide reaches by flagging with your opposite leg.
GYM AS DOJO
“The gym is no substitute for outdoor climbing,” said the editors. Well, with one exception: When practicing the footholds, handholds, body movements, and even crack techniques discussed in this manual, stick to gym topropes to beef up your technique before you try scaling cliffs. The gym allows you to practice precise movement and limb placement on all types of holds. Once you’ve mastered this chapter’s content in the gym, then take your game outside.
The post Learn To Rock Climb: Basic Techniques From Handholds to Footwork and Drop Knees appeared first on Climbing.
]]>
As a human you are programmed to climb, but your intuition isn't always correct.
The post Get Better: 10 Counterintuitive Tactics To Take Your Climbing To The Next Level appeared first on Climbing.
]]>Anyone can hit the campus board and get strong, but truly skilled climbers are able keep it together even when they’re drowning in lactic acid, miles above the runner. Too often our inner caveman—the beast with no technique—asserts itself at the worst possible moment, and our panicky fight-or-flight response causes us to do the wrong thing (take flight).
Among the first things we hear when we start climbing are exhortations to “stay calm,” “relax” and “use your feet.” Prompts like these shape our technique in the early stages, but such advice eventually dries up, making it harder to take technique to the next stage.
One secret to advancing your ability is to understand exactly how your technique is thrown off when you’re outside your comfort zone. We tend to blow it because we presume that our subconscious always knows best. Humans are a climbing species, and certain components of our natural, default climbing style are helpful, but the key is to carefully define those aspects that are counter-productive and counterintuitive. In the heat of battle, no matter how skilled and experienced you think you are, you will always have that simmering tendency to do the wrong thing. These 10 counterintuitive technique pointers can help you go from Stone Age to Stone Crusher.
1. Don’t bang your feet
Everyone knows how important it is to place your feet accurately, so why refuse to when you’re pumped or scared? Nine times out of 10, you bang your feet when you’re maxed because you’re off balance, or, to be more specific, you keep your hips in the center as opposed to directing them over the active (higher) foot. Stand on the floor with your feet slightly wider than shoulder width and then stand on one foot. You must shift your hips to the side, over the weight-bearing leg. A good climber’s hips will zig-zag up the wall. A bad climber’s hips will move in a straight line. So the next time you‘re about to drag your foot when you’re flailing at the top of a route, you know what to do. Shift, baby!
2. The biggest footholds aren’t always the best
Another classic symptom of being pumped or hit by adrenaline is to throw your foot onto the largest and most obvious foothold, even if it is in a bad position, either too high (which makes it hard to stand up) or too far out to the side (which throws you off balance and necessitates a giant rock-over). If only you’d had the confidence to trust those smaller dinks that were lower down and closer in, they would have enabled you to build your feet up in smaller steps. more to the point, if only you’d seen them in the first place. Next time the red mist descends, look again for your footholds and consider the position before you make a hasty decision.
3. Build the feet first, then reach
It’s a simple decision: either step up and then reach, or reach and then step up. I guarantee that when you’re fresh and on easy ground you’ll see the sense in stepping up first, so why when you’re redlining will you be so tempted to go for the reach? If you stretch for a handhold with both feet low down: your heels lift up, and you may slip and slam against the wall. Best case, you stay on but are tucked against the wall, lose visibility below you and have a nightmare trying to locate the foothold again. Yet when your fingers are uncurling, the handhold always seems more tempting. This is perhaps one of the most common reasons for failing on an onsight. Last year in Céüse I dropped from the last move of the onsight of a route that I’d been saving for 15 years, purely because I slapped for the pocket before building my feet. Coping with the failure was hard enough, without reminding myself that I’m supposed to be the guy who teaches this stuff!
4. Arms straight
Bending your arms wastes strength and restricts the blood supply to your forearms. It’s obviously smarter to hang from straight arms and direct all the force through your skeleton instead of draining your muscles, so why do you only do this when fresh and composed?
Once again, the straight-armed style does not come naturally. If you ask a beginner to step onto a climbing wall, using any holds, he will do so with straight legs and bent arms. an orangutan would probably do the exact opposite and pull on with straight arms and bent legs, but the natural human instinct is to stand and bend the arms and this becomes your undoing on steeper routes. Lowering the center of gravity is also counterintuitive because you’re focused on trying to climb up. The last thing you are thinking about is moving down. So the next time you’re holding a lock-off, shaking out, chalking up, or feeling for a hold, ask yourself if you could simply lower your hips and relieve the strain.
Related to this: you know that you shouldn’t lock off, pull up reels of slack and stretch up to clip from a tiny crimp when a better hold next to the draw would enable you to clip from a straight arm. But when you’re maxed you fool yourself. Perhaps there’s something different about this particular clip? No, there’s not. Think about it.
5. Don’t over grip
Over gripping is natural when you’re halfway up a rock face. It’s usually when you’re cruising on easier ground that you relax your grip as much as possible, but this is one of the first things to vanish when anxiety levels rise. Those moments of madness when you start trying to rip the holds off the wall are invariably the times when you should attempt to conserve grip strength. Similarly when you’re composed and thinking straight, you often stop to reassess how you are gripping a hold—perhaps there’s a sneaky catch for the thumb, or a hidden incut section, or maybe you can switch from crimping to a more relaxed open-hand grip?
For some reason, when you’re on the brink of taking a whipper, it’s usually a case of anything will do. How many times have you pulled back up the rope, only to realize that you weren’t gripping the hold properly? The answer is not to waste precious time faffing with holds, but instead make a split-second check of your grip. It could easily determine the difference between success and failure.
One of the most important performance skills is the ability to maintain good technique in high-pressure situations, and one of the best ways to achieve it is to work from a checklist of the most common mistakes that crop up when you’re climbing by the seat of your pants.
In the heat of the battle, instincts often take over and we ignore the highly counterintuitive, learned aspects of climbing technique. Last issue this column tackled five mistakes. This issue we take on five more. At the end of this article, you should have a good idea what to do next time you’re staring down the crux with your forearms feeling like balloons.
6. Stalling on cruxes
Why is it that when you reach a poor hold you stop in your tracks and waste time wishing that it was bigger? Stalling won’t make the hold get bigger or you feel stronger. If you’ve sussed the hold once or twice, sized up your feet and located the next handhold, then all you’ll achieve by delaying is increasing your pump and reducing your chances. If you can retreat to a good rest, then feeling around for a better grip might be viable, but a common error is to hold back for no good reason. The smallest hold on the route is the one you want to spend the least time on.
7. Tunnel vision
A surge of adrenaline has the effect of narrowing your vision. This primal response may prepare us for combat, but in a modern climbing situation it can cause some of the most irritating and easily avoided failures. By forcibly reminding yourself to “look wide” when the pump kicks in, you will be much less likely to miss crucial holds.
Acknowledge that when you are pumped or scared, you are less likely to spot rests or decipher sequences. Often, rests require you to break the climbing sequence and step to one side. I remember being way too amped for my own good while trying to redpoint Punks in the Gym (5.13d) at Arapiles, Australia, a route that I’d wanted to climb since childhood. Having fallen off the last move and split my fingertip on the third day, I found the only rest on the route by accident while lowering down. Infuriatingly, it involved shuffling half a move left and changing feet. The busted tip prevented me from nailing the route before I left but I know that if I’d had my eyes open, that rest would have made all the difference.
8. Forgetting to breathe
If you can take one thing for granted, it’s that you’re going to be breathing during a climb. But the chances of you breathing in a manner that maximizes your prospects for success are about a million to one, unless you make a conscious effort to override instinct. You naturally hold your breath during cruxes and then gasp off the oxygen debt afterward when you make it to a good hold. When a degree of fear enters the equation your natural breathing becomes even less effective as you suck thin, shallow and rapid breaths through your mouth and make yourself even more anxious. Entire books have been written on breathing but the key is to remind yourself to breathe deeply and regularly. By lengthening your exhalation you will naturally induce a
deeper inhalation. This is undoubtedly hard to remember when you’re fighting through a crux and effective breathing is often the last thing on your mind.
9. Not shaking the key arm
Picture this: You’re pumped out of your mind and you see the clipping hold. What do you do next? Option A: you go for it and then realize that you don’t have enough reserve in the tank to pull up the rope, so you’re forced either to grab the draw or pitch. Option B: you hang back, shake the arm you’ll be using to make the clip (perhaps even to the point that the other hand virtually uncurls) and then you take the clipping hold and make the clip with ease. This important tip for pump-management can also be used to enable you to save strength for a poor hold at the crux when you’re maxed-out. Of course, it requires that crucial extra bit of planning and restraint that so often evades us in the heat of the battle.
10. Not stepping through
This is the big one for anyone transitioning from vertical routes to overhangs. Most of us learn to climb on vertical walls, and master the parallel-hips style. When you see a foothold to the left side of your body, you use it with your left foot, and footholds on the right get used with the right foot. This approach works perfectly well on vertical walls, but has disastrous consequences on steep walls. First, you are forced wildly out of balance as your hips barn door away from the wall as you make each reach. Second, you must use extra arm strength to make each move. The net result is that most low- to intermediate-level climbers think that overhangs are impossibly strenuous.
It comes as something of a revelation to realize that there’s an alternative method that makes overhangs feel much easier. By stepping through and using the outside edge of the opposite foot (i.e. placing your left foot on a foothold to the right) you twist your hip into the wall and bring your body into balance. Better still, you can make the reach with your arms virtually straight, by twisting your torso instead of blasting your biceps. Other important variations to this technique also need to be learned and practiced—the drop-knee, the inside and outside flags and so on—but the key is to remember that this is not a natural way to climb. Even a 5.13 climber, pumped out of his mind, 10 feet above a bolt on a wildly overhanging wall, must remind himself to step through.
RETURN TO THE BETTER CLIMBING INDEX
Neil Gresham has been training and coaching for two decades. In 2001, he made the second ascent of Equilibrium (E10 7a/5.14X) on Peak District gritstone, and last year established Freakshow (8c/5.14b) at Kilnsey, also in the U.K. On October 13, 2016 he made the first ascent of Sabotage—an 8c+ (5.14c) extension to Predator (8b/5.13d) at Malham Cave, North Yorkshire, England. Sabotage is Gresham’s first climb of the grade.
The post Get Better: 10 Counterintuitive Tactics To Take Your Climbing To The Next Level appeared first on Climbing.
]]>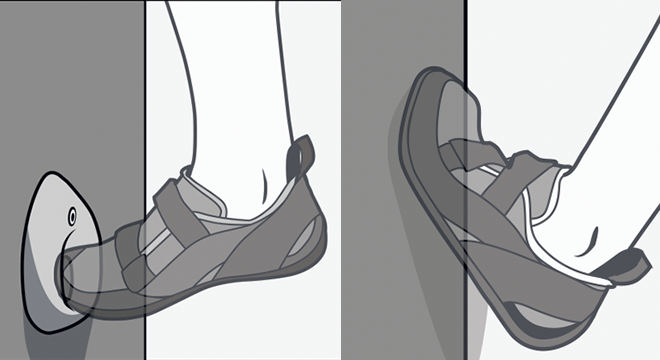
How you use your feet is actually more important than being strong. Don't believe it? Try climbing without your feet. Propel yourself upwards with more ease by dialing in your footwork with these expert tips.
The post 7 Simple Drills To Improve Your Footwork appeared first on Climbing.
]]>
You’ve surely heard this once (if not a thousand times) before: Climbing is all about your feet. However, when a fellow climber recites that adage, it’s generally not followed with a detailed explanation about how and why your feet are important, so it can be confusing and frustrating and maybe not mean much at all in the end. So listen up, as that’s about to change. Two people who know a few things about improving footwork are 5.14 climbers, brothers, and training experts Mike and Mark Anderson, who together authored The Rock Climber’s Training Manual. They’ve compiled a list of guidelines and drills that will help you improve your footwork and become a better climber overall. Soon you’ll be spreading the adage, too—but with the knowledge and experience to back it up.
Why?
Footwork is typically the last skill addressed when climbers try to progress. This bias is not surprising since emphasis is almost always put on upper body strength, but learning to optimally place and weight your feet reduces strain on your forearms and puts your body in a position to efficiently reach the next set of handholds. Plus, the muscles in your legs are larger and have more stamina than your arms, so the more propulsion you can get out of those stems, the better. The net result is climbing that feels anywhere from a little to a whole lot easier.
When?
Do these on toprope or bouldering close to the ground, so you can focus on the movement instead of worrying about falling. Set aside dedicated practice time two or three times a week; you can easily incorporate the exercises into a 20- or 30-minute warm-up. Pay attention to how your body feels (sensory feedback) while performing the drills, and practice them frequently. Your new skills won’t become part of your on-the-rock repertoire unless they are natural and familiar. You can accelerate this by attempting these drills on increasingly difficult terrain.
How?
Wear tight-fitting, high-performance shoes
Strap on your redpoint kicks when redefining what you can effectively stand on and move off of. Your mileage gym shoes will be too sloppy and loose to get the desired result and practice.
Also read: 8 Tips for Fitting Rock Shoes to Problematic Feet: Yours
Keep your feet low and move them frequently
Most gym routes encourage large movements between footholds. And while high-stepping or a wide stem may help you send the blue route, these techniques have much less value on real rock. When practicing, work to make small, frequent foot placements. Specifically, try making three foot placements for every hand move. Don’t be surprised if you have to add intermediate feet that aren’t part of the designated route. Climbing in this style will train you to keep your body close to the wall and your weight, well, on your feet.
Focus on feet and body, not hands
It’s easy to get fixated on hand sequences and simply put your feet on the biggest holds you can find. The gym offers an excellent place to experiment with how utilizing different foothold locations will drastically affect body position, which in turn, affects the use of handholds.
Weight footholds correctly
There is more to good footwork than just putting your piggies exactly where you want them. Once your feet are in position, concentrate on wrapping your toes over the hold while weighting your foot in a way that maximizes friction between hold and rubber. This requires a large amount of core strength and body awareness.
Also read: 8 Simple Things I Wish I’d Known As a Beginning Climber
Drills
Precision Feet
Goal: Toe accuracy
When boulder traversing or toproping, pick the best spot of every foothold you encounter and move your foot onto this exact location with great precision like a bull’s-eye. Do not take your eyes off the foothold until your foot is perfectly placed. Move quicker as your skill level increases.
Foot Stab
Goal: Improve coordination
Wear your shoes, stand in front of the wall, and balance on one leg. Reach out and accurately touch pre-selected foothold targets with your raised foot. For increased difficulty, pick targets that require tricky reaches and challenge your balance.
Blinking
Goal: Evaluate foot placement by feel
Pick out a foothold and move your foot toward its exact location. Before your foot makes contact, close your eyes and finish locating the hold using spatial awareness. Keep your eyes closed until you have your foot securely placed. Evaluate your performance first through feel, and then open your eyes to confirm. Pick out the next hold and continue.
Jibs Only
Goal: Simulate real rock and utilize bad holds
Only allow yourself to use tiny screw-on foothold jibs, small divots, waves molded into the body of handholds, and natural features on the surface of the wall.
Downclimbing
Goal: Focus on lower extremities
Many people develop tunnel vision and focus only on what is directly above them and in reach of their hands. When stuck in this pattern, the hips, legs, and feet are easy to forget. Practice downclimbing and let your feet lead the way as you shift your body to most effectively weight and utilize your feet.
Glue Feet
Goal: Increase holding power and prevent slips
Imagine that your toes become frozen to the hold as soon as you place a foot; you can’t change the relationship between foot and hold—no pivoting, tilting, or repositioning. Simply flex at the ankle when moving past the hold. Learn to establish and feel a wide contact area between your foot and the hold, and then work to maintain this maximum contact while the rest of your body moves.
Observe
Goal: Learn from others
Watch advanced climbers on the exact route or boulder problem you just climbed. When in witness mode, analyze how they move and use their feet. Also, note which footholds they use and consider why. Another option is to watch World Cup competition climbing videos to glean footwork nuances that you can later apply to your own climbing.
Foothold handbook
How to get the best purchase on common gym holds.

- Place pointed toe precisely in the opening
- Press down with forefoot
- Raise heel slightly to engage calf
Flat Wall

- Smear like on a slab
- Drop heel as far as possible to maximize contact
- Bend toes upward to engage forefoot
Small Edge

- Focus on the most positive section
- Keep ankle at about 90°
- Wrap toes around hold
Sloper

- Drop heel to maximize contact
- Push toes and forefoot down
- Stay up high on hold
Mike and Mark Anderson—Mike has climbed 5.14 and done free free ascents of grade V and VI big walls in Yosemite and Zion. Mark has put up several 5.14 first ascents throughout Colorado and works as a climbing coach. Together they designed the Rock Prodigy Training Center, a unique hangboard system, and authored The Rock Climber’s Training Manual.
The post 7 Simple Drills To Improve Your Footwork appeared first on Climbing.
]]>
It’s common to see climbers miming beta. They stand at the base of the wall, waving their arms in the air like they’re performing a spell, and then pull on. But when performing this ritual, many ignore the important footwork they’ll need to execute amidst the hand movements. Paige Claassen explains that our foot beta … Continued
The post Quick Tip: Focus on Your Footwork Beta appeared first on Climbing.
]]>It’s common to see climbers miming beta. They stand at the base of the wall, waving their arms in the air like they’re performing a spell, and then pull on. But when performing this ritual, many ignore the important footwork they’ll need to execute amidst the hand movements. Paige Claassen explains that our foot beta is often if equal, or greater, importance—and complexity.
If you’re serious about climbing harder grades with reduced fatigue, then improving your footwork will help you accomplish your goals—and send your projects. Climbing Magazine and pro climber Paige Claassen have teamed up to create Precision Footwork, a 7-week online course which focuses solely on footwork, one of the most crucial—but all too often overlooked—aspects of rock climbing. Learn more and sign up here.
Related:
- What the Wear and Tear on Your Climbing Shoes Says About Your Footwork
- Video: Train Toe Hooks the Easy Way
The post Quick Tip: Focus on Your Footwork Beta appeared first on Climbing.
]]>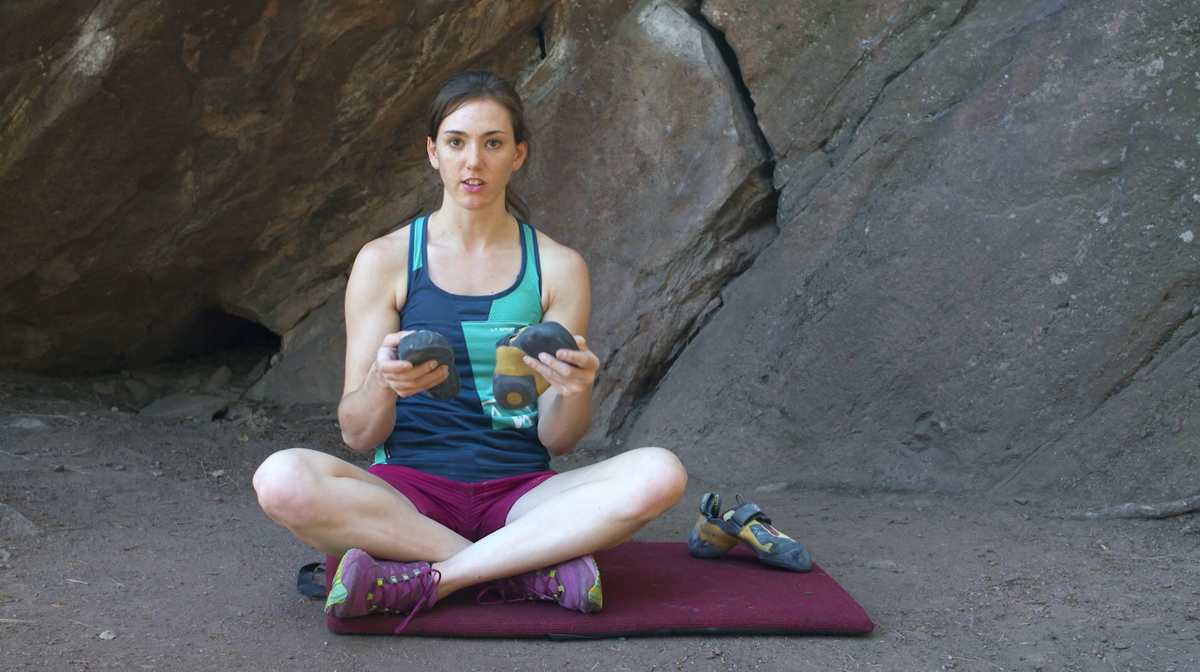
Do all of your climbing shoes have holes in the same spot? There’s a reason for that, and it can tell you something about your footwork. You might be dragging your feet, or you might not be using the best part of your foot. But, not all shoe wear is the result of bad footwork. … Continued
The post What the Wear and Tear on Your Climbing Shoes Says About Your Footwork appeared first on Climbing.
]]>Do all of your climbing shoes have holes in the same spot? There’s a reason for that, and it can tell you something about your footwork. You might be dragging your feet, or you might not be using the best part of your foot. But, not all shoe wear is the result of bad footwork. Some wear patterns can be the sign of good footwork. Paige Claassen explains what to look for in this excerpt from her Precision Footwork online course. (Hint: Not seeing any wear on the top of your shoes, try this toe hook drill.)
If you’re serious about climbing harder grades with reduced fatigue, then improving your footwork will help you accomplish your goals—and send your projects. Climbing Magazine and pro climber Paige Claassen have teamed up to create Precision Footwork, a 7-week online course which focuses solely on footwork, one of the most crucial—but all too often overlooked—aspects of rock climbing. Learn more and sign up here.
The post What the Wear and Tear on Your Climbing Shoes Says About Your Footwork appeared first on Climbing.
]]>
Struggling with toe hooks? The technique is less intuitive than many other climbing moves. Paige Claassen developed the above drill while training for a hard project in Norway. Integrate it into your normal gym routine to see fast progress with your footwork. If you’re serious about climbing harder grades with reduced fatigue, then improving your … Continued
The post Paige Claassen: Train Toe Hooks the Easy Way appeared first on Climbing.
]]>Struggling with toe hooks? The technique is less intuitive than many other climbing moves. Paige Claassen developed the above drill while training for a hard project in Norway. Integrate it into your normal gym routine to see fast progress with your footwork.
If you’re serious about climbing harder grades with reduced fatigue, then improving your footwork will help you accomplish your goals—and send your projects. Climbing Magazine and pro climber Paige Claassen have teamed up to create Precision Footwork, a 7-week online course which focuses solely on footwork, one of the most crucial—but all too often overlooked—aspects of rock climbing. Learn more and sign up here.
The post Paige Claassen: Train Toe Hooks the Easy Way appeared first on Climbing.
]]>