One climber’s trash is another climber’s trad rack
The post Top Mistakes to Avoid When Buying Used Climbing Gear appeared first on Climbing.
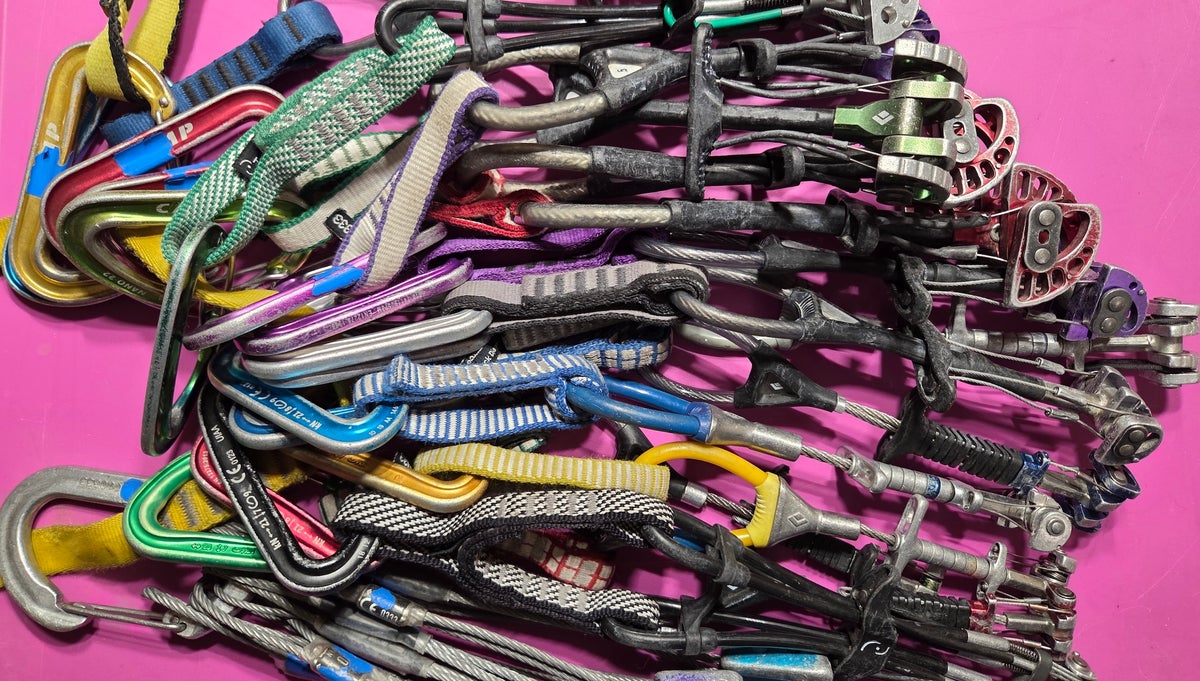
]]>I tried to buy my first trad rack off eBay. It was a double rack of Black Diamond C4’s with a rack of stoppers to boot. They looked good in the photos, albeit a little old. The lobes weren’t too damaged, trigger wires were intact, and the stems looked unbent. They had the chunkier nylon slings and came with some beat-up wire gate carabiners.
Unfortunately, when I made the purchase, eBay suspended my account and blocked the transaction. That’s because, at the time, I was living in Peru as a Peace Corps Volunteer, so when eBay saw me trying to make a $1,000+ purchase from South America with a brand new eBay account and an American credit card, I guess I triggered some online safety software.
To get around this obstacle, I implored a buddy of mine in the U.S. to buy the rack instead. I Venmoed him some cash, and he shipped the rack to my parent’s house. A month later, my parents muled the rack down to Peru in their luggage when they came to visit me. Thanks to this new-to-me, used rack, I plugged my way up trad climbs all over the Cordillera Blanca.
That purchase kickstarted not only my passion for trad climbing, but also my enthusiasm for buying used climbing gear. I wondered what other equipment I could buy secondhand. I also wondered what gear I could sell to financially power my lifestyle.
Fast forward 10 years, and the majority of my rack is still used. Not to mention, half the garments in my wardrobe come from a thrift store. I’ve sold ropes to friends for their ice climbing missions in Alaska and shipped abandoned cams I bootied to beginner leaders building their racks. In the process, I’ve learned a thing or two about red flags, green flags, and other things to look for when buying used climbing gear.
Why Buy Used Climbing Gear in the First Place?
There are two crucial advantages to buying used climbing gear. The obvious one: It’s drastically more economical than shopping for new gear. You can get more for your money when buying secondhand stuff. I’ve been known to score fully functioning cams for 25 bucks and carabiners for just a couple of doll hairs.
Choosing used climbing gear can also be more sustainable. Keeping gear in circulation for longer amongst all sorts of users means that these products don’t end up in landfills or incinerators as quickly. This shrinks the unavoidable carbon footprint of each item by getting more value out of the natural resources required to make the product. Plus, it delays the inevitable extraction of more natural resources and the production of carbon emissions required to replace the item within a commodity chain.
That said, it’s not all banger deals when you buy used gear. You do have to pay more attention to what you’re buying and how you’re buying it when you’re shopping around the used market. And if you shop online, you run the risk of getting scammed.
Here’s what to look for based on what I’ve learned from my gear thrifting over the years.
Tips for Buying Trad Gear, Helmets, and More Hard Goods
When it comes to climbing gear, hard goods are, by and large, the most straightforward items to buy. The caveat is that the sale could go south if you wind up with a sketchy online seller (more on that later).
But for the most part, because hard goods are, well, hard, they are more durable and lend themselves nicely to being bought and resold many times. Here’s what to look for by type of gear.
Helmets
Look for helmets made with modern materials and a modern design. For example, any helmet made with expanded polypropylene (EPP) or expanded polystyrene (EPS) foam is ideal. Regarding plastic, polycarbonate or ABS plastic (acrylonitrile butadiene styrene) are modern options. If it has MIPs helmet technology, even better.
In addition, the helmet’s interior foam and exterior plastic materials should be completely crack-free, and the helmet must fit you properly. Small dents and scuff marks are okay.
Essentially, don’t go for the ones that looked like someone bored out a bowling ball and attached a chin strap, like this.
Used helmet red flags: Cracks, outdated materials, and design
Camming devices
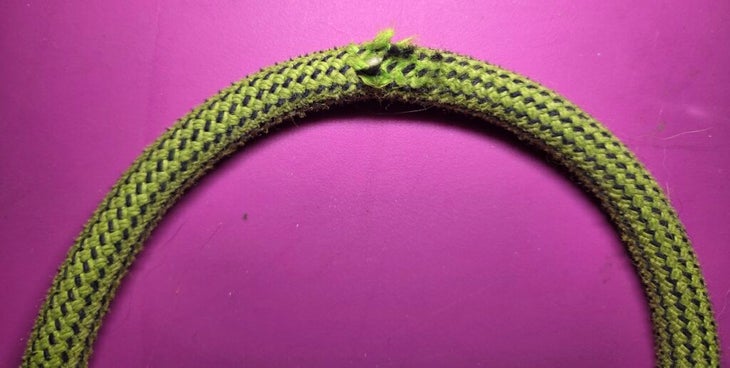
Trigger wires should not be frayed, and the stems should not be bent. The lobes can have some wear and tear, but should not be deeply gouged or cracked. The slings should not be frayed, discolored, or torn, and the sewing should be 100% intact.
So long as the original owner hasn’t removed the manufacturer’s label, you can check the date sewn into the small label on the sling to know exactly how old the cam is.
Used cam red flags: Frayed wires or slings, bent stems, cracked or gouged cam lobes
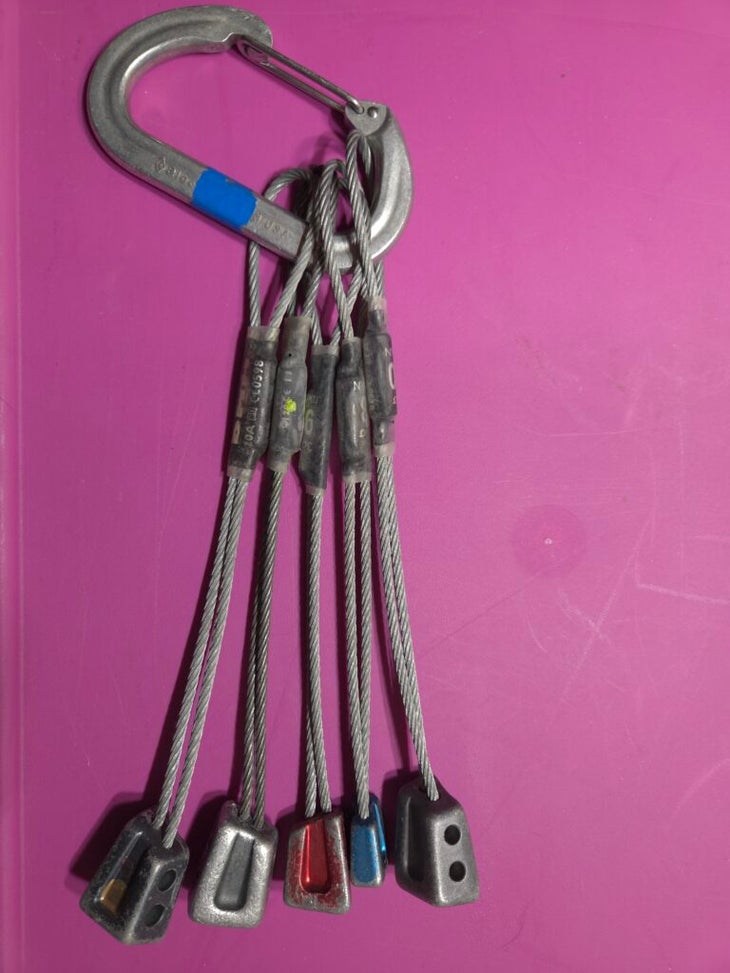
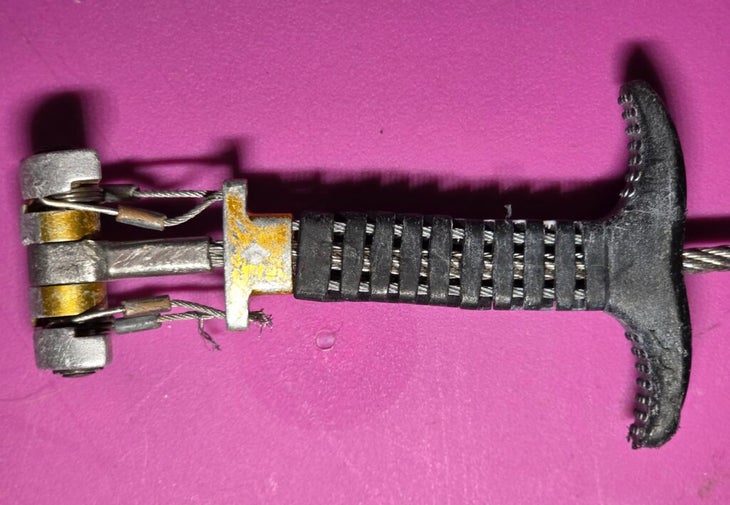
Stoppers
Stoppers hold up remarkably well. They’re just hunks of metal, after all. This makes them easy to resell and replace.
For stoppers, some signs of wear and tear are okay, like scratches in the color anodized finish. But pay close attention to the cable wire. The cables should not be frayed or grotesquely bent.
Used stopper red flags: Frayed and badly damaged cable wires
Quickdraws
The bolt-side carabiners should not be badly damaged, cracked, or marred. The rope-side carabiner should not be visibly worn out from rope friction. The gate action should still be snappy, and the gate should close completely. The sewing on the dogbone must be 100% intact, and the material should not be discolored or badly damaged.
Like cams, you can also check for dates on quickdraws to get their approximate age. Each quickdraw should have a small label sewn into the dogbone.
Used quickdraw red flags: Cracked or damaged carabiners, carabiniers that don’t fully close, dogbone discoloration
Carabiners: Non-locking and locking
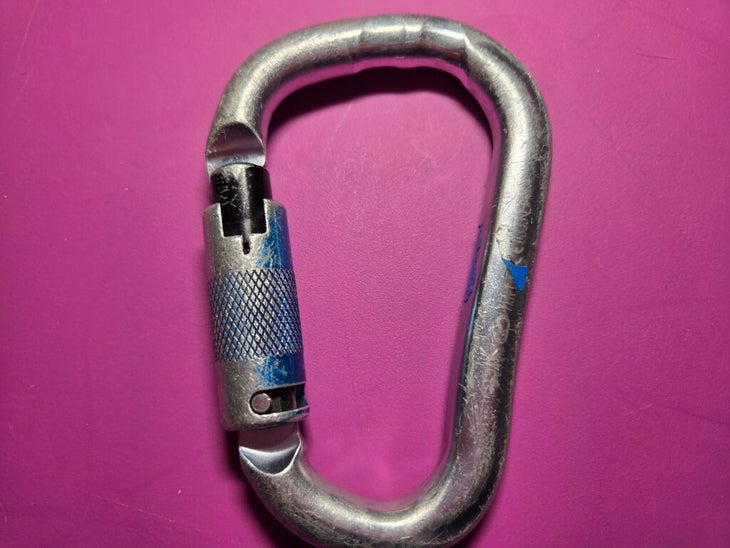
It’s okay if a carabiner shows signs of wear. However, you want to avoid carabiners with deep grooves in the basket from rope friction. You should also avoid carabiners that have sticky gates. If it’s a locking carabiner, avoid carabiners with faulty locking mechanisms.
Used carabiner red flags: Deep grooves, sticky gates, defective locking mechanisms
Soft Goods
For the purposes of this guide, we’re defining soft goods as climbing gear that is, well, literally soft—made from fibers or fabric, not hard materials. Buying used climbing soft goods can be a little trickier because, in general, they are less durable and more susceptible to wear and tear. For that reason, some folks avoid buying used soft goods altogether.
But when it comes to dirtbagging, saving money, and equipping yourself for your next rock trip, safety third, right?
I say maybe.
For soft goods like ropes, slings, and harnesses, it’s really important to inquire about the age of the item, how it was used, and how it was stored.
Ideally, the items will only be a couple of years old, lightly used or brand new (sometimes you can even find soft goods in their original packaging), and have a verifiable history of responsible storage (e.g., in a rope bag or in the gear closet, and not just in the trunk of a car or garage).
Ropes
Climbing ropes should not be discolored, too frayed, or possess apparent sheath damage or core shots. Most cores are white-colored, whereas sheaths are multi-colored. So, if you see white, skip the sale. You also want to inspect for core separation and flat ropes underneath the sheath.
Whenever possible, verify the type, length, and manufacturer of a rope by looking for the factory-installed label on the bitter ends. Inquiring about the rope’s age is also a good idea. However, age isn’t a tell-all data point when considering a used rope purchase. For example, a one-year-old rope that was used heavily might be in worse condition than a three-year-old rope that was used once for an expedition. It’s more about looking for red flags than counting years.
That being said, most rope manufacturers recommend a 10-year lifespan even for unused ropes that are properly stored and in their original packaging. From there, the recommended lifespan only decreases based on usage.
Used rope red flags: Discoloration, frayed fibers, core shots, sheath damage
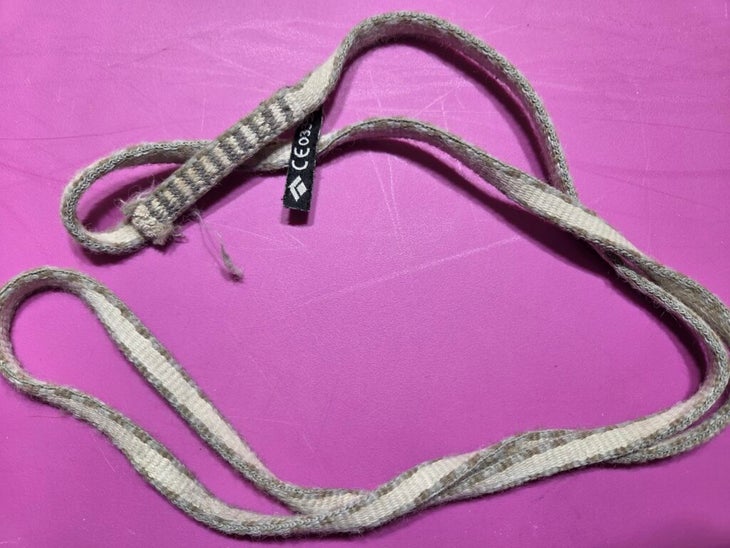
Sewn slings
Avoid slings that are discolored. You also want to avoid slings that are very fuzzy. If you can see some fuzzy texture, but the sling is still young, and you feel the seller is trustworthy, it may be worth it. But if it’s looking like a shag carpet, stay away.
Like cams and quickdraws, you can check the manufacturer’s label on the sling to verify its age.
Used sling red flags: Fuzzy texture, discoloration
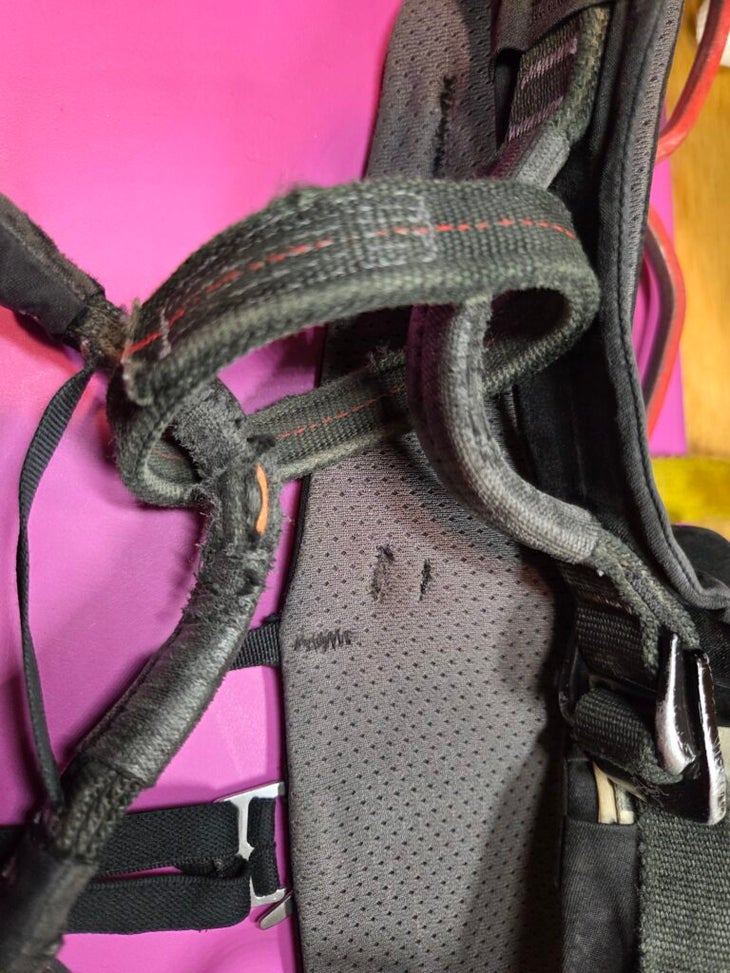
Harnesses
The sewing on all harness components—including the belay loop, tie-in points, etc.—must be 100% intact. In addition, the two tie-in points of the harness should be undamaged from rope friction. Also, look for damaged or badly worn fabric on the belay loop or tie-in points.
Some harness manufacturers, like Arc’teryx, use a different-colored material (e.g., red) on the interior of their tie-in points to indicate excessive wear and tear. The waistband should not show any egregious damage, and the gear loops should be well-attached. All buckles should be 100% functioning.
Used harness red flags: Loose or broken threads, detached components, faulty buckles
Climbing shoes
Climbing shoes can show some wear, but avoid any with significant holes or tears. Avoid shoes with delaminating rands and non-functioning closure systems. If a shoe’s edges are particularly beaten up, you can still make the purchase and have the shoe resoled or fixed up. Nowadays, cheap secondhand shoes plus a professionally done resole are still more affordable than a brand-new pair from the factory.
Ideally, a used pair of shoes won’t smell too bad. One day, with smell-o-vision, buying used rock shoes online will become even more interactive.
Used shoe red flags: Holes, tears, delaminating rubber, dysfunctional closures, bad odors
Where to Find Used Climbing Gear
You can find used climbing gear in two primary places: online or at local gear shops that specialize in or stock used products. I’ve been known to find gear in both areas, but I probably buy more used gear online than in person. Each source comes with some pros and cons.
Where (and how) to buy used climbing gear online
The internet is a convenient place to look for used climbing gear. For example, climbing-related forums like Mountain Project have a dedicated page for buying, selling, and trading used climbing gear. Geartrade is another great place for climbers searching for secondhand goods. Even Facebook Marketplace can be a reliable source of used outdoor gear.
However, some extra challenges come with buying gear online. The primary concern is whether the seller is legit. Unfortunately, I’ve heard all sorts of stories of people agreeing on a price for the collection of goods, sending money electronically via Venmo or PayPal, then never receiving the goods. The other issue is that the seller’s account of the condition of the gear may not be accurate.
To avoid this type of scandal, it can be helpful to investigate the seller. Look for green flags, like fully developed online profiles with complete names, seller location, and profile images. High-quality images of the equipment for sale are also essential.
For example, on forums like Mountain Project, you can view how long a user’s profile has been active. You can also see an inventory of the seller’s posts in the forum. Typically, the longer someone has been active on a forum like Mountain Project, with a lengthy string of verifiable forum contributions—or even better—successful used-gear transactions, the safer the deal.
The same goes for you as the buyer. Buyers and sellers will be more likely to interact with you online if your profile is complete, your online presence is reliable, and your behavior is polite. No angry pawn shop vibes.
Another more mainstream source of used gear is eBay or the REI Re/Supply Program. eBay has solid recommendations for finding trusted sellers. REI is obviously a trustworthy source. However, it’s important to note that the REI Re/Supply is only suitable for finding climbing shoes and climbing clothing. Some used-gear retailers like REI choose not to re-sell soft climbing goods for fear of liability.

Finding used climbing equipment at local gear shops
If buying used gear online doesn’t sound like your jam because of the potential obstacles related to illegitimate sellers, delays in communication, and extra shipping fees, the best thing to do is avoid it altogether. Instead, source used gear in person.
The best place to look is mom-and-pop style gear shops. Think the Black Diamond x Wilderness Exchange in Denver, CO, the Rock and Snow Annex in the Gunks, the Moab Gear Trader in Utah, or Snow, Mountain, River in Flagstaff, AZ.
For buyers, places like the Rock and Snow Annex are treasure troves of lightly used and sometimes brand-new gear and clothing. For sellers, these consignment programs are a valuable opportunity to make back money on gear no longer needed.
The major advantage of buying used gear in person is that you support small businesses. Plus, what you see is what you get—no surprise dents or discoloration you didn’t notice, or that were obscured, in the online photos. And you can have what you purchase right away—no waiting for shipment. However, the disadvantage is that you’re limited to the gear inventory at your local shop.
If You Don’t Love Used Gear, Let It Go
Buying used climbing gear is a great way to save money and participate in a more sustainable commodity chain that reduces your carbon footprint as a climber.
Likewise, selling your used gear is also a great way to participate in that process. But I know it can be hard. Attaching sentimental value to certain items and keeping them longer than you should is normal. I still have an original 10-year-old carabiner from my first rack of quickdraws. It holds my gloves now.
However, it’s so much better to let things go and let them live a second, perhaps third, or fourth life with another climber. Who knows, maybe you’ll buy back a cam you sold years ago. Talk about full circle, right?
The post Top Mistakes to Avoid When Buying Used Climbing Gear appeared first on Climbing.
]]>
Do’s and don’ts to deploy with your partners
The post Communication Breakdowns Can Be Deadly. These Pro Tips Will Help You Avoid Them. appeared first on Climbing.
]]>In the 1969 classic rock song, “Communication Breakdown,” Led Zeppelin’s Robert Plant howls into the microphone, “Communication breakdown, it’s always the same / havin’ a nervous breakdown, a-drive me insane.” While Zeppelin’s song was definitely not about rock climbing (it was about a girl), the lyrics exemplify precisely how I feel when I’m in the vicinity of climbing parties experiencing a communication breakdown or when I am experiencing one myself.
As a climber with over a decade of experience and a rock climbing guide trained and certified by the American Mountain Guides Association, I’ve experienced my fair share of breakdowns. Endless walkie-talkie chatter drives me insane. Unclear communication about being “on belay” or “off belay” makes me a nervous wreck. And sometimes, the complete lack of communication (and double-checks) between partners before the leader casts off has me waiting for a seemingly inevitable accident to occur.
We can all stand to improve how we communicate with our climbing partners. So, whether you’ve suffered through communication breakdowns or just want to streamline how you communicate with your climbing partners, I have some helpful ideas. I’ve compiled a list of climbing communication do’s and don’ts that will empower you to avoid breakdowns altogether and deal with them if they do occur.
Communication breakdowns in rock climbing
I consider a communication breakdown to be any time clear and obvious communication is non-existent in the first place or temporarily altered. Breakdowns can take a lot of forms. Likewise, the severity of the breakdown can vary.
Breakdowns tend to arise from three main sources– environmental factors, incongruent command language between two people, or unclear understanding of the intentions of the involved parties. Examples include:
- Two climbers use different language for the same command.
- A loud truck can drown out climbing commands as it passes the cliff momentarily.
- A shift in weather patterns can eliminate verbal communication altogether.
- The shouting of multiple climbers confuses nearby parties within earshot.

Don’t assume, do standardize communication
It can be dangerous to assume that your climbing partner communicates in the same way as you. This is especially critical for new climbing partnerships. Therefore, it’s imperative to standardize a strategy or system for how you plan to communicate.
Align with your partner(s) on how you plan to give commands while everyone is still on the ground. If you disagree on tactics or language, then you’ll need to compromise. Don’t start climbing until you reach a point where both partners unquestionably understand how communication will be carried out on the climb.
The following video is a good example of standard rock climbing commands between two partners. While the exact way you interact with partners may differ, your command delivery should be as clear and concise as possible.
Even seasoned partners need a game plan
Long-time climbing relationships are still at risk of a communication breakdown, mostly due to complacency. That’s why you shouldn’t assume you’re on the same page, no matter how long you’ve been climbing with someone.
An obvious example is at the end of a single-pitch climb. Are you planning to come off belay to rappel and clean (I don’t recommend this)? Or will you stay on belay and be lowered by your belayer? Even if your partnership’s modus operandi is always to clean and lower, you should confirm a game plan beforehand.
While there are risks involved in both rappelling and lowering, the American Alpine Club and American Mountain Guides Association recommend lowering versus rappelling to clean a single-pitch route.
Do perform radio due diligence
Harnesses equipped with walkie-talkies are seemingly a lot more common now than when I started climbing over 10 years ago.
I admit that using a radio while climbing satisfies the nostalgic desire to be a secret agent I had as a youngster. But remember that radios should be deployed in rock climbing as tools, not toys. If you consider your radio a tool, then you’re bound to use it and care for it more responsibly.
Here are a few tips before heading out for some climbing with your radio:
- Check the battery life and charge/replace batteries if necessary.
- Check your channel and perform a radio function check with your partner.
- Confirm that no other parties are on the same channel. Change channels if necessary.
- Create a contingency plan if your radio system fails (see below).
Do extend your communication strategy to include nearby parties
On busy days, your communication plan should include nearby parties. To be proactive, introduce yourself and get the names of nearby climbers. Speaking on a first-name basis can mitigate any inter-party communication breakdowns. You don’t need to introduce yourself to everyone at the crag, but getting the names of the climbers on routes to your left and right is a good starting point.
For example, where I guide in the Gunks, the cacophony of climbers shouting at one another can be disorienting. There are folks coming “off belay, “on belay,” and “off rappel” all over. Not to mention the calls for “rope” before climbers chuck their ropes off the cliff’s edge. By dropping in a first name whenever I shout a command, I can ensure my message reaches the correct ears.
Furthermore, if in your introductions, you meet a nearby climber with a similar (or exactly the same) name as someone in your party on a neighboring route, devise a way to distinguish between the two.
In October, on the Checkerboard Wall in the Black Canyon of the Gunnison, my climbing partner, Mike, and I were on Monkey and Engineer (5.10). Right next door, another climbing duo with another Mike was climbing Maiden Voyage (5.9). Therefore, our party agreed to communicate using Mike’s last name or the color of his rope, while the other party continued using Mike’s name.
This video really enforces the importance of using first names and concise language when climbing. Fun fact: As of this year, the instructor from the video, Lyra Pierotti, is now the 18th woman to become a fully certified American Mountain Guide/ IFMGA Guide.
When using radios, don’t chat
Call me crusty, but radios are not toys to chat about what’s happening. Instead, radios are tools you can use to deliver important information. When you overcommunicate with radios, you risk getting lost in translation.
One day, I overheard a climber radio down to his belayer, “I’ve reached the top of the pitch. I am going to build my anchor, go off belay, and then put you on belay. Also, did you see that awesome hawk fly over my head?”
The belayer responded, “Yeah, that hawk was awesome. You’re off belay!” A few minutes later, the leader radioed again, “Okay, anchor built, take me off belay.”
Distracted by the extra chatter from the leader about their process and the awesome bird, the belayer took the leader off belay before they asked to go off belay. This exposed the leader to a catastrophic accident because they were no longer on belay or attached to a new anchor system.
Fortunately, in this scenario, everything panned out okay. But I would have loved to see (and hear) the climbing team simplify their multi-pitch communication tactics.
For example, after the leader builds an anchor and directly attaches themselves, they should say “off belay.” Once they have prepared the rope and loaded it into their belay device, they should say “on belay.” Save the awesome hawk banter for when both members of the rope team are at the belay station.
Even when not using radios, concision is critical. Avoiding verbose language is imperative to guarantee that critical information is transferred from partner to partner. For example, when shouting at your partner, typically, the fewer words and syllables there are, the better.
Do more and overcommunicate less
When climbers are not adequately prepared for unplanned obstacles, they inevitably revert to overcommunicating to try and solve the problem. I see this all the time.
For example, a piece of gear is stuck, and the follower is shouting at the leader for tips on how to clean it. “It’s stuck. I can’t get it. How did you place it?” The leader responds, “What did you say? What piece? I can’t hear you! What?!” Meanwhile, highway traffic or a loud river rages in the distance, further complicating communication.
I also see over-communicating occur when a follower is stuck at the crux. They’re shouting for beta from the leader, throwing out sandbagging accusations. Up top, the leader is spraying beta into the void, “side pull … look for the jug up and left … there’s a hidden foot under the roof.”
In my experience, over-communicating commonly just causes more problems. Instead of shouting, the climber from the first example needs to work on freeing the gear independently. Always remember to bring a nut tool for these occurrences. If it’s really stuck, well, maybe it should just be left behind.
In the second example, the leader could reposition themselves so they can coach more clearly. If things are particularly dire, they could go into action, like hauling the climber through the crux. Or the climber could aid the sequence to keep the rope moving. Lastly, in a single-pitch setting, lowering the traumatized climber instead of forcing them to follow and clean the pitch is a worthwhile solution.
Do have a contingency plan when communication breaks down
Imagine this—the wind picks up, and you’re shivering at the belay, paying out little stretches of rope as your partner quests. They’re at least 65 feet (20 meters) away, above a roof somewhere and completely out of sight. You can hear them trying to tell you something, but with the worsening weather, any sort of reliable verbal communication is off the table.
We’ve all been there. Without having devised a contingency plan for this sort of communication breakdown, you might find yourself pretty puckered up. On the other hand, with a deliberate contingency plan in action, you’d be able to deal with this breakdown without breaking a sweat.
A contingency plan can help you remain in control when regular verbal communication isn’t possible. For example, standardizing how you plan to transmit information to each other silently, such as with rope tugs, can allow you to communicate without words.
Most importantly, your strategy should be dynamic enough to deal with changing conditions that may negatively impact your ability to speak with your partner. In the above hypothetical, we have the trifecta: a rope-stretching pitch, noise-obstructing features (big roof), and weather, like wind. In this case, deploying walkie-talkies could solve the breakdown.
But what if you don’t have radios, or your radios run out of battery? Make a plan for those scenarios, too.
Bottom line: Communication is critical
For some folks, rock climbing may be pretty casual or mundane. I admit: I feel this way, too, when I’m top-roping inside. The laid-back vibe of climbing could be why I see some of these communication breakdowns crop up. But this perspective is bound to cause trouble—especially when climbing partners don’t establish solid communication habits from the get-go.
The fact of the matter is communication is critical for safety when you tie into a rope with your partner, regardless of how mundane it may feel or who you’re climbing with.
Therefore, communication ought never to be taken for granted or considered mundane. Reliable and concise communication saves lives. Leave the breakdowns to Zeppelin.
The post Communication Breakdowns Can Be Deadly. These Pro Tips Will Help You Avoid Them. appeared first on Climbing.
]]>
These two self-rescue methods will help you safely extricate yourself if you miss a rappel anchor
The post Please Don’t Unclip and Downclimb After Missing a Rappel Anchor appeared first on Climbing.
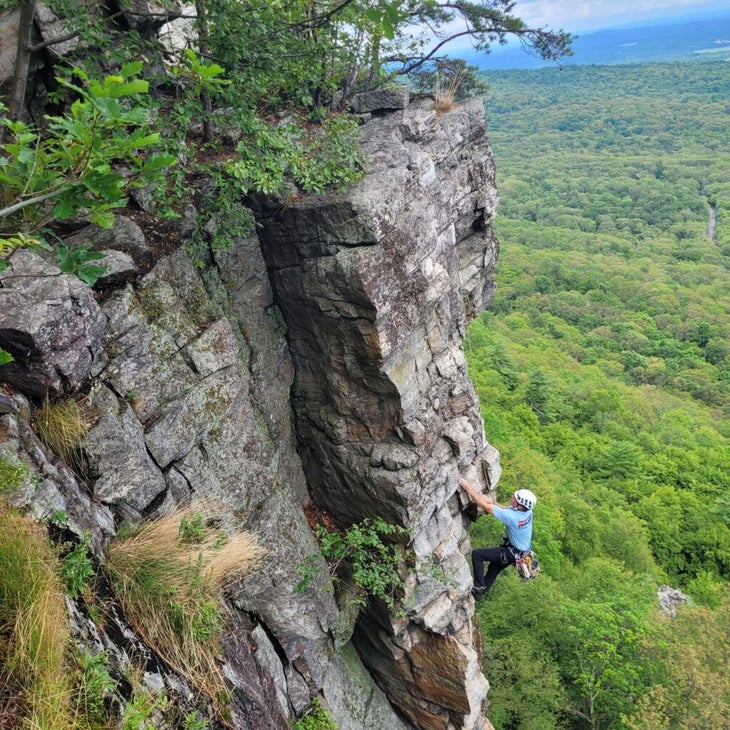
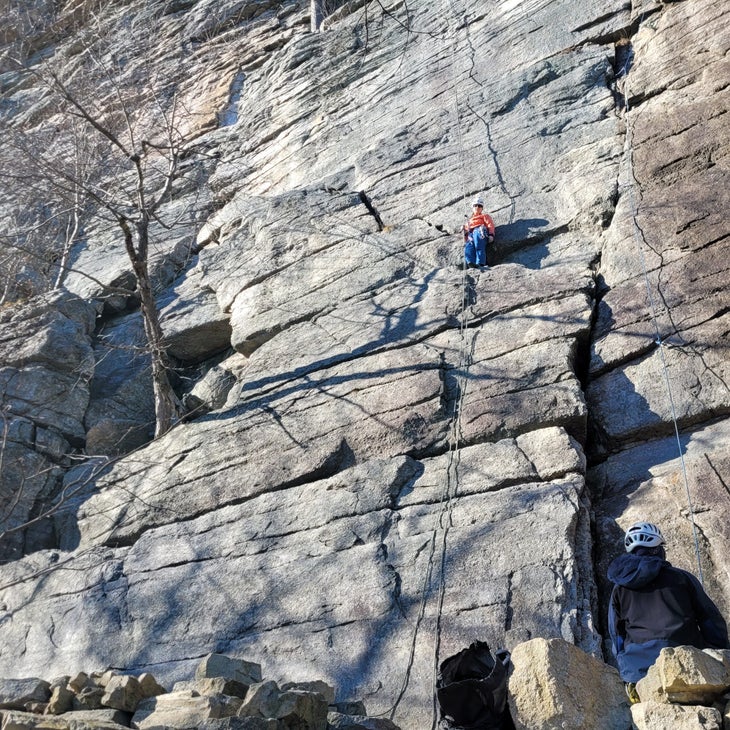
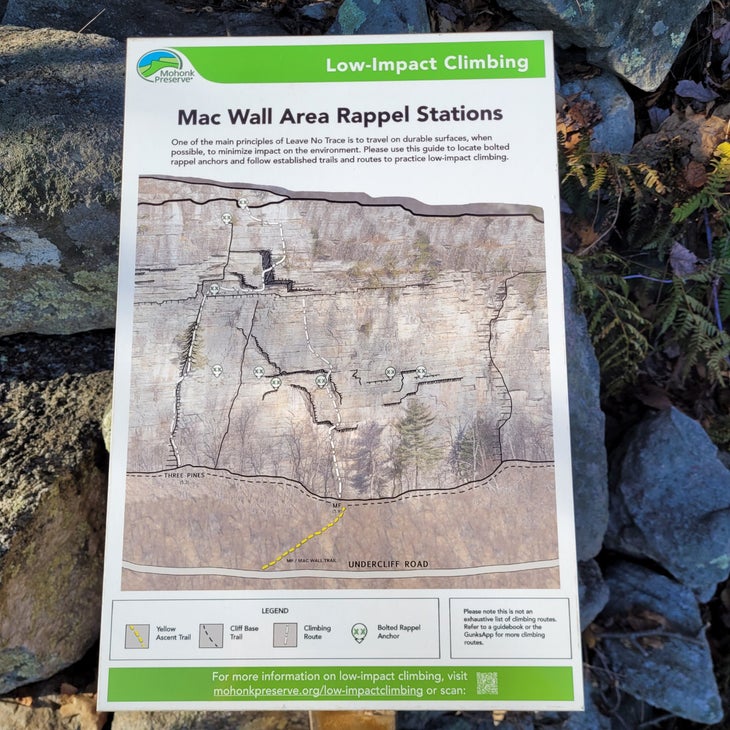
]]>I had just finished a day of guiding and was sitting at the base of MF, one of the Shawangunks’s most coveted 5.9s, when I heard a voice shout out somewhere behind me.
“Hey! I’m almost down, but our ropes are not on the ground,” one climber yelled up to their partner above them. “I’m not very high up, though, so I’m just going to come off rappel and downclimb.”
“Downclimb” sounded a lot like free solo, which sounded like an accident waiting to happen. An accident I’d inevitably have to respond to. So, with a strange feeling of selfish altruism, I walked in the direction of the shouting voice.
The two climbers were coming down the rappels for a classic Gunks multi-pitch called Three Pines (5.3). They had already completed one rappel and were in the middle of the second. There are three total raps. The first climber stood on a ledge 20 feet above the ground, well below the third rappel station they should have stopped at. Boulders littered the craggy base area directly below them. They had already taken themselves off rappel, the ropes dangling off to the side, out of reach. Their partner was still at the top of the second rap, out of sight, presumably rigging their device.
Trying to avoid being “that guide” at the cliff who inserts themselves into situations to spray down unsuspecting climbers with cunning cliffside beta, I asked if I could offer my opinion of how to get down safely. The climber accepted my offer, having begun to realize the precariousness of the situation they had put themselves in.
I advised them to sit down on the ledge. Since they had some cams on their harness, I also advised them to place a couple of pieces of protection in a nearby crack and connect themselves directly to them. Then I told the climber to relay the following information to their partner, who was now slowly descending.
“Please instruct your partner to stop at the correct rappel. It’s critical they also do not miss the third station. Then, tell them to rig a new rappel like normal. Once the ropes of the third rappel are rigged, we’ll swing them over to you. Grab control of both strands, put yourself back on rappel, and finish your descent.”
Within 10 or 15 minutes of my arriving on the scene, both climbers were back on the ground, and no one had to do any soloing. They explained that they had heard there was a third station but assumed their ropes would reach the ground after two rappels.
What To Do When You Miss a Rappel anchor
Method 1: Build an intermediate anchor and let your partner save you
If you’ve ever rappeled into the abyss, desperately scouring the cliff for the glint of a steel anchor system, only to finally glimpse that anchor way above your head, then you know how the climber I found at the Gunks might have felt.
Fortunately for them, there was a ledge to take refuge on and cracks to place gear. (Plus, they had knots in both strands, which mitigated the risk of rapping off the ends of their rope. Kudos to them.) This allowed them to deploy the relatively simple tactic I coached them through. Making themself safe with a trad anchor, taking themself off rappel to free up the ropes, and allowing the second climber to fix the situation by rappelling to the correct anchor, setting up a new rappel, and returning the ropes to the stranded climber. To perform this tactic safely, it’s important to know how to build bomber anchors and transition between two systems (i.e., the improvised anchor and the rappel) in a redundant fashion, and it should only be attempted by climbers with that experience.
But what if you’re on a steeper route with no ledges? What if there are no cracks to place gear? What if there is no heroic climbing guide at the base to help?
In that scenario, the best way to fix the problem is to ascend the rappel ropes.
Method 2: Ascend the rappel lines
Sometimes, when you miss a rappel station, you’ll find yourself stranded in a section of wall where there’s no option to build an intermediate anchor and carry out the solution outlined above. In this case, the best way to fix the problem is to ascend the ropes back to a height where you can access the appropriate anchor.
Ascending ropes safely requires an understanding of knots, friction hitches, and redundantly transitioning between systems. This process is slow going and can be physical, especially during a free-hanging rappel. It’s imperative to practice the skill in a controlled scenario before deploying it on a real climb. That said, how exactly you ascend the rap lines will vary based on (a) the rappel system you deployed to go down and (b) the extra equipment you carry on your harness. (Having a basic assortment of self-rescue gear is always a good idea for scenarios like these.)
Note: since the specifics of your system determine your options, it’s important you know how to ascend ropes using what you’ve got. I recommend this video to watch different demonstrations of ascending a rope with various tools.
One Common Way to Ascend Rappel Ropes
Let’s assume you’re performing a standard single rope rappel (i.e., two strands) with a tube-style device that has a guide-mode eyelet, is extended off your harness, and is backed up with a friction hitch. Let’s also assume you have at least a handful of locking and non-locking carabiners, a length of cordelette, or a double, triple, or quad-length sewn sling.
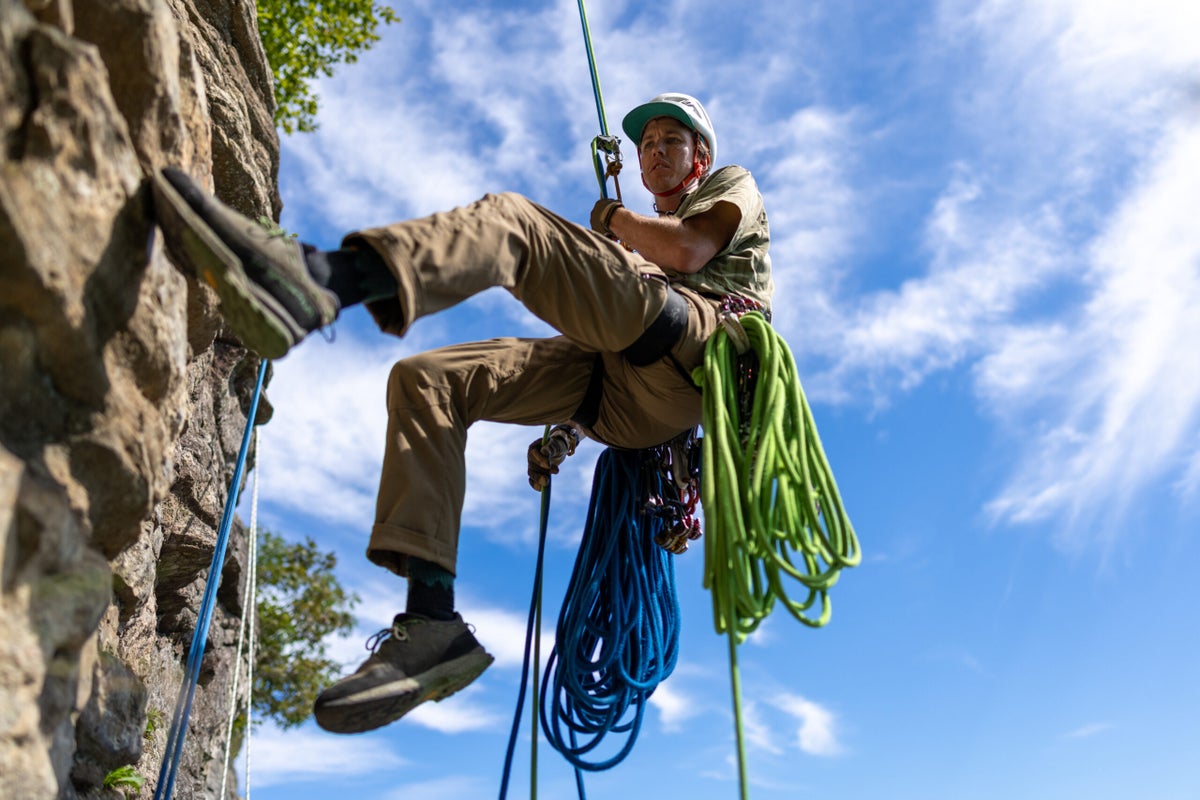
1. Increase security with a cat knot. To rig an ascension system, you’ll need to go hands-free. Your friction hitch backup allows you to do this, but it’s always a good idea to tie a cat knot (short for catastrophe) below the friction hitch for an extra layer of security.
2. Deploy an ascension device. Using a sewn sling, rig a klemheist (or any other friction hitch, including a basic prusik) on both strands above your rappel device. When pulled down under load, the klemheist grips the rope, allowing you to ascend; but when it’s not under load, you can smoothly slide the klemheist upwards. Check that it’s grabbing the rope (and not slipping) by tugging downward. The loop at the bottom of the sling will become your ladder.
3. Convert your rap device to guide mode. To do this, clip a locking carabiner in the guide mode eyelet of your rap device. Once that is pre-rigged, extend your klemheist up the rap lines above you. With one hand, pull down on your klemheist to get your weight out of the harness. (You may also need to step down into the ladder loop or onto the rock.) With the other hand, clip the locker into the belay loop and lock it.
With your rappel device in guide mode, it functions as a progress capture, meaning it captures the upward progress you make while ascending with the klemheist. With your device in this mode, you can remove the original third hand that was backing this process up. You can also either untie the cat knot or keep it for security.
4. Ascend the ropes. Once you’ve converted your device into a progress capture, you are ready to ascend the rap lines. Ascending the rope using this system involves a series of body weight transfers between your rope-grabbing klemheist and your harness. By transitioning back and forth, you effectively climb up the ropes.
Repeat the workflow until you’ve returned to the original rappel anchors you came from or until you’ve ascended to a high enough point where you can access the anchors you missed. As you ascend, consider tying more cat knots.
For visual learners, I recommend this video:
Practice Makes Perfect
Ascending ropes can feel uncomfortable and awkward at first. Therefore, it’s imperative to practice this skill in a controlled environment and as close to the ground as possible. There are also nuances to this system that take practice to learn. Play with how far you set your klemheist up the rope, the length of your ladder loop (it can be shortened by adding a knot, but not lengthened), the devices you deploy, and which limbs you step up and pull down with—everyone has their own preferences for these things. You should also know that terrain differences will impact your ascension process. This is much easier to do in low-angle, slabby terrain. In steep terrain, where you may be hanging in space, the process is a powerful abdominal workout. It’s a good idea to practice both.
Preventative tactics to avoid missing the rappel anchor in the first place
Missing a rappel anchor is not fun. It slows things down, and if you’re out on a big climb, it could mean you’re getting benighted or stuck in a storm, the two most common ingredients for an epic. It’s much more fun to rappel properly.
Consult the guidebook. Guidebooks are important resources of information and almost always contain beta about how to get down from multi-pitch climbs. Pay attention to how many rappels are called for, how long each rappel is, and their specific locations on the cliff.
Know how long your rope is. Nowadays, most people climb with 60- or 70-meter ropes. That means that with a standard single rope you can descend 30 or 35 meters per rappel. If the route beta calls for longer rappels than that, you’ll need two ropes.
It’s also important to consider whether the rope you’re climbing on has been shortened. If it’s your rope, you probably know whether it’s been chopped and by how much. But if it’s your partner’s rope, do you actually know its length? The factory stickers on the bitter ends of the rope will possess this information, assuming they haven’t been chopped or fallen off.
Be aware of shorter rappels. Not every rappel is full-length. Sometimes rappel lengths are shorter than you’d expect, either because of the cliff features or because rope lengths back in the day were shorter (this is especially common in older crags like the Gunks). In addition, sometimes, a short rappel sets you up for subsequent full-length rappels, like rapping from Table Ledge to Almost Table Ledge when descending the Diamond.
Not all rappels are straight down. In addition, not every subsequent rappel station is directly below the anchor above it. Sometimes, subsequent rappel stations are offset compared to where the descent line started to accommodate for terrain like rope-eating features or to reach a more comfortable stance. Therefore, if you zip down your rap lines like a secret agent and aren’t paying attention to the shiny bolted objects in the wall or colorful slings in the nearby tree, you may miss something, triggering a potential epic.
Always close your system and rappel with a backup
Missing a rappel anchor with a closed system (i.e., a barrel in each strand) and a properly functioning friction hitch backup so you can go hands-free is one thing. Missing a rap while free-snaking or rappelling without a backup is a completely different animal—one that could potentially chew you up and spit you out to the bottom of the cliff.
So when it comes time to rappel after summiting, practice good habits by closing your system and rappelling with a backup. On brand new routes where you are onsighting the descent, consider rapping with a portion of the rack just in case you need to build an anchor.
The post Please Don’t Unclip and Downclimb After Missing a Rappel Anchor appeared first on Climbing.
]]>