
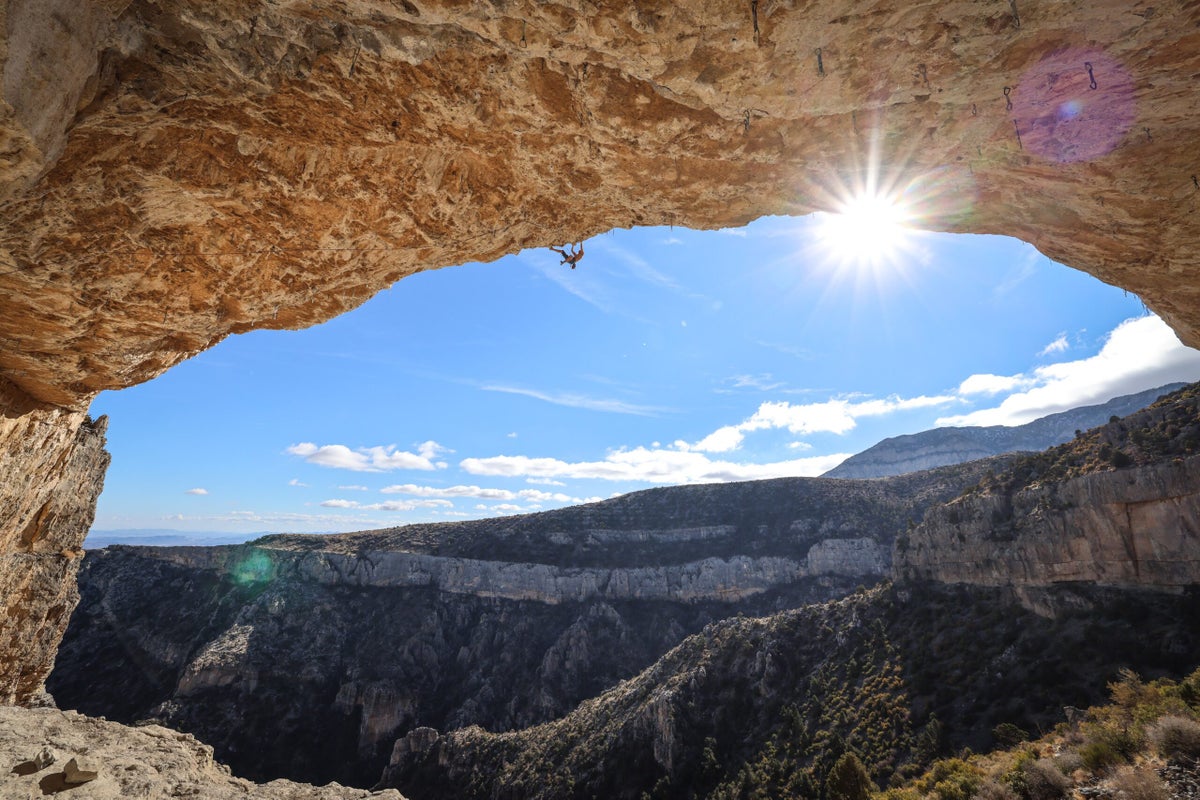
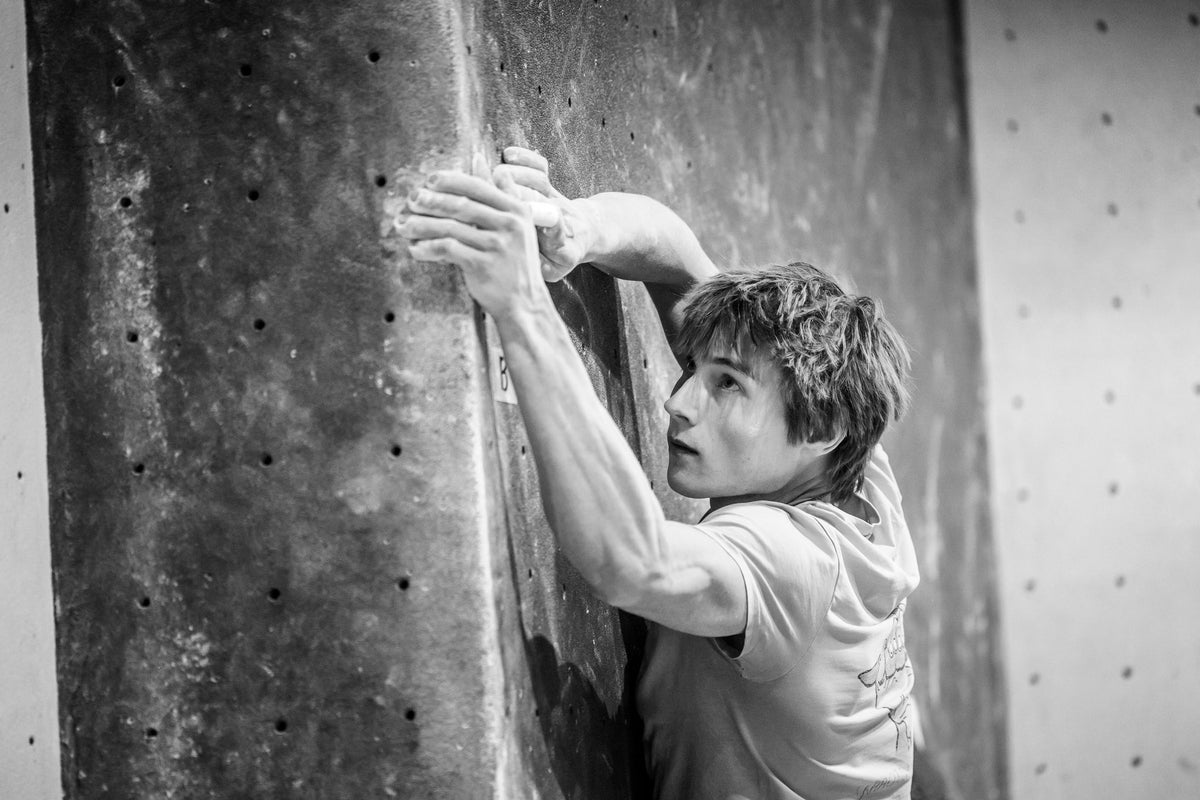
Whether your project is four bolts or forty, you’ve got to be able to hang on for the ride.
The post The Best Way to Gain Endurance for Sport Climbing appeared first on Climbing.
]]>This article is the final in a series of four. Read articles one, two, and three to get up to speed.
Over the course of this series I discussed all manners of training, from learning about our bodies’ three bioenergetic systems, to identifying weaknesses while projecting, to training the two factions of our anaerobic system (power endurance). Perhaps most important for sport climbers, however, is learning how not to get pumped silly while questing up sustained, overhanging pitches. Whether your project is four bolts or forty, you’ve got to be able to hang on for the ride.
The importance of aerobic training as a sport climber
Before I get into training for endurance, let me underline that aerobic training, in some climbing-specific form, must be done year-round. Our bodies’ are frustratingly slow to adapt to a higher aerobic threshold (think: years), but can lose those gains in a matter of weeks without training. Aerobic training should be seen as a career-long quest, that you can always improve upon, no matter how old—or how fit—you may be.
If you are serious about your aerobic growth as a climber, I recommend you perform at least one climbing-specific aerobic capacity workout per week throughout the year. (That is, unless you are injured, have a planned rest week, or have other extenuating circumstances.) Nonetheless, I cannot over emphasize the importance of building a wide aerobic base as a sport climber, regularly, throughout the course of your climbing career.
I recommend completing one of the following workouts below per week, year round, to effectively stress the climbing-specific aerobic (oxidative) energy pathway. Now, onto some training!
Aerobic capacity workouts
Spray wall endurance circuit: 2’ on, 4’ off, 4’ on, 6’ off, 6’ on, 4’’ off, 4’ on, 2’ off, 2’ on. (Keep pump underneath 6 or 7 out of 10 to focus on the aerobic system) Climbing intensity light-moderate.
This spray wall session is essentially a variation of an ARCing circuit that effectively targets the oxidative pathways in your climbing muscles. The climbing and rest periods are relatively short to begin, slowly grow, and subside over the course of the circuits. The key to this workout is to slowly build your pump to a moderate level, and maintain it. If at any point during the circuit you feel your pump reach a redline state, you should stop and rest on a jug or move to larger holds until you are back in that moderate zone.
Sport climbing for volume: Complete about 12 sub maximal climbs on your gym’s lead wall (three grades below your limit). Focus on flowing like a route climber and climb on terrain that brings you to a moderate level of pump as you ascend higher over the course of each climb. This session is also not intended to provide a blistering pump. Move to an easier route if this becomes the case at any point during your session. Rest approximately 10-15 minutes between each route.
Climbing “Double Laps”: The name of the game for this workout is to climb many routes a few grades below your projecting level. This workout is a more complex version of the above exercise, and involves more “time under tension .” Complete each route in your session twice (or one route and then a slightly easier route next to it for your second lap). Sport climbing “doubles” should look like: climb a route, and as soon as you lower, have your belayer pull the rope and then proceed to repeat the route again. The second lap should be aimed at managing your existing pump, and potentially even resting in positions you may not have needed to on your first. Rest 15-20 minutes between each round of double laps and aim to complete at least 6 rounds.
Aerobic capacity training in a bouldering gym
8 boulder circuit: Choose 8 boulders in the gym that are at 30-40 percent of your limit. Do each boulder with 20’’ of rest in between. After all 8 are completed, rest 20 minutes and repeat. Do 2-3 rounds in total. This climbing workout workout is great if your local gym does not contain sport climbing or if you couldn’t find someone to belay you.
Closing Thoughts
After reading this series, you now have a heightened understanding of your body’s three energy systems and how they pertain to different factions of your climbing game. Learning to effectively self assess your strengths and weaknesses as a climber (articles 1 & 2), and apply effective training to build upon these weaknesses (articles 3 & 4) should be a career-long endeavor if you want to maximize your potential for growth within your climbing. I hope to see you all during future training articles, but in the meantime please reach out to me with questions, comments, or concerns you may have when you take these concepts and apply them into your own training.
Until next time, stay psyched and climb on!
The post The Best Way to Gain Endurance for Sport Climbing appeared first on Climbing.
]]>
Coach and elite climber Cameron Hörst explains why climbers might not be strong enough for their project–and what training they should be doing instead.
The post Too Weak For Your Sport Project? Here’s What to Do About That. appeared first on Climbing.
]]>This article is the third in a series of four. Read article one and two—and check back next Monday for the final installation.
There are two types of strength sport climbers should be aware of: maximum power and power endurance. Maximum power draws from your body’s anaerobic alactic system (learn more about that here) while power endurance—high-intensity bouts of climbing up to about 90 seconds—calls on the anaerobic lactic system. Both types of strength are crucial for overcoming sport-route cruxes and I’ve written about them at length in the link above.
In this article, I will explain how you can train these two vital aspects of your body’s anaerobic energy production. No matter your climbing background, if you’re “too weak” to clip the chains on your project, you can nurture your body to a state of higher anaerobic capacity via a smartly designed training program. So let’s get to it!
Adding strength workouts to your climbing training
I typically recommend that climbers train in a climbing-specific manner max four days a week, and less if also climbing outdoors.
Beginner climbers should focus their gym time on actual climbing, while intermediate and advanced climbers should engage in doses of both climbing and targeted, climbing-specific training. Advanced and elite-level climbers may need to incorporate a couple of “two-a-days” per week—putting in up to six sessions over the four days of gym training per week. (If this sounds like you, please reach out to talk specifics. It is all too easy to overtrain during such an intensive schedule.)
Whether you’re climbing 5.11 or 5.15, focus each gym session on training a single energy system. You should target your weakest energy system with two sessions per week and at least one session per week for the other two energy systems.
Optimizing your training days is complex due to the fact that sport climbing demands physical prowess in all three of your energy systems—you need to be able pull hard moves and cruxes, but also recover at rests and climb through the pump after many moves of vigorous climbing.
Sport climbers should aim for one “max strength” session (anaerobic alactic focus), two “power endurance” sessions (anaerobic lactic focus), and one “aerobic capacity” session (oxidative focus) per week. Advanced and elite climbers who are deep in training mode should incorporate a couple of “two-a-days” per week, enabling them to train each energy system twice per week.
I have outlined a basic max-strength and power-endurance training program below. This is not a one-size-fits-all program—that’s never the case with climbing training. My intention is to present an effective, science-backed training philosophy, alongside some basic workouts to help get you started. To develop a personalized training program, I can’t recommend working with a professional coach enough.
Strength & power workout (alactic system focus):
This session will consist of near-limit movements and exercises, and therefore should always be performed following at least one rest day.
A few things to keep in mind while training the alactic system
- Complete a proper warm-up before beginning at-your-limit movements
- Your high-intensity exercises should last between two to ten seconds (up to 20 seconds if engaging in limit bouldering)
- Give a high-quality effort during each exercise and boulder attempt. Rest for a minimum of three minutes between exercises.
- End your workout when fatigue forces you onto lower-intensity exercises. Depending on training history, the duration of the actual alactic-focused training could be as little as 30 minutes and up to perhaps two hours. (Note: Performing limit exercises in a fatigued state tempts injury and compromises the effectiveness of your overall training program. Your goal is to consume the minimum effective dose of alactic training, not a body- and soul-crushing maximal dose!)
Examples of anaerobic alactic focused exercises
- Limit bouldering. Using a home woodie, spray wall, system board, or commercial bouldering set, select short, near-maximal problems that you can attempt (or send) in 5-15 seconds. You should not be on the wall for more than 20 seconds.
- Max-weight or minimum-edge hangboard training. I recommend doing either single, 10- to 12-second hangs (with 3 minutes rest in between) or the 7 on/53 off protocol (3 cycles of 7-second hangs followed by 53 seconds of rest) taking a full 3 minutes rest after the 3-hang set is completed. Either way, most folks should limit themselves to just 6 to 9 total hangs.
- No-hang max edge lifts. Consider repurposing some of your hangboard sessions into no-hang training. The training protocols are similar, but the novel strain and training stimulus of no-hang training benefits many well-trained climbers. The ForceBoard gauge by PitchSix is a great digital training device with SmartPhone real-time data and workout tracking.
- Limit bouldering. This session should be a full hour or two, rest well between attempts! For advanced climbers, I recommend the Tension Board 2 at 45 degrees or the Kilter Board at 50 degrees.
- Weighted pull-ups. Hang enough weight from your harness’s belay loop to make doing 5 reps of standard pull-ups challenging. Rest 3-5 minutes between each of the 5 sets. Elite-level climbers may be able to graduate to doing sets of 5 one-arm pull-ups.
- Campus boarding. This is a wonderful training tool if you’re strong and disciplined enough to use it properly. Exercises to consider using (but not in the same sessions!) are “Ladders,” “Touches,” “Lock-offs,” “Switches,” and “Double-Dynos.” Just 2-3 sets of 1-2 of these is plenty. Rest completely between sets—3 minutes at least. Warning: This advanced training tool has injured many climbers. Do not campus in a fatigued state. Do not campus if you’re uncertain of proper campusing technique and training protocols.
“Power-endurance” workouts (anaerobic lactic focus)
Power-endurance training sessions are the most pumpy and mentally grueling of a climber’s gym-training program. Engaging in repeated 20- to 90-second bouts of high-intensity exercise triggers sensations of pain and rising levels of fatigue. When properly programmed and executed, these training-induced stresses will yield gains in anaerobic capacity that really pay off on the rock! Performed infrequently—or too frequently, and in excess—these power-endurance sessions can lead to overtraining syndrome and decreased performance. (If you’ve ever noticed your climbing performance decrease despite “all your hard training,” you might now know why.)
After completing a thorough, progressive warm-up, your power-endurance training session should take between 30-90 minutes depending on your training history. Perform 1-3 of these exercises or climbing protocols described below.
Examples of anaerobic lactic focused climbing protocols
- 30/30 Intervals. This protocol is 30 seconds of all-out, max-intensity climbing (Rate of Perceived Exertion, or RPE, 9-10) followed by exactly 30 seconds of rest. Do 6 of these 30/30 intervals back-to-back, being sure to stick to this precise rest/climb interval protocol (use the timing app on your phone to get it right!). Then, take 10-15 minutes of rest, before firing into your second set of 6 30/30 intervals. Well-conditioned climbers can complete up to 4 sets of 6 30/30 intervals; elite climbers should consider wearing a 5-pound weight belt. Important: Do not climb set boulder problems. Instead, climb intuitively, “open-hold” style, on a spray wall, home woodie, or system wall. Use the smallest holds possible without falling off the wall. As you fatigue, use bigger holds and smaller arm moves to avoid reaching muscular failure before the 30-second interval is completed.
- Bouldering 4x4s. These offer a slower-paced and less-intense interval workout than the 30/30s. Begin by picking out 4 different boulder problems 2-4 grades below your max. For example, if you’re a V8 boulderer, pick out a couple V5s for this exercise. Here’s how to do it: Lap the first boulder 4 times in a row with a brief shake out and rechalk between goes. Your rest should roughly equal the amount of time you spent climbing, then hop back on the wall for the next lap on the same problem. After you’ve sent the boulder 4 times, take a 5- to 10-minute rest. Repeat this process on 3 more boulder problems, for a total of 4 ascents of 4 different boulders. Be sure to adjust up or down the grade of the boulders you climb—they should be challenging, but doable without falling. Tip: Interactive climbing boards (i.e. Kilter, Tension, etc.) are perfect platforms for 4×4s because of the ease of switching to a new problem within the proper target grade.
- 1’/4’ Intervals. This is another all-out protocol, similar to the 30/30 intervals detailed above. The difference here is a longer climbing interval (1 minute) which makes it more lactic (and pumpy). The 4-minute recovery between climbing burns allows partial, but not complete, recovery, so expect the fatigue to build over the course of doing 10 total 1/4 intervals. Be sure to make this physically hard, but technically straight-forward. Use the smallest holds and biggest arm moves possible (9 out of 10 RPE), but, like the 4x4s, toggle down the difficulty as you fatigue. Perform 1/4 intervals on a spray wall, system board, Treadwall, or bouldering wall.
- 20-move circuits on spray wall. I recommend this protocol to advanced sport climbers who need the physical capacity to do many hard moves in a row (as a simulator of long crux sequences in outdoor projecting). The key is to produce a limit, 20-move circuit that will really test your mettle. You can get as creative as you like with it—even mimicking the moves and sequences of your current project—but the circuit needs to totally power you out. For advanced climbers, I recommend adding a weight belt to drop the difficulty of individual moves without reducing the intensity. This way, the 20 moves are still hard, but also higher percentage. Do 3-5 sets of this 20-move circuit with a complete rest (>15 minutes) between burns.
- Route intervals. Once thoroughly warmed up, your goal is to give a few all-out efforts on two or three near-limit sport climbs. Pick routes that you’re not likely to flash, but have a good chance of sending on your second or third go. It helps to have a motivated partner (and good belayer) to take turns with. Rest at least 15-20 minutes between each attempt. Block out 2-3 hours for this session; you should aim for 4-8 quality attempts. Important: If a particular route is “shutting you down” or feels tweaky, immediately move on to another route.
Examples of anaerobic lactic focused exercises
- EMOM pull-up intervals. EMOM stands for “every minute on the minute.” In this exercise, you will do 5 pull-ups EMOM for 20 minutes. This makes for 100 total pull-ups. If you find this amount to be easy, then do 6 pull-ups EMOM for your next session! Increase as needed to make this protocol grueling.
- 7”/3” hangboard repeaters. Pick 3-7 grip types to train. In addition to the half-crimp and open-crimp grips, select a few others such as open hand, two-finger pocket (middle pair or inside pair), wide pinch, and narrow pinch. You will perform 1 (entry-level) to 3 (advanced) sets of repeaters with each grip position. Each set consists of 6 hang-rest intervals consisting of a 7-second hang and 3-second rest. Therefore, each 6-hang set will take about 1 minute. Add weight, as needed, to make each hang challenging but yet not so heavy that you can’t complete a set of repeaters. Rest 1-3 minutes between sets (limiting to 1-minute rest between sets will make this more lactic and grueling to perform).
- Campus board up-and-downs (large holds only). Using the largest rungs on a campus board, ladder up and down the board (using every rung or more every-other-rung) continuously for 20-60 seconds (hard). Rest 3-5 minutes before contemplating another set. Do 2-5 total ladder “up-and-downs.”
Looking forward
Now that I have walked you through various strength, power, and power-endurance protocols I challenge you to apply these concepts into your goal-directed training. In the fourth and final article, I’ll share how to train your aerobic energy system for resistance-style routes, and how to recover faster between boulders and routes. Until then, hit the gym, and try out a few of the power-endurance protocols detailed above!
The post Too Weak For Your Sport Project? Here’s What to Do About That. appeared first on Climbing.
]]>
Coach and elite climber Cameron Hörst highlights three all-too-common hang ups for sport climbers—and how to train them away.
The post 3 Common Projecting Mistakes and What To Do About Them appeared first on Climbing.
]]>This article is the second in a series of four. Read article one here—and check back next Monday for #3!
As a professional climber and coach, I see all sorts of projecting woes at the crag. Folks are too weak, too tired, too scared to fall, too scared to succeed. While each of these issues requires patience and keen introspection to overcome, weakness is generally the simplest to address.
If you are struggling to make links on your project, you have a weakness in one of your energy systems. (Check out this article for a debrief on the differences between Anaerobic Alactic, Anaerobic Lactic, and Aerobic.) Generally speaking, sport climbing demands that you optimize all three of your energy systems, since you must be able to power through severe crux moves while simultaneously resisting the fatigue of a sustained effort.
Any given sport climb, however, might have very specific demands that stress one energy system more than the other two. For example, an eight-meter “bolted boulder problem,” that you must redpoint in just 90 seconds, will call most heavily on the two anaerobic systems (alactic and lactic). Conversely, a 30-meter “resistance” route will be far more demanding on the aerobic energy system. Sure, your limited anaerobic reserves will be tapped for individual hard moves and sequences, but persevering for 10 or 20 minutes (or more) on a long, steep route is more of a test of your climbing-specific aerobic fitness.
Many climbers have a “weakest energy system.” Do you know which one is yours?
A weak system is the result of potentially favoring your most practiced form of climbing, your past and present ways of training, your sports history, and your genetics (i.e. are you fast-twitch or slow-twitch?). Let’s examine common signs and symptoms of a weak energy system. Reflect on your climbing struggles and see which sounds most familiar.
Scenario #1: “I’m unable to power through a short crux sequence.”
If you often feel underpowered on crux moves—or you can’t execute the single hardest move on a route—a weak anaerobic alactic system may be part of the problem. Of course, poor beta-recognition skills (or movement skills) might be preventing you from efficiently navigating those limit moves. But mental and technical skills aside, crux moves often have a high energy cost that you can only meet with a robust alactic energy system.
The solution: invest a few sessions per week into performing brief, high-power exercises such as 3- to 10-move limit boulders, max-weight hangboarding and pull-ups, near-limit campus boarding, and leveling up your core strength and stiffness. We will take a deeper dive into what this looks like in next week’s article.
Scenario #2: “I can’t link long, difficult sequences.”
If you frequently struggle to link long crux sections, then a weak anaerobic lactic system may be to blame. (Although, as I’ve said before, perhaps you’re powering out due to irrational fear, anxiety, overgripping, or improper pacing.) Assuming you’ve got smooth movement and a focused mind, the feeling of a rapid “power out” (i.e. the inability to climb hard, sustained movements for up to 60 seconds) is a sign of a relatively weak anaerobic lactic (glycolytic) system.
In absolute terms, the anaerobic lactic system is the least trainable of the three bioenergetic systems. However, over the short term (2 to 4 weeks) you can make meaningful relative gains in power-endurance through proper training. Therefore, a short block of focused lactic-system training might bump your anaerobic capacity enough to send your project sooner rather than later.
Climbing-specific interval training is the gold standard for leveling up your anaerobic lactic energy system. Intensity must be high (Rating of Perceived Exertion [RPE] of 8-9 out of 10) and the exercise duration should be 20 to 90 seconds, with a work-to-rest ratio of between 1:2 and 1:4. Commonly used exercises include bouldering 4x4s, Treadwall or spray wall intervals, hangboard repeaters, and pull-up intervals, to name just a few. I’ll provide a much deeper drill down on power-endurance training protocols next week.
It’s important to note that the above-mentioned lactic system training will not provide long-term gains by itself. Elevating your absolute anaerobic-lactic power output year over year demands simultaneously increasing your alactic (max strength) and aerobic power. Keep that in mind while you build your annual training program.
Scenario #3: “I struggle to recover at rests / I pump out near the chains.” (AKA You’re a punter!)
If either of these scenarios sound familiar, then your limiting physical constraints likely revolve around a weak climbing-specific aerobic base. No matter if your route is 15 meters or 30 meters tall, the majority of the energy powering you up the climb comes from the aerobic energy system. While you can rely on the anaerobic systems to get you through a short crux section or two, successfully climbing to the chains—and recovering at mid-route rests—is all about aerobic power.
A strong aerobic system demands a consistent, almost year-round commitment to high-volume climbing at least twice weekly. Like a runner training in their Zone 2, your goal of “Zone 2 climbing” is to climb many routes at or just below your flash level. Whether you do this at a sport crag, gym or home spray wall, the goal is to accumulate 30 to 60 minutes of actual climbing time on sub-maximal terrain.
Getting the intensity right is critical. Shoot for an RPE of 6-8 out of 10. Importantly, avoid climbs so hard that you get massively pumped or fall—these routes are too lactic and miss the target for effective aerobic-system training. Likewise, don’t waste your time on super easy routes that are mindless and effortless—there are no aerobic system gains from such low-intensity exercise. For experienced climbers, the aerobic training sweet spot is one to three letter grades below your current redpoint limit. Strive for a work-rest ratio of 1:1 or 1:2. Taking turns climbing and belaying with a partner is a perfect way to do this workout in the gym.
Final thoughts
Now that you have a conceptual understanding of your body’s three energy systems, you are empowered to accurately self-assess the root of your physical weaknesses as a route climber. Above I have outlined some basic training techniques for spinning up each energy system, and I will expand on each in future articles. Until then, happy climbing!
The post 3 Common Projecting Mistakes and What To Do About Them appeared first on Climbing.
]]>
Cameron Hörst highlights two common hiccups in multi-session projecting—and how you can put them to bed.
The post A Pro’s Advice for Short-Term and Long-Haul Projecting appeared first on Climbing.
]]>I often give uninspired attempts on my projects during the first few sessions—hanging on nearly every bolt—despite being a professional climber. To a bystander, it would seem unlikely that I would ever link the sequences of a steep, physical 30-meter cave route together into a send. But over 15-plus years of climbing, and actively studying the “art” of projecting, I’ve learned that the most important part of projecting is learning from my repeated failures. By incorporating this feedback, and dialing in my sequences and strategy, I often see rapid progress from my initial attempts.
So how do you craft an efficient redpoint strategy? And what happens when your project is truly at your limit? It’s all too easy to get stuck in a loop of failure that lasts weeks or months.
In this article, we’ll examine two scenarios common in multi-session projecting. Depending on your situation, the solution to sending may be technical and quick to remedy, or it may be physical and take a month, a season, or more to level up for the send.
Scenario #1: “Any Go Now!”—You’re close to sending the rig
This scenario is characterized by the “one-hang ascent”: often falling off before the anchor, a key rest, or at the end of the crux sequence. When you’re in this situation, don’t despair—instead, be stoked that with some tactical adjustments you are sure to send:
How to Send
Optimize Your Warm Up
A poor warm up equals a wasted attempt—and potentially a vicious flash pump that wrecks your entire day. By contrast, a slow, thorough warm up allows you to wield all the strength, power, and endurance you trained so hard to acquire.
Many climbers do a quick warm-up comprised of a few hangs, pull-ups, and stretches. While this might suffice for a sub-maximal route, success on a limit route demands that your alactic power is fully turned on and your aerobic energy system is fired up.
Turning on your finger strength and upper-body power is best achieved using a portable hangboard. Do a series of progressively strenuous movements such as dead hangs and pull ups. If you’re able, add weight or use progressively smaller holds as you feel your body turn on. Follow this with some shoulder and torso mobility work (for a route at my limit, I will do shoulder circles, neck rolls, sagital and lateral leg kicks). Finally, don’t forget to do at least one set of push-ups—vital for activating your scapular stabilizers.
Activating your aerobic and lactic energy systems is best done on an appropriate warm up (a route with a similar angle, but easier than your project) or going bolt-to-bolt on your project. Either way, be sure that this warm up ascent is strenuous enough to produce a moderate pump, but not a deep, exploding “flash pump.”
Refine Your Beta
Don’t fall into the trap of believing that the first beta you used is the best beta. If you’ve only put in a few goes on the project, there’s a good chance you can further refine your sequences and increase your efficiency of movement. Be sure to focus on non-crux sequences, too. These “filler” sections of a project are often overlooked on the hunt for beta, but they will decide how pumped you’ll be when you engage in the true crux.
If you’re faced with an especially long and/or complex crux sequence, commit to trying a half dozen or more hold and sequence variations. Get creative and a little crazy—this just might give you the beta breakthrough you need!
A final, huge tip: On your formative “working burns” on the project, try to identify the critical rest positions. Knowing the location of all the shake-out positions will allow you to leverage the powerful send-strategy of “sprinting from one rest position to the next.” Learn more about pacing here.
Improve Your Mental Game
This concept is simply too broad to thoroughly address here so I will provide some simple yet profound advice: Optimize your intentions before starting a redpoint attempt.
If you tend to carry a lot of nervous energy up a climb, take a few slow belly breaths to tamp down that inner buzz. Nix any thoughts of “needing to send” or fears of failing (again) by focusing on just the moves ahead of you. Better yet, before climbing, vow to “have fun” no matter the outcome. By letting go of outcome-oriented thoughts, you are liberated to climb your best and enjoy the experience. (Check out Climbing’s “mental training” page for more expert advice.)
Scenario #2: “I’m Getting Worked”—You’re Nowhere Near Sending
If you’ve already logged several days on the project, and progress is slow or imperceptible, then you’re likely in the midst of a long-haul adventure that will demand you become a better, stronger climber. Unfortunately, there is no quick fix to magically piece together a redpoint ascent.
If you’ve succeeded in doing all of the moves, but with many hangs, then you might be able to gain some momentum via the tactic of low-pointing—that is, linking progressively longer sequences up to the anchors. If gains remain slow, you might need to put the project on hold and return in a month or two as a stronger, fitter climber. If you are a relatively new climber (two years or less in the sport), your “training” may just mean improving movement efficiency, or garnering more confidence on lead (by lead climbing more often). However, if you are a rather experienced climber pushing your limit, I have some tips you can implement into your climbing specific training.
Heading back to the gym for some project-specific training is a smart move, but it involves much more than just hitting the hangboard. You need a sober understanding of your physical constraints, specific to your project’s demands. Ask yourself: Does the challenge revolve around doing a difficult boulder problem, or hanging on through a series of pumpy, submaximal sequences?
If it’s the former, then a strength- and power-training block, including limit bouldering sessions, will help you level up. I recommend two of these strength/power/bouldering (SPB) sessions per week, along with two maintenance endurance sessions (done on the day after your SPB session). On the other hand, if you’re failing to redpoint due to the aggregate load of climbing the entire route, then you need to level up your endurance. The pathway to better on-the-rock fitness is climbing more!
Make it your goal to climb four days per week, with at least three of these sessions spent mostly on a rope (gym or crag). Hitting the right training zone is the key here—your goal is not to try maximal routes on every session (a common mistake). Instead, execute two sessions of high-volume submaximal climbing (one to four number grades below your redpoint limit). Round out your week with one strength/power/bouldering session (as maintenance) and one near-limit session of route climbing. The latter is best done in a climbing gym on routes within one number grade of your limit.
After a one-month block of route-specific training, take a few “deload” days and then return to the project for a few attempts. How do you measure up? If progress remains elusive, then you may want to pick another project for the time being and set your sights on returning to the mega-project next season.
To wrap up
In the next article, we’ll dig deeper into energy system training. I will describe even more complex (and very common) scenarios you may face while projecting and the ways you can overcome them with strategic training. Then, at the end of the series, we will go through various climbing-specific exercises you can implement in your training to take your redpointing to a new level!
The post A Pro’s Advice for Short-Term and Long-Haul Projecting appeared first on Climbing.
]]>
Coach and elite climber Cameron Hörst explains how sport climbers in the 5.10-5.13 range should train for the crag.
The post A Simple Guide to Sport Climbing Harder appeared first on Climbing.
]]>This article is the final in a series of four. Read parts one, two, and three.
After last week’s focus on training for bouldering, now it’s time to focus on a sport climber’s differing needs. This training program will be a good fit for most folks climbing between 5.10-5.13 and addresses only the physical aspects of training—how to increase your strength, power, and endurance—but does not address the vital aspects of climbing technique, mental game, and nutrition.
Balancing Training Around Your Life
To improve as a sport climber, you will likely need to spend more time in the gym (or on the wall) than your bouldering counterparts. It is common for high-end sport climbers to spend a combined 10-20 hours per week training indoors and climbing outside. Finding this kind of time to commit to climbing—amidst a busy work, family, and social schedule—demands disciplined planning and execution.
Energy System Training for Sport Climbers
Under the tutelage of my father, Eric Hörst, I learned to schedule my training thoughtfully, rather than making it up on the go as many folks do. Here’s a quick overview of what my father taught me:
ATP (or adenosine triphosphate) is our muscles’ energy currency, and there are three bioenergetic systems that produce ATP for climbing.
- Anaerobic alactic: Provides instant power for brief near-maximum intensity movements up to 10 seconds.
- Anaerobic lactic (a.k.a glycolytic): Provides a rapid supply of ATP to sustain high-intensity movements, between 45-60 seconds, before a rapid power down and “pump” begins to develop.
- Aerobic (oxidative phosphorylation): The aerobic energy system takes over as the primary source of ATP production about 60 seconds into sustained exercise or climbing—and can continue for hours. The aerobic energy system is the motherlode of enduring power that gets you through very long boulders, sport routes, and multi-pitch climbs, and supports faster recovery too.
Training for Sport Climbing: It’s Complex & Time Consuming!
Training for sport climbing is complex because, unlike bouldering, you cannot simply try moves at your limit, hangboard, and strength train and expect to bump up your redpoint grade.
In sport climbing, all three energy systems come into play—but to different extents depending on a climb’s nature. A short, steep three-bolt route will be far more anaerobic than a 100-foot resistance climb, which pulls from the aerobic energy system. Ultimately, to excel in sport climbing, you need to train all three energy systems so they are on call for the demands of any given route: Powerful individual moves will be powered by the alactic system, the anaerobic lactic system ensures you connect pumpy sequences together, and the aerobic energy system will help you recover mid route.
Most sport climbers are comparatively weak in one of the three energy systems compared to the other two. To decipher which one is your limiting constraint, ask yourself: Do I struggle most with individual hard moves (anaerobic alactic), linking longer crux sequences (anaerobic lactic), or connecting the full route together (aerobic)? If you identify a disproportionately weak energy system, then be sure to target it twice per week during your dedicated gym-training weeks.
Scheduling Your Weekly Workouts
I recommend doing one alactic workout (limit bouldering and near-limit exercises), one anaerobic lactic workout (power-endurance climbing and exercises), and two aerobic system sessions (sub-maximal route climbing) each week. This Daily Undulating Periodization (DUP) schedule could be executed like this:
- Tuesday: Alactic workout
- Wednesday: Aerobic climbing workout
- Thursday: Rest
- Friday: Rest or generalized training (antagonist exercises, running, and core)
- Saturday: Anaerobic lactic workout
- Sunday: Aerobic climbing workout
- Monday: Rest or generalized training
The tenets of DUP training are that you never train the same energy system on consecutive days and, if you are doing two-a-day training (common among more advanced climbers), you must separate the training of the two different energy systems by at least six hours. For example, you might perform a limit bouldering session (alactic) in the morning or midday, then in the evening engage in either a power-endurance (lactic) or capacity climbing (aerobic) session.
Assuming sound day-to-day nutrition and recovery practices, you might be able to repeat this DUP program for up to eight weeks, before taking a deload week or tapering your training ahead of a road trip.
Now, let’s get into some training!
The Workouts
Following are three distinctly different workouts, designed to target a specific energy system. They are each standalone workouts, so do not combine them in a single session.
Limit Bouldering & Strength/Power Workout (Anaerobic alactic focus)
- Progressive Warm-up
- Engage in at least 20 minutes of warm-up activities, including dynamic stretching of major muscle groups, some bodyweight pull-ups and push-ups, TRX trainer Y’s, I’s, and T’s and/or rotator cuff dumbbell exercises, and then conclude with a few fingerboard hangs (5-10’’ body weight hangs on a 20mm edge). If you are a more advanced climber, you should finish the warm up by conducting one set of up-and-down laddering on a campus board.
- Limit Bouldering Pyramid
- Sport climbers should focus on building the capacity to do several near-limit boulders (and anaerobic alactic recovery) rather than projecting a boulder at their maximum difficulty. Here’s how to do it.
- Whatever your current “session limit” boulder grade is, begin the pyramid four V grades below it. For example, if you can climb V8 in one session, begin this pyramid with three V4s.
- Next do two V5s, two V6s, and then one V7 (give it a few tries, then continue on).
- The top of the pyramid is V8, so spend 10-15 minutes projecting one V8.
- After 15 minutes on the V8, begin your journey back down the pyramid by climbing one more V7 (~3 tries), one V6, one V5s, two V4s, and finally two V3s.
- Rest 3 minutes between each boulder, and attempt, and this entire pyramid will take about 90 minutes.
- Max Hangboard Training
- Do two sets of weighted near-limit hangs using the seven second on/53 seconds off x three-hang protocol:
- Do a 7-second weighted hang on a feature that you can barely hold for 10 seconds with near-maximum effort (select added weight appropriately). I recommend using 14-20mm edges and a half-crimp or open-crimp grip. Rest for exactly 53 seconds, so that each hang-rest couplet takes exactly one minute. Do two more hangs following the above protocol. Each hang should be near maximal, but not quite take you to failure…except, perhaps, on the third hang of a set. After doing the first set of three hangs, rest for five minutes before doing a second set of three hangs. Increase the added weight as needed to keep this exercise “near limit.” Note: If the bouldering pyramid left you exhausted or with achy fingers, then you must skip this exercise.
- Do two sets of weighted near-limit hangs using the seven second on/53 seconds off x three-hang protocol:
- Pull-Up: 5×5 Protocol
- Do five sets of five pull-ups with a 3-5-minute rest between sets. Add enough weight to make each set challenging.
- Core Training
- Perform three core exercises that target different aspects of the large torso muscles (e.g. Deadlift (three sets of five reps), Front Lever, and Windshield Wipers).
Power-Endurance Workout (Anaerobic lactic focus)
- Progressive Warm-up
- Engage in at least 20 minutes of warm-up activities, including dynamic stretching of major muscle groups, some bodyweight pull-ups and push-ups, TRX trainer Y’s, I’s, and T’s and/or rotator cuff dumbbell exercises, and then conclude with a few fingerboard hangs and, for the more advanced climbers, one set of up-and-down laddering on a campus board.
- Power-Endurance Interval Training
- Perform only one of the following interval training protocols:
- Bouldering 4x4s: Select a moderate boulder problem and climb it four times in four minutes. The ideal boulder would take 30 seconds to climb followed by a 30-second rest. After sending it four times, take a five-minute rest. Next, select a second problem and climb it four times using the same protocol. Continue in this manner, decreasing the difficulty if needed, until you’ve climbed four different boulders a total of four times each. Note: A more advanced climber could take a 20-minute rest and then repeat the 4×4 protocol a second time.
- 30s/30s Intervals: Perform these intervals on a spray wall or treadmill, not on established boulders. You are going to climb intuitively with the hardest movements you can manage (without falling or reaching premature failure) for 30 seconds. Rest exactly 30 seconds, before launching into your next all-out 30-second climbing interval. Continue for a total of six 30/30 intervals. One set will take six minutes if you time your intervals precisely. Now rest for 10-15 minutes before performing a second set of 30/30 intervals. Advanced climbers can do up to four sets (a total of 24 intervals). Note: Each interval should be “all out.” Use small holds and bigger moves when you’re fresh, then move to better holds and easier moves as fatigue grows.
- Perform only one of the following interval training protocols:
- Route Projecting
- Partner up and take turns projecting gym routes near your limit for up to two hours. Strive to make high-quality efforts with each go ending with either a fall or clipping the chains. Rest 10-20 minutes between each attempt or send. By its nature, this near-limit route climbing is very lactic (pumpy) but also draws heavily on the aerobic energy system.
- “Frenchie” Pull-ups
- Using a pull-up bar (palms-away grip), pull your chin above the bar and lock-off with your hands against your chest for a four-second count. Lower yourself to a straight-armed position, and then immediately pull up to the top position again. This time, lower yourself only halfway and lock-off at a 90-degree angle. Hold this position for four seconds, then lower yourself to the bottom. Pull up a third time, and lower yourself about two-thirds of the way (elbow angle of 120 degrees) and hold here for another four-second lock-off. Lower to the bottom position to complete the first cycle. But don’t stop here—immediately begin a second cycle of Frenchies: pulling up three more times with four-second lock-offs in each of the three positions. Continue through a third and fourth cycle, if you’re able. Stop when you can no longer perform a full pull-up or hold the lock-off. Rest for five minutes, then perform a second set of Frenchies.
Climbing Capacity Training (Aerobic system training)
- Warm-up
- Complete 15 minutes of warm-up activities, including 5-10 minutes of generalized aerobic warm-up activity (treadmill, rowing, stationary bike), a set of bodyweight pull-ups and push-ups, and a bit of dynamic stretching or other mobility work.
- Submaximal High-Volume Route Climbing
- The goal is to climb as many routes (or aggregate feet) as possible over 1-2 hours without falling. Therefore, the climbing must be very submaximal with nothing more than a mild to moderate forearm pump. Select routes between 1-3 full number grades below your redpoint limit. For example, if 5.12 is your redpoint limit, then climb routes mainly between 5.9 and mid-range 5.11. If climbing on an auto-belay, rest for 5 minutes between climbs. Otherwise, partner up and take alternating turns at lead climbing. To get the intensity right, think of this climbing workout as the equivalent of going for a “zone 2” run. Your effort should be steady, but moderate—never approaching “try hard” territory. Begin by climbing around 400 feet of wall in a session, but build towards 800 feet or more over a year of training.
- Plank Core Circuit
- Do two sets with a 10-minute rest in between.
The post A Simple Guide to Sport Climbing Harder appeared first on Climbing.
]]>
Coach and elite climber Cameron Hörst explains how boulderers in the V3-V9 range should train for the blocks.
The post A Simple Guide to Bouldering Harder appeared first on Climbing.
]]>This article is the third in a series of four. Read parts one, two, and four.
Developing a “perfect” personalized training program is an endless journey—and my passion as a coach. In this article, I present a blueprint for training a boulderer in the V3-V9 grade range. Beginner and elite boulderers, however, have unique needs that require a more nuanced program than I offer below. For example, a V12 boulderer will likely need more high-end strength and power training, and a larger workload, than I prescribe here.
Energy System Training for Bouldering
ATP (or adenosine triphosphate) is our muscles’ energy currency, and there are three bioenergetic systems that produce ATP for climbing.
- Anaerobic alactic: Provides instant power for brief near-maximum intensity movements up to 10 seconds.
- Anaerobic lactic (a.k.a glycolytic): Provides a rapid supply of ATP to sustain high-intensity movements, between 45-60 seconds, before a “pump” begins to develop.
- Aerobic (oxidative phosphorylation): The aerobic energy system takes over as the primary source of ATP production about 60 seconds into sustained exercise or climbing. While the instantaneous power output of the aerobic system is at best about one-third of the anaerobic alactic system, the duration of aerobic energy production can continue for hours. The aerobic energy system is the motherlode of enduring power that gets you through very long boulders, sport routes, and multi-pitch climbs. The aerobic energy system drives all muscle recovery, whether it’s an on-climb shakeout or on the ground between boulders or routes. It’s important to recognize that a strong aerobic energy system supports faster recovery between bouts of climbing—of any kind.
Given that most boulder problems (or attempts) last between a few seconds up to perhaps a minute, it’s the two anaerobic systems that yield the vast majority of a boulderer’s ATP. As a result, bouldering specialists can have a narrower scope of training than a route climber (who needs extensive aerobic energy system development). Boulderers can level up their two anaerobic systems through climbing-specific protocols that include: 1) near-limit movements on the wall, 2) brief max-strength/power exercises, 3) power-endurance training (anaerobic lactic) with bouts of pumpy climbing lasting 30-60 seconds.
We know that the best training results come from targeting one energy system per workout, rather than trying to train all three in a single session. Embracing this strategy allows you to select climbing and training activities that hit the bull’s eye of the session target (alactic, lactic, or aerobic system development).
In the context of a single week, I recommend scheduling two alactic-focused workouts (limit-bouldering and near-limit exercises), one or two anaerobic lactic workouts (power-endurance climbing and exercises), and one aerobic session (route climbing, sub-maximal spray wall climbing, ARCing). This system of cyclic energy-system training is often referred to as Daily Undulating Periodization (DUP).
The tenets of DUP training are that you never train the same energy system on consecutive days and, if you are doing two-a-day training (common among more advanced climbers), you should separate the training of the two different energy systems by at least 6 hours. For example, you might perform a midday limit bouldering session (alactic), then in the evening engage in either a power-endurance (lactic) or capacity climbing (aerobic) session.
Assuming sound day-to-day nutrition and rest practices, you might be able to repeat this DUP program for 4 to 6 weeks, before taking a deload week or tapering your training ahead of a road trip.
The Workouts
Here are three distinctly different workouts, each designed to target a specific energy system.
Limit Bouldering & Strength/Power Workout (Anaerobic alactic focus)
- Progressive warm-up: Engage in at least 20 minutes of warm-up activities, including dynamic stretching of major muscle groups, some bodyweight pull-ups and push-ups, TRX trainer Y’s, I’s, and T’s and/or rotator cuff dumbbell exercises, and then conclude with a few fingerboard hangs and, for the more advanced climbers, one set of up-and-down laddering on the large holds of a campus board.
- Limit bouldering: This is the meat of the workout: 60-75 minutes of limit and near-limit bouldering and/or system boarding. It’s vital to make only high-quality, full-power efforts, so be sure to rest for 3-5 minutes between goes. End your bouldering before you reach a state of total exhaustion. If you find yourself reaching this state of high fatigue, then end your session now and do none of the additional exercises below.
- Max hangboard training: Do 3 sets of weighted near-limit hangs using the 7 seconds on/53 seconds off’ protocol. Here’s how to do it: Do a 7-second weighted hang on an edge that you can barely hold for 10 seconds with near-maximum effort (select added weight appropriately). I recommend using between 14-20mm edges and a half-crimp or open-crimp grip. Rest for exactly 53 seconds, so that each hang-rest couplet takes exactly 1 minute. Do two more hangs following the above protocol. Each hang should be near maximal, but not quite take you to failure…except, perhaps, on the third hang of a set. After doing the first set of three hangs, rest for 5 minutes before doing a second set of three hangs. Do a third set of hangs after another 5-minute rest. Increase weight-added as needed to keep this exercise “near limit.”
- Pull-up: 5×5 protocol: Do 5 sets of 5 pull-ups with a 3-5 minute rest between sets. Add enough weight to make each set challenging. Important: Only do the weighted pull-ups and weighted hangs if your preceding bouldering session was not exhaustive!
- Core training: Perform three different core exercises that target different aspects of the large torso muscles (e.g. Front Lever, Windshield Wipers, and Decline Crunches). Rest 3 minutes between each exercise and do this to 80 percent of failure.
Power-Endurance Workout (Anaerobic lactic focus)
- Warm-up: Engage in at least 20 minutes of warm-up activities, including dynamic stretching of major muscle groups, some bodyweight pull-ups and push-ups, TRX trainer Y’s, I’s, and T’s and/or rotator cuff dumbbell exercises, and then conclude with a few fingerboard hangs and, for the more advanced climbers, one set of up-and-down laddering on a campus board.
- Bouldering 4x4s: Select a moderate boulder problem and climb it 4 times in 4 minutes. The ideal boulder would take 30 seconds to climb followed by a 30-second rest. After sending it 4 times, take a 5+ minute rest. Next, select a second problem and climb it 4 times using the same protocol. Continue in this manner, decreasing the difficulty if needed, until you’ve climbed 4 different boulders a total of 4 times each. Note: A more advanced climber could take a 20-minute rest after completing 4 boulders and then repeat the 4×4 protocol a second time.
- 1 minute on/4 minutes off spray wall intervals: Do this exercise in place of bouldering 4x4s, not in addition to them. Climb the hardest moves you can manage (given the growing pump) for exactly 60 seconds. Rest 4 minutes before starting your next burn. At the start of your training plan, do 6 sets in a session, but add one more set per session until you reach 10 sets of 1 min/4 min intervals. Going forward, instead of doing more sets, add weight via a 5-pound weight belt/vest or a pair of 1- or 2-pound ankle weights.
- Pull-up endurance protocol: Do 5 pull-ups per minute for 10 minutes to reach a total of 50 pull-ups. Each set of 5 pull-ups may take 10 seconds, so rest exactly 50 seconds before beginning the next set. During your next workout, add one more set of pull-ups—that is, 11 sets of 5 pull-ups. Keep increasing by one set per session until you reach 20 sets of 5 pull-ups. After you’ve reached 20 sets, increase your reps to 6 pull-ups per set.
Climbing Capacity Training (Aerobic system training)
- Warm-up: Engage in 15 minutes of warm-up activities, including 5 to 10 minutes of generalized aerobic warm-up activity (treadmill, rowing, stationary bike), a set of bodyweight pull-ups and push-ups, and a bit of dynamic stretching or other mobility work.
- Volume bouldering session (submaximal): To achieve the correct intensity, you must be disciplined to climb on easy boulder problems only. As a rule, your effort should never be more than a 5 out of 10, and you should never feel at risk of falling off the boulder. Aim for around 30 boulders over an hour—about one boulder every two minutes. If you find yourself getting winded or more than mildly pumped, then the boulders are too hard (and too anaerobic).
- Plank core circuit: Do two sets with a 10-minute rest in between.
Balancing Training Around Your Life
Since you are a passionate climber striving to become stronger year after year, you must refine your everyday life to allow for an escalation in your training and commitment to climbing. I ask myself each year: “What can I sacrifice to have more time, energy, and resources to dedicate to training and climbing?” It’s also important to consider how you can optimize your nutrition and sleep habits (Am I constantly eating junk food? Not sleeping eight hours?) to build a more resilient body that recovers faster and allows you to crank harder!
The post A Simple Guide to Bouldering Harder appeared first on Climbing.
]]>
Coach and 5.15 climber Cameron Hörst explains why—and how—climbers should perform a self-assessment protocol.
The post Before You Start Your Training Plan, Do This appeared first on Climbing.
]]>This article is the second in a series of four. Read parts one, three, and four.
Part 2: Self-Assessment to Optimize Your Training
Developing an effective climbing training program begins with an accurate self-assessment of your strengths and weaknesses on the wall. But gaining a clear understanding of your weaknesses is easier said than done. For example, many climbers conclude they aren’t strong enough because they get pumped quickly on a near-limit climb. But perhaps they fatigue prematurely due to “energy leaks” caused by their lackluster footwork, poor movement skills, and fearful mind. In this case, leveling up technical and mental skills will yield a quicker increase in climbing ability than, say, engaging in a block of dedicated finger training.
Obtaining an accurate assessment of your climbing could be as easy as scheduling a session with a veteran climbing coach. A professional’s well-trained eye will quickly point out the critical flaws that are most holding you back. Align your training program to address these technical and physical weaknesses and you will be on a fast track to improvement.
Many climbers, however, don’t have access to a veteran coach to highlight their flaws. This is where the magnifying glass of a multi-pronged self-assessment comes in handy.
Conducting a Detailed Self-Assessment
As I described in the first article in this series, our sport is uniquely complex for both athletes and coaches because we have so many performance variables at play. It is therefore difficult to outline a self-assessment protocol that sleuths out your critical weaknesses—but it can be done. Who knows, perhaps we can even identify an unknown Achilles’ heel.
Your self-assessment must examine four primary areas: technical skills, mental and tactical skills, physical fitness, and recovery/nutrition practices. Each of these four areas is quite complex on its own and worthy of deep analysis not possible in this article’s word count. So consider my instructions as a starting point for examination of each area. Hopefully, you (or a qualified coach) can continue to drill into each area in the seasons to come.
1. Technical Skill Assessment
Self assessment of your technical and movement skills is best accomplished via video analysis. Make a habit of setting up your phone on a tripod to capture footage of every near-limit boulder problem and route you attempt. Do this for a few weeks, being sure to sample a wide range of climbing styles, wall angles, hold types and, if climbing outside, rock types. The goal is to gather dozens—if not hundreds!—of boulders and climbs. Capturing failed attempts is as important as the glorious sends. Save them all.
The large screen of a laptop is much better for detailed viewing, so move all of the files from your phone to your computer and organize them into folders according to route type and style. Now, get to work with your sleuthing for technical flaws and common themes of your flailing, failed attempts. Disassociate from the climber on the screen and analyze what you see without emotion—this way you can be brutally honest in your assessment.
Focusing mainly on the episodes of “failure,” ask yourself a series of probing questions:
- How would you score the climber’s footwork on a scale of 1 to 10? Consider if it’s decisive and precise, or unsure, noisy, and/or sloppy.
- How would you score ease of movement? High-quality movements tend to look smooth and “easy,” even on crux moves, whereas tight and jerky movements are generally inefficient and low scoring.
- How would you score the pace of climbing? Of course, the optimal pace varies by route, so this is a bit more tricky to judge, especially on slabby climbs when you can stand on your feet for a long time. Overhanging routes, however, generally have two speeds: slow while at rests on larger holds, and faster when the holds get smaller and the wall steepens. Given enough video in your collection, you may be able to score technical skills in various subtypes of climbing, such as cracks, roof, slabs, and such.
2. Mental Skill Assessment
The mental domain is the most challenging for a coach or climber to assess, and an in-depth assessment is beyond the scope of this article. But here are two tips to get the process started.
- After every boulder or climb (success or failure), take a moment to turn your thoughts inward. Reflect on the critical moments of the climb—what thoughts and emotions did you feel? What thoughts helped or hurt your performance? In what ways could you have improved the quality of your thinking, self-talk, and fear management? Take notes and look for common threads that connect your successful ascents and distinguish them from unsuccessful attempts.
- Use video analysis to revisit past climbing struggles. If it was a safe boulder or route, did you fall trying, or “take” quitting? In reviewing the video, try to remember how you felt, what you were thinking and, if possible, what issue was holding you back from making a better effort. Now, consider how you could have reframed your struggles and thoughts in more empowering ways.
3. Physical Fitness Assessment
A veteran coach can put you through a variety of tests to assess many aspects of climbing-specific and generalized strength, power, and endurance, as well as mobility and flexibility. I’ll provide you with five simple tests to measure a few key climbing-specific metrics. All you need is a pull-up bar and hangboard. Repeat these tests every few months to gauge your progress.
To get the most accurate results do a thorough warm up before every round of testing, and be sure to rest at least 15 minutes between each test.
- Max pull-ups to failure. The benchmark exercise for strength-endurance of the pulling muscles. Test using a pull-up bar with a palms-away grip and hands about shoulder-width apart. Do a full range of motion—no half reps and no resting mid-set!
- Weighted pull-ups (five-rep max). This test is an excellent measure of pulling strength, without the stress of doing a true one-rep max strength test. You’ll need to do a few sets with increasing weight to determine your five-rep max.
- Max weighted hang (five seconds). This is the benchmark measure of maximum finger strength. Use a 20mm edge in a half-crimp position. Like the previous test, you’ll need to experiment with increasing the added weight to determine your max weight.
- Body weight hangs to failure. This test is one way to measure the anaerobic endurance of the finger flexor muscles. Use an open-crimp or half-crimp grip on a 20mm edge and hang until you can’t hang anymore!
- Five seconds on, five seconds off repeater hangs (to failure, 20mm edge). This test is a good measure of your finger flexor muscle aerobic endurance. Precise intervals are critical—strive to hit the five-second hang and five-second rest intervals spot on. I recommend using a stopwatch app on your phone. Since each hang+rest interval takes 10 seconds, you will do six hangs per minute. Continue as long as possible—channeling your redpoint mindset!
4. Nutrition and Recovery Practices Assessment
Nutrition and recovery are rich topics requiring a book of their own to adequately cover. But suffice it to say, even with the best training program you can fail to benefit fully from it due to inadequate sleep, poor-quality nutrition, and not enough rest days. My advice: strive to get more educated and be on point with your sleep and nutrition—they are both powerful levers for multiplying your efforts at the gym and crag!
Conclusion
You’re now armed with a self-assessment protocol to identify the key constraints on your climbing performance. Narrow the aim of your training on these critical areas, and you’ll begin the leveling-up process! Remember to physically assess yourself (in the above categories) every couple months to gauge your strength/endurance progression.
You can also perform these assessments at the beginning and end of a training block to test the effectiveness of your training. For example, if you realize one of your individual weaknesses is strength and power, and spend a month trying to increase this through vigorous hangboard, bouldering and pull-up protocol, then you should see your weight for the max-hang and weighted pull-up (five-rep max) increase. Or if climbing-specific muscular endurance is your weakness and you spend a month or two trying to train it up, then by the end of the training block you should see your ability to do body weight hangs to failure and body weight pull-ups to failure increase. The next two articles will provide training templates to help you get the job done right.
The post Before You Start Your Training Plan, Do This appeared first on Climbing.
]]>
Coach and 5.15 climber Cameron Hörst explains how to develop a training program for 5.10-5.13 climbers.
The post Stuck Climbing the Same Grade? You Need a Training Program. Here’s How to Make One appeared first on Climbing.
]]>This article is the first in a series of four. Read parts two, three, and four.
Part 1: Developing a strategy for physical gains and technical growth
Developing an effective climbing training program is a challenging task that demands a nuanced approach. This article is the first in a series of four, in which I’ll show you how to design a personalized training program that develops your strength, endurance, and climbing skill set. With a dedicated multi-month effort, you are sure to reach some of your climbing goals!
The Importance of a Personalized Approach to Training
Look around the gym or crag and it’s clear that no two climbers are the same. While you may climb with friends who are roughly the same age or experience, you have obvious differences in climbing skill, physical capability (finger strength, flexibility, etc.), mental disposition, and the nature of your physique, among other things. Obviously, then, the most effective training program for you will be somewhat different from anyone else. Your personal climbing preference—bouldering, sport climbing, gym climbing, multi-pitch—must also be taken into account when building a training program.
What is a “Training Phase”?
A “training phase” or “cycle” is a block of time dedicated to climbing-specific training rather than climbing performance. This dedicated training block is best scheduled during your off-season from outdoor climbing. Winter is “training season” for many climbers, so it is an opportunity to build strength, power, and endurance that can be leveraged when you return to climbing outdoors.
To participate in a training phase you will need access to a well-equipped climbing gym, enabling you to engage in truly climbing-specific training by pulling on plastic, wooden hangboards, system boards, and even on tall lead walls. Old school “health clubs” and CrossFit gyms—while good for a fatiguing weight lifting workout— lack specificity and, therefore, are an ineffective pathway to enhance climbing performance.
Climbing a few days per week on a home woodie or at the gym will also allow you to expand your technical skill set, movement efficiency, and mental game. It is important to combine these “skill set days” with exercises that increase your climbing-specific strength and fitness to develop a comprehensive training phase.
How Long Should A Training Phase Last?
An effective training phase should be no less than one month, however eight to 10 weeks is ideal for developing lasting strength, power, and endurance for your next climbing season or road trip.
Many team sports employ a periodization scheme for their multi-month off-season training, commonly dedicating a month or so to base aerobic-endurance training, then a month or more to strength training, and then concluding with a few weeks of grueling power-endurance (anaerobic intensive) training prior to the start of their next competition season. While such a periodized program may have some use in climbing, most non-competition climbers aspire to “perform” their best in climbing year-round. If you prefer to test yourself on limit boulders or sport routes throughout the year (at either gym or crag), then a traditional block-periodization scheme is not the best fit for you.
As I will cover in future articles, a better approach is to vary your training focus throughout each week (a.k.a. Daily Undulating Periodization, or DUP). For example, you might perform two max strength/power workouts (anaerobic alactic focus) per week as well as two or three endurance-oriented (aerobic and anaerobic lactic focus) sessions. This DUP training strategy will simultaneously level up all three energy systems, enabling you to perform well on the plastic or rock at almost any time, year-round—just avoid doing the same exact workout on back-to-back days.
Determining the Daily and Weekly Focus of Your Training
You must identify your shortcomings on the rock to get the most out of your training phase. It’s not enough to simply state “I’m too weak to climb the next grade.” You must strive for a nuanced approach to self-assessment that begins with evaluating your technical and mental skills. (More on this in the next article.)
Physically, most climbers feel they need stronger fingers. Quite often, however, experienced climbers are robbed of their finger strength due to a weak core and poor postural control during crux climbing movements. This underscores the importance of a comprehensive approach to building your climbing training phase.
Common goals for climbers beginning a training phase include: increasing maximum finger strength and endurance, core strength, pulling power and endurance, and increasing mobility and lower body flexibility. If you’re a boulderer, gains in strength and power may be more meaningful, whereas gains in anaerobic and aerobic endurance are likely the priority if you are a route climber.
Common Climbing Training Mistakes to Avoid
Here’s an abridged list of common climbing training mistakes. Climbers stuck at a given grade level—or reaping little from their training efforts—may be suffering from one or more of these flawed approaches.
- Not climbing or training on a consistent basis. If you’re only climbing/training once per week (or less), don’t be surprised if you’re not progressing. Twice per week is the minimum number of climbing training sessions for eking out some gains…but strive for three or four gym visits per week.
- Attempting to train too many climbing aspects and exercises in a single session. You’re not training optimally if you attempt to boulder, route climb, hangboard, and weight lift all in a single session. Keep your individual sessions focussed, and be mindful of overtraining. More on this in the coming articles.
- Absence of a weekly-training game plan. Try to plan your workouts at least a week in advance. Identify your training days, then consider the appropriate focus for each session (perhaps bouldering and strength/power training on Thursday and then route climbing/endurance training on Saturday).
- Training the same max strength/power exercises or near-limit boulders on back-to-back days. High-intensity training/climbing is extremely taxing on the neuromuscular system and connective tissues—doing this on consecutive days will provide a poor return on training investment and it will often result in injury (most commonly finger, elbow, shoulder) and time away from climbing.
- Not doing any generalized aerobic training. No, you can’t run, bike, or swim yourself to the next level of climbing. However, there’s plenty of research—and pro-climber proof!—that doing some base aerobic training supports climbing performance and recovery between boulders and exercises, and increases stamina on route climbs and during rigorous workouts. My recommendation: Try to fit in a total of one to two hours of Zone 2 cardio (prolonged low-intensity aerobic activity)1 each week—this can be done on rest days from climbing-specific training or it could be done on a climbing-training day as a separate workout (say, in the morning, if you’re an evening gym climber).
In Closing
Yes, climbing training is a complex topic, but I hope that my series of articles will provide straightforward and accessible insight that you can start implementing today. In the next article, I’ll provide a strategy for self-assessment and basic exercise prescription. The final two articles will then detail a basic training program for intermediate boulders and sport climbers, respectively.
The post Stuck Climbing the Same Grade? You Need a Training Program. Here’s How to Make One appeared first on Climbing.
]]>