From jogging to stretching to high intensity intervals, here's what to do to support your goals.
The post A Climber’s Guide to Off-the-Wall Training appeared first on Climbing.
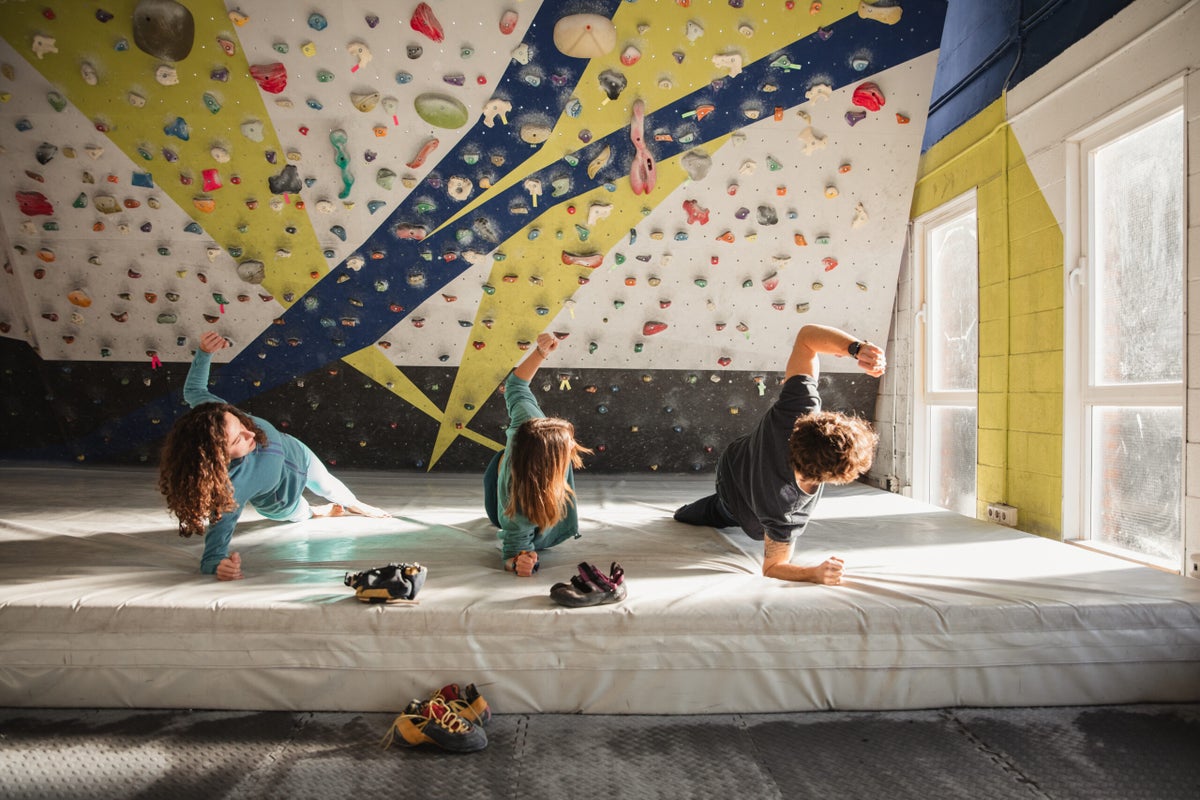
]]>We have come a long way from the days when the main rest-day activities known to climbers were jogging, stretching, and drinking with your buddies. There is now a daunting list of off-the-wall training options, many of which may have a positive, complementary effect on your on-the-wall performance. However, balance is always an issue, with potential to lose your way and for your training to do more harm than good.
Below is a review of off-the-wall training options, with brief guidelines on strategies and pros and cons. For the purpose of classification we will include all forms of training that don’t actually involve climbing. To be clear, this piece is not about what to do on rest days during climbing trips or performance periods, but rather the types of complementary training that can be conducted, mid-training program, on days when you don’t do climbing-based training. Rest days on climbing trips or during projecting periods is a separate topic.
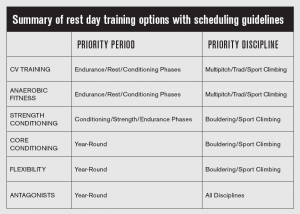
1. Cardiovascular (CV) Training
While most climbers understand aerobic cross-training to be valuable, tastes and tolerances vary considerably, from the predilections of the ultra-runner to those of the couch potato. The cardiovascular demands of climbing increase the further you move away from bouldering toward sport and into trad routes, and thus your preferred discipline should determine the amount of supporting CV work you do.
It works best to maintain a certain degree of cardiovascular fitness year-round by training a minimum of once or twice a week, increasing it to three to four times a week during periods of time off from climbing or phases of endurance-based training. However, when you are training strength, it pays to reduce hard and prolonged CV sessions in order to promote quality training and maximize recovery.
Running and use of cross-training/elliptical machines are preferable to cycling, which is prone to building up the leg muscles. If you want to cycle, my advice would be to stick to the roads, minimize hills, and spin with a high cadence. Swimming is best suited to rest or conditioning phases, as it can tire the arms, shoulders and upper body. Those who are less fit should build up from 15- to 20-minute sessions of running, cycling or swimming, etc., at a steady pace until they can sustain 35 to 40 minutes of effort. If you can manage 45 minutes, no need to go for longer as that may be counterproductive for your climbing. You don’t need to train with a heart rate monitor either, just go at a medium level, such that by the end you neither feel fresh nor completely whacked.
2. Anaerobic Conditioning
According to today’s thinking, anaerobic conditioning provides a better use of your rest-day time than aerobic work, unless you are training for very long routes or have a major weakness in cardiovascular fitness. The ability to switch between aerobic and anaerobic energy systems is very relevant to climbing, more so than relying purely on aerobic systems.
There are two options: You can either incorporate intervals into your cardiovascular sessions (by doing a set number of timed all-out bursts, followed by timed cool-offs) or do high-intensity interval training (HIT) circuits in the multi-gym or at home. Circuits could involve a mix of general endurance-based floor exercises. A great strategy is to include antagonist exercises in these routines, to tick that box simultaneously, but beware of including exercises that work the main climbing muscles (forearms, back and biceps), as those may disrupt recovery from your climbing. Sample exercises are pushups, seated dips, sit ups, leg paddles, dorsal raises, star jumps, squat thrusts, burpees (star jump, squat thrust and press-up combined). You don’t need a heart-rate monitor, but a stopwatch is handy. Guidelines for timing and frequency of sessions are as given for CV training above.
3. Strength Conditioning
One of the hottest current training debates is the role of strength conditioning in climbing. Strength conditioning (SC) has become so fashionable that some might believe it is as important as climbing itself. My take is that it has a place for those with lighter frames who are in need of general body strength and dynamism, yet it should still be regarded as supplementary training. Strength training also has the most relevance to bouldering, with sport climbing coming a close second and trad or multi-pitch being less relevant.
A good general approach is to do a program of six to eight exercises per session, such as lunges, clean-and-jerk, bench press, bent over row, shoulder press, bicep curl, tricep press, abdominal crunches and dorsal raises, covering all the main muscle groups. Put special focus on weaknesses and full-body exercises, such as clean-and-jerk and lunges. Do three sets of 10 to build a base, and then work toward doing lower-rep sets of four to six. There are endless variations and protocols, and if you’re not experienced, it pays to see a SC coach who understands climbing. A typical campaign might involve three sessions a week during a dedicated conditioning phase, which may last three to six weeks and may be repeated at another point in the year. Note that there is major potential for these sessions to disrupt gains from climbing sessions, so it really doesn’t make sense to overdo it or to continue year-round unless you have a severe weakness in general body strength.
4. Core Conditioning
Specific core conditioning can be regarded as a subset of general strength conditioning. Ideally you will perform sessions on rest days from climbing, since your fingers and forearms are usually the most fatigued, while the core is rarely pushed to the limit. However, if you are working hard on very steep routes or boulder problems, your core will usually take a hit; if so, it may make sense to rest the following day rather than punish your core further.
Climbing-specific core exercises such as front levers and hanging leg raises can’t really be regarded as rest-day training; however, floor exercises such as crunches, leg paddles and a range of Swiss-ball exercises should be workable. There are many options for training structure, and one method is to start a campaign with high-rep sets for endurance and then to move on to lower-rep sets for strength. Another is to complement the main theme of your current training phase: for example, by doing high-rep sets for core work during endurance phases and low-rep sets for strength phases.
5. Flexability
Flexibility work is a no-brainer for rest days, seeing as it doesn’t disrupt training gains, and the benefits are clear, so keep this up year-round. For any climber, one session a week should be the minimum, two are optimum, and three are ideal. The less flexible you are, the more you stand to gain, although those who are flexible should still stretch.
If you can’t make time on rest days, then stretch your legs (e.g.: hamstrings, quadriceps and groin) when resting between burns at the climbing gym. Never do static stretches for your arms on climbing days: save those for your cool down or rest days.
A range of protocol exists for static and dynamic stretching, resistance stretching and so on, but don’t get bogged down with the fine detail—just do it. Do a general program for the whole body, with the most focus on stretching your legs and opening your hips. Hold stretches for 20 to 30 seconds, and perform them once or up to three times.
6. Antagonist Training
Most climbers have heard of the importance of training the opposition muscles—the forearm extensors, chest, front shoulders and triceps—to prevent muscular imbalances and associated injuries, yet this type of training always seems to end up at the bottom of the time-versus-priority list. Still, this training is the deal-maker that keeps you in the game.

The key exercises are simple pushups and forearm extensions, performed with an extensor trainer (such as www. thepowerfingers.com or from other brands). Do three to five sets of 20 to 30 reps two to three times a week as a minimum requirement, or, to take things further and build compression strength for bouldering, try working out on suspension straps two to three times a week. Key exercises are the plank, pec fly, dip and suspension push-up. (It is easy to find supporting info online: Simply search “suspension strap exercises” or Google “TRX” workout.) If you’re looking to build strength, keep the reps between three and eight. Use strict form and finish all exercises just before you feel yourself start to lose control. As with flexibility work, keep up antagonist training year-round, either performing the sessions on rest days or at the end of climbing sessions.
For rest-day training, the most important factors to consider are whether the training is complementary and the extent to which the training may cannibalize energy from climbing. So if you only have one gear and tend to destroy yourself on rest days, it may be time to reevaluate your priorities and reel yourself in. On the flip side, if you get spanked on long routes because you’re generally unfit, or if you keep getting injured because you don’t train your antagonists, time to up your game.
Also Read
The post A Climber’s Guide to Off-the-Wall Training appeared first on Climbing.
]]>
Pull-ups are the most commonly practiced training exercise for climbing, yet how much do we really know about them?
The post How To Maximize Your Pull-Up Trainings appeared first on Climbing.
]]>Pull-ups are the most commonly practiced training exercise for climbing, yet how much do we really know about them from a biomechanical perspective? It is common for climbers to discuss different strength protocols for pull-ups, as well as supportive exercises for preventing injury, but the fundamental requirement is to understand the nuances of form, so that we’re performing the exercise correctly. So let’s take a look under the hood.
Basic anatomy
The pull-up is a closed-chain movement, which in the case of the upper body, means that the hands can’t move. The body is suspended by the hands and as we pull-up, the elbows flex (bend) and the shoulders adduct (move downward toward the mid-line of the body) and extend to bring the elbows to the torso. Pull-ups use the latissimus dorsi, the wing-like muscles that originate below your shoulder-blades and extend to your lower back. The “lats” are the largest muscles in the upper body and are the prime-movers in a pull-up, meaning that they provide most of the power to raise your body. Other muscles utilised are the biceps, deltoids (shoulders), rhomboids, and core.
Pull-ups vs chin-ups
Pull ups are commonly confused with chin-ups. Pull-ups are performed with a pronated grip (overhand, with palms forwards) with arms slightly-wider than shoulders, whereas chin-ups use a supinated (underhand) grip with arms closer together at approximately shoulder width. Both exercises are comparable because although the shoulder movements are different, the muscles responsible for those movements are the same. As stated, in pull-ups the shoulders are adducted, whereas in chin-ups, the shoulders extend (as the arms are pulled down and backwards). Ultimately, both types of shoulder motion are powered by the lats.
Many climbers who are new to both exercises will find chin-ups to be easier. This is because the biceps are in a mechanically disadvantageous position when you use a pronated grip. Conversely, when your palms face toward you, your biceps are in a stronger position and able to generate more force. Of course, for climbing an overhand grip is more relevant and thus, you should prioritize the pull-up when you train.
Pull-up form
Coaches will debate endlessly the importance of form in training. In general, the take-home is not to view form as a binary thing, as in good or bad. We should strive to do an exercise as well as possible while accepting that things don’t always have to be perfect. But, if you’re thrashing away, then you are risking injury. Better to do fewer reps with less load and to concentrate on loading the muscles smoothly and evenly.
To perform a pull-up, grasp a pull-bar or jugs on the hangboard with palms facing forward. If using a bar, position your hands slightly wider than shoulder-width. Hang from the bar with your arms extended. If you are new to pull-ups, you may want to bend your knees slightly to assist with balance and you can try crossing your ankles to reduce swinging, which can break the rhythm of the exercise. Alternatively, climbers with a strong core may wish to keep their legs straight and feet next to each other. Now, lift your chest, lean back slightly and engage your core muscles to reduce swinging.
Pull with your arms, trying your best to maintain a smooth motion. Continue pulling until your chin is above the bar and not just touching it. Avoid craning your neck and stretching your chin to the bar, as this is cheating and may cause injury. Slowly straighten your arms and lower yourself back to full arm extension, but do not fully relax your arms or shoulders between reps. Coaches will always debate exactly what you should and shouldn’t do at the bottom part of a pull-up. Some suggest that you should never slump onto fully straight arms as this may place excessive strain on the elbows and shoulders in the long-term. Others suggest that it’s important to train the ability to pull up from the fully slumped position. I suggest that the middle ground represents a good option. In other words, lower to the point where your arms are fully straight, but keep your muscles engaged; ie: don’t relax fully at the bottom of the rep. Aim to hold muscle tension as best you can but don’t worry too much if you aren’t able to do this for the last rep or two of each set.
Common pull-up mistakes
Pull-ups seem like a straightforward exercise, yet when we look around the gym we see some surprising variations in form. This is perhaps because pull-ups are inherently hard to do and many climbers battle to the point where they start to go freestyle. The following faults are common, yet easily fixed.
- Kicking with the legs (aka: kipping. The legs can be used to create a wave of momentum through the body to cheat-out a few more reps. My suggestion is not to go there as it simply takes load off the target muscles and could lead to injury if the movements are too violent. If you really want to do more reps then simply reduce load by using foot assistance.
- Reduced range of motion. Some will struggle with the first part of a pull-up, others will find the top part harder, and some will struggle with both and may only be able to do the middle part. The outcome is a kind of half pull-up, which is performed only within the middle part of the range. Clearly, if you do this then the weaker part of the range won’t be trained at all and the gap will only widen. The answer is not to kid yourself by trying to perform more reps within a reduced range. Again, the solution is to reduce load using foot-assistance and be strict with yourself.
- Dropping down fast onto straight arms. This is a fundamental no. Correcting this isn’t even a matter of reducing load, seeing as, if you can do the upward (concentric) part of the movement, then you should definitely be able to do the negative (eccentric) part in control. Simply don’t do it!
- Pausing excessively on straight/slumped arms at the bottom. We’ve already debated the pros and cons of whether to maintain muscle engagement at the bottom part of a pull-up and there are different schools of thought on this. However, one thing is for sure, if you hang in excess of one to two seconds on straight arms to rest, then this is essentially cheating. Maintain a steady pace and always move straight out of the lower position.
This article has explored pull-up anatomy and provided guidelines on form but it does not provide a complete picture on pull-up training. Read more on the subject to gain knowledge of training protocols, exercise variations and injury prevention strategies.
The post How To Maximize Your Pull-Up Trainings appeared first on Climbing.
]]>
There's a time and place for static moves. But what do of the world's strongest climbers have in common? They are very good at moving dynamically.
The post Want to Climb Harder? Train Dynamically. appeared first on Climbing.
]]>The ability to climb dynamically is a critical skill for hard bouldering and sport climbing, yet many climbers struggle to “bounce and slap,” even when that is what the move demands. A static style has its place on easy terrain, or even difficult sections if the protection is marginal. However, you will be pouring away energy if you lock off and slow-mo to every hold on cruxes and sustained sequences, and you’ll place unnecessary strain on your tendons.
It can be difficult for climbers who have engrained a static style to re-program themselves to move dynamically, but have faith. It can be done. My first advice is to boulder more, and to redpoint hard projects rather than exclusively climb onsight. My next recommendation is to be sure that fear of falling isn’t encouraging your static style. If so, address this fear as a priority. Once you have done that, you should analyze your movements via video feedback or the constructive criticism of your partners.
Meanwhile, you can make strides with the following supportive exercises. Don’t worry too much about full-blown dynos as these rarely crop up unless you’re a hardened boulderer. Instead, take a detailed look at the deadpoint sequence, which essentially provides the blueprint for dealing with all hard climbing situations.
1 Deadpointing
Deadpointing is the term coined to describe reaching (or “slapping”) for a hold at speed. In contrast to dynos, which you use to overcome long reaches, deadpointing is often required when you are either too weak or too pumped to hang onto a hold long enough to reach the next hold statically. Once you master the technique, you can start using it strategically to climb harder and more efficiently.
With deadpointing, you usually remain on one or both of the “take-off” footholds. Aim to catch the target hold precisely at the weightless moment (or “deadpoint”) at the top of the move. If you let go of the lower hold and reach for the target hold too early, or move too slowly, you won’t achieve sufficient height; but if you hold on too long, you’ll lose momentum and “drop out” (i.e.: you will be traveling downward by the time you catch the hold).
2 Movement Sequence
1. Commit: Don’t waste time attempting to static a move. There is no such thing as a half static/half dynamic move. Do one or the other.
2. Set your feet: Make a quick check that your feet are in the best position and don’t delay. On longer deadpoint moves, you will need to generate upward thrust from your feet; consider this when selecting footholds. Placing one foot higher than the other usually works best. If using both feet feels unbalanced, consider taking one foot off and flagging.
3 Generate Momentum
You can crank up momentum three different ways. For all three methods the key is to let go with the lower hand approximately two thirds of the way through the pull-up. A small bounce can work well before you go for the move, but don’t bounce more than once.
a) Hinge deadpoint. Use this method when you are moving to a hold directly overhead. Straighten the arms and lean back from the wall by bending at the waist like a hinge, then thrust the torso inwards and jump to the hold.
b) Pendulum deadpoint. For diagonal or sideways moves, swing the hips like a pendulum and then “flick” your hand to the hold.
c) Rock-over deadpoint. If there’s a good high foothold, rock up onto it at speed. Use the hinge method to generate additional momentum from your torso.
4 Maintain Contact
Be accurate with your fingers, especially on pockets and slopers, which may only have one specific good part. Your hips should finish vertically below the target hold—too far in and you’ll swing out after grabbing the hold. Too far out and you’ll miss the hold. You need to be stationary as you hit the hold. When using small footholds that are positioned low, “drill” your toes and tense your hamstrings and core muscles at the precise moment you latch the hold—think “feet” at the same time as you’re thinking “hands.” Don’t be too quick to blame lack of core strength if your feet are coming off, as lack of coordination is nearly always the culprit. Down-turned shoes help. If you’re still having difficulty sticking the target handhold, try cheating into position by using extra holds when climbing indoors or a power- spot from a partner if climbing outside. This will help you build confidence in the move and enable your body to map into position.
5 Additional Exercises
For extra practice in moving dynamically, try double-handed deadpoints on a campus board with your feet on foot rungs. Alternatively, clapping push-ups and star jumps (start squatting then jump and extend your arms and legs out to the sides) will teach you timing and get you moving more explosively.
Don’t think dynamic moves are relevent to your outdoor climbing goals? Watch professional comp climber Jim Pope absolutely crushing outdoor climbs using his indoor skills.
Related:
- Yes, beginners and intermediate climbers should fingerboard, says Dr. Tyler Nelson in “Most Climbers Are Getting Fingerboard Training Wrong.”
- Struggling to Make Gains? 20 Minutes With A Kettleball Will Change Your Climbing
The post Want to Climb Harder? Train Dynamically. appeared first on Climbing.
]]>
This eight-phase (12-month) training series will present specific workouts based on the principles of periodization. Each six-week segment will build upon the previous one.
The post The Training Bible: A Complete One-Year Training Plan appeared first on Climbing.
]]>The post The Training Bible: A Complete One-Year Training Plan appeared first on Climbing.
]]>
If your forearms inflate like balloons and your fingers always seem to uncurl just before the anchors, then these winter endurance workouts are just what you need.
The post Two Winter Workouts to Boost Your Endurance by Spring appeared first on Climbing.
]]>The gym season is here. Time to ask: Am I getting the best returns from my training? Now can be a crucial time to gain. In particular, you can boost the productivity of power-endurance and low-intensity workouts by applying some basic principles of training structure. In this article, I discuss how to train endurance and power endurance over the winter.
Part 1 tackles interval training, helping you calibrate difficulty, work time, and rest times, with an eye toward building power endurance. Power endurance is the type of fitness required for most sport routes, with typically sustained sequences of 20 to 60 hand-moves. Although most climbers use the term power endurance, coaches may also say “anaerobic endurance” or “high-intensity endurance.” The trademark of power-endurance terrain is that there are no real rests—stopping and shaking will only result in more fatigue. Hence the best approach is just to keep moving.
Part 2 discusses low-intensity endurance training for longer routes, a crucial yet easily ignored area of training that provides the key to recovering on the fly. Low-intensity endurance training involves sticking it out for 60 10 150 move sequences, which may take between six and 15 minutes to execute.
Part 1: Interval Training for Power-Endurance

With power-endurance training, it’s easy to fall into old habits: to climb routes at the gym, guided by whim, on whichever lines are free. But the biggest mistake is to try to break into that elusive new grade every session. This causes you to take either long rests between climbs (and, as a result, fail to climb a worthwhile amount) or, conversely, burn out during the first half of the session and be forced to lower the grade so much that the second half of the session is not productive.
How can we ensure that we climb the right number of routes, at the right grade to maximize the benefits of our sessions? The answer is to adopt the same approach used to train for endurance sports such as rowing, running and cycling—interval training. This involves striking a balance between the intensity (or difficulty) of the climbing and the volume (or number of routes/moves). The equation is simple—the higher the intensity, the less volume can be achieved. With interval training the idea is to achieve an optimum balance, keeping both volume and intensity reasonably high.
Setting the Training Grade
Another key principle of interval training is that the intensity of each interval remains constant. Pick a fixed grade (typically one or two grades below your maximum onsight capability) and stick to this for the duration of the session until you fail. For example, someone whose best current onsight grade is 5.12c would (after warming up) maintain the grade of 5.12a throughout the session. The idea is that the first two or three intervals feel comfortable, the next few are tough, and the last are desperate.

Number of Repeats
Repetitions will depend on how many moves you are completing during each work interval. For shorter work intervals (e.g. 20 to 30 moves), aim for a larger number of repeats (e.g. 8 to 10), and for longer work intervals (e.g. 50 to 60 moves), shoot for a lower number (5 to 7). See the table for guidelines.
Rest Times
Your rest between each work interval has a direct effect on the amount of repetitions possible. If you take 30-minute rests between each climb, then you would probably be able to roll out routes at your training grade all day, but if the rest drops to two minutes, then you would be on the ropes after two or three climbs. The answer is to strike a balance. Rest times should be approximately “time-and-a-half” of the work interval, so the higher the number of moves, the longer the corresponding rest. Again, see the table.
The Technique Element
Climbing differs from most endurance sports in the sense that the technique component is highly varied. You will achieve better results from switching between different routes, rather than lapping the same route. Training on circuits is also beneficial. Last, it is also vital to train on different types of holds and different wall angles, selected to prioritize your goals or weaknesses. In other words, if your project is a 40-move, gently overhanging sport route on small crimps, then this is what you must simulate in your training.
Training Tips
A common oversight is to train the same number of moves (usually the length of the routes at your gym) every session. Make sure you train at different intensities within the given spectrum for power endurance (20 to 60 moves). For longer work intervals, lower off and do double or triple laps. Make sure you pull the rope down and start climbing again as quickly as possible, without any rest. Circuits on the bouldering wall provide a great option if you don’t have a belay partner.
Goal-Setting
The key to success in any type of training is to have goals for every session, and interval training lends itself perfectly to this notion. Aim to reduce the rest times very slightly every time you train. The table gives upper and lower values for rest times, so start training at the higher value and reduce the rest by 15 to 30 seconds every session. If you are training on circuits, then an alternative to reducing the rest times is to add five moves each time, or to make a few of the moves slightly harder. With this approach, if you train power endurance two or three times a week, it only takes a month or two before you notice impressive results.
Part II: Low-intensity Endurance
Climbers sometimes use the term “stamina” to refer to low-intensity endurance. In other sports it is common to hear endurance classified as aerobic or anaerobic but in climbing this is confusing. For example, a given climb may have a short, intense, sustained section, requiring anaerobic endurance, followed by a longer, easier section that calls for aerobic endurance. It is common for both aerobic and anaerobic energy systems to be tested on the same climb, as lactic-acid levels rise and fall, and it’s difficult to separate them completely when it comes to training low-intensity endurance. To train this, we’ll do sequences between 60 10 150 hand moves, which may take between six and 15 minutes to execute.
A common mistake is to ignore low-intensity endurance training altogether. Few gyms have routes that even come close to the required height, so we take the easy option and simply order what’s on the menu. The usual approach of doing hard single routes (for high-intensity endurance) requires less discipline and less pain tolerance, as you won’t be spending as much time under the influence of fatigue. It is a classic error to try to climb the hardest possible grades every time you train. A commitment to training low-intensity endurance will require that you resist this temptation. Yet even for those who can do double or triple laps on easier routes, or occasionally climb down and then back up again, there is still plenty of room for applying a little more structure.
The New Routine
Low-intensity endurance-training sessions can be done on a lead wall or an easy section of a bouldering wall.
Lead wall
The lead-wall option is good provided you have a like-minded partner and you don’t hog popular lines when the gym is busy. Either lead up, lower back down, pull the rope as quickly as possible, and lead again; or lead up, climb down, and then climb back up again. At first, down climbs will need to be considerably easier than up climbs, but with practice you can narrow the difference.
Bouldering wall
The bouldering wall is great for climbing alone. It usually works best to make up sequences at random, or to link easier color-coded boulder problems
or circuits.
When to train
Elites may wish to train endurance up to five times a week, with perhaps one power session in addition. Intermediates may do three or four endurance sessions (plus one power session) and beginners should do two or three endurance sessions (plus an easy boulder session). It is universally accepted that low-intensity endurance provides the best and safest type of training to start a training program. You can then move on to prioritize high-intensity endurance training. Another tactic is to do a phase of concentrated low-intensity endurance immediately prior to an onsighting or trad trip.
Vary the workouts
Don’t always train the same number of moves at the same angle. Alternate between some of the variables given below.
Number of moves
Mid-intensity endurance: e.g.: 60–80 moves
Low-intensity endurance: e.g.: 80–150 moves
Wall angle
Practice “jug endurance” on steeper walls and “fingery endurance” on lower-angle walls.
Sustained or fluctuating
A sequence of climbing requiring low-intensity endurance may either be sustained, with the moves all at a similar level, or fluctuating, with harder sections interspersed with good rests. The former style requires a steady pace, perhaps taking the occasional quick flick of the forearm to attempt to recover, whereas the latter is about sprinting the hard sections and milking the rests. Both styles are important to practice.
Training Structure
Setting the training grade
Below is a guideline for an intermediate-level climber.
- Triple set: 2 or 3 grades under onsight limit for a single route.
- Quadruple set: 3 or 4 grades under onsight max.
- Up>down>up: 1st up-climb (2 or 3 grades less than onsight max). Down-climb (4 or 5 grades less than onsight max). 2nd up-climb (2 or 3 grades less than onsight max).
Remember that the cumulative grade of three or four easy-ish routes racked up back-to-back should actually be pretty close to your limit grade. For example,
four laps of a short gym-length 5.11a, back-to-back, is actually equivalent in effort to a long 5.11d or 5.12a on rock.
How many sets should you do?
Aim to complete between four and six work intervals for low-intensity endurance. To some extent this number will depend on how hard you pitch the training grade, but if you do substantially less or more, then clearly the routes or circuits are either too hard or too easy. Always complete the work, but by the seat of your pants. The first one or two overall sets should feel fairly comfortable, the next two should be tough, and the last two—a desperate fight.
It is also worth noting that low-intensity sessions can work very well for active rest, or injury rehab, provided you drop the grade considerably lower and do one or two less sets overall.
Rest times
Time-and-a-half is a good guideline. For example, if you’ve been climbing for 10 minutes, rest for 15.
Structure Variation into your training
Try the following combinations to add variety to your training. No single structure is superior to the other, so try one that is new to you.
Interval structure
This is similar to the structure given in No. 192 for high-intensity endurance, where intensity, length of climbing and rest times all remain fixed and constant. E.g.: 10 mins on (or 100 moves) x 5 with 15 mins rest between sets.
Intensity pyramid structure
Length of climbing and rest times remain fixed, but the grade / intensity pyramids up and then back down again: E.g.: 100 moves with 15 mins rest between sets at 80% > 90% > 100% > 90% > 80% of max onsight grade.
Duration pyramid structure
With this option, the intensity / grade remains the same for each set, but the duration of climbing varies in a pyramid structure. E.g.: Fixed grade of 90% of onsight max for all sets: 7 mins on, 10 mins off, 10 mins on, 15 mins off, 15 mins on, 20 mins off, 10-on-15-off, 7-on.
About the Author
Neil Gresham has used his own endurance training to find his way up 5.14+ sport and trad lines. He specializes in coaching intermediate climbers. To learn more about his offerings, see his website.
The post Two Winter Workouts to Boost Your Endurance by Spring appeared first on Climbing.
]]>
Welcome to CLIMBING's 12-month training plan. This eight-phase series will present specific workouts based on the principles of periodization, a proven approach to training that results in peak performance. Each six-week segment will build upon the previous with the end result being a better, stronger climbing machine—you. Now, get started!
The post The Training Bible Phase 1: Conditioning appeared first on Climbing.
]]>Welcome to Climbing’s yearlong training plan. This complete eight-phase training series will coach you through specific workouts based on periodization, a proven approach to training that results in peak climbing performance on the rock and in the gym. Each six-week segment will build upon the previous with the end result being a better, stronger climbing machine—you.
Most training articles give you the theory but then leave the hard part—i.e. actually laying out and following a structured, day-to-day plan—up to you. Not this time. Our plan, which works for climbers of all levels, gives you a drill-by-drill outline of every session. It begins with a six-week Conditioning block, which is followed by Low-Intensity Endurance, Strength Training, Power Endurance, Strength/Power, Endurance, Power Endurance, and Peaking.
One note: throughout this year of training, you should try to climb outside as much as possible. For best results, tie your crag sessions in with the program. For example, during the Power Endurance phase, do boulder intervals and hard onsights or redpoints. On Strength days, simply boulder or work a hard project. If you go away on a major climbing trip (for longer than five days), you should take at least three full rest days before and after the trip before resuming training.
CLIMBING TRAINING PLAN PHASE ONE: GENERAL CONDITIONING (6 weeks)
Before you can safely tackle the high training loads recommended in later stages of this plan, you must first develop a good base of fitness. Skip this step and you will risk burning out later in the program. The first few weeks of conditioning target general fitness, and the amount of climbing gradually increases as the phase progresses. These four main work-outs target different areas of fitness. It’s up to you to choose what days during the week you perform these exercises.
Weekly Microcycle Calendar:
Weeks 1 & 2
1. Aerobic / anaerobic conditioning & flexibility: [ x 4 per week ]
2. Low-intensity endurance:[ x 1 per week ]
3. Bouldering – volume / easy problems: [ x 1 per week ]
4. Antagonists & core: [ x 3 per week ]
Weeks 3 & 4
1. Aerobic / anaerobic conditioning & flexibility: [ x 4 per week ]
2. Low-intensity endurance: [ x 2 per week ]
3. Bouldering – volume / easy problems: [ x 1 per week ]
4. Antagonists & core: [ x 3 per week ]
Weeks 5 & 6
1. Aerobic / anaerobic conditioning & flexibility: [ x 3 per week ]
2. Low-intensity endurance: [ x 3 per week ]
3. Bouldering – volume / easy problems: [ x 1 per week ]
4. Antagonists & core: [ x 3 per week ]
SESSION-PLAN DETAILS
1. Aerobic / Anaerobic Conditioning & Flexibility
a) Run [ 30 minutes ]
Running is preferable to cycling in order to avoid bulking up the leg muscles. Go at a slow steady pace to warm-up for the first 5 minutes. Then do 5 intervals of 1 minute on at 90 to 95 percent effort followed by 1 minute slow jog to recover. Then run at a steady pace to finish. Each session make the intervals 10 seconds longer, until eventually you are doing 2 minutes on / 1 minute off x 5, then 5 minutes to warm down.
b) Burpee [ 10 minutes ] x 8 (on 1st session). 1 minute rest. Repeat x 4.
Do 1 more rep per set each session (i.e., by session 10 you’ll be doing 18 reps per set).
c) Flexibility [ 15 minutes ]
Hold stretches for 20 seconds, release for 10 seconds, then repeat again for 20 seconds.
1. Hamstrings
2. Thigh / quadriceps
3. Calf
4. Groin
5. Lats
6. Shoulders
7. Chest
8. Forearms (flexors & extensors)
2. Low-Intensity Endurance
You have two options: one for the bouldering wall and one for the lead wall. Don’t do both in one session! Warm up first.
a) Routes: 4 x 4s
Select four different routes of the same grade that you can climb consecutively. The grades should be at least two notches below your onsight grade for beginner/intermediates and four below for advanced/elite. Lower off and move to the next route as quickly as possible. Do this four times with rests equal to climbing time. Pick wall angles based on abilities:
Beginner / Low Intermediate: Vertical
Intermediate: 5- to 10-degrees overhanging
Advanced: 10- to 20-degrees overhanging
Elite: 20- to 30-degrees overhanging
b) Bouldering Wall: Random climbing [ 10 minutes on, 10 minutes off x 4 ]
If you don’t have a belayer, find an easy and quiet area of the bouldering wall. Warm up first then climb around, selecting holds at random for 10 minutes. Go up, down and diagonally as well as traversing. Try linking color-coded problems, provided they are easy enough. Aim for a moderate and continuous level of pump. If you get too pumped, then find a resting position and work at recovering before continuing.
Remember that injuries can still strike at any time, so it’s vital to warm up and cool down, as well as to listen to your body and adjust the workload if you’re not recovering.
You don’t need to be a slave to the plan. It’s fine to swap sessions around and substitute training indoors with climbing outside at any opportunity.
3. Bouldering [ Volume / Easy Problems ]
Climb problems in ascending/descending grade order. Rest 1 minute between problems at first two levels. Rest 2 minutes between harder grades. Aim to do one more problem at each grade with each session.
[ Beginner / Low intermediate ] 5 x V0; 5 x V1; 5 x V2; 5
x V1; 5 x VO
[ Intermediate ] 4 x V0; 4 x V1; 4 x V2; 4 x V3; 4 x V4; 4 x V3 ;4 x V2;
4 x V1
[ Advanced ] 4 x V1; 4 x V2; 4 x V3; 4 x V4; 4 x V5; 4 x V4; 4 x V3; 4
x V2
[ Elite ] 3 x V2; 3 x V3; 3 x V4; 3 x V5; 3 x V6; 3 x V7; 3 x V6; 3 x V5;
3 x V4; 3 x V3; 3 x V2
4. Antagonists & Core
a) Antagonists
Do 3 sets of 20 reps of the following exercises with 2 minutes of rest between sets. Don’t go to failure (or, optional, go to failure on last set).
1. Push-ups (kneeling if required)
2. Reverse wrist curls [Use a weight that you can handle comfortably for 3 sets of 20 reps.]
3. Finger extensions (with rubber band)
b) Core
1. Extreme plank [ 10 reps x 3 sets with 2 minutes rest ]
Do an extra rep each session.
2. Iron cross [ 10 reps x 3 sets with 2 minutes rest ] – A plank but spread arms/legs wide
Do an extra rep each session.
3. Leg paddles [ 50 reps x 3 with 2 minutes. rest ]
Lie on your back in a half sit-up position. Hands on temples, crunch-up to mid-way. Stretch legs out straight in front, hold feet just above the ground and paddle up and down.
Do 5 additional reps each session.
YOUR INDEX FOR THE COMPLETE YEAR-LONG TRAINING SERIES BY COACH NEIL GRESHAM
Phase One: General Conditioning
Phase Two: Low-Intensity Endurance
Phase Three: Strength Training
Phase Four: Power Endurance
Phase Five: Strength/Power
Phase Six: Endurance
Phase Seven: Power Endurance
Phase Eight: Peaking
ABOUT THE AUTHOR
Neil Gresham has been training climbers since 1993. Check out his training website climbingmasterclass.com.
The post The Training Bible Phase 1: Conditioning appeared first on Climbing.
]]>
All climbers need endurance, and there’s no such thing as too much of it.
The post Want to Improve Your Endurance? Start Here appeared first on Climbing.
]]>There are many ways to go about improving your endurance and skills for leading, yet many climbers continue to make the same mistakes, slowing down their rate of improvement. A basic approach will often prove to be more effective than a highly complex one. All climbers need endurance, and there’s no such thing as too much of it. Even if you boulder exclusively, having endurance enables you to do more moves in a given day, and finish each problem that much fresher.
Let’s start with some tips and a basic overview. The top nine tips for any endurance training regimen are:
- Vary the intensity. Do sessions where you’re focused on shorter climbs with harder moves for strength endurance and sessions where you focus on longer easier climbs for long endurance.
- Make a plan. Start with long endurance to build base fitness and then move to strength endurance (usually in combination with strength).
- Mix up the methods. Don’t just do routes; do circuits, boulder intervals and so on.
- Combine climbing-based training with cross-training. Supportive aerobic fitness plays a crucial role, so use your rest days accordingly.
- Use an interval structure, where the grade (or work difficulty) and rest times are fixed and you aim for a certain number of repeats/climbs.
- Train specifically for weaknesses and goals. For best results simulate the requirements of projects or train on steeper angles if that’s what you find toughest.
- Finish sessions with endurance exercises. Even if your forearms are pumped and your fingers are burnt, you may still be able to do some worthwhile endurance exercises for the core and arms at the end of the session.
- Set goals. Write down your current capacity for repeating routes in single, double, triple and quadruple sets. Then write down what you hope to be doing halfway through your planned endurance phase (e.g., in three weeks’ time), and again at the end of the phase (e.g., in six weeks’ time).
- Stay focused on technique and the mental element. Improvements in endurance are often as much to do with skills as physical elements. Maintain a constant awareness for relaxed, efficient movement and mind control during your sessions. For best results, switch between different climbs, rather than lapping the same route or circuit.
Endurance Training Methods
Routes
For beginners and intermediates, there is a huge value to training endurance by leading routes, as this enables skills to be developed in combination with fitness. Toproping is for beginners and not recommended for anyone who wishes to progress at the higher grades. Routes can be climbed individually or in multiple sets to achieve different training effects. Use the guidelines given for strength endurance and long endurance to determine how many consecutive laps you need to do, and note that this also depends on the height of the lead wall you’re training on. To climb routes in multiple sets, lower off quickly but safely between each one, pulling the rope down and then moving on to the next one.
Auto-belay machines are also suitable for both strength endurance and long endurance training but are less preferable to leading.
Circuits
Circuits are pre-planned, continuous sequences of moves, commonly 15 to 80 moves long. They provide one of the best and most convenient methods for endurance training, as you don’t need to rely on a belay partner. If you’ve only trained endurance on routes then using circuits for the first time will give your climbing a major kick-start. Some climbing gyms offer purpose-designed circuit walls, which feature pre-set color-coded circuits, but if you don’t have access to one then you can set your own circuits on an appropriate bouldering wall or woody. The aim is to climb around, either in a circle, figure-8 or upwards, downwards and sideways movement. Avoid rests or cruxes and make the climbing equally blended. Use the guidelines given previously for the number of moves, rests and repeats for strength endurance and long endurance.
Boulder Intervals
Contrary to popular misconception, bouldering walls are fantastic tools for endurance training, provided you know the protocol and are mindful of other climbers who may wish to use the same space. The basic principle is for problems to be grouped together in blocks and climbed back-to-back, either with no rest, or very brief rests in between. A longer rest is then taken between blocks and the blocks are repeated a fixed number of times. Boulder intervals tend to lend themselves more to training strength endurance, rather than long endurance. For strength endurance, do three to five boulders in a row and for long endurance do eight to 15 boulders in a row.
Pro Tip: Down-climbing For Endurance
One approach, which works well for long-endurance training is to down-climb an easierroute on the same line. Unclip on the way down and reverse lead if you feel confident or just top-rope back down, stay on the wall at the base of the route and have your belayer pull the rope through.
Stick/Point Training
Whether we care to admit it, most of us gravitate toward sessions we find comfortable—both physically and mentally. Rock is rarely so generous, especially when it comes to onsighting. Even if you are familiar with the rock type, you never know what’s coming next and the route may dish out an uncomfortable surprise.
To break out of the common trap of climbing in your comfort zone, add a rock-specific onsighting element to your endurance sessions—you’ll need a motivated and like-minded training partner. Take turns using a stick to point each other around randomly made-up sequences on the bouldering wall.
The idea is to maximize the element of awkwardness, for example by suddenly going quiet and leaving your partner stranded in an awkward position, desperately awaiting instruction. Give the person hard moves and sustained sections, interspersed with awkward resting positions, and aim to be as unpredictable and sadistic as possible. After all, your friend will soon be returning the favor! However, don’t overcook it to the point that your partner keeps falling. The longer you keep the climber on the wall, the more pain you will force him or her to endure. It’s no surprise that few climbers do this type of training, as it is arguably the hardest that exists for climbing. However, to prepare you for early-season rock, there is nothing to match it. Use the training guidelines given previously.
Pace Training: Slow It Down
We all tend to sprint up gym routes faster than we climb on rock. Outdoors the holds are harder to see and the sequences trickier to read, so at times it pays to force yourself to climb slowly in the gym. Pause for three to five seconds for each hand move to simulate the rhythm of a typical sport onsight. Alternatively, if you are preparing for trad, count for six to 12 seconds per move and then, every fourth or fifth move, pause for a minute regardless of the size of the holds. This exercise will improve your ability to shake out in awkward positions and remind you how it feels to fiddle in wires when you’re pumped out of your mind. For sport onsighting, stay on the wall for eight to 12 minutes and for trad stay on for up to 15 or 20. Climb up and down if necessary, using an easier route for the down climb, or lower off quickly, pull the rope and continue leading upward. It makes sense to use an auto-belay or climb around at random on an easy bouldering wall, provided you’re not hogging the space.
Campus Boards for Endurance
Campus boards are great for endurance training. Stronger climbers can go footless and train top-end strength endurance, whereas climbers operating from an intermediate level can train with feet on, and work both strength endurance and long endurance (aka anaerobic capacity or aerobic power). The main exercise is basic laddering, but you can spice things up with variations such as up and downs, where you go up one rung, return to the start and then go up one rung higher each time until you top out.
For strength endurance you need to be capable of performing between 12 and 30 repetitions, whereas for long resistance it will be between 60 and 150 reps. For long endurance it may make more sense simply to time yourself on the board rather than counting moves/reps. Clearly, the training variables will be rung size and spacing, and whether or not you go footless. The advantages of using a campus board for endurance are that the training is formulaic and easy to measure, and you can switch your brain off and go for the burn. The downside is that you won’t be training footwork and technique and the movements are repetitive, so you should never do the training for long stints (e.g., four or five weeks max).
Hangboards for Endurance
Hangboards are often categorized as strength-training tools; however, they can be equally effective for endurance and come into their own for quick home workouts when time is scarce.
Also Read:
The post Want to Improve Your Endurance? Start Here appeared first on Climbing.
]]>
The classic mistake is to listen to your natural instinct to save yourself by jumping from an easy warm-up route onto your target onsight for the day.
The post Most of Us Are Warming Up Incorrectly appeared first on Climbing.
]]>I understand the importance of getting pumped as part of your warm-up for onsighting, but what is the best way to warm up?
—Eli Grisham | Las Vegas, NV
First, you are right about the importance of getting pumped in your warm-up. The classic mistake is to listen to your natural instinct to save yourself by jumping from an easy warm-up route onto your target onsight for the day. The effect is a “flash pump,” which comes on like an express train and can end your day. If you get moderately pumped first in a controlled and strategic way and then rest, the pump you receive on your target onsight is much easier to control. You will also recruit more muscle fibers and prepare yourself for harder moves, as well as summoning the technique and mindset for the battle.
However, getting the formula right for this process is one of the greatest tactical challenges in sport climbing. It is indeed too simple to talk about a primary pump when you really want a primary, a secondary and tertiary pump. For example, your first warm-up route should be so easy that it does not get you pumped at all. Your second warm-up route should get you 30 percent pumped, your third route should get you 60 percent pumped and your final route before your target onsight should take you as close as possible, but not past, the point of peak fatigue. Note that this final warm-up route should induce a higher level of fatigue than the average climber usually dares to allow.
You often hear climbers trying to convince themselves that they are not fit enough to warm up in this manner, but this is usually bunk. This strategy (or a version of it) is essential for all climbers, regardless of the grade they climb or their state of fitness. What should vary according to current fitness levels is the number of warm-up routes. For example, if you are feeling very fit then do a total of four or five warm-up routes with a couple at 60 percent pump, whereas if you are feeling less fit then do three, but never any less for sport climbing.
The greatest skill here is to judge the exact grade of your final warm-up route. If you overcook it you may not recover sufficiently but if you underdo it your body won’t be sufficiently prepared for the rigors of your target onsight. A rule of thumb if you are feeling fairly fit is to go one grade less than your target onsight. Shave a grade off both these figures if you are feeling unfit.
The next skill is deciding how long to rest afterward. No matter how long you rest, you are still unlikely to be able to clear the pump completely, but don’t allow this to psyche you out. Even if you do set out with the traces of a slight pump, you will find it easier to manage than setting out fresh and encountering a flash pump. The key is to spot the point when lactic acid levels are no longer lowering and to go before you cool down too much.
A final point regarding the exact sequencing of warm-up routes is that high-level climbers will need to skip grades because they have further to climb up the pyramid. For example, a classic pyramid sequence for someone who is attempting a 5.12b onsight might be a 5.10c > 5.11a > 5.11c > 5.12a before trying the 5.12b. However, someone attempting to onsight a 5.10c might do a 5.6 > 5.8 > 5.9 > 5.10a and then finally the 5.10c. An alternative for both the climbers if they were feeling unfit might be 5.10c > 5.11b > 5.11d for the 5.12b climber and 5.7 > 5.9 > 5.10a for the 5.10c climber. Personally, I believe it is the former combination, with an extra warm-up route, that will produce the best result. Note: choose warm-up routes that mimic your target project. In other words, if your project is 30 moves, pick longer warm-up routes rather than bouldery ones, and vice versa.
The post Most of Us Are Warming Up Incorrectly appeared first on Climbing.
]]>
Neil Gresham puts Klemen Premrl and Tim Emmett, two of the world’s best ice climbers, in the hot seat for training advice
The post How to Train for Steep Ice and Mixed Climbing appeared first on Climbing.
]]>Training for winter climbing has followed the same trajectory as training for rock in the sense that it has now become a highly specialised game. The approach for competitions is different to the approach for dry-tooling at the crag, which in turn differs from the way you’d train for a combination of steep ice and mixed climbing. There are lots of conflicting opinions out there but one thing’s for sure: You always learn when you talk directly to good climbers and ask them, in simple terms, what they do. I thought I’d do exactly that for steep ice and mixed, and so I’ve put two of the world’s best in the hot seat.
Britain’s Tim Emmett and Slovenia’s Klemen Premrl require little introduction, and they are perhaps best known for their futuristic and inspirational routes at Helmcken Falls in Canada. Routes such as Spray-on… Top! (WI10, M9+, 230m), their full-height, 7-pitch routes at this crag, is one of the most demanding undertakings of its kind on the planet. Both climbers also have a pedigree in competition climbing—Emmett reached the podium in the IWC in 2000 and 20001 and Premrl has been in the final many times, with a best result of fifth in 2003. At the crag, Premrl has flashed up to M13 and M14 after work and Emmett has flashed up to M11. I caught up with these guys whilst paying homage to Helmcken during a recent trip, which I trained extensively for yet was still blown away by the level of physicality that’s required just to climb one pitch. This in turn sparked my intrigue as to how these guys prepare. [Interview conducted spring 2023]
***
Gresham: What’s your overall approach to the year’s training?
Emmett: I don’t train for winter all year round as I’m pretty focused on rock for most of the year. This year I started training for Helmcken after getting back from Spain in November. It’s a fairly short period to prepare but the advantage is that it’s easier to get psyched for and all my rock training feeds into it, so I’m in good shape as a starting point. I try to maintain my finger strength whilst training for winter, so I start sessions with hangboarding. This means the sessions are quite long, but this is only for a fairly short period. Objectives are really important to find the motivation to train when you may not feel like it. The longest prep period for me was 10 weeks and this was for Mission for Mars (WI13) in 2019. We had a major objective and knew we wanted to do something longer, harder, and steeper than what we’d done before, so this really provided focus and energy for the training.
Premrl: I don’t train for winter all year round either, but I start earlier than Tim, usually in September, and it overlaps with the end of the sport climbing season. Then when a trip gets close, I stop hangboarding and rock climbing and just focus the last six weeks on tool training. If you’re doing the World Cup circuit, you may need to train all year round but, for me, it makes sense to phase it because I don’t have the motivation. I’d still say that 70% of the tooling training I do is outside, but I do this from November on. It would just feel weird for me to be out on a tooling crag in the Summer with a T-shirt and a chalk bag!
Gresham: Talk to me about how you train for power and strength..
Premrl: Usually, in October, I focus on strength and power work, which involves one-arm max-hangs on tools. I train with 40-kg added weight, but clearly you need to tailor this to your level and take care of your shoulders when doing these. I also do max two-arm pull-ups and one-arm lock-offs. I hold lock-offs for 5 to 12 seconds at 120 degrees and 90 degrees, but not full-lock (with arm fully bent/closed) as this is stressful for the elbows (I train with 5- to 10-kg added weight for these).
The training then moves more towards board problems with tools, which involve very hard moves with a weight vest. I use a 45-degree board, as it’s harder than a roof because you have to gain height and you lock-off more, whereas with a roof you can just hang. I do four different system-style problems, each which involves making a big move, lowering back down in control and repeating the move 3 times in a row for one arm and then swapping and doing the same for the other arm. The first is a one-foot-on problem, where I pull-up then reach as high as possible; the second is an under-cling move; the third is a big diagonal, side-ways move; and the fourth involves figure-4s. I work on these individually and then the goal in the next month is to link them all together in a fierce power-endurance circuit.
I also do some specific training where I try to identify which moves cause me to fail when I’m on a route and then focus on these in training; for example, big wide crucifix moves where you have to release your feet and swing and absorb the force in your arm.
Emmett: Similar for me, really. I also did two-arm max pull-ups and weighted one-arm hangs, but my board isn’t set up for hard axe problems so instead, for power, I campus on tools with a weight-vest. I’ve screwed a load of metal O-rings into my campus board and they require real accuracy and strength. I usually try to do up to 12 moves in one hit. Klem and I sometimes set fun training challenges for each other, which is great for motivation, seeing as we rarely get to train together in person, although sometimes we get a bit competitive and things can go crazy. There was one time when I may have added slightly too much weight and got completely shut down!
Gresham: Same question for training endurance.
Premrl: When I’m short on time, I just do one-arm hang intervals on tools for 20 seconds-on, 10-seconds-off 10 times, then switch hands. I do this three or four times total with no additional rest—you rest one hand when training the other (when I’m in good shape I use a 5- to-7-kg weight vest on some sets). When I have more time I go out and climb routes that I know on a local tooling crag but you have to set rules to make it harder. I do sessions on a M13 where I start off climbing it once-at-a-time (as one rep) and I do 3 to 4 reps with a 20-minute rest in between. Then, as I gain endurance, I would try to do 2 of those reps with 5- to 7-kg weight vest. I also train on an M10 where I climb up it and back down—2 to 4 times up and down with a 5- to 7-kg weight vest is one rep, and I do 3 to 4 reps with a 20 min rest in between. The key point is that I don’t allow myself to shake mid-route (I’m only allowed to shake on top and bottom of the route). I also ban matching hands and I cross through instead. This gets you so much more pumped and prepares you for sections of super hard routes, where shaking out isn’t possible.
I’ve drilled pockets in my board at 20-cm intervals and I climb up, down and around on these, skipping alternates, so it’s like doing offset pull-ups and lock-off training for endurance. I either go up-&-down footless with lock-offs (and I do this with a 5-kg vest when in shape for power endurance) then I take a rest on the ground and repeat four times. For ‘long endurance’ I go up-&-down many times using feet, then take a longer rest and repeat. You have to pace yourself and not always go for the best performance in one go. If you do one massive burn you will be so pumped that you destroy the session.
It’s important to change the style and occasionally I climb with figure-4s, but mostly I favour ‘DTS’ – (dry tooling style with no figure-4s). I also switch between a style where you swing more and a more static style without swinging. This is always a much harder workout, especially for the core and you also become more aware of where you need to place your feet to prevent the swing and to push you to the next hold. For me, cutting loose is too easy!
Overall I think it’s good training in the sense that it prepares you physically, however, I’m slightly skeptical as it doesn’t always feel specific enough to real climbing because I don’t use bad hooks. In theory you could do this but in reality it isn’t very practical as you’ll end up firing off the board a lot. I guess to take things further I’d start trying to train this way.
Emmett: I’m a bit more limited with my training facilities as I don’t have a decent tooling crag nearby or a large board, so I have to make do with a small campus set up at home. For endurance I do foot-on circuits wearing trainers with my feet on bad foot-holds. The help you get from your feet is minimal and just enough to help you stay on for longer periods. For the tool placements, in addition to the metal O-rings, I use drilled-out wooden holds because they require less accuracy, meaning you can keep going for longer. I usually start off like this, to build a base and then once I can do several stints of 10-minutes fairly comfortably, I step it up and try to do figure-4s. I allow myself to flat-smear with my feet but I don’t use the footholds. I’ve never managed 10 minutes of this—the best I’ve done is 9! I don’t really train static stuff as my climbing style is more about cutting loose and swinging but I certainly see the value in it. I also do one-arm repeaters like Klem.
Gresham: Do you do strength conditioning with weights and or TRX?
Premrl: For me, TRX is the way to go for strength conditioning. When you’re short on time and can only train, say two hours on alternate days, then TRX gives you everything you need. The training is much more specific to climbing than weights and I always use this as a guiding philosophy. For maximum value I have the handles running through a pulley, which means you have to be extra controlled and balanced.
Emmett: I don’t do TRX or weights but I know I should! I do a load of bodyweight stuff, such as press-ups, hanging core exercises, wind-screen wipers, alternate front levers, leg-raises.
Gresham: And do you do any supportive cardio work?
Emmett: If I’m training for any route which is endurance-based (rock or winter) then having a decent cardio base is very important. Some of the long pitches I’ve climbed have taken an hour (such as Interstellar Spice, which is 85 metres and with poor rests) and supportive cardio work really helps me to recover. I run two to three times a week (or up to four) for 30 to 40 mins at a steady speed. I’ve tried intervals but don’t think it’s the way forward and only tend to do this for climbing-based training. I did do a phase when I pushed the running harder, but it was detrimental. If I stay in zone 1, it doesn’t exhaust me for climbing sessions. Easy runs on rest days are also good for mental health and general well-being. I stress that this approach is for steep ice and mixed, but when I went to the Himalayas it was much more about leg work.
Premrl: For walking into ice routes you need to be cardiovascularly fit, but I’ve never fallen off any mixed route because I was out of breath. Presuming that every athlete should do cardio to be fit, I’m pretty sure that for hard mixed it doesn’t have a big impact. I do uphill running because I like it (and it may help for summer alpine and the Dolomites) but it would be the first thing that I’d cut out or my training if I was short on time. In fact, recently I did cut it out because I was busy with work and it wasn’t a big deal because I have a decent base. If you’re training for power you should certainly reduce the amount or cardio that you do.
Gresham: Do you work on flexibility?
Premrl: I think flexibility is less important in ice/mixed than in sport climbing but it’s still important. When it’s steep and the footholds are bad you have to put your feet really high and this requires hip flexibility. I stretch my shoulders statically after a hard training session on tools to maintain functional mobility.
Emmett: Bridging between icicles is a brilliant way to get rests, so it’s helpful to work on hip flexibility for that, but for general movement I don’t find it’s useful. After sessions it’s important to stretch the bicep with a straight arm and your palm against the wall as your biceps get used so much.
Gresham: And what about injury prevention?
Emmett: For me the staples for injury prevention are push-ups, offset push-ups, and powerfingers (forearm extensions with an elastic trainer gadget), and this combination has really sorted my elbows out. Also forearms and shoulder stretches too.
Premrl: I try to warm up with a Theraband and work on my rotator cuff doing both internal & external rotation. On one hand, TRX can be great for antagonist work, but it can also be stressful for shoulders, so it’s important to use good form and build up gradually.
Gresham: Tell me about the future of training facilities.
Premrl and Emmett: No doubt there’s scope for taking things way further. Imagine an angle-adjustable board, like a Kilterboard for mixed training! You could tilt it over to the point when your tools started to rip because the placements became too sloping and you then tilt it back to work on endurance.
Also Read
- After A Shooter Threat, Employees at Touchstone’s Hollywood Boulders Walk Out
- The Place Where Murder and Climbing Meet
- Babsi Zangerl Nabs the 4th Ascent of Meltdown
The post How to Train for Steep Ice and Mixed Climbing appeared first on Climbing.
]]>
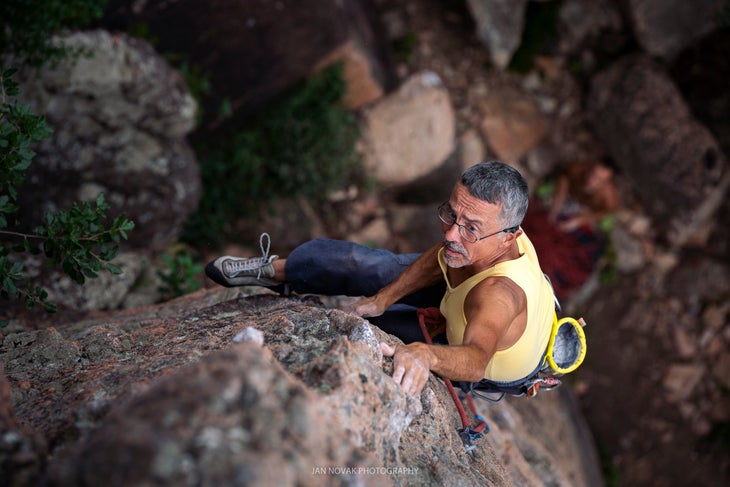
An expert looks at the physiology and training of older climbers by age group, from 45 to 50, from 50 to 60 and beyond.
The post Getting Older? Here’s What Coach Says To Do To Keep Cranking appeared first on Climbing.
]]>Today, an increasing number of veteran climbers refuse to throw in their rock shoes and take up something more sensible. As climbing matures, so do its participants, and this brings about an urgent need to address safe and effective training practices for seniors. Should older climbers do specific strength training? What sort of methods should be prescribed and how much rest is necessary? Any other sport would have a coaching framework to guide participants, but climbing doesn’t and we are left to forge our own way and learn from frustrating mistakes. The purpose of this article is to make sense of the theory and speculation that surrounds the subject of training for older climbers.
Physiology of Older Athletes
My father once opined that as a veteran athlete, if you are maintaining performance then you are improving because you are winning the battle against the aging process. The science of aging predicts a steady decline in athletic performance from the age of 30 (and no, I’m afraid that wasn’t a misprint that was supposed to say 40!) onward. This depressing statistic might suggest, even to me at the age of 36, that I am better off sitting here at the keyboard than out on the rock. Thankfully, a closer examination reveals a more optimistic picture.
Men are understood to reach maximum strength potential during their mid-20s and women by the age of 30. From this point onward, muscle mass and explosive strength decline at three percent per annum during your 30s and at one percent from then on. Joint stiffness increases with age (don’t we just know it!); however, muscle-fiber density and capillarity hardly change. Sports requiring high levels of power-endurance show similar decline curves, although aerobic endurance declines notably later and at a slower rate—peak V02 max can still be reached by men from 30 to 35 and by women at 35 to 40. Remember, we are talking about maximum capability here. It is still possible to gain strength and endurance during your later years; you just can’t reach peak level. The effects of age-related performance decline are greater for high-level performers than for lower-level performers. In other words, the bigger they are, the harder they fall: A 60-year-old Chris Sharma is going struggle to stay on form way more than the average mortal. Another notable factor is the need for increased recovery time with age, both within and between training sessions. Numerous studies provide evidence on this subject, and our own experiences speak for themselves.
Safe and correct training practices allow participants in more conventional sports to maintain performance, and in some cases—especially for late starters and especially in endurance events—to improve. Climbing, though, is not a conventional athletic sport. Nearly all research into age-related decline has been conducted in sports like running, rowing or cycling where there is a high emphasis on brute strength and endurance. Owing to the massive technique element in our activity, it is definitely possible to out-climb your former youthful and exuberant self by relying more on wisdom and superior movement skills than campusing strength.
The Roller Coaster: Motivation and Lifestyle
If you invite the average veteran climber to grumble about why he is unable to climb 5.14, I can guarantee that physiological limitations won’t even be halfway up the list. A stressful job and hectic social life, or the constraints of running a family are far more powerful grade-crushers than a two-percent loss in tendon strength. It sometimes feels like a losing battle to fit training in around everything else, and the classic result is intensive spurts of climbing followed by long periods of forced inactivity. The frustration associated with performance loss leads to an excessive eagerness to play catch-up, and the result is usually injury.
Over time, the injuries are harder to comeback from. The single most important advice for any veteran climber is to make every attempt to straighten the curve. An hour of climbing twice a week is infinitely better than doing nothing, even if you only have time to warm-up and do a few easy routes or problems. A run or multi-gym workout is also better than nothing.
Training for Vets: An Age Specific Plan
In the model outlined below the age categories are loose and should be adapted to your requirements. Some climbers are simply more susceptible to injury than others—always consider factors such as weight, build and previous years of training. It may be necessary for a 50-year-old climber who is highly injury-prone to adopt the training practices of someone 10 years his senior. Equally, a 60-year-old who has never been injured in spite of years of training may wish to push for something a little racier than the guidelines given here. The lowest category is 40 to 50, but many 40 to 45 year olds may not need to train differently from the way they trained in their 30s, provided they are injury-free and adopt safe practice.
Warm-up
A good warm-up is one of the most important considerations for a veteran climber, but what exactly does this mean? Always start with a jog-on-the-spot or pulse raiser and some general mobility exercises to loosen up. The main thing is then to spend as long as possible (from 30 minutes to an hour) doing stints of easy climbing or traversing, interspersed with resting and stretching. Each climbing stint should be slightly harder than the previous.
The biggest mistake of all is to leapfrog grades and not sequence your warm-up in a pyramid style. The first three traverses should be on juggy vertical walls and no pump whatsoever should accumulate. After that, for route climbing, aim to get roughly 25 percent pumped, then 50 percent, then 75 percent, before you try something close to your limit. For bouldering, build up the problems in grade sequence, switching styles and doing at least three or four of each grade with plenty of rest in between. Don’t build a pump at all. And don’t miss out on the never-ending opportunity to improve your technique
by keeping your mind 100 percent in tune with your movements during your warm-up traverses. Don’t just carry on thinking about the day’s work. Try performing technique drills by focusing on various aspects of climbing style such as accurate footwork, fluid movements, controlled breathing, relaxed grip, keeping your arms straight and twisting in with your hips on overhangs.
Strength
Strength training is by far the most difficult component to incorporate into a veteran’s program. Nobody wants to lose the hard-earned strength gained in his earlier climbing years, but if you have a catalog of injuries from a long climbing career, then it makes much more sense to aim for a lower level of strength, while keeping climbing. This principle is surely the cornerstone of training for the majority of veteran athletes.
We must also consider the scenario for those who get into climbing late. For most climbers in this category a lack of specific strength for hard moves is the major weakness. Yet it takes years of progression, even for young climbers, to build up finger strength without getting injured, and the threat of injury is amplified for those over 40. Again, it is a tough fact to accept, but it is probably better for climbers over 40 to minimize their specific strength training and to focus on endurance.
The only group of veteran climbers who should feel tempted to up the level of strength training are those in their 40s who can boast an injury-free record from a climbing career mainly geared towards routes and endurance. In this case, you will have a solid foundation of tendon strength and it may well be possible to introduce a higher workload of strength training than that which is prescribed here. In general, though, the secret for aging climbers is to change the way you think about training and to place less emphasis on power and more on technique (which,of course, is also a more effective strategy for younger climbers).
There should be strictly no campusing or system training in a veteran’s program and the emphasis for strength work should always be on bouldering. Read every problem before you attempt it and review your sequences afterwards to see where you could have saved energy. There is endless potential for improvement and this is also one of the few golden nuggets that will make you improve while simultaneously reducing your chances of getting injured. Hard bouldering should also be given less and less emphasis in your overall training plan, until you reach 60, then you should probably cut it out altogether.
Endurance
You can expect reasonable improvements in endurance as a veteran climber if you are fairly new to the sport, but if you have been climbing at a reasonably high level for many years, it may only be possible to maintain endurance in pure physiological terms. If you consider the intrinsic links between endurance and technique in climbing, however, there is room to break new barriers as a veteran.
Route-reading, spotting rests and making better use of them, learning to relax in strenuous positions and climbing more quickly are all skills that will help you keep climbing far longer on sustained ground than merely focusing on improving your lactic tolerance. Aside from the technique element, the key to endurance training as a vet is to not make too many changes to what you do on any day but to lengthen the recoveries between sessions. Train middle-distance endurance (power-endurance) and long-distance endurance (stamina) on separate days.
Don’t make the mistake of going for too much volume at the expense of intensity (unless you are commencing a training program). In other words, instead of doing loads of laps on easy routes, try to keep the difficulty of the routes up and lengthen the rest times accordingly or aim for slightly less repetitions. Quality over quantity should be the guiding motto.
Opposition and Cross Training
A crucial component to reduce the chance of injury for veteran climbers is always to maintain a focus on antagonist training (antagonists are the “opposition muscles” to the muscles commonly used in climbing). A general strengthening routine in the gym (or a few sets of push-ups) twice a week provides the means. This does not have to be too scientific—you just have to do it! Cross training and aerobic conditioning are also important, both for fitness and for weight control, but do not overdo it, as this will impede your recovery between climbing sessions.
Nutrition and Hydration
The older you get, the more your body needs good nutrition. Weight control is particularly important for veteran climbers as it provides a safer alternative to strength training—get lighter and you’ll get stronger automatically! However, beware of extremes and be sure to strike a balance that enables you to recover sufficiently from your training. Protein shakes and protein/carbohydrate recovery drinks provide essential support. For endurance sessions lasting over an hour, take an electrolytic replacement drink. Nutritional timing is also a crucial issue for those with a busy schedule. Don’t eat a big meal before training, instead eat at lunchtime, then have an energy bar or piece of fruit before you climb. Avoid eating big meals late as this will cause you to gain weight.
Age in climbing is a case of mind over matter—if you don’t mind then it doesn’t matter, provided you are armed with all the tricks regarding safe and effective training practices. Today we have seen 60-year-olds climbing 5.14b. Male and female climbers all over the world are achieving personal bests despite having only a few hours to train, two or three times a week. Quality over quantity is the guiding motto, so make those sessions count and make the rests count even more. Focus on technique and endurance, and go easy on the strength work.
Training Plans
Your objective is to do a little, and often, rather than intensive spurts followed by long breaks. An additional aim as you get older should be to increase the amount of rest both within and between climbing sessions. You should also carefully monitor the overall intensity of each week and try to push your training forward in waves. For example, a light week is followed by a moderate week and then a hard week, and then repeat with a light week, and so on. Your training should also be split into phases, which show an overall theme or priority (for example, a bias towards either strength or endurance).
Overall it is best to prioritize endurance and to keep strength-training phases as short as possible (three to four weeks) in order to minimize the chance of repetitive-strain injuries. A change is often as good as a rest. Incorporate phases of full rest into macrocycle plans (for example, two cycles of two weeks of full rest per year). The older the climber, the longer and more frequent these should be, but beware of taking excessively long, full rest phases due to the associated performance loss.
Ages 45 to 50
Bouldering:
Short sessions (two-hr. max, including 45-min. warm-up and 15-min. warm-down) two/three times/week.
Maintain focus on technique. The optimum steep-training angle is 25 to 35 degrees overhanging. Switch between steep and vertical problems. The half-crimp is the utility training grip, but also do a minimum amount of careful work on full crimps and pockets. For the first hour flash all problems; then during the peak hour, try slightly harder problems that might take two or three attempts. Only make powerful moves on problems within your grade. Avoid all-out dynos or campus-style moves. Cutting loose is OK, but emphasize control. Rest completely for 10 minutes for every 30 minutes of climbing and rest one minute for every move completed on harder problems. Do supplementary bar exercises at the end (pull-ups and leg raises—no more than four sets of eight to 10 reps). Warm down and stretch.
Specific Endurance
Power-endurance (20 to 30 moves): Do interval training on routes or circuits one or two grades below your onsight level, with rest times exactly double the work time. Aim for six to eight repeats. Be strict with the stopwatch and never reduce your rest times.
Stamina (50 to 80 moves): Do up-and-downs on easier routes (e.g., up a 5.10, down a 5.8, up a 5.9) or long stints of random climbing on an easy part of a vertical bouldering wall. Aim for four or five repeats with rests double the work time. Simulate the pace of trad climbing by climbing slowly.
Gym and cardio work: Focus on antagonist exercises (chest, shoulders, triceps). Four or five sets of push-ups twice a week is the minimum. Maintain cardio fitness with running or cycling (2-3 times per week for 20 to 35 minutes at a light to moderate intensity).
During Each Week
Three to four sessions per week in hard weeks; only three in moderate weeks.
- Strength priority phases: Two/three boulder sessions/week, with one day on routes.
- Endurance priority phases: Two/three endurance sessions/week, and one day bouldering.
Basic Macrocycle Outline:
Overall 50/50 split between strength and endurance or slight endurance bias.
Phases to be no longer than four to five weeks in length.
Sequencing: One light week, one moderate week, two hard weeks.
Age 50 to 60
Bouldering:
Same as 45 to 50 year olds, but shorter sessions (90 minutes max including one hour warm-up) two times/week max. Also, spend slightly less time on harder problems (30 to 40 minutes). Avoid dynamic moves and minimize cutting loose. Rest 10 minutes for every 20 mins of climbing and rest 90 seconds for every move completed on harder problems. Reduce intensity of bar exercises, or skip altogether.
Specific Endurance
As for 45 to 50 year olds.
During Each Week:
As for 45 to 50 year olds, except a maximum of three sessions/week, even in hard weeks.
Basic Macrocycle Outline:
Greater overall priority towards endurance, with longer endurance phases (six to seven weeks).
Shorter strength phases (two to four weeks) or consider cutting strength out altogether.
Sequencing: One light week, two moderate weeks, one hard week.
Age: 60 plus
Bouldering:
Avoid bouldering altogether, or go for mileage-based sessions on easier problems that you can flash comfortably. Stick to vertical with the very occasional
overhanging problem.
Specific Endurance
As for 45 to 50 year olds, but reduce the training grade of interval routes for power-endurance (three grades below your onsight level). Maintain the same
rest times, but go for slightly more repeats (nine or 10). Stamina training can remain the same.
Gym work and cardio: Same as for 45 to 50 year olds, only slightly shorter/easier gym sessions.
Weekly Plans
Two hard sessions per week or three moderate sessions in hard weeks.
Endurance work only: Two/three routes/endurance sessions/week (with occasional light bouldering).
Macrocycle Plan:
No hard weeks
Sequencing: One light week, two moderate weeks.
Frequent contributor Neil Gresham is best known for his repeats of two of Britain’s scariest trad routes, Indian Face (5.13a X) in Wales and Equilibrium (5.13d X) on Peak District gritstone. He redpointed 5.14c at age 46 and E11 at 49. He has been coaching and writing training articles for 25 years.
Also Read
- My Draws Were Stolen
- Three Tips To Take You From 5.10 to 5.11
- Don’t Lead on a Boat Rope Because Your Pappy Did
The post Getting Older? Here’s What Coach Says To Do To Keep Cranking appeared first on Climbing.
]]>
It's easy to push your training too far, and get injured or see negative progress because you are doing too much. Knowing when to end a training session can be subtle. Here's a climbing coach's tips for guiding you through these murky waters.
The post How To Know When To Keep Training And When To Quit appeared first on Climbing.
]]>“No pain no gain” is perhaps the oldest training cliché. It may serve well for some sports, but when applied to climbing the outcome is usually disastrous. We tend to associate effort with results, yet too much effort too frequently will simply lead to injury. Climbing and training for climbing places a great deal of strain on small and fragile muscles and tendons, so we need to be strategic in our approach. The message isn’t to avoid pushing to the limit, it’s to know how and when to do this, and when to quit.
It takes years of experience to develop a radar for controlling the effort level in your training. The approach will be different for each individual and it will change for the same person throughout the year and over time. Frustratingly, some climbers seem to give the impression that they can beast themselves in every session, tempting others to copy. Yet the truth is that these climbers will pick their moment, or if they don’t then they are likely to add themselves to the injury data.
So what can we learn from the experiences of others and how can we shortcut the process of developing an off switch in our training? The answer is first to identify the respective feelings that we are aiming to achieve in strength sessions and endurance, and to understand how they differ. The next step is to attempt define some loose-fitting criteria for effort levels; essentially, easy, medium or hard. For some of us, the very act of doing this will be a revealing exercise—teaching us that the effort level shouldn’t always be the same. The final stage is to look at how you should cycle effort levels, whether on a daily, weekly or monthly basis and preferably in accordance with a structured plan.
Feel of endurance sessions
In endurance sessions the aim is to get pumped in our forearms, out-of-breath and feel generally fatigued to varying degrees.
Effort level 1: Light endurance sessions
There are two viable approaches to this type of session. One is only to climb very easy stuff, so that the pump is mild. An example would be aerobic capacity-style sessions, where we move around for long durations on very easy warm-up terrain. The other approach is to climb a bit harder, but to train for short durations. An example would be to do two warm-up climbs and only one hard climb, with plenty of rest in between and without climbing to the point of failure.
Effort level 2: Moderate-to-hard endurance sessions
Here the pump level will be much greater, typically around the 75 to 95 percent mark for most of the session, and we may tease to the point where we fail and our fingers uncurl, but only on one or two climbs, typically toward the end of the session. Sessions may be relatively long or if shorter, we may be working to short, tough recovery times. This represents the most commonly used effort-level because it enables us to achieve some relatively hard training without over-taxing our system and placing excessive demands on recovery.
Effort level 3: Very hard, limit endurance sessions
In these sessions we may reach the point of failure multiple times and the sessions may also be the longest in duration.
Feel of strength sessions
In contrast to endurance sessions, the aim of strength sessions is not to get pumped in our forearms or feel generally fatigued. The objective is to maximize the quality of effort by taking long rests and not doing too much volume, so that we are able to pull as hard as possible. However, the effort level should still vary, as follows.
Effort level 1: Light strength sessions
There are two approaches to this level. One is to consciously avoid pulling hard. The aim here is merely to stimulate the muscles at a low level. For example, when bouldering we would simply do warm-up problems, plus a few mid-level problems that we can comfortably climb. The other is to pull harder and climb something closer to limit level, but only to do a very small amount. For example, after warming up, you would do no more than one hard boulder problem or, say, three or four max-hangs on the hangboard. This will have the effect of recruiting full strength without over-taxing muscles and energy systems, thus meaning that less recovery is required.
Effort level 2: Moderate-to-hard strength sessions
In these sessions we would seek to pull hard and to the limit, at times reaching the point where we’re failing on moves. However, we wouldn’t do this constantly throughout the session. An example when bouldering would be to try problems close to our flash-limit and then work a few problems that we could do, say in two to four tries.
Effort level 3: Very hard, limit strength sessions
The majority of these sessions would be spent failing on moves, whether on very hard projects or on flash attempts beyond our limit. These sessions may also be longest in duration.
Cycling effort levels
So when should we climb light, when should we climb moderate-to-hard and when should we push beyond the limit? Of course, there are so many layers to this question, it depends on individuality and so many factors. However, as a staple, for most climbers we might dare to suggest that level 2 is the way to go! Why? Because level 1 sessions don’t really represent hard training, so if you use level 1 as a staple you simply won’t be forcing improvement. Level 1 sessions may promote recovery, although more research is needed in this field. Conversely, level 3 sessions are so taxing on our systems that they require longer recovery periods and thus, if used too frequently we can tease the line with over-training. As such, most climbers default to training at level 2, as this represents the middle-ground and means that they can train quite hard and quite frequently. Level 2 is also the way to go for climbers who don’t really have the aptitude for planning their training. Put simply, if you can’t really be bothered to plan your training then level 2 sessions represent the safest bet.
However, the best answer is to cycle the effort level, whether on a daily, weekly or monthly basis.
DAILY SEQUENCES
Intermediate climber (majoring on level 2 sessions)
- Day 1: level 2
- Day 2: level 2
- Day 3: level 1 or rest
- Repeat > >
Elite climber (majoring on level 2 sessions)
- Day 1: level 2
- Day 2: level 2
- Day 3: level 2
- Day 4: level 1 or rest
- Repeat > >
Intermediate climber (majoring on level 3 sessions)
- Day 1: level 3
- Day 2: level 1 or rest
- Day 3: level 1 or rest
- Repeat > >
Elite climber (majoring on level 3 sessions)
- Day 1: level 3
- Day 2: level 1 or rest
- Repeat > >
WEEKLY CYCLE OF EFFORT LEVEL
- Week 1: level 2 – Preparatory week
- Week 2: level 3 – Load week
- Week 3: level 2 – Peak / maintenance week
- Week 4: level 1 – Recovery week
- Repeat > >
CYCLE EFFORT ON MONTHLY BASIS
- Month 1: Level 2 – preparatory / base phase
- Month 2: Level 3 – Load phase
- Month 3: Level 2 – Peak / maintenance phase
- Month 3: Level 1 – Recovery phase
- Repeat
The post How To Know When To Keep Training And When To Quit appeared first on Climbing.
]]>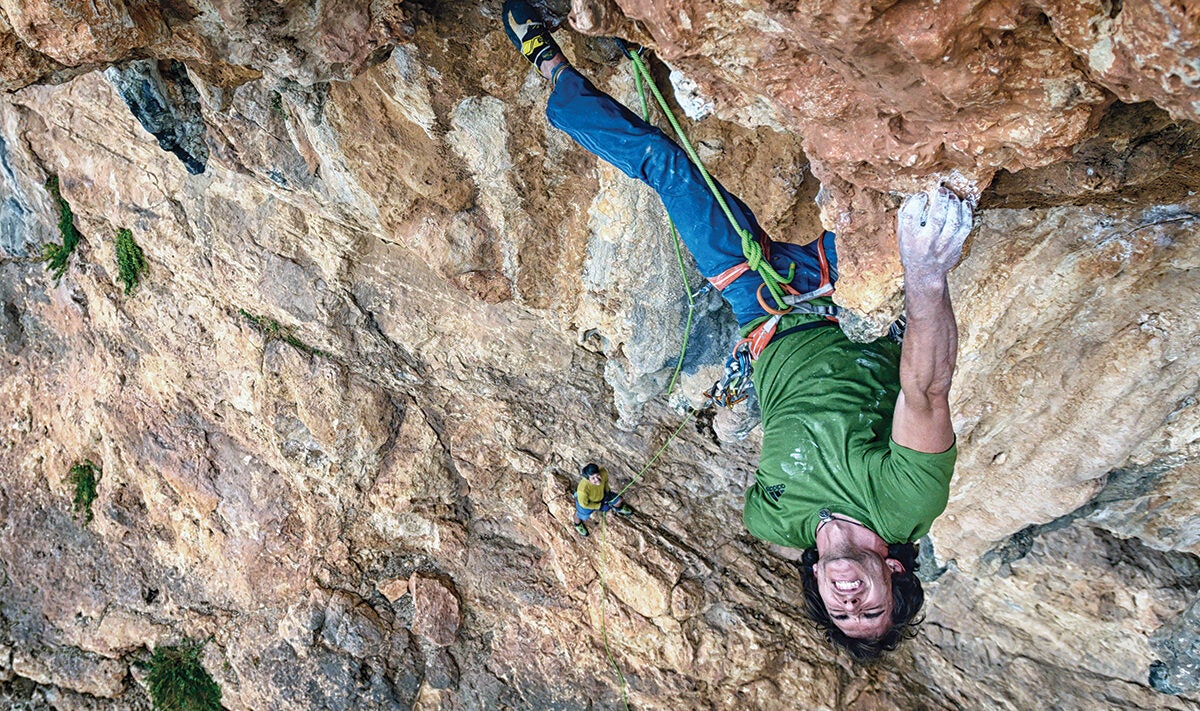
Not many will argue that hitting the fingerboard will improve your climbing grade, but if simply going climbing is just as effective...
The post Is Training Worth Your Time? appeared first on Climbing.
]]>For decades, climbers have debated how much they should train and even, fundamentally, whether to train at all. When I started climbing, back in the 1980s, training remained in the closet: a guilty secret, as if you were cheating. Climbers even held a romantic notion that perhaps our unique and variously demanding activity couldn’t be “trained” for. Indeed, Ron Fawcett, Britain’s top climber and a world leader in the late 1970s, famously said, “The best training for climbing is climbing.”
The big question is whether or not the picture has changed.
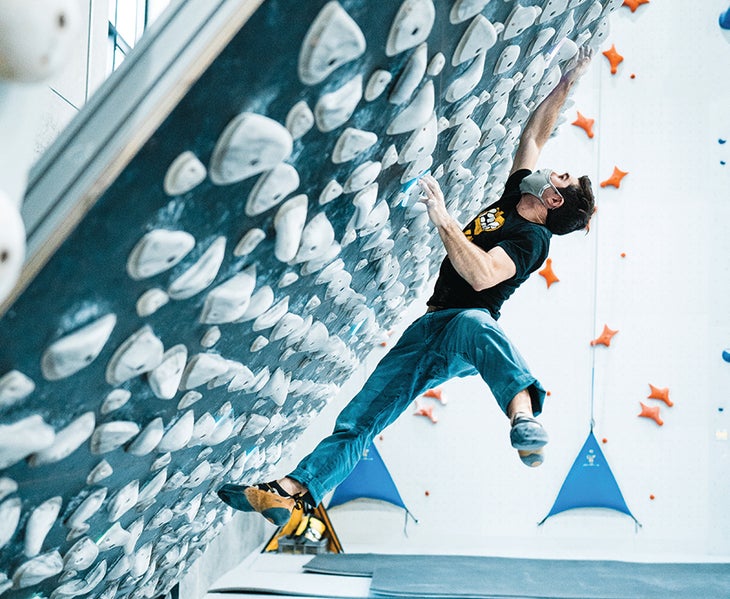
Today, we see a generation of training-obsessed climbers. One flick through Instagram might lead us to believe that unless we perform regular benchmark tests—one-armed front levers or pull-ups on 6-millimeter crimps, anyone?—and plan out our training on spreadsheets, we are behind. Coaches debate endlessly about hangboard protocols, how to target different energy systems, and the ratios of a wide range of performance variables in a periodized program. Yet when you go to the crag, you see a lot of good climbers (including really good ones) who don’t do many of these things. They’re too busy out at the rock, trying hard routes!
We could, of course, debate the precise definition of “training.” You could argue on one hand that nobody really “trains,” and on the other that everyone does. As a coach for nearly three decades, I find the word “training” to reflect an attitude, rather than a specific practice. It’s the process of analyzing your climbing performance and committing to exercises or drills because you hope they’ll make you climb harder (I’m pretty sure most people do this at some point).
So, if we accept that you train, at least to some degree, the next question is How much do you train?
Most things in life work best in moderation, and this is never truer than in training. Training gives, but it also takes away. I could list endless advantages of training (since I’m a coach, you’d hope so!). First, through training, we can diagnose and address weaknesses. One example might be a climber who always uses an open grip because she can’t grip holds in the half-crimped position. If she trains the half crimp on a hangboard consistently for several months, she’ll begin to use it more when climbing, and may feel much more confident and versatile overall. Another example might be a climber who struggles with endurance but only has access to a bouldering wall. If he performs regular endurance-based bouldering drills (lapping easy and mid-grade problems in blocks), then he can, in fact, build endurance on a medium that is generally more about strength. We can stretch to promote flexibility; we can perform supportive strength-conditioning exercises to reduce the risk of injury. A well-structured plan may also help prevent burnout by cycling the workload.
Above all, we need to love rather than fear the pressure. The point isn’t to train to make your project feel easy—to overpower it; it’s to thrive when it feels hard!
I could go on, but you get the picture—training helps a great many climbers to perform well. I put any or all my climbing successes down to hard and strategic training, because the physical aspects of climbing do not come naturally to me, whereas the technical, tactical, and psychological aspects do. And so we enter the crux of the debate: understanding a tipping point at which training stops working as medicine and may become poison.
Some climbers love to train—so much so that they actually forget to go climbing. They love training because they’re good at it, and may not actually love climbing because they struggle on rock. Indoors, and especially on the campus board, they are roundly praised: “You’re so strong and would definitely climb ____ when you go outside.”
Then, lo and behold, it doesn’t happen. After a beatdown, these climbers return, scratching their heads, to their spreadsheets and periodized plans to see where they went wrong.
The biggest training trap of all is that, if we take it too far, we lose the skills and raw instincts upon which good climbing performances are forged. To climb well, we need to be creative and adaptable. Watch footage of Adam Ondra redlining on a 9a onsight, lashing out for microscopic holds as if guided by radar. Or Ashima Shiraishi, flying into a full-splits stem on a powerful boulder at a competition. We also need to have a head for running out the rope or pushing high above the pads. When Alex Honnold and Tommy Caldwell are way above their gear on some blank granite face, their minds—not arms—are driving them onward. We also need an eye for reading complex sequences. We need to be able to change a game plan quickly.
Above all, we need to love rather than fear the pressure. The point isn’t to train to make your project feel easy—to overpower it; it’s to thrive when it feels hard! To get the job done, we need to hone a killer instinct and the ability to snatch a result when the odds are against us. Training won’t teach us any of this. In fact, it may have the opposite effect.
Last year, I attended two team meets in Europe with some of the world’s best climbers. I found that many had minimal appetites for complex, science-based training. Some of the 9a+/b climbers I spoke to weren’t familiar with much of the latest scientific theory, and many believed it was possible to take things too far. Sure, you could argue that some of these girls and guys have superior genetics, but those alone aren’t enough to reach the pinnacle in climbing. The sentiment among this crew was that training was only half the battle, and you’ll always need to put the time in on the crags to fulfill your potential. You can overanalyze something to the point where you go off on a tangent and lose sight of your priorities or central goal—or the joy of climbing.
It’s all about balance. I’ve come across a great number of climbers who are lost without a training plan. If you’re one, I suggest that this is an iffy headspace as far as your climbing is concerned. As a coach, I have a policy of refusing to issue a repeat training plan to a climber immediately after the person has completed the first one (even though many clients have begged!). Training periods should always be followed by performance periods—or if that latter term adds pressure, periods when you just climb for the pure sake of it. Moreover, if you only train and train and train, you run a real risk of performance decline and injury due to overtraining (see Master Class, No. 381).
In short, to be a really good climber (and, I dare say, also to enjoy climbing fully), switch off your training brain periodically and just go.
Takeaways
- 1. When planning your year, consciously allocate periods during which you won’t be following a structured training program, and just climb at whim.
- 2. If you struggle more with technique or your head game, spend more time working on those aspects of performance than training. If necessary, work specific technique drills, and take practice falls. Maximize your time on rock.
- 3. Don’t sweat minor losses or gains in physical performance. Benchmarking scores on a hangboard is useful for reference, but often has little significance at the crag. If your scores go down, you may end up climbing better, relying more on technique.
The post Is Training Worth Your Time? appeared first on Climbing.
]]>