Ratchet up your redpoint grade—and ditch some needless pump—with this flagging primer.
The post Feeling Unbalanced? Make Sure You Know How to Flag appeared first on Climbing.
]]>
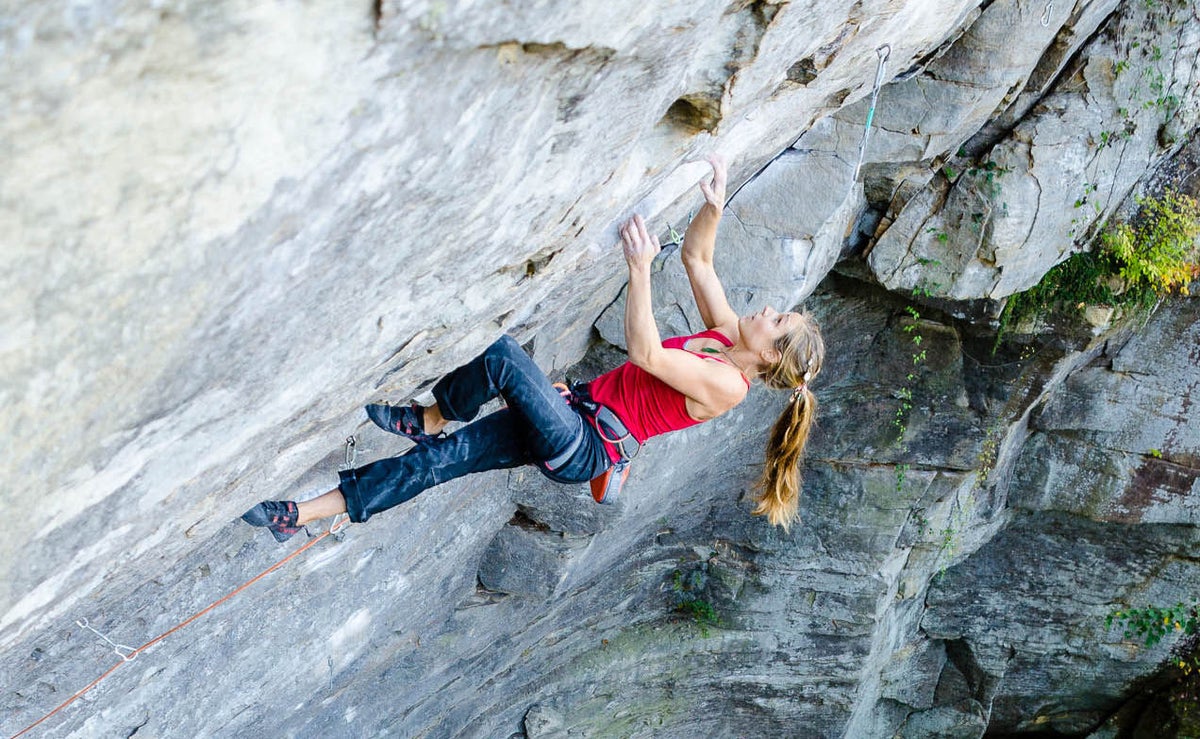
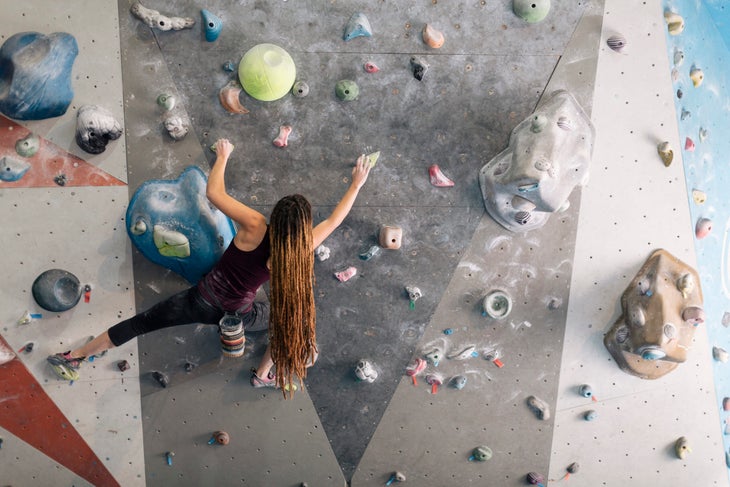
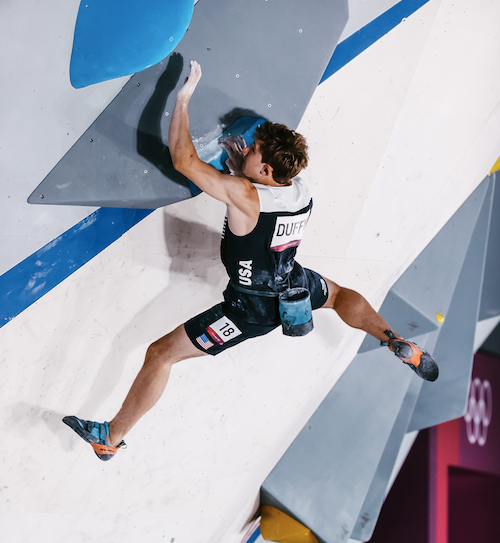
Wouldn’t it be nice if the crux on your project had a huge, sticky, perfectly formed foothold in just the right place? But then no climb would be harder than 5.8, and what’s the fun in that? As you venture into the world of intermediate and advanced routes, you’ll find yourself forced into some awkward body positions, whether it’s because there is no hold to be found or because the movement is actually easier when you leave one foot off. A technique called flagging allows you to use that free-hanging foot as a counterbalance to make the next move, gain more reach, or prevent a barndoor swing. This move can be used on all angles and types of routes (except slabs, generally), and you’ll find flagging makes you a smoother climber when it becomes a go-to move in your quiver of skills. Below we’ll outline how to maximize this technique, including some authoritative tips from 5.14d climber Ben Spannuth.
Flagging Basics
Flagging is specific to the location and quality of the holds, body position, and the direction of movement. Although these details will determine exactly how you flag, there’s one general guideline: Picture a vertical line that runs through the center of your body, and the goal is to keep your weight balanced on both sides of that line. Having a right handhold and left foothold creates this balance, but imagine having a right hand and a right foot; once you begin to move upward, your left foot is going to swing out (aka barndoor), pulling you off. Flag that left foot behind your right (a rear flag) to move the weight to the right, more in line with your supporting foot and hand, keeping your body from swinging out by shifting your center of gravity. Flagging utilizes pure body positioning (instead of power, strength, or endurance) to statically make the next move, which improves your overall technique, reduces dynamic movement, and uses less energy on the wall. This means less throwing and stabbing at holds and more time simply stepping up and latching them. With both rear and side flags, keep your flagging leg as straight and engaged as possible—a loosely hanging limb can easily pull you out of position.
Rear Flag

Common on overhanging terrain, the rear flag puts the free leg behind and almost perpendicular to the standing leg. It’s used when you have holds on only one side of your body and you need to move the opposite direction. Let’s say your left hand and left foot are on and you need to move right, a rear flag with the right foot behind and to the left will shift your center of gravity farther left, thus more in line with your supporting hand and foot. This body position is more stable, and it becomes easier to funnel upward power from your left foot into your hips (because they’re closer to, instead of extended away from, your power-providing foot and leg), giving you a larger range of motion to latch a handhold when moving right.
Side Flag

With your free leg out to its respective side (e.g., left leg will be out to the left), press against the wall with the instep of that foot. Instead of using an individual hold for the flagging foot, think of the whole wall as something to push against. The harder you press, the more leverage you will get to move upward, so keep that leg straight and really push with the foot. A common scenario for the side flag is left hand and right foot on two holds that are aligned somewhat vertically, right hip turned into the wall, and left foot flagging to the left side. Your supporting right foot will drive you up and right while the left leg maintains balance on the left side. If moving left, stand up on the right foot and twist your right hip into the wall; the flagging foot will keep your body from swinging out.
More Flagging Tips
With Ben Spannuth

• In general, you will flag when you have good holds for only one side of the body, particularly when back-stepping isn’t as efficient because the foothold is too high or too far from the back-stepping foot.
• Flagging is useful for all angles of climbing terrain, and it can feel super-balancey on more vertical angles, so it’s important to keep your whole body flexed and tight. On steeper climbs, think about sinking deep into the flag by hanging low off the supporting hand and foot while really activating the flagging foot and keeping your butt, quads, hamstrings, calves, and feet engaged. This will help you maximize the position and even offer a quality rest if needed.
• Try to find a body position where you’re minimizing the amount your body moves, meaning you can just reach up for a hold instead of jumping for it. Flagging will give you a wider range of motion when moving statically, so you won’t have to move as dynamically. Settle into the position that’s going to be the most efficient, meaning your legs will hold most of the weight but you can still reach the next hold. You can always shift more weight to your feet than you think. Part of this is trusting the one foot that’s on fully, which will cause you to put more weight on the hold and allow you to sink deeper into the flagging position.
The post Feeling Unbalanced? Make Sure You Know How to Flag appeared first on Climbing.
]]>
Chimneys can be strenuous, runout, and baffling. They can also take you to some pretty incredible places.
The post Can Climbing Chimneys Actually Be FUN? appeared first on Climbing.
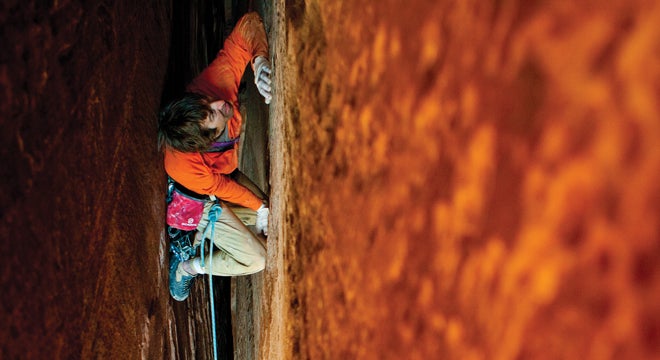
]]>Royal Arches, Yosemite. Kor-Ingalls Route, Castleton Tower. Durrance Route, Devil’s Tower. What do these super-classic moderates have in common? They each have a physically demanding chimney. This term refers to any fissure that your body fits inside, ranging from a squeeze chimney (one to two feet wide) to much wider, where you must stem the gap with a foot and hand on each side. Each width requires its own set of unique movements, so we talked with wide-crack wizard Rob Pizem (who points out that this was one of the earliest climbing techniques) to break it down into a step-by-step process.
Movement
Squeeze

The tightest of the tight, where just breathing in can prevent you from moving upward. Remove any bulky gear (pack, shoes on harness, etc.), put it on a sling, and clip it to your belay loop so it hangs down. Choose a side to stick in first: If the crack gets tighter as it goes deeper, put your dominant hand inside for jamming, or if there are more edges on one side, face it so you can use them for holds. This style is “anything goes,” but every movement should be small and approached with patience. Look for narrower sections to wedge your feet with heel and toe smeared on opposite sides, like you’re standing. Try heel-toe cams, twisting your ankle so your foot cams sideways into place (Pizem’s favorite), or a T-shape (feet perpendicular, with the heel nested into the arch of the other foot). Hands should be doing anything: finding edges/crimps (including on the face next to the crack!), smearing with palms, and arm-barring or using a chicken-wing (palm on one side and upper arm on the other)—try elbow up and down. Inhaling may lock you into place, so exhaling might release you.
Froggy Style

This is required for chimneys that are just bigger than squeeze but not expansive enough to fully stem. Back on one side, knees pushing into the other. With the soles of your feet pressing into the back-side, push out with your palms—fingers pointing down or to the side—kept low for leverage. Lean your upper body slightly forward, and push down and out with your feet and hands so you can scoot your butt and lower back upward. It will be slow and steady, but push with everything to hold you in place while your upper legs lift your body. Repeat pushing to slide your legs up.
Stemming

For the widest chimneys out there, put your left foot and hand on one side with the right hand and foot on the other. Press and push your feet and hands outward, trying to maintain as much external pressure as possible. “Think about pushing through the wall,” Pizem says. “Most people slip because they are pushing down when the holds actually require them to push out.” Always be looking for edges, bumps, or slabbier sections to use as footholds. Pull down on holds above or palm the wall to get some downward force so you can move up one foot at a time.
Chimney Cheats (With Rob Pizem)
Gear
- No tight, downturned shoes; think flat, stiff, and supportive.
- Check belay loops, waistbelt, and leg loops for damage.
- Use a webbing strap to move your chalkbag (side or front).
- Pants, pants, pants! Protect your legs with jeans or canvas.
- Put all pro on a sling. If the chimney gets tight, hang the gear down and out of the way by clipping it to the belay loop.
- Tie your knot with a longer bight so it’s below your crotch.
- Take your helmet off—just put it back on when it’s over!
Mental
I tell myself that the first ascensionist would have placed a bolt if it were really bad! The only reason you’ll fall is if you quit or go limp. Start on shorter chimneys to build endurance and technique, then attack the longer ones. Plan on being runout at times, but secure. Breathe and climb from rest to rest. This will keep you focused on the few feet in front of you.
Protection
Place when you can, not when you want to. That means taking everything you can get: small nuts, slinging blocks, or walking a huge cam up next to you. Look for spots on the face, too. Pro will be limited, but your position is surprisingly secure.
Rest
Find a way in which you are not applying external pressure but you still won’t slide down. Turn your upper body so your shoulders are wedged, or inhale to lodge your chest in place. In froggy style, lean forward so your chest is against the rock, or sit down on your wedged feet. Look for any holds, bumps, or edges to put your feet on. You have to rest your way up.
The post Can Climbing Chimneys Actually Be FUN? appeared first on Climbing.
]]>
What makes the perfect route? Is it the setting, technical difficulty, rock quality, style, variety, or maybe just how you were feeling that day? Through our 100% subjective polling process, we asked Facebook users, pro climbers, photographers, route equippers, media makers, and any well-traveled bolt-clipper (who would stop obsessing about their strength-to-weight ratio long enough … Continued
The post America’s 100 Best Sport Climbing Routes appeared first on Climbing.
]]>What makes the perfect route? Is it the setting, technical difficulty, rock quality, style, variety, or maybe just how you were feeling that day? Through our 100% subjective polling process, we asked Facebook users, pro climbers, photographers, route equippers, media makers, and any well-traveled bolt-clipper (who would stop obsessing about their strength-to-weight ratio long enough to respond) what their absolute favorite routes across the country are. We then cross-referenced those responses with Mountain Project’s Top 50 Classics and Route Finder tools to create this list loosely organized by region and grade. So grab a cold one, sit down with your friends, and get ready to debate—and build one hell of a bucket list in the process.
Region: Eastern
Quality over quantity is the rock mantra for this part of the country. And the climbs are so damn good that we could make a case for filling half our national list with the hardman testpieces of Rumney and the bomber sandstone lines of the New River Gorge alone. Climbers like Joe Kinder, Dave Graham, and Sasha DiGiulian got their starts here, and while you might not be crushing 5.14+, the crisp fall days spent climbing amid brilliant gold and fiery red leaves will make you think about putting down roots. It’s that good.
Crowd Pleaser (5.7)
Rumney, NH
Smooth, clean face climbing up positive holds on the first pitch leads into a slabby, airy arête with fun exposure on the second pitch. It’s guaranteed that everyone will love this, uh, crowd pleaser!
Mrs. Field’s Follies (5.8)
New River Gorge, WV
Crack climbing, face moves, an overhang, and, believe it or not, it’s a 5.8 sport climb.
Junco (5.8+)
Rumney, NH
Mellow slab climbing and a stellar finger crack lead into a fabulous view of the quaint New England hills of Rumney. “My all-time favorite 5.8; it can’t be beat… I don’t see this one ever getting old.”
The Eagle’s Gift (5.9+)
Eagle Bluff, ME
Take one look at the massive roof on this line put up in 1991 and you’ll deny profusely that it could be easier than 5.11, but a couple thank-the-lord jugs in just the right places make this a fun romp.
Lonesome Dove (5.10a)
Rumney, NH
“Wow, always classic, always fun, one of the best routes of its grade… Every single move on the climb is fun… This is by far the greatest climb I’ve ever done.” You might have to wait in line for this technical slab with small edges and holds, but it’s well worth it.
Honeybadger (5.10a)
Adirondacks, NY
The Empire State isn’t known for its sport climbing—trad is king here—but there are a few standouts, and this well-protected, “sick!” route is at the top of the list. A delicate, balance-focused slab then “dances nicely up the face on positive holds.”
Millenium Falcon (5.10c)
Rumney, NH
“It’s so good you can’t even remember how good it is until you’re back on it.” Situated at one of the best cliffs Rumney has to offer, creatively named the Main Cliff, this climb works its way up a steep face and tops out with just a bit of techy climbing—good sequencing goes a long way.

Waimea (5.10d)
Rumney, NH
“Flowy moves between incut flakes on classic overhanging black and tan Rumney rock—beware the pumpy crux at the top!” A prominent ebony streak of rock makes Waimea instantly stand out, but once you pull on, you’ll see how creative movement makes this list-worthy.
Legacy (5.11a)
New River Gorge, WV
“Awesome, varied movement on a beautiful piece of rock…impeccable face climbing,” raved one Appalachian climber about this 90-foot route with big reaches to solid holds and a small roof.
Flying Hawaiian (5.11b)
Rumney, NH
Another shoe-in, this “crazy, sweeping dihedral with a shiny line of bolts on the right wall is long, proud, and f***ing terrifying, which only adds to the allure,” says one local climber. An adventure through and through, this climb tests power, technique, and your personal commitment factor, making it the testpiece for the grade at Rumney.
Porter for Recorder (5.11+)
New River Gorge, WV
“With no section that is less than perfect, this is without a doubt one of the best 5.11s in the New.” Committing clips, shaky cruxes, and a variety of different climbing types means this line will certainly test you, but at the end of the day you will be coming back for more.
Under the Milky Way (5.11d)
Summersville Lake, WV
A “stupid hard” boulder problem kicks this no-gimme route off, and a blunt arête will have you slapping, crimping, and cursing your way to the delicate and balancey moves near the chains. When you get done throwing your wobbler after whipping at the top, don’t forget to look back at the view.
Narcissus (5.12a)
New River Gorge, WV
The ideal gym rat’s first 5.12 that just so happens to be a classic for the grade and the region. A super-overhanging pumpfest on crimps and jugs has a crux that you can dyno through or use a terrible intermediate—both ways are hard.
Technosurfing (5.12b)
Rumney, NH
An obvious line up the middle of the cliff, this impressive route has three bouldery and intense cruxes, each separated by no-hands rests, and an overhanging ledge system guards the chains. It might see a little too much traffic, but it’s for very good reason.
Shagg It (5.12d)
Shagg Crag, ME
The granite is perfectly carved into what seems like straight-from-heaven holds. “It’s long and has it all, from steep, reachy sidepulls to jug hauling, as well as a few hand jams and technical moves to finish it off. Badass.”
Quinsana Plus (5.13a)
New River Gorge, WV
Sustained and techy climbing on a bright orange face complete with pockets, edges, rails, and a mantel add up to a superb, outstanding route.
Apollo Reed (5.13a)
Summersville Lake, WV
Jugs ahoy! With 90 feet of somewhat unrelenting steepness, you’ll welcome the massive jugs that come about halfway through on this line, and thanks to the blocky nature of the sandstone, a plethora of hold options provide several ways to get through the crux at the second bolt.

Beat Junkie (5.13b)
Rumney, NH
“Predator gets most of the attention because of its photogenic position, but Beat Junkie has better moves, better rock, and a better overall feel,” according to one local. Sustained climbing, varied moves, an exhilarating finish, and the “possibility to fall from almost any move on the climb,” make this a must-do 5.13.
Cold War (5.14a)
Rumney, NH
“After about 80 moves, four cruxes, four kneebars, and 12 bolts of climbing, clip the chains and lower off. Then shirk all belay duty and take a nap in the sun.” Ah, if only it were that easy!
China Beach (5.14b)
Rumney, NH
Some guy named Dave Graham put this line up in 1999, and it became an immediate standout line when it was featured in Dosage II being climbed by the first ascensionist himself. Technical layback moves, overhanging crimps, and very difficult and precise footwork are just part of the fun.
Region: Midwest
There’s a reason we meet more Midwesterners in Colorado than Coloradoans. But from South Dakota’s granite spires to Kentucky’s sandstone caves to Texas’ surprising limestone, you can find dozens of road trip–worthy destinations. In fact, “the Middle” has more than a few single-pitch clip-ups that put the rest of the country to shame.
Waves (5.8)
Mt. Rushmore, SD
Two pitches, safe bolting, and ripple-like features in the pegmatite granite offering huge holds make this line an absolute must-do. “The holds are massive, and the protection is awesome.”
Green Goblin (5.8)
Horseshoe Canyon Ranch, AR
It’s hard to find a 5.8 that’s considered “sustained,” but Green Goblin is one—wonderfully carved sandstone ledges and edges force the climber to stem, layback, flag, and employ various intermediate techniques on this
“easy” route.
Waste Knot (5.8)
Custer State Park, SD
With 15 to 20 feet between bolts, this line is the definition of spicy. One fan places this 130-foot moderate into the category of “if you only have time for one climb, make it this one.”
Best Seat in the House (5.9+)
Obed, TN
It’s clear where first ascensionist James Gose got the name for this stellar arête climb in one of the South’s premier climbing areas. Hit the life-saving jug at the top, scramble above the anchors, and take it all in.
Baba Cool (5.9+)
Mt. Rushmore, SD
Legendary climber Paul Piana once had this to say about this crystal-covered, six-bolt wonder: “A perfect route. All-time classic. Climb this route!” Enough said.

To Defy the Laws of Tradition (5.10a)
Red River Gorge, KY.
It’s rumored to be the first bolted line in the mighty Red, hence the name—or maybe first ascensionists and Red godfathers Porter Jarrard and Chris Snyder were just Primus fans—but either way, “cool, technical moves and a slightly overhanging finish make this a classic.”
Gettin’ Lucky in Kentucky (5.10b)
Red River Gorge, KY
Imagine taking thick ceramic dinner plates, gluing them to a wall, and then climbing via the jugs, pockets, sidepulls, and massive edges they create—that’s pretty much what this ultra-über-classic line is like. With a great name to boot.
The Sundance (5.10b)
Spearfish Canyon, SD
“This route can get sadistic if you don’t have Popeye’s forearms and the muscle shirt you bought didn’t actually come with any real muscles.” The wall leans back as you get to the top, and big whippers are not only possible but encouraged.
Carp (5.10c)
Spearfish Canyon, SD
“Technical at the bottom on small pockets and edges that lead into a funky dihedral” and “fun—no matter how hard you climb.”
Spawn (5.10c)
Obed, TN
“Lots of great climbing on super-solid white sandstone with a great view from the top. Take time to look,” writes Kelly Brown, author of The Obed: A Climber’s Guide to the Wild and Scenic.
Crimp Scampi (5.10+)
Horseshoe Canyon Ranch, AR
Even with the copious amounts of chalk covering the holds, you might still have a hard time reading the correct sequence. “A bit hard for the grade, especially with the more recent polish, but screw the haters, this route is fantastic!”
Horseshoes and Hand Grenades (5.11a)
Horseshoe Canyon Ranch, AR
Andy Chasteen, the founder of the madman climbing competition 24 Hours of Horseshoe Hell, says, “Sweet route. Thin, steep climbing with one long move leads to a little easier terrain and a rest before pulling a bulge (big grips) to easier terrain again…classic!”

Amarillo Sunset (5.11b)
Red River Gorge, KY.
With a few thousand lines in a small area, to be called one of the best routes in the Red means it’s gotta be good, and Amarillo is the poster boy for what makes the Red special. Big moves between even bigger holds, which are delicately carved out huecos and pockets, this line is just as fun as it is aesthetic.
Aerial Anticipation (5.11c)
Wichita Mountains, OK
Although no single move is harder than about 5.10+, the steep roof is unrelenting on blood-filled forearms, and each hold grabbed will leave you expecting big air…
Liposuction (5.12a)
Reimer’s Ranch, TX
Pull onto the dripping limestone tufas of this ultra-classic and you might think you’re in Spain for a minute. Starting on a platform about 10 feet above your belayer, jump to a jug, climb a horizontal, upside-down spine with one leg on each side, then move up to find (and milk!) the no-hands rest before the final exit sequence. Sick!
Rap Bolters From Hell (5.12a)Wichita Mountains, OK
This route is as “backcountry” as it gets for the Sooner State. A two-mile hike through the beautiful and wildlife-filled (bison anyone?) Charon’s Gardens Wilderness Area will make you think you’re in Vedauwoo, and this beautiful, crimp-filled face has the fun and techy climbing of Smith Rock with the “crowds” of, well, Oklahoma.
Mercy, the Huff (5.12b)
Red River Gorge, KY
“One of the best sport routes on the continent. Never too hard but very sustained and always interesting. Totally stellar rock,” strongman Mark Anderson says. Another line put up by first ascent masterminds Porter Jarrard and Chris Snyder, Mercy features distinct boulder problem cruxes separated by big rests. Guidebook author Ray Ellington writes, “Take your time, breathe, relax, focus—and don’t fall at the top!”
Barbwire and Lingerie (5.12b/c)
Obed, TN
One guidebook calls it “one of the best 5.12s in the South,” and we can’t argue. Steep and sequential, this interestingly named line has a high crux that rejects many a too confident climber.
Battlecry (5.12b/c)
Spearfish Canyon, SD
“This is one of the best routes in the entire canyon, and possibly in the whole universe.” Pockets that get shallower as the wall gets steeper—practice your own battle cry for the potential big whipper on this creamy limestone beauty.
Jesus Wept (5.12d)
Red River Gorge, KY
Far and away one of the best routes in the Red (and our wonderful cover shot this issue), this magnificent climb would impress the Messiah himself with its bouldery start and multiple pocketed cruxes. For the Red is the kingdom and the bullet sandstone and the glory forever and ever. Amen.
Whiskey a Go-Go (5.13a)
Necedah, WI
Several short and thin finger cracks break up the steep face of Y-Crack Wall, and Brian Runnells (aka ClimbingNarc) says it’s “50 feet of intense and intricate movement.” Almost a quarter of a century ago, first ascensionist Dave Groth climbed this stout line on gear and gave it a rating of 5.12c R. Now it’s 5.13a with bolts—go figure, ya softies!
The Force (5.13a)
Red River Gorge, KY
In classic Red style, this 75-foot line put up by Chris Martin is capital-S Steep with ever-smaller holds. The guidebook says, “May the force be with you for the redpoint crux at the top.”
Tied to the Whipping Post (5.13a)
Wichita Mountains, OK
Located on the Lost Dome with Rap Bolters From Hell, this “old school” 5.13 line climbs a gray water streak on perfect red granite covered with green lichen in a beautiful setting far enough from the car that it’s almost guaranteed you’ll be alone. What else could you want?
Ultra-Perm (5.13d)
Red River Gorge, KY
“One of the best routes east of the Mississippi (or west for that matter),” reads the guidebook entry for this five-star, standout, world-class, one-of-a-kind route. The wildly overhanging wall starts with jugs that will build up your nerve before the crux smacks you over the head and yells in your ear, “You gotta earn it, dummy!”

God’s Own Stone (5.14a)
Red River Gorge, KY.
For a while it seemed like every young crusher and their mom was ticking this line (We really mean it: Mom and daughter duo Robyn and Brooke Raboutou, who was 10 at the time, both sent the route on the same trip in 2012.), but it was popular for good reason. Located on a strikingly beautiful golden wall, it follows a steep line on smaller and smaller holds with a midway bouldery crux that will hit you right in the ego.
Region: Mountain West
With the Continental Divide winding like a dragon spine through this peak-filled region, one might think that trad and alpine climbing reign supreme (and, yeah, that stuff’s pretty damn good too), but this region is rife with world-class bolted lines, from enduro testpieces in the hardman’s paradise of Rifle, Colorado, to perfect pocket pulling in Ten Sleep and Wild Iris, Wyoming, to cobble conglomerate caves in Maple Canyon, Utah. If you don’t already live here, start planning a visit. Like now. Seriously, what are you doing?
Tachycardia (5.7)
Maple Canyon, UT
Three pitches of fun, well-protected cobble climbing on mostly less-than-vertical terrain that tops out with a steep headwall guarding the stand-alone summit—this route proves that a climb doesn’t have to be hard to be world-class.
Playin’ Hooky (5.8)
Clear Creek Canyon, CO
Another perfect-position multi-pitch climb high above the river on the slabby walls of one of the Front Range’s best sport climbing areas. Comfortable belays, solid exposure, and fun movement combine to offer a giggly outing. Must be done on a work day for full effect.
Room With a View (5.8)
Stone Hill, MT
The climb itself is only about 60 feet tall, but because of the rock formation’s incredible position over the beautiful Koocanusa Lake, it will feel like 500 feet of air under your butt. Take a deep breath, pull through the roof, and enter the room!
Guppy (5.8)
Clear Creek Canyon, CO
Getting to the wall of this climb is half the fun. After crossing the Tyrolean traverse over a rushing creek, you are rewarded with 115 feet of sustained 5.8 climbing on perfect rock, ending with a spicy crux. A 70-meter rope is a must!
Scream Cheese (5.9)
City of Rocks, ID
This “scary but remarkably fun” route, according to one City of Rocks lover, has incredible holds, a friction-dependent crux at the top, and a runout at midway that will make any 5.9 leader earn his stripes.
Post Moderate (5.9)
Diablo Canyon, NM
With 165 feet of sustained 5.8 climbing and some thought-provoking 5.9 crux moves at the very top, this climb has “plenty of bolts for those that need it.”

Edge of Time (5.9)
Estes Park, CO.
Sandbagging at its finest! When you start getting Elvis leg above the sketchy runout about halfway up, wondering how the hell anyone could call it 5.9, peek around the arête to one of the most breathtaking views of Longs Peak. Now quit your bitching and send.
Tribal Boundaries (5.10a)
City of Rocks, ID
Get ready to get intimate with the rock. Almost entirely vertical, Tribal Boundaries is the definition of balancey. It starts on edges no more than a finger pad wide, and only gets thinner as you climb over the ridiculously scenic City. If you’re sliding your hips and your face right against the stone, you’re doing it just right.
Winds of Fire (5.10a)
American Fork Canyon, UT
“Lots of fun moves with great pockets, cool exposure, better-than-average protection, and a crux that had me scratching my head,” said a fan of this route put up by Scott Unice.
Mr. Slate (5.10b)
Flagstaff, AZ
“A classic line with super-cool pockets and features with a really fun roof move,” describes one local climber. The jugs found in the carved-out huecos on this climb will make you giddy with joy.

Beer Bong (5.10b)
Ten Sleep, WY
With a name like that, how could any self-respecting climber NOT call this wild but accessible route one of the best?! A slabby crux about halfway up leads into a crazy chimney scoop that forces the climber to turn around backward, face out from the wall, and stem his way up 5.7 jugs to the top.
Tabula Rasa (5.10c)
The Monastery, CO
Technical slab climbing moves get you up a detached spire at one of the most breathtaking alpine crags right outside of Rocky Mountain National Park. Make sure your buddy on the ground has his camera out and ready to snag a shot of you on this photogenic line.
Colossus (5.10c)
City of Rocks, ID
Huge scoops with scattered edges and patina flakes give this line phenomenal movement and force creative problem solving on the go, as your arms keep trying to punch out for the day. Hold on tight and ditch your ego for the blue-collar mantel at the top.
Babe-a-licious (5.10d)
Logan, UT
Seventy feet of pure radness. Flakes and pockets go up the middle of this overhanging wall, which ends in a mini-roof. The little rests right where you need ’em are the only reason this climb doesn’t get a higher grade.
Circus in the Wind (5.11-)
Ten Sleep, WY
“One of those climbs you hop on with no prior knowledge of, then every move flows into the next, and it feels so natural that you don’t have to think for a single second. Then when you start to get pumped and have to try a bit harder, you’re clipping the chains. A true masterpiece,” one longtime Ten Sleep climber said. Praise be to the genius of first ascensionist Charlie Kardaleff.
Not My Cross to Bear (5.11a/b)
Penitente Canyon, CO
Techy stemming that will put callouses on your palms. This line couldn’t get any more perfect thanks to the small nubbins in just the right spot and the lovely Virgin de Guadalupe watching over you from the face right next to this laser-cut dihedral.
Tribal War (5.11b)
Wild Iris, WY
Get off the ground with tech-tastic slab climbing then finish off this 70-foot route (long for the area!) by fighting the fierce pump that’s come to spit you off.
C++ (5.11c)
Devil’s Head, CO
“Wow! For a single-pitch sport route, this thing is epic,” described one Colorado climber. Try not to let the stellar view distract you from the sustained climbing on the upper headwall.
License to Thrill (5.11c)
American Fork Canyon, UT
“Über-classic…amazing…One of the few routes at American Fork that would be good at any climbing area in America,” said a few different fans of this steep 80-foot line that features big moves and big holds. Pumptacular!

Groundwork (5.11c)
Maple Canyon, UT
Just because a route is all jugs doesn’t mean it’s a gimme, and Groundwork is in-your-face proof of that. Challenge yourself by the conglomerate cave that angles back even more just as your hands want to give up and let go.
Lats Don’t Have Feelings (5.11d)
Shelf Road, CO
Lats might not have feelings, but forearms sure do, and yours will be screaming bloody murder as you crimp, sidepull, gaston, and grunt your way up this 75-foot route that feels more like 175 feet. This line is visible all the way across the canyon at the main camping spot for this understandably popular winter climbing area, and it will taunt you until you tick it.
Wet Dream (5.12a)
Clear Creek Canyon, CO
Overhanging 5.11 jugs, vertical face climbing, a slab-tastic techy portion, a powerful V4 boulder problem, and a runout 5.9 section at the top—there’s not much more you could cram into 110 feet of climbing. The variety and length of this must-do route will spit off even 5.13 climbers who get too cocky. Mega bonus points for the onsight!
Namaste (5.12a)
Kolob Canyon, UT
This line of huecos and pockets is the definition of immaculate, and the location in the beautiful backcountry of Zion will make you feel like you’re in a bright-red sandstone dream. Put up by the esteemed Conrad Anker, there aren’t any heartbreaker moves in the 140 feet of climbing, but the pump might foil your sending plans.
Cocaine Rodeo (5.12a)
Ten Sleep, WY
The chalked pockets on this aptly named route ride the bucking-bronco ups and downs of three bulges that each have their own distinct crux. Luckily a few big rests will let you regain enough juice to send this long route that contains some of the best limestone pocket pulling in the country. Happiness in Slavery (5.12b)
Happiness in Slavery (5.12b)
Ten Sleep, WY
As first ascensionist Aaron Huey would say: THIS IS THE BUTTERY SICKNESS!!!! Pockets, crimps, and wicked pump on some of the best rock in the canyon. “If you don’t get on this route, you hate America and your mom.”
Slap My Fro (5.12b)
Winslow Wall, AZ
“An arête climbing masterpiece,” according to local photographer Blake McCord. The thin, technical climbing is continuous and surprisingly slabby for how hard it truly is. Multiple devotees said it was the best route they’ve ever climbed regardless of the area.
Bullet the Blue Sky (5.12c/d)
Penitente Canyon, CO
You show us a prettier, more aesthetic line and we’ll show you a liar. This remarkable, fabulous, jaw-dropping route must have been chiseled by God himself. Slopey pockets, pinches, and a big ol’ dyno are all part of the fun. The word “classic” doesn’t even begin to do it justice.
Ultrasaurus (5.13a)
Flatirons, CO
Read also: Milk Bone (5.13a) and $00pr kr33m (5.13a), also in the Flatirons. Paying homage to our former editor in chief and the talented man behind these routes, Matt Samet, we couldn’t choose between these three tremendous testpieces. We were never that good at math anyway.

The Eighth Day (5.13a)
Rifle, CO
“Just ask anybody who’s ever even looked at it,” Chris Kalous of The Enormocast says about calling this long route one of the best in the country. Eighth climbs a perfect gray streak in the strongman’s paradise; Honnold calls it “a proud line on a nice wall,” and Hayden Kennedy claims it’s the “best route in Rifle.” Need we say more?
Grand Ol’ Opry (5.14c)
The Monastery, CO
“Technical, powerful, immaculate granite, and there’s only one way to the top—pretty much everyone has to use the same beta,” pro climber Paige Claassen says of this challenging route, put up by neighbor Tommy Caldwell in their backyard of Estes Park.
Region: West Coast
There’s no arguing that the far left region of the country is beyond stacked with incredible climbing, and any single one of the states is worthy of a cross-country road trip. This area also boasts the birthplace of sport climbing: Smith Rock, Oregon. With other hot spots like Owens River Gorge, California, and Red Rock, Nevada, you’ll find endless varied, fun, and always-interesting clip-ups.
5 Gallon Buckets (5.8)
Smith Rock, OR
“You see this route from the trail and really hope it’s within your ability level so you can climb it, and it’s perfect for any entry-level sport leader,” one Smith Rock enthusiast says. The biggest huecos you’ve ever seen yield the biggest jugs you’ve ever hooked your whole arm around. Hold on tight, though, because the polish is real—and the first bolt is 30 feet up.
Cryptic (5.8)
Joshua Tree, CA
Sometimes climbing isn’t just about climbing, and this 50-foot line on an insanely perched boulder is the perfect example of position, view, and location being the main attraction. But don’t worry, the moves are pretty freaking fun too.
Cry Babies (5.9)
Smith Rock, OR
Climb the 5.8 and fun Ginger Snap to get to this five-star second pitch variation. The amount of exposure on the arête will have you over-gripping and wondering how the hell anyone called it 5.9.
Leonids (5.9)
El Cajon Mountain, CA
It’s three pitches (all 5.9), spot on for the grade, and 350 feet long in sunny Southern California—are you excited yet? This dreamy multi-pitch is bolted well with excellent rock. The only drawback is that your toes might hurt from all the edging on a slab!
Big Bad Wolf (5.9)
Red Rock, NV
Nothing scary or dangerous about this four-pitch, 220-foot-long desert stunner. With short pitches, ample bolts, and easy communication, it will get you high above the desert floor with a clear view of nearby Las Vegas.
Pistol Pete (5.10a)
San Bernadino Mountains, CA
A cruiser, varied route on perfect patina flakes takes you up an arête and puts you on top of a beautiful pinnacle in the San Bernadino Mountains, way above sea level.
Screaming Yellow Zonkers (5.10b)
Smith Rock, OR
“Another super-mega 5.10…cruising up knobs and pockets,” according to guidebook author Jonathan Thesenga. Just so happens to share an anchor on the Mesa Verde Wall with another world-class 5.10: Moons of Pluto. Just get to Smith already!
Moons of Pluto (5.10d)
Smith Rock, OR
This nubbin adventure is an excellent example of the knobby knobs of Smith’s volcanic welded tuff, and this line will have you moving slowly and carefully right next to the arête overlooking a stunning view.
Under the Boardwalk (5.10d)
Red Rock, NV
“Just think jugs, jugs, jugs as you walk there,” reads one online description, but this climb is no gimme! Huge holds down low give way to smaller ones up top as the wall gets steeper, forcing good climbing technique and just a touch of try-hard.

AC Devil Dog (5.10d)
Sonora Pass, CA
“First you hug, then you slap!” one local describes. Columnar basalt forms outstanding pillars that provide one-of-a-kind double arête climbing, where you’re trying to bear hug a formation that’s as wide as a refrigerator with nominal feet and blunt handholds.
Cunning Stunt (5.10d)
Index, WA
Say that five times fast—just not around your mom. Climb flakes on a steep face that is not too easy but not too hard: “absolutely delectable, exquisite technique,” one devotee said.
Desert Dessert (5.11a)
Frenchman Coulee, WA
Another tongue twister and another marvelous line in the Evergreen State. Climb the freestanding pillar on double arêtes with striking green streaks on the face. “This climb is sick, and this wall is sick!”
O.R.G.asam (5.11a)
Owens River Gorge, CA
How’d this route get its name? Well, if you like laybacking and crack climbing next to bolts, this rig might be better than sex. This fully bolted sport climb has ample crack and flake systems to get you sweaty, tired, and pumped. Care for a cigarette?
Towering Inferno (5.11b)
Owens River Gorge, CA
Another top 100 route that’s a must-do “for novelty, length, and position,” the 480-foot, five-pitch Inferno demands power and endurance for the sustained movement that includes a few mini boulder problems. Giddyup!
Mr. Choad’s Wild Ride (5.11b)
Red Rock, NV
With big ol’ pockets in the desert sandstone, you might feel like you’ve transported from Nevada to Wyoming on this long, unrelenting pitch. Find the mono for
brownie points.
Rock ’n Rattle (5.11c)
Leavenworth, WA
Excellent, steep climbing on a face dotted with green lichen characterizes this route that provides thought-provoking moves up into an overhanging roof. “An incredible pitch in an awesome position beautifully high above the Wenatchee River.”
Sunny and Steep (5.11+)
Red Rock, NV
The moniker pretty much sums this route up, with ledges and edges galore lining this beautifully overhanging wall that gets drenched by the sun all day—perfect for cold winter cragging.
From Chocolate to Morphine (5.11d)
Owens River Gorge, CA
According to a local climber, “This wild line moves up a steep slab, over a roof to a headwall, and just won’t quit!” You’ll notice the pump right as the climbing gets harder, and neither lets up until you clip the chains.
Scirocco (5.12-)
The Needles, CA
“The best and most memorable pitch I’ve ever done,” one fan said of this 150-foot route. “The soaring, flawless arête” includes some seriously heads-up runouts, especially up high when you’re starting to get tired and desperate.

Dreamin’ (5.12a)
Smith Rock, OR
Jonathan Thesenga’s Smith Rock Select guidebook calls it “a mega-classic line with bold runouts…full-value climbing—make sure you have your head dialed in.” This clear line of chalked holds is a standout line in the place where it all started.
Fifth Force (5.12b)
Index, WA
Shares a start with the equally rad Cunning Stunt, and many who attempt this 100 feet of “vertical climbing with hard cruxes and great rests” find it to be sandbagged. One local photographer had one thing to say about the grade: “Ha!”
The Gift (5.12d)
Red Rock, NV
“On a sunny winter day, one can spend the afternoon watching numerous people cruising the lower section only to be spit off by the crux, again and again and again.” Fun, right? This very famous route has “nice flow on tasty rock.”
Monster Skank (5.13b)
Red Rock, NV
“The line, the location in a desert corridor, the gorgeous rock, sparse features, and even the name make this a solid classic,” one local climber explains. Another says, “If you ever work a 13b, let it be this one.”

Peace (5.13d)
Tuolumne Meadows, CA
With the infamous Bachar-Yerian (5.11c X) as its neighbor, this route, put up 20 years ago by Ron Kauk and Chris Falkenstein, is one of the hardest climbs in the area. A long pitch of golden knobs on Medlicott Dome, it’s a crowning achievement for any climber.
Just Do It (5.14c)
Smith Rock, OR
Alex Honnold called it “the proudest line up the proudest wall,” and since it covers 140 feet on the extraordinary Monkey Face, who are we to argue? When it was put up in 1992 by French climber Jean-Baptiste Tribout, it was by far the hardest climb in North America, and in June 2014, American Paige Claassen redpointed the 18-bolt route in a send that took 47 minutes.
Did we miss your favorite route? Or do you think a route we included is a steaming pile of choss? Tell us in the comments!
Thanks to the following folks who helped create this list: Jordan Achs, Jacob Bodkin, Dan Brayack, Paige Claassen, Paisley Close, Dylan Connole, Kevin Corrigan, Shannon Davis, Craig DeMartino, David Goldstein, Ben Hoiness, Alex Honnold, Kaare Iverson, Chris Kalous, Dan Krauss, Dougald MacDonald, Meagan Martin, Blake McCord, Chris Noble, Rob Pizem, Alli Rainey, Liz Regan, Alton Richardson, Brennah Rosenthal, Justin Roth, Chris Schulte, Gary Sorcher, Matt Van Biene, Chris Vultaggio, and JP Whitehead.
This article originally appeared in the October 2015 issue of our print edition.
The post America’s 100 Best Sport Climbing Routes appeared first on Climbing.
]]>
There’s a fatal flaw to many climbers’ training regimen: monotony. Get strong by having fun.
The post Summer Slump? These 13 On-the-wall Workouts Will Prepare You for Sending Season appeared first on Climbing.
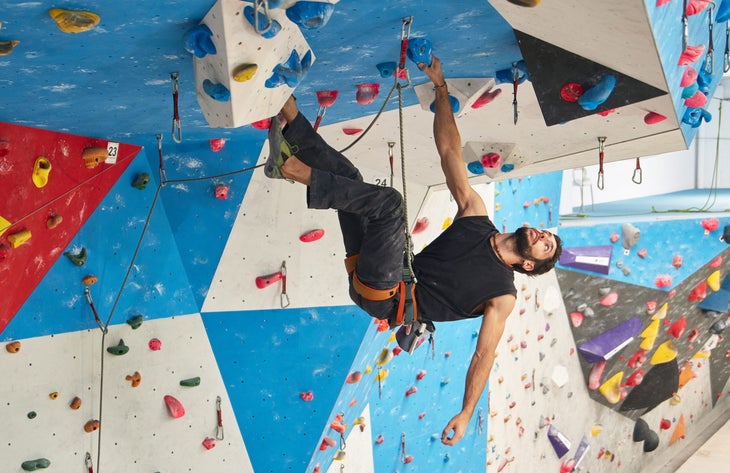
]]>Thanks to your local climbing gym, rock climbing is a four-season, every-day-of-the-week sport. It’s always sunny in the plastic paradise, even during the dark, cold, and wet winter months. Easy and instant access should do wonders for your climbing, but there’s a fatal flaw to many climbers’ training regimen: monotony. It’s easy to fall into a blah routine or just hop on any 5.10 with the shortest line. But infusing your workout (and it is a workout) with purpose, variety, and motivation will yield big results in your strength, endurance, and power.
We teamed up with professional coaches and trainers to develop 12 workouts that will maintain psych for the gym and training. The best part? All you have to do is climb. No complicated multi-month schedule to follow—just pick a specific workout and go. Of course, the upside to training is not only a more impressive ticklist come send-season, but a beautiful and awe-inspiring physique to go with it. We know you didn’t get into climbing for those rippling muscles, but we haven’t heard any complaints.
Key terms & definitions
Power: High-intensity movement or maximum strength combined with speed and the ability to do a hard move quickly and forcefully; climbers need this for “big” moves, lunges, and dynos, among others
Endurance: The ability to do low intensity work for a long time, meaning how long you can stay on the wall
Power-Endurance: The ability to sustain high-intensity movements; being able to do many hard moves in a row
Technique: How to move efficiently with footwork, hand moves, sequences, beta, etc.
Projecting: Learning how to read routes, figure out beta, and execute moves after lots of trial and error; includes the mental approach to difficult climbs
Body Tension: Important for overhangs; this focuses on core strength and will make any move easier
On-Route Recovery: Learning how to rest while climbing, and climbing when you’re tired and/or pumped
Volume: A catch-all term for climbing a lot; ups mileage, increases strength and endurance, and helps with reading routes
Body terminology
Core: Fingers of steel, strong arms and legs, and mental focus are useless without a solid core. The “core” consists of the midsection from abs and obliques (side abdominals) to the mid and lower back and hips. There are dozens of smaller muscles that make up the “core,” and they perform as one unit to bridge all the different parts of the upper and lower body. It wraps all the way around your torso and supports everything, making the separate movements work together for one common goal. There’s not a single thing in climbing (or life, really) that doesn’t involve the core, and strengthening it is invaluable for preventing injury. This area of the body builds strength quickly, but remember to work all the muscles that comprise it.
Forearms: Sinewy, vein-popping forearms are a dead giveaway for identifying most climbers. Our sport’s never-ending demand on this group of relatively small muscles builds them up into freakishly jacked and vascular tools de crush. The forearms are the operating force behind pinches, crimps, finger-locks, gastons, underclings, and more. Although they are usually the first body part to give out when climbing (the awful pump), they are also some of the quickest muscles to develop when training.
Biceps: Welcome to the gun show. Biceps coordinate complicated and intricate movements of the hand, as well as flexing and rotating the forearms. Without the bicep, you wouldn’t be able to bend your arm at the elbow or twist your hand in the strange ways climbing demands. These muscles are also particularly important for lock-offs and underclings.
Back: Climbing is all about pulling, and the back has the biggest and strongest “pull” muscle group in the body. The latissimus dorsi (lats), rhomboids, and trapezius (traps) are the three large muscles that are responsible for every climber’s ability to pull. As a result of climbing a lot, the upper back can overdevelop into a “hunchback” appearance, even if that person doesn’t do a single pull-up or other back exercise.
Legs: Your foundation but easily overlooked. As the most underrated cog in the machine, the legs are literally the driving force behind most movement. Your upper body holds you on the rock, but your legs move you UP, whether you’re bouldering or peakbagging. Because these muscles are so large (compared to the smaller arms), use them as much and as efficiently as possible. Calves are crucial to standing on dime edges, pockets, and smearing on slabs, while quads are the secret to big power moves. Hamstrings keep you on overhangs and make heel hooks possible.
Workouts
1. Pyramids (endurance)
Pick a number grade you feel consistent with. If you’re a solid 5.11 climber, then go with 5.10. Without untying from the rope or resting between attempts, climb 5.10a to 5.10d, then back down from 5.10d to 5.10a. If you fall below halfway up the route, start that route over and try to complete it, and then keep moving through the pyramid. If you fall again below halfway, move on to the next route. If you fall above the halfway point, count it and move onto the next route. By the end of the pyramid, you should have climbed eight routes without rests in between. Rest at least 15 to 20 minutes, and then go another round. Advanced climbers can shoot for three rounds.
5.11 sport climber: 5.10a, 5.10b, 5.10c, 5.10d, 5.10d, 5.10c, 5.10b, 5.10a
V9 boulderer: V5, V6, V7, V8, V8, V7, V6, V5
2. Route Intervals (Endurance and on-route recovery)
Perform a series of difficult, four-minute climbing burns with only five minutes rest between each climb. You and your partner will each take turns climbing (toprope or lead) for four minutes, while the other belays. There’s a one-minute transition period between each climb—be sure to double-check both the knot and belay device with each changeover. Select routes within two full number grades of your onsight limit—for example, if you onsight 5.11, then climb between 5.9 and 5.11. Use a stopwatch to stay on schedule for climbing exactly four minutes. If you finish the route with time to spare, immediately begin downclimbing the route until the four-minute mark. When your four minutes are up, lower to the ground, untie, and belay your partner on his climb. Do at least six climbs each—this will take exactly one hour if you stay on schedule. Beginners should shoot for at least six climbs, while intermediate and advanced climbers should try to get at least 12 four-minute burns in.
3. Climb for Points (volume training)
This workout is best done three times a week with a day of rest in between, for four weeks in a row. Focus on incremental progress for that month, followed by an easier fifth week, and then try your project. It’s great for the end of a setting cycle, when the problems or routes have been up for a while and you have them wired. It works for bouldering and sport climbing, but set lower point goals for bouldering. The climb’s grade is the point value, but you get double points if the climb is at your onsight level. For example, a V6 boulderer gets five points for a V5 but 12 points for a V6. Set a number goal and climb until you reach it, getting as much rest as you need within that session. Beginners set lower number goals, and intermediate/advanced climbers set higher point goals.
V6 boulderer (points/day): Week 1: 40 Week 2: 45-50 Week 3: 50-55 Week 4: 55-60
5.10 sport climber (points/day): Week 1: 100 Week 2: 150 Week 3: 200 Week 4: 250
4. Laps (endurance)
Pick a grade range for sport climbing that is about 70 percent of your redpoint. A 5.11+ climber should climb 5.10+ with a few 5.11- routes. Climb five routes in your range, with no rest between each route. If the five routes feel impossible, then go to an easier grade or try four routes. Take a 15- to 20-minute rest or belay your partner on his turn for a break. Repeat the set of five laps, trying for different climbs. If there aren’t enough routes in the range, it’s ok to repeat. Beginners should aim for two rounds of this (10 routes), while intermediate and advanced climbers can shoot for three or more rounds. You should be thoroughly exhausted when you’re done.
5. Project, Push-up, Pull-up (projecting skills and Power)
Power is difficult to train for, but a great way to gain it is to try hard moves when you’re already tired. Find a project at your limit that you’ve never been on, isn’t your style, and is something you wouldn’t mind putting some effort into. For 15 minutes, work on your project. When the time is up, you have five minutes to do 50 push-ups and 20 pull-ups. Even if you haven’t done that many, quit when the five minutes is up. That’s one round. Do six rounds of this, so by the end, you will have put 90 minutes into your project and aimed for 300 push-ups and 120 pull-ups. It helps to do this with a partner who is equally motivated. Bring a notepad to keep track of your rounds. This is easier with boulder problems, but can be done with sport routes as well.
6. Traverse Eliminates (endurance)
Use a near-vertical section of wall that will allow you to traverse for 20 to 30 feet—each traverse will be out and back, so you’ll travel double the distance. Do four times with a different eliminate each time; the eliminate means you won’t be allowed to use holds in certain ways. First, traverse the section of wall using only side-pull handholds. All hand and footholds are on, but you can only grip using the sides of the holds. The second traverse is a finger eliminate: Use only two fingers of each hand to grip (alternate the fingers if desired). Do the third lap using only the pinch grip on each hold. In the fourth and final set, traverse the wall using only one hand. E.g., use the right hand out and only the left hand on the way back. This last round might require deadpointing or lunge moves to advance your hand from hold to hold. Rest three to five minutes between each traverse.
7. Bouldering Intervals (power-endurance)
You’ll need a stopwatch and partner. The goal is to ascend five strenuous boulder problems in five minutes with minimal resting. Pick challenging problems that you can still do when you’re tired and that are easy to descend, purposely minimizing recovery time. Remember you only have five minutes to do five problems. Once the five minutes are up (regardless of whether you’ve sent five problems), it’s your turn to be timer/spotter while your partner goes. Do three (beginner) to six (advanced) rounds of these bouldering intervals. You can make a game of it by keeping score and determining a winner of each round by adding up the V-numbers of the five problems completed.
8. Bookends (technique)
Start and end any climbing session with solid technique practice, so if you start to use improper or poor movement (e.g., dynoing past an intricate footwork sequence instead of working it out), technique is reinforced at the end of the routine. After warming up but before the climbing session, do 10 to 20 minutes of specific technique drills at a low intensity with slow, methodical movement that emphasizes flexibility. Do it again after climbing but before cooling down—hence the “bookends.” The drills consist of doing the exact same movements five or more times in a row. Suggested movements: step-throughs, back-steps, back-step flags, keeping opposite hand and foot contact, crossing hands, dynamic drills (two hands moving simultaneously, focusing on the hips to create movement rather than the arms), and any other complicated move. Concentrate on developing a continuous “flow” that incorporates all the techniques together; movement should be deliberate rather than sloppy.
9. 3×10 Intervals (endurance and on-route recovery)
If your inclination is to rest or “take” when you’re pumped, this workout is for you. It’s natural to want to kick back until the burn fades, but that won’t make you stronger. This format is three rounds of 10 climbs in a row, and it’s designed to help you tolerate the pump. Within each group of 10 climbs, the highest difficulty should be one full number grade below onsight level. The order should alternate easy-hard-easy-hard, with the hardest climbs in the second, fourth, sixth, and eighth slots; the tenth is a cool down. The easy climbs should start about three number grades below onsight, the next hard climb would be two number grades easier than onsight. Choosing routes takes practice, so write down your groups beforehand so you don’t have to keep track in your head.
5.11c onsight climber: 1) 5.8 2) 5.9 3) 5.8 4) 5.10 5) 5.9 6) 5.10+ 7) 5.10- 8) 5.10+ 9) 5.9 10) 5.8
Depending on how that felt, adjust the set to be easier or harder.
An easier group: 5.7; 5.10; 5.8; 5.10+;) 5.6; 5.10+; 5.8; 5.10; 5.9; 5.8 A harder group: 5.7; 5.10-; 5.8; 5.10+; 5.7; 5.10+; 5.8; 5.10+; 5.9; 5.6
10. Lock-offs (static strength)
Find a boulder or sport route that you can do consistently—usually a few grades below redpointing level. Climb the selected problem and lock off every single move, holding the reaching hand just below the next hold for three seconds. Make sure it is a full three seconds. This will force you to focus on the intricacies of each move so that your body positioning has to be nearly perfect to efficiently execute each move. By the end of the climb, if you don’t feel like you had to try hard, downclimb in the same fashion, pausing the hand that’s reaching down to the next hold. Rest a few minutes and move on to the next problem—do this for each climb, increasing the grades if you can.
11. Up-Down (power-endurance)
Pick two climbs (boulder or sport) at grades you can flash, one slightly harder than the other, and next to each other. If you climb V7, pick a V5 and a V4. Climb up the harder problem first. Once you reach the top of the boulder, shake out, and without topping out or jumping off, downclimb to the start of the next problem using any holds on the wall. Without letting your feet touch the ground, complete the second boulder and jump off or top out. Rest a few minutes and repeat for the rest of your climbing session.
12. Peter Pans (body tension and endurance)
This is great if you don’t have much time but want to get worked. For bouldering or sport climbing, this drill teaches you to stay on the wall when your feet cut and swing. Choose an overhanging route or problem with decent holds all the way up. Grade doesn’t matter, as long as the holds are big and easy for you. For each move, cut both feet intentionally. Swing them off the wall and then back on. Make the next move, and then swing them off the wall and back on. Repeat for every move on the route. Make sure to keep your arms slightly bent to help engage your core; don’t straight-arm anything. This workout will tire your entire body pretty quickly, so you might not need as many climbs to get worked. Beginners aim for five routes or 10 problems; intermediate/ advanced climbers aim for 10 routes or 15 to 20 problems, or do a combination of routes and problems.
13. World Cup Simulator (projecting skills, power, power-endurance)
Pick a project, any project! The purpose of this exercise is to force you to focus and execute under pressure while building power and endurance. Find a boulder problem that you know you’d have to work on for at least one full gym session before being able to complete. Project that boulder problem for 15 minutes. Once the 15-minute round is up, you have 15 minutes to climb every problem in the gym of a certain grade. That’s one set. Say you pick a V4 that you know will be difficult. Work that for 15 minutes. Then climb every V1 in the gym within 15 minutes (at least five problems). If you fail at completing every problem, move on to the next projecting round. Do six sets of this. Rests will be in between attempts on the project.
Rules for Gym Rats
1. Climb outside. Yes, this is the first tip of training indoors. This is why most of us train in the first place, so don’t sacrifice outdoors time to stay in a gym. It’ll keep you from burning out on plastic while giving you a reason to try harder when you are inside.
2. Climb at least three days a week, not all in a row.
3. Cross-train. Climbing works specific “pull” muscles, so work opposing “push” muscles to avoid injury.
4. Drink more water than you think you need: at least 64 oz. per non-training day and 96 oz. on training days.
5. Listen to your body. If you think you need a rest day, take one. If you climb really hard one day, chances are your body will need rest to maximize the gains you made the day before. If you feel a tweaky muscle or tendon, take the few days off now to avoid being forced to take two months off when that tweaky feeling turns into a full-blown injury.
6. Pick a weekly schedule that works for you and is easy to stick to. Two options: 6a. Climb Monday, Wednesday, Friday, with Tuesday and Thursday as rest days (you can climb outside on the weekends, but don’t train). 6b. Climb two days on, one day off, two days on, one day off, two days on, four days off. Repeat.
7. Warm up and cool down. Get your body ready to climb by doing a few easy routes, jumping jacks, jogging, stretching, etc. Cool down after workouts by climbing more easy routes/problems and stretching. This will avoid injury and promote recovery.
8. Maintain a healthy, balanced diet. Fuel your body with whole, natural foods that include a solid mix of protein, fat, and carbohydrates.
This article originally appeared in Climbing in 2013.
Julie Ellison started climbing in Alabama more than a decade ago and is now living out her dream of van life with her pup, a 60-lb. lap dog named Lizzie. As the Editor at Large of Climbing magazine, Julie thrives on creating high-quality, inspirational stories and photos for climbers of all disciplines.
The post Summer Slump? These 13 On-the-wall Workouts Will Prepare You for Sending Season appeared first on Climbing.
]]>
And maybe even learning to love them.
The post 14 Tips For Not Sucking On Slabs appeared first on Climbing.
]]>In an odd way, friction slabs are like wide cracks: Hate ’em all you want, but you can’t climb some of the most classic trad routes without working through them. It’s common to find slab sections leading into and out of perfect cracks in places like Yosemite, California; Lumpy Ridge, Colorado; and North Conway, New Hampshire. They’re characterized by a low angle (between roughly 65° and 80°) and a dearth of holds (think: micro-divots, bumps, edges, dishes, and nubbins ). There’s nothing to pull down on, so you must employ a set of techniques unique to these features (or lack thereof).

Hazel Findlay’s 14 Tips for better slab climbing
2. Butt out! This puts your weight over your feet, which increases pressure (and thus friction) on the rock. This will make you feel more secure.
3. Believe in your feet: Trust your foot and put more weight on it. This will make invisible holds usable.
4. Smear:With heels down and toes bending upward, paste the balls of your feet and as much rubber on the rock as possible. Don’t edge—this decreases the amount of rubber on rock, thereby reducing grip.
5. Don’t get fancy: Reaching way up, high-steps, mantels, and crimping those barely there holds pulls your body into the rock and reduces the weight on your feet.
6. Breathe deeply: Move deliberately and continuously.
7. Pumped calves: Legs are the only things moving you up, so they’ll pump out just like your arms do. Sink your heels way down to rest. This stretches overworked muscles and increases rubber-rock contact. If a single hold is good, switch your feet and rest each in turn
8. Embrace limited pro: Welcome to runout country: No cracks or fissures means you won’t get gear in, and bolts are usually well-spaced. Prepare mentally and place solid gear whenever you can. If there’s a traverse, place pro to catch your direction of fall.
9. Acknowledge heinous falls: This is where the term “cheese grating” comes from. If you do fall, maintain your body position and slide down with your feet still touching the rock. Gently pat the wall every few seconds to stay upright, but don’t let your hands slide down the rock.
10. Don’t lose momentum: One secret is just to keep moving. This prevents getting stuck in a position that feels impossible to move from, and it keeps your mind calm and focused.
11. Positive self-talk: Before climbing, I tell myself that I’m good at slab climbing and that I most likely won’t fall. I follow that with saying that I’m quite experienced at falling down slabs, so should I take a big fall, I will be OK. Once I start climbing, I often tell myself that my shoes work and that my feet won’t slip. I say over and over in my mind: It will stick. It will stick.”
12. Don’t think, just move: I try really hard not to overthink what I’m doing. One of the best things about slab climbing is the fluidity of the movement; success is usually found from being relaxed and simply climbing instead of over-analyzing every move. If you get stuck in a particular position, you’ll have to get out of it at some point. Embrace this, decide what to do, and move with confidence into the next position. Don’t doubt yourself or second-guess.”
13. Shoes make a difference: Two important things are body position (the foot is weighted in the right direction) and confidence (the foot is weighted enough). If you believe your foot will stick, then it most likely will. The opposite is also true. Probably the most important thing when slab climbing are the rock shoes you wear and how they fit. (Flat, flexible, and comfortable shoes are best.)”
14. Gain confidence through experience: If you aren’t an experienced slab climber and the route is dangerous—don’t even try it. Gain experience on safer territory; it might still be a bit scary, but at least you’ll be safe. Confidence is an integral part of slab climbing, and if you don’t have any, then you’re in trouble. Gain confidence through experience, and you’ll start to love slab climbing.”
The post 14 Tips For Not Sucking On Slabs appeared first on Climbing.
]]>
While there are numerous ways to haul and lower, we’ve outlined simple and efficient methods that are versatile for a number of situations and easy to learn by beginners and longtime climbers alike.
The post Climbing Multipitch Routes? Better Master the Art of Self-Rescue appeared first on Climbing.
]]>There’s an understood credo in climbing that every climbing team is responsible for their own safety, and knowing how to escape from a bad situation, whether it’s injury, weather, or rockfall, should be in every climber’s bag of tricks. Unfortunately, since learning and practicing these skills takes time away from actual climbing, very few climbers educate themselves about these essential self-rescue skills, and even fewer climbers regularly practice them. In an effort to expand and improve upon my own knowledge of self-rescue, I attended an Advanced Rock Rescue course offered by the REI Outdoor School. The class emphasized two skills—hauling and lowering—as the most important techniques to learn when first delving into self-rescue. While there are numerous ways to haul and lower, we’ve outlined simple and efficient methods that are versatile for a number of situations and easy to learn by beginners and longtime climbers alike.
[Take our Essentials to Self-Rescue Course Here]
Start Here
One of the first things veteran guide and senior instructor Paul Haraf made clear during the class is that there are infinite situations that might require some level of self-rescue, from spraining your ankle and not being able to complete a climb to a belayer being knocked unconscious from a falling rock. Because you can never predict what the exact circumstances might be, the most important factor are to have a thorough knowledge of what the systems are, how they work, and how to quickly and safely set them up. If you’re well-versed in the systems, you can apply and adapt them to whatever situation you might find yourself in. That said, the majority of self-rescue scenarios will involve minor injuries that prevent you and your partner from finishing a route. Because of this, hauling your partner up to you and/or lowering him to the ground or a previous anchor are the most often-used techniques. The skills outlined here involve top-down rescue, meaning you’ll be hauling or lowering a follower (as opposed to a leader when belaying from below), with an auto-blocking belay device set up correctly on a solid anchor. Lastly and perhaps most important: Practice, practice, practice! Haraf suggests setting up a practice station in your house so you can do it whenever you have a few free minutes.
How to Haul Your Partner
The most basic system is a 3:1, also called a Z-pulley, meaning that for every three feet of rope you move through the system, you’ll raise the climber one foot. A 3:1 system also means that you’re reducing the weight of the hauled load by two-thirds, so in a frictionless world it would take 50 pounds of effort to raise a 150-pound climber. Of course, the real world has friction with the rope, the anchor, the rock, etc., so that number isn’t exact, but it’s relatively close.

1. Build a prusik (A) with a closed loop of cord on the weighted strand, and tie an overhand in the bight (B) to shorten if necessary.
2. Clip a non-locker inside the prusik loop, and then clip the brake strand of the rope into the biner (C). Slide the prusik down the rope as far as you can.
3. Using your legs (not just your arms) and your body weight, pull the brake strand (D) up toward the anchor. Once the prusik engages, this will raise the climber.
4. Keep pulling until the prusik is in a position where you can’t pull efficiently any more. At that point, slide the prusik back down the rope and repeat. The auto-blocking belay device will hold the climber while you reset the system.
How to Lower Your Partner
Lowering a climber with an auto-blocking belay device set up on the anchor is a topic fraught with debate. There are many schools of thought on how to do it safely, but in this skill, we’re going to skip that controversy entirely and instead lower with a Munter hitch. This involves putting the follower on a friction hitch with a backup (Haraf says, “Never trust anyone’s life to a single friction hitch!”), removing the belay device from the system, building a Munter, and using it to lower with an auto-block backup that’s clipped directly to your belay loop.

1. From the belay device, take a few feet of the brake strand and tie an overhand on a bight, then clip that to the anchor with a locking biner (A). This will be the backup for your friction hitch.
2. Using a long cordelette or sling, tie a Klemheist on the climber’s weighted strand of the rope (B).
3. With the other end of the cord, tie a Munter-mule-overhand on a locking biner that’s clipped to the anchor (C). Slide the Klemheist down the rope as far as you can.
4. Transfer the weight of the climber from the belay device to the Klemheist by wiggling the biner clipped through the loop of the belay device back and forth (D). Keep wiggling it until a few inches of rope have moved through the device and the Klemheist has engaged, holding the weight of the climber.
5. Remove the belay device (E) completely from the setup, and with that section of rope, tie a Munter onto the locker that was holding the belay device on the anchor.
6. Pull slack through the Munter and tie an auto-block hitch with a closed loop of cord onto the brake strand (coming from the Munter) and clip it to your belay loop. Slide it up toward the Munter and sit back on it so it’s engaged.
7. Untie the backup overhand that’s clipped to the anchor (A). Slowly untie the Munter-mule-overhand on the cord, using the Munter part to transfer the weight of the climber from the cord to the rope. Then remove the cord entirely.
8. The climber’s weight will be completely on the Munter hitch, your brake hand, and the auto-block backup.
9. With one hand on the auto-block and another higher on the brake strand, gently squeeze the auto-block so it disengages. Lower the climber as you normally would, using the auto-block as a backup.
General Rescue Tips
- Clip into the anchor with a clove hitch on the rope, which allows you to change your distance from the anchor and get into a better position to see your follower.
- The anchor should be high, about chest height or above. This will help the rope run easier over any ledges or avoid them completely.
- You want at least a 3mm difference in diameter between cord and rope for maximum friction when applying hitches.
- Organization leads to less chaos, so put your own clip-in point on your side of the anchor and face biner gates up for better access and easier clipping/unclipping.
- Prusiks can only be built with cord; a Klemheist can use cord or slings.
- Every inch counts in these systems, so when sliding hitches and pulling rope, move them as far as possible every time, but keep them within reach. This might also mean tying an overhand in a prusik if it’s too long.
For tons of class options from beginning rock climbing to advanced anchor clinics, check out rei.com/learn for listings in your area.
This article originally appeared on Climbing.com in 2016.
Also Read
- How to Transition from Gym bouldering to Outdoor Blocs
- Need More Endurance? Use a Hangboard
- Five One-Hour Workouts to Fit Your Frantic Schedule
The post Climbing Multipitch Routes? Better Master the Art of Self-Rescue appeared first on Climbing.
]]>
"I’ve been climbing for a pretty long time, long enough that I feel like I shouldn’t still get so freaking nervous when I’m going for the send."
The post My Redpoint Jitters Are a Work in Progress appeared first on Climbing.
]]>Climbing makes me nervous. Not in the “Oh, that doesn’t look safe, I don’t like you doing that” way my mom gets nervous about it, but more along the lines of stomach-churning, palms-sweating performance anxiety. I’ve been climbing for a pretty long time, long enough that I feel like I shouldn’t still get so freaking nervous when I’m going for the send. When I played soccer, the more preparation and pre-game effort I put in, the less nervous and anxious I would be before the big moment. Of course I would still have some game-time jitters, but I could always remind myself, “Hey, this is exactly what you trained for, get psyched!” As soon that ball was centered in the middle of the field, I felt focused and ready to go. The problem with climbing—for me at least—is that no matter how much I’ve trained, it’s completely random and unpredictable as to how I’m going to feel and how I’m going to perform.

My good friend Paul and I went climbing the other day with my mini-project in Boulder Canyon on my mind. We were out for just a few hours in the middle of the afternoon; I had morning errands and he had something to do late in the day so it was going to be a quick mission. It was the first really nice Saturday in Boulder, sunny and 70, slightly cooler in the canyon, not a cloud in the sky. It was one of those days where that delightful Boulder Canyon granite was perfectly dry and sticky, and felt blissful under my hands, especially after fondling a lot of plastic in recent months. The route I was aiming for was Free Fall, a short 5.12a (online haters downgrade all you want, I’m still calling it 5.12a) with a super-fun bouldery crux right in the middle. The line was completely within my abilities, and the only reason I hadn’t sent is that I just hadn’t sent. Every time I had been up to climb the route, it was after work or whenever I had some other sort of time constraint (like this particular session). I never chose this spot for a full day of cragging because I had done everything I wanted to do there over past visits. Except Free Fall.

I had some kind of weird hang-up about this route, to the point where thinking about it the few hours before we actually went up there made my palms sweat and my heart race. Maybe it was the crux’s big dynamic move followed by a campusing hand-match that I had to do without my feet. Or maybe it was the fact that the bolt protecting the crux is in an awkward place, so it’s easier not to clip it and just take the whip, which is a bit intimidating because with the angle of the ground below, it feels like you’re only about 10 feet above the deck with five feet of slack out…. (Read first ascensionist Richard Rossiter’s awesome story about why the bolt is placed there and how Free Fall got its name here.) Or maybe it was the fact that I knew 100% without a doubt that I was physically capable of sending this route, and the only thing standing in my way was my own dumb head. Whatever it was, I hadn’t sent yet, and it was looming over me. I hung the draws to warm up, and the crux felt ridiculously easy, so easy that I said to myself with more than just a touch of sarcasm, “Remind me again WHY you haven’t sent this yet?” I rested for a while, and as my friend and I sat underneath the route, he asked me, “On a scale of 1 to 10, what’s your psych level?” My response was, “Eh, about a 6.” He replied, “OK, well I need you at an 8.” (Keep in mind this is the person that likes a headbutt in the stomach before pulling onto a hard route, and he suggests them for other people as well—needless to say, he’s a freaking great climbing partner.) As my head fluttered and my stomach reeled from nerves, I said, “Well if I could just throw up, I would definitely be psyched!”
I’ve actually heard about super-strong climbers yacking right before big sends, so if it works for them, why can’t it work for me? But why was I so nervous in the first place? I’ve been climbing long enough to know that I was gonna walk out of there that day—having sent or not—and it wouldn’t mean a whole lot. I had left without the send of that exact route several times before, and nothing had drastically changed, the apocalypse didn’t start, and it didn’t mean I was weak, incapable, or not a good climber. I just…failed. Have you ever heard the saying “last day best day” in reference to climbing trips? I take that to heart, and if I haven’t already sent a project on a trip, I like to give it one more solid session on the day we leave. A few times I have actually completed the climb, getting in the car for the ride home buzzing and elated from capping off an already-great trip with one last personal success.

However, a more common scenario is me NOT sending, and the funny thing is that I still get in the car completely satisfied and happy that not only did I try my best and put in the effort, but I also just got to go on an unbelievably cool and fun climbing trip. The only pressure I ever feel is completely self-imposed, so if I can put pressure on myself to succeed, can’t I just as easily flip the switch and remove that pressure and the resulting anxiety? So here I was, with all my knowledge and experience of failing and succeeding, and my stomach was still doing backflips in between dancing the two-step on top of my intestines.
As I pulled on and did the first few easy moves, my nerves slowly gave way to my brain focusing in on the task at hand, willing my body to do the same. When I got to the crux, I pulled the campus move pretty effortlessly, without even thinking about it, and I was able to send. Obviously I was overjoyed, but mostly just so I didn’t have to go back up there for a really long time if I didn’t want. I rode the high of finally sending my mini-project for a day or two afterward, but the thought that’s been floating in the back of my mind since I clipped the chains that Saturday is “What’s next?” A few days ago, I found another project in the canyon: Jolt Cola (5.12a). I did all the moves on toprope my first time on it, but the second go (also on TR), I was back to the cycle of sweaty heart-palpitation nervousness. What is up with that? I get that the nerves and buildup are all part of the fun, but that doesn’t mean I like it! Rock climbing is inherently scary, so duh, we’re going to get nervous. Rock climbing is also very hard, so duh, we’re going to fail. Since this seems to be a never-ending cycle for some of us (ahem, me), let me pose a question to y’all, because I can use all the help I can get. How do YOU deal with pre-sending nerves?
This article was originally published in 2015.
Also read:
- Steve Roper on Yosemite in the ‘60s, Writing “50 Classic Climbs,” and What’s “Just As Good” as Climbing Half Dome
- The Latest “Necessary” Piece of Climbing Gear is a Problem
- Flowchart: Can You Skip the Climbing Gym Tonight?
The post My Redpoint Jitters Are a Work in Progress appeared first on Climbing.
]]>
No so long ago, hand jamming seemed a trad-only skill. But now jams play a crucial role in World Cup Comps and on America's first 5.15c sport route. Is it time you learned?
The post Hand Jams: They’ll Help on Granite Big Walls, But Also in Comps appeared first on Climbing.
]]>Imagine climbing a hard, dead-vertical 120-foot pitch without feeling the slightest bit pumped. No, you’re not suddenly Peter Croft or Steph Davis—you’ve simply become adept at the elusive hand jam, a crack climbing technique that, once mastered, feels bomber while requiring minimal effort. The concept is simple, but opposite to what you might be accustomed to with face climbing: Fill the gaps left by the rock instead of pulling on the rock itself. Practice hand and foot jamming enough and every hand crack you approach will bring you pure giddiness.
The Move
Feet First
The first thing to remember with any type of climbing is that your feet come first. Your lower body is the dominant pushing force behind any upward movement, and your arms should only serve to hold you into the rock and keep you balanced. Luckily, foot jamming is much easier to learn than hand jamming, so even beginners with no real technique can still make their way up a hand crack. First and foremost: Wear comfortable shoes that won’t cause too much pressure or pain when you wrench your foot into the crack over and over. To foot jam, lift your foot to knee-height and turn your knee out so the bent leg sticks out to the side of your body at nearly a 90° angle. Next, slide your foot in the crack a few inches (pinky toe down), and then twist your knee so it’s vertical and back in line with your body. Now step up and reach with your hand. Staying balanced can be the hard part, so pay attention to which move—left or right, hand or foot—feels most natural to come next. Always be looking for features on the face to utilize for balance or a good rest with hands or feet.
Hands Up
Whenever you’re faced with a hand crack, look for constrictions just like you would when placing gear, don’t be afraid to reach past flaring sections, and keep an eye out for face holds. With your thumb pointing straight up, slot your hand in the crack and slide it in just a few inches shy of your wrist. Slot it down and fill the empty crack with the meaty part of your palm. If the heel of your palm isn’t quite large enough, put your thumb under your palm and flex; this will make that large muscle slightly bigger to fit the crack. This is a thumbs-up jam, ideal for endurance and greater reach. The thumbs-down jam gives more power and is often an easier technique to learn (beginners will probably nail this before the thumbs-up move). Reach up so your elbow is slightly bent and your thumb is pointing straight down. Slide your hand in the crack, slot it down, and then engage your shoulder and lats to pull your elbow back down and in line with your body. This twist creates torque to keep you in the crack and pull you up. The biggest drawback is that you can’t reach as high in this orientation.
Sizes
Each person has his or her unique hand size, and thus every person has his or her ideal hand crack size. “Perfect hands” is exactly what it sounds like: a crack that was made for you, a crack so perfectly sized, you can just slot your hand in and know it’s going to stick. It’s helpful to talk to someone about a route who has a similar hand size to you. Keep in mind grades can be totally based on the first ascensionist’s hand size, so take the number—like any grade—with a grain of salt. This is especially true in places like Indian Creek, where small-pawed climbers might be able to cruise 5.11s but have to thrutch their way up 5.10s. “Thin” or “tight hands” refer to a crack that is slightly too small for an effortless hand jam, but it is too big for a finger jam. “Loose” or “rattly hands” mean that the crack is slightly too large. Remember: What is one person’s “tight hands” might be your “perfect hands.” Learn what size cam corresponds to your perfect hand size, so whether it’s a No. 2 or a .75, you’ll be able to read route beta and know beforehand if you’re going to crush or thrutch.
- Want to learn to trad climb? Take out 8-week online course: Intro to Trad Climbing. From placing/removing gear and proper belay techniques, to how to make an anchor and manage a stuck rope, Intro to Trad Climbing takes the guesswork out of exploring trad.
A Note about Taping
Despite the mummified hands you see on climbers preparing for a three-pitch route in Yosemite Valley, taping is not always necessary. Take into account the rock type and crack size. In places like Vedauwoo, the rock is coarse and rough, so taping is a good idea to protect your skin. In Yosemite the rock is smoother so it won’t tear your hands up as much. A nice tape glove can also make slightly loose hand cracks feel more secure, and it can offer a bit more friction. If the hand crack is only one or two pitches on a longer route, skip the full tape glove and just wrap a few loops of tape around the back of your hand and your palm. Check out one of our expert’s perfect tape glove technique.
Another great option: crack gloves, a.k.a. hand jammies. They’re more expensive than tape, but they’re also far more convenient and will last you a lot longer. If you plan on doing a significant amount of gear climbing, these are a worthy investment.
Jam Session With Anne-Gilbert Chase
Your First Time
In the beginning, a hand jam will feel bizarre and a little painful, but with practice it will feel secure and normal. There is almost no effort involved in the perfect hand jam. Think about body positioning and movement as much as your individual hand and foot jams. It’s like climbing a ladder: Trust your feet to push you up and let your hands guide you. The rhythm of movement is similar to the ladder-climbing motion too.
Thumbs: Up or Down?
If the crack is slanting in one direction, it can be more efficient to have the top hand thumb-down and bottom hand thumb-up so you can shuffle your hands in the crack. Thumbs-down is great for placing gear or trying to shake out and rest. For the most efficient upward progress, thumbs-up is the way to go.
Practice, Practice, Practice
The more you hand jam, the easier and more secure it will feel. Look for features in the rock, such as constrictions, that can help to secure a hand jam or provide a rest. When your hand is placed in a constriction, it acts like a nut, and you can use less muscle power and rely on your skeleton more. Again, focus on your feet. Your legs are stronger, can handle more weight, and will take the force off your arms.
Think Small
Since I have had many years of experience with these fissures, hand cracks feel easy and comfortable for me. For someone who is new to hand cracks, the best approach is to break the crack down into sections and focus on one at a time. Look for places to rest or step a foot onto a face hold to rest your ankle. Focus on the movement and finding a rhythm with your hands and feet for efficiency. This will save tons of energy.
Crack Gloves
In the last few years I have been wearing sticky rubber–covered crack gloves, which can be really nice in the alpine when you might want tape gloves for one or two pitches but not for the entire climb. They’re also great when it’s cold and you want to put on a pair of warm gloves at the belay.
- Also read: “A Woman’s Guide to Climbing” by Steph Davis
Anne-Gilbert Chase spent the last three winters in Patagonia and just completed her biggest objective yet: nursing school.
This story originally appeared in the September 2015 issue of our print edition.
The post Hand Jams: They’ll Help on Granite Big Walls, But Also in Comps appeared first on Climbing.
]]>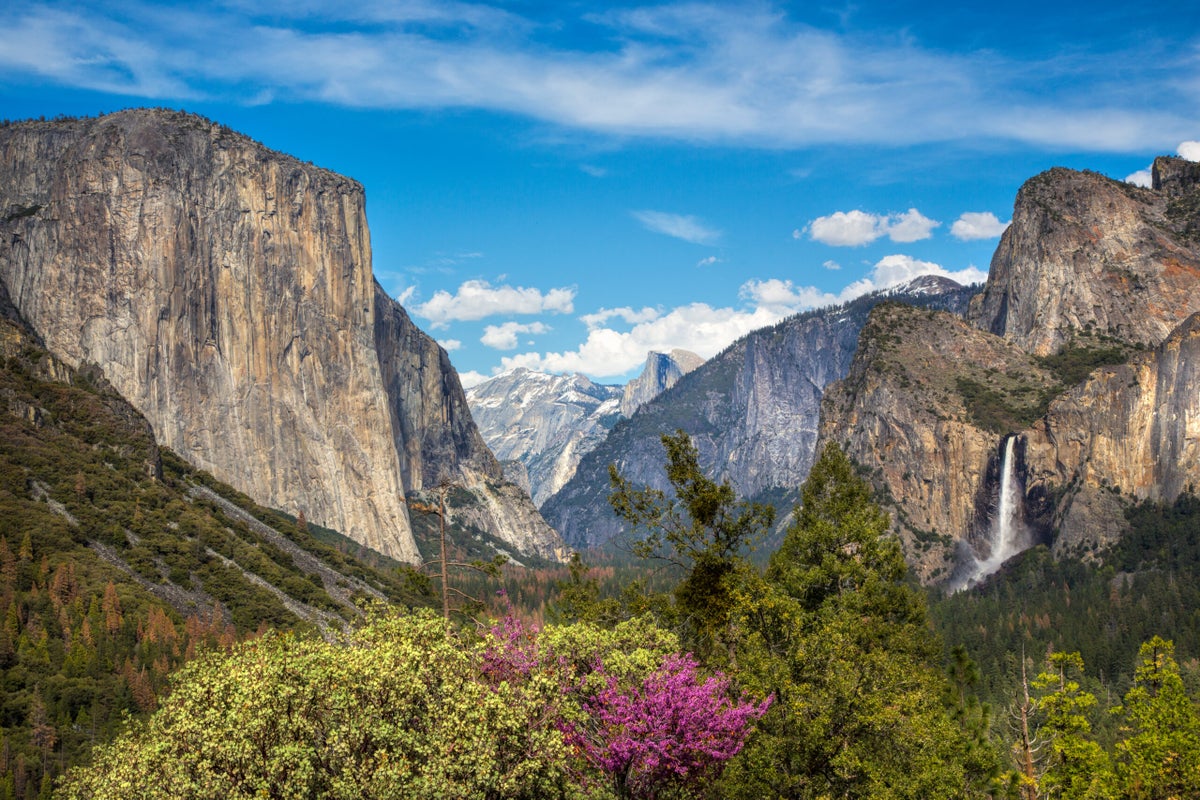
No need to wait until you can lead 5.12 or poop on a portaledge. If you can lead 5.6 trad, you can climb here, especially if you follow these 10 tips.
The post 10 Things I Wish I Knew Before I Climbed in Yosemite appeared first on Climbing.
]]>Must concentrate on belaying. Okay, good—Robin figured out that stemming in the corner makes the last pitch a snap. Must not be distracted by the butterscotch-scented breeze wafting off the ponderosa pines. I start to hear the jangling of the gear she’s cleaned so far; she must be close. Must ignore the four routes to my left that I’m itching to climb and the sea of granite spread out before me. “Nice job, Robin! You’re almost to the top! Wait till you get a load of this view…”
Focusing on the task at hand can be a challenge in Yosemite, especially at the top of a classic like Munginella (5.6), which overlooks the Valley floor and is the quintessential “first” multi-pitch to do in the area. Oh, and it’s a real bitch when the sky is blue, the sun is shining, a gentle wind cools you off, and there’s not a line of climbers trailing behind you, creating a subconscious urge to move faster. But these are minor distractions compared to the realization that hits me as Robin, my fellow Coloradan and perfectly matched partner, nears the summit. I’ve just climbed—no, I’ve just led—my first route in Yosemite, the Mecca of American climbing! Me! Little old Julie from Alabama: a bolt-clipper with a bad back, no crack technique, and a boulderer’s fear of heights. Satisfaction follows elation, and then comes a question. Why had I been so scared of this place? Take away the signature view of Half Dome in the distance, and it’s just another beautiful day on a sweet cliff.
Oh, right; it’s because no other climbing area in the U.S. has more historical significance or more world-famous routes. Because Yvon climbed here, and Royal and Lynn and Ron and Beth and other household names who have been setting the standard for rock climbing since the 1960s. Because the park’s intimidating 3,000-foot walls are home to seemingly unapproachable locals who crush from dawn to dusk every single day. And, well, because no other place on the planet is quite like Yosemite.
But I’m here to tell you that my anxiety was misplaced. And yours is, too. If you can lead 5.8 trad, or even 5.7, you can climb here. Now. No need to wait until you can lead 5.12 or poop on a portaledge. I was a scaredy-cat for years, and then I finally started to pay attention to that annoying self-help wisdom about life beginning at the end of your comfort zone. What I discovered is that Yosemite climbing is perfectly attainable for any and all mere mortals, like me, who have a desire to scale some rock.
Here are 10 lessons I learned for a sweet Yosemite vacation:

1. Start early (alpine start!) to avoid crowds.
Yosemite is the climbing destination for people from all over the world, and those people are the ones you’ll be climbing behind or awkwardly trying to pass on the long routes. Big-wall climber and pro crusher Tommy Caldwell recommends climbing in the off-seasons like spring or fall (avoid summer when the non-climbing tourists are out in full force), which also have the best temperatures. His prime windows: late September through mid-November and April through May.
If you must come during the summer, get ready to be social. Caldwell says, “These climbs are some of the best in the world, so obviously many people want to climb them.” Start late in the day and get comfortable climbing at night with a headlamp, or start an hour before daylight. If you get stuck on a crowded route, don’t be afraid to pass or let someone pass you. “It will make your experience more enjoyable to not have someone right behind you,” Caldwell says.
Our week in early October was damn near perfect: ideally crisp temps, few tourists and even fewer climbers, and the Valley at the height of its golden autumn beauty. For a full week of climbing, we only got turned away from a small handful of routes, and we easily found alternatives. Come with a ticklist twice as long as what you could actually complete; that way, you’ll have options prepared if one route is crawling with climbers.
2. Plan your camping in advance.
That early start applies to campgrounds, too. Camping in the Valley is limited; there are only 13 public campgrounds. You can reserve spots up to six months in advance (recreation.gov).
Camp 4 rose to fame for being the hangout for many wild childs of the 1960s and ’70s, like John Long, John Bachar, and Jim Bridwell, who were pushing the limits of climbing in their own unique fashion. Their rowdy spirit is still alive at Camp 4 with late-night partying and general debauchery. Pro and host climber Rob Pizem, who has been climbing in the Valley since 2001, says, “If you want that experience, then it’s the place to be. But if you want to sleep well in a mellow environment, then pay for a real campsite.” Upper and Lower Pines campgrounds are excellent quieter alternatives, and they allow up to six people per site as well, so even if all the spots are taken, chances are you could share with a generous vacationer or fellow climber.

3. Don’t believe Yosemite grades.
Yosemite is the birthplace of our current grading system, the eponymous Yosemite Decimal System, which ironically is part of the reason it has some of the most inconsistent grades in America. Some routes were established when 5.9 or 5.10 was the hardest climb in the country—meaning an old-school 5.7 in the Valley might be considered 5.8 or even 5.9 by today’s standards. My friend and local Dean Fleming summed it up perfectly when he said, “5.8 is 5.10; 5.9 is 5.10; 5.10 is 5.10.” I thrashed my way up Black is Brown, a bulgy and angling 5.8 at Church Bowl, falling multiple times. A few days later, I cruised Peruvian Crack (5.10a) at Royal Arches without coming off once. Trust me, my crack technique hadn’t magically improved in such a short time.
Start well below your leading level, and get used to the rock and the climbing before you venture onto harder stuff. Caldwell says many people have a humbling first trip to the Valley: “Don’t expect to be able to climb anywhere near the level you can climb in your gym or at your home crag.” He points out that “Yosemite is a true trad climber’s area; it’s physical and takes a unique head space to be successful there.” You want a strong lead head for difficult climbing (think runout slabs and offwidths) on what might be considered an “easy” route. Alex Honnold, who has free soloed El Cap numerous times, recommends choosing objectives based on a realistic assessment of your ability and skill level. “You want it to be hard enough to push you, but not so hard that you get completely shut down and waste a day epicing,” he says. “There’s almost unlimited routes to choose from, so be flexible and be smart.” Of the endless lines in this place, there are hundreds of routes that fall in that ideal range of difficult but doable—no matter your skill level.
Yosemite first ascensionist and writer James Lucas offers a similar suggestion: Aim low for your first few routes. “Start with smaller walls before hopping on El Cap,” he says, “and be prepared—the walls in Yosemite are huge; it’s easy to get in over your head.” Some good starter walls are Church Bowl, Pat and Jack Pinnacle, Five Open Books, and Glacier Point Apron, which offer dozens of routes in the 5.7 to 5.9 range.
- Related: The Untold Story Behind the 1977 Yosemite Plane Crash—and the 6,000 Pounds of Weed On Board
3. Don’t believe Yosemite’s star ratings, either.
Fewer stars mean fewer people, but that doesn’t necessarily mean a bad route. Face it: In a place like the Valley, even a no-star line is likely better than the threestar climb at your local crag. On my last day in the Valley, after waiting in line every other day of the trip, Fleming took me on his One-Star Classic Tour, where we climbed five stellar single- and multi-pitch routes.
4. Don’t be afraid to drive.
Another secret from Fleming: There are always uncrowded routes—you just might need to drive around to find them. We tried it for a day, and despite a little over an hour spent driving, parking, and approaching, I still climbed more pitches than any other day—and never stood in line. If a route is occupied, go find another one. Since the approaches are mostly less than 10 or 15 minutes, there’s little penalty. Reed’s Pinnacle area is an excellent choice because there are a few dozen high-quality routes and rarely any climbers in the off-season. Totally ignored by many climbers and very close to the road, Lower Brother provides excellent climbing with no crowds at any time of the year.

5. Practice on cracks and granite beforehand.
Despite several weekends of prepping at places like Lumpy Ridge and South Platte near my home in Boulder, Colorado, I still felt like a rhino doing ballet on Yosemite hand cracks. Get out as much as you can in the time leading up to your visit, but know that you probably won’t be good at it right off the bat. The granite here was polished by glaciers millions of years ago, which created a slick surface that evades even the stickiest of rubber, so be confident with your feet and know how to smear. Although one friend likened crack climbing to “wrestling a bear” your first few times out, understanding the concept of filling a crack versus pulling down on a protrusion is a great starting point. I found hand jamming the most difficult, mostly because my small mitts mean that “perfect hands” for a lot of people is “off hands” for me—it’s just a little too big to be ideal. Practice cupping your hands, going thumbs up (more efficient), going thumbs down (more power), and foot jamming (painful but crucial). A helpful hint: Your feet propel you upward, and your hands just keep you on the wall.
If you want to lead, be proficient with placing gear—but you might not need special practice for this. As Honnold points out, the rock in Yosemite tends to be solid, and you can usually trust good placements like you can trust a bolt. “Plenty of A3 pitches are actually a lot like sport climbing: There’s bomber gear every five or six moves, but not much in between,” he says. “Sometimes you just have to climb a bit and trust that your gear is good and that you’re safe, even though it might be scary.” Honnold has seen first-time visitors stress about placing enough gear, but he suggests that one should focus more on putting in reliable placements where it counts.
A standard rack (full set of cams from smaller than fingers to 4”, and a full set of nuts) should suffice. Doubles in fingers and hands is a good idea, too. Bring plenty of long runners for moderate routes that tend to wander more. Many first ascents in the area were done only with nuts, so it’s possible to do plenty of routes with only passive pro (hexes were popular here as well). To make it easy on yourself for your first visit, pack those cams, including offsets.
6. Bring the longest rope you can find.
Many of the older classic routes were developed when a 50-meter rope was the norm, so the pitches (and rappels!) are short; combining two Yosemite pitches might be closer to one pitch in modern climbing. Having a longer rope can save time on the way up by linking pitches and having fewer belays, but note that it can also be confusing and treacherous while rappelling. Pioneers of the Valley would only have 50 meters (164 feet) to work with when setting rap stations, so if you’re heading down a double-rope rappel with a 60- or 70-meter rope, you won’t even come close to the ends. Many a Valley stranger has gotten benighted on “easy” climbs like Royal Arches (5.7 A0) by rappelling past anchors and ending up in no man’s land. ICM organizer Carol Kotchek says, “Make sure you know how you’re going to descend off the route before you go up. The descents can be very complex, and it can be incredibly dangerous to go the wrong way.” Long ropes help on the ascent, but they can make descents tricky.
Bringing a longer rope is helpful for single-pitch cragging, too. Many of the lines at Church Bowl and Reed’s Pinnacle were established when first ascensionists were finding “natural ends” to certain routes, so they let the pitches go as long as they thought was appropriate. That led to 150-foot-long single-pitch climbs. I climbed with a 60-meter rope, but found myself wishing I had 70 meters, or even 80. This is particularly important if you’re going to be toproping; we found ourselves Texas Toproping, where two ropes are tied together with an overhand knot, much like you would join two ropes for rappelling. One “single-pitch” route called Y Crack (5.10a) in the Royal Arches area required two rappels with a 60-meter rope to get back to the ground, despite my veteran-Yosemite-climber friend promising me we could get back down in one easy rappel. Luckily, there was a sinewy tree sticking out of a crack about 30 feet off the ground, just large enough to hold both of us.

7. Pack a map.
One of the Valley’s perks is the painless access to a few thousand feet of climbing (like the 10-minute walk to get to the 2,900-foot Nose on El Cap), but the numerous walking trails and roads form a confounding web, and some of the approach descriptions in guidebooks are poorly written. My partner and I found ourselves walking up and down the same paved trail four times looking for the offshoot path that led to the Five Open Books. If you don’t have a local at your disposal, plan ahead and use a guidebook and maps to figure out exactly where the route is the night before so you don’t spend valuable climbing time trying to figure out the approach.
Same goes for the road labyrinth on the Valley floor. The streets are one-way and the signage is perplexing; you’ll drive in endless circles if you don’t know where you’re going. Jonathan Siegrist made his first trip to Yosemite in 2012 with Caldwell to attempt free climbing the Dawn Wall, and he suggests grabbing a park map on the way in and being patient with yourself because the “interwoven maze of one-way roads, bridges, and seemingly identical signs advising different routes are super confusing.” He claims it took him at least 10 days to figure out the complex network of pavement. Unfortunately, there’s not one ideal guidebook or map, so obtain a few to cross-reference.
8. Get out of Yosemite Valley.
Climbing on the Valley floor is primo: The approaches are short, and the climbs are long. But a quick drive up and out can lead you to more world-class climbing—with no lines, cooler temps, and unrivaled views. Reed’s Pinnacle is a short jaunt up the road and off the floor, with plenty of moderate routes and almost no people. My partner and I each climbed the two-pitch Ejesta (5.8) and single-pitch Stone Groove (5.10b) in just over an hour with no waiting and a refreshing wind.
Pizem suggests Tuolumne Meadows, which is in the park, sits at 8,600 feet, and hosts plenty of slabby and long beginner routes. Stately Pleasure Dome has several 5.6 to 5.8 multi-pitches, and Fairview Dome offers a bit more of a challenge with routes in the 5.8 to 5.10 range. The famed Jailhouse Rock is about a two-hour drive west of Yosemite Village, and Siegrist recommends the challenging sport climbing there for a welcome break from the “burly, slippery granite” in Yosemite. Check out this area if you’re a 5.12 or 5.13 sport climber and want to tick some overhanging and beta-intensive lines like Soap on a Rope (5.12d) and Fugitive (5.13a).
9. Bolt-clippers and boulderers will have plenty to do.
While the Valley is truly a trad climber’s paradise and the long routes are the gems of the area, there are plenty of smaller sport climbing and bouldering objectives. But don’t expect the straightforward climbing of your nearby crag; the routes range from “sporty” (exciting with widely spaced bolts) to more standard pulling on chickenheads or diorite knobs and dikes. Check out the Parkline Slab for low-angled and moderate routes from 5.8 to 5.10. The guidebook Yosemite Sport Climbs and Topropes ($20, supertopo.com) by Chris McNamara and Chris Van Leuven is an excellent starting point. Bouldering here is in a class all its own: Expect little to no holds on clean faces with awkward mantels, physical compression moves, and slippery slopers.
10. Yosemite Valley Nuggets: Quick-hit tips from the experts
- Don’t try to warm up on easy stuff; chances are that an “easy” climb is a sandbag, and you’ll waste time waiting in line.
- Rack gear on your harness; a lot of the climbing is so slabby that a shoulder sling will just drag down in front and trip you up.
- Valley life is more of an urban experience than a wilderness outing. Embrace it.
- Borrow whatever weird gear you can get your hands on (Tricams, hexes, offset cams, and all nuts). The piton scars on most routes take lots of different gear.
- Always pack a headlamp.
- Manzanita plants can snag anything from your body: cams, slings, draws, rope. Use a pack on approaches and descents to keep gear secure.
- Carry water-purifying tablets in case you run dry; even though you’ll most likely be looking at the road all day, it might take longer than planned to get back.
- Need beta or have a question about anything in the park? Check out the Climber Coffee meeting at 9 a.m. in Camp 4 every Sunday during spring and fall, and in Tuolumne during high summer.
- Be extremely bear aware; don’t leave food or anything with a scent accessible for a minute—even in a car. Use the bear boxes throughout the park.
- The “John Muir Hotel” isn’t quite as plush as the Ahwahnee Hotel: It serves as Yosemite’s jail. Obey the rules (especially bear regulations, overnight camping outside of a campground, parking, and speeding), so you don’t get nabbed.
- Buy everything you can outside the park. While you can stock up on anything you might need (or even get your oil changed) in Yosemite, it’s expensive. Any of the towns along Highway 99 are a good last stop.
- Don’t underestimate the weather; it’s easy to get fooled by a sunny California day. It can change quickly and be completely different from crag to crag. Bring layers and extra food/water in a summit pack, and start early when you can.
- Take a dip in the Merced River near North Pines Campground after climbing on hot days.
- Adopt the chicken-wing, arm-bar, and other offwidth techniques because there is a wide section on most routes. Just stay calm and inch your way up it.
- Be courteous and friendly to others you might encounter while climbing; it’s a small community.
- Fern Spring is the best place to get water: It’s close to the car and has cooler, cleaner H2O than the RV stations.
- Stop by the Mountain Room Lounge at Yosemite Lodge for a friendly climbers’ atmosphere and a cold one.
This article originally appeared in 2013. Thanks to our Yosemite expert panel: Tommy Caldwell, John Connor, Cory Fleagle, Dean Fleming, Alex Honnold, Carol Kotchek, James Lucas, Rob Pizem, Alton Richardson, Kate Rutherford, and Jonathan Siegrist
-
Related: “The Road to Becoming a Yosemite Climber” by Duane Raleigh
The post 10 Things I Wish I Knew Before I Climbed in Yosemite appeared first on Climbing.
]]>
Instead of spending your climbs untangling a rope, learn a few simple methods that will help you spend more time sending.
The post Streamline Your Next Multi-pitch With These Rope-management Tips appeared first on Climbing.
]]>Managing the rope at belays and rappels on multi-pitch routes can be a smooth operation that leads to quick transitions and more climbing. Or it can be a headache-inducing rat’s nest of chaos that means wrestling with yourself every time you try to feed out slack. Instead of spending your multi-pitch climbs untangling a rope, learn a few simple methods that will help you spend more time sending. Try out these tricks on shorter routes so that when you’re faced with 15 pitches, or 10 long rappels, you’ll have these techniques dialed in and ready to put to use.
Belaying
With a ledge: Making sure the rope coils or stacks nicely as you belay the follower is the key to fast changeovers. If the stance is on a ledge, stack the rope just as you would on the ground, but be careful of loose rocks an errant coil could knock down. Keep in mind who is leading the next pitch, too. If your follower is taking the lead, his end of the rope will already be on top, so you don’t need to do anything. If you’re going on the sharp end again, you’ll need to get your end on top before you take off. The classic “pancake flip” works well: Grab the whole stack of rope, one hand on bottom and one on top. Flip it just like you would a pancake, so the correct end is on top and it won’t turn into a tangled ball.
Without a ledge: No ledge (a “hanging belay”) means you’ll have to coil the rope over whatever you’re tied into the anchor with. Lean out slightly from the wall so that your tether is taught. The key here is to make the loops gradually longer or shorter (this is contingent on who is leading the next pitch), instead of making them all the same. Loops of the same length will tangle faster than you can say “off belay.”
If your partner is leading the next pitch: Make the first loops the longest, so the shorter coils will be on top. Make the longer coils as long as you’d like, but not so lengthy that they’re getting caught on rocks or features below. Each subsequent coil should be shorter by a few inches, so the long coils on the bottom won’t get twisted up with the shorter strands. With the short coils on top, the rope will feed smoothly when you switch from pulling in slack to paying out rope as your partner goes on lead.
If you’re leading the next pitch: You’ll want the belayer to have the same setup listed above: long coils on bottom, short coils on top. That means you’ll coil the rope properly for your partner as you belay him, and you’ll need to do it in reverse, so start with short coils that hang at least a foot down on each side. Each coil after that should be several inches longer. Once he reaches the belay and clips into the anchor, work together to flip the coils onto his tether. Have him pick up the bundle of rope straight off your tie-in point, and, keeping them in order, he should move the bundle so it’s touching his tether. At this point, you should take the other side of the coils and flip them over onto his tether, so longer strands are on bottom.
Rappelling
In high winds: The “alpine torpedo” is a great trick for not getting the rope blown off course by strong winds when you toss it; it’s best when rapping from a ledge. Stack the rope from the anchor by starting in the middle and working out toward the ends of the rope, making two tight, neat stacks. Take the last three feet of rope from both ends and ball it all up together into your hands. Make sure the rope stacks have a clear path to get down, and throw this ball of rope straight down as hard as you can. This should cause the rest of the rope to pull out of the stack, hanging untangled and straight down from the anchor.
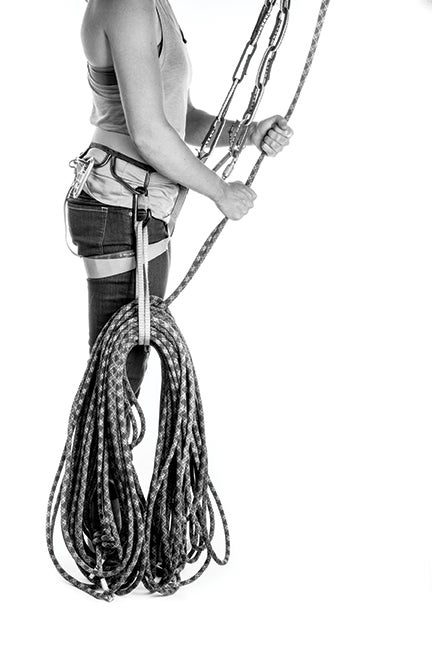
With people below you: Whether you’re rapping a popular descent line or the route you just climbed, tossing the rope becomes an issue when there are people below you. Rappelling with “saddlebags” is an excellent option to keep handy for situations when you might not want to blindly toss the rope, including broken or flaky terrain where the rope can easily get jammed on the toss (fig. 1). You’ll need to extend your rappel so the rope feeds smoothly. Make the rope coils about four feet long (two separate coils if it’s a double-rope rappel, one coil/saddlebag for each side), clip a carabiner to a gear loop on your harness, and then clip a sling or some cord to the carabiner. Wrap the sling around the middle of the rope coils and clip the other end of the sling onto the carabiner on your harness. As you rappel down, the rope should feed smoothly from your saddlebag. Since it might be difficult to tell how much rope you have left, you should knot each rope end, too.
Also read:
- Watch Seb Bouin Climb a 430-foot 5.15b/c
- What to Eat to Crush Your Climbing Day
- Jason Momoa and Chris Sharma on Creating Reality Competition Show ‘The Climb’
The post Streamline Your Next Multi-pitch With These Rope-management Tips appeared first on Climbing.
]]>
Your Virgin Island itinerary is simple: send, rinse, repeat.
The post Is This the World’s Best Beach Bouldering Area? appeared first on Climbing.
]]>This article originally appeared in the November 2015 issue of our print edition.
“If you could go anywhere in the world to climb right now, where would you go?” I asked my boyfriend on a subzero January night in Colorado. It was barely 6 p.m., already pitch black outside, and we were sunken into our comfy leather couch at home, giving in to the overwhelming apathy toward activity that only cold winter nights can bring. Part of my inquiry revolved around finding the motivation to keep stumbling to the gym to follow a cobbled-together training regimen. We both wanted some fun in the sun—nothing big, nothing too adventurous, just a climbing trip that would remind us how much fun this sport is.

Kalymnos, Greece, and Anywhere, Spain, were at the top of my bucket list, but after some quick research, the plane tickets starting at $1,200 seemed out of our price range, especially when combined with food, housing, and all those other little expenses you inevitably incur along the way. Ever since a story on Virgin Gorda appeared in the now-defunct Urban Climber in 2011, I had been eyeing this magical island that was home to a somewhat improbable scenario of humongous egg-shaped granodiorite boulders (similar to granite) dropped onto the pillow-soft white sands of the British Virgin Islands. In this place, I could satisfy my hyperactive rock climber self at the same time as my inner fruity drink–sipping beach bum. A quick search revealed we could get a plane ticket for less than $500. That can’t be right, I thought, as I refreshed the tab five, six, seven times. It seemed too good to be true: a tropical paradise filled with high-quality, climbable rock that’s also affordable. We were headed to Virgin Gorda!

Step One
About a month later, I was lost in the frustrating world of planning a trip to a place where “on time” actually means “whenever we feel like it.” Any specific times, locations, or details provided online mean precisely jack squat. The relaxed vibe of “island time” is amazing when you’re actually on your chosen island, but it can make getting there a lesson in going with the flow.
The cheapest way to get to Virgin Gorda is to fly into St. Thomas, take a taxi to the ferry station on the other end of the island, and then take a boat—or two or three—to the eight square miles of sand and boulders on the far east side of the British Virgin Islands. Plane tickets were purchased, but I still had to figure out the incredibly confusing ferry schedule, which went something like this: A few of the ferries run nonstop from St. Thomas to VG, but only a couple days a week. The other days you’ll have to take at least two boat rides, most likely from different ferry companies, and there’s a good chance that the boat will make an unexpected stop somewhere else, which could in turn make you late for your next ferry. Oh, and by the way, you could arrive at the dock for your scheduled ferry and the boat just won’t show up, meaning you shouldn’t buy your tickets in advance.
I could meticulously plan and obsessively check ferry departure times beforehand as much as I wanted, but any small incident completely outside my control could leave us stranded on any of the islands with no escape. It wasn’t a lack of organization on their part necessarily—there were, after all, plenty of ferry schedules available online—it was the indifference toward that organization that made the planning process nerve-wracking. After several days of research, I had a good idea of which ferries we would need to take based on our arrival and departure times, but that could crumble like a sand castle during high tide if the luggage handler had a whim to enjoy “just one more” lunchtime Red Stripe at the marina’s bar.

However, stepping off the plane in St. Thomas to blue skies, sun, and the warm Caribbean wind a few months later retroactively erased any frustration, anxiety, or annoyance from my memory. Then a grinning local handed me a free shot of some tasty mango-flavored rum, and the syrupy sweetness washed away every single shred of negativity I had felt over the past six months. We all travel for different reasons—to be rewarded with new friends, interesting cultural experiences, and hilarious stories to name a few—but here in the Virgin Islands, I could feel the darkness and malaise of winter sloughing off like a useless, hollowed-out shell. With the rum adding a layer of fuzzy warmth to my body, I stood up a little straighter, and my heart lit up with the excitement of what was to come in this heaven on Earth.
First-rate Rock
The next morning we hit the archetypal Virgin Gorda bouldering locale: Spring Bay. With gigantic boulders lining crescent-shaped sandy inlets filled with crystal-blue waters, Spring Bay has dozens of problems of all grades, with most of them falling in the V0 to V3 range. One thing that attracted me to Virgin Gorda in the first place was the plethora of moderate climbing. Most of the problems are V5 or easier, with a few in the V8 to V9 realm and plenty of open projects for more serious crushers. This heavy emphasis on lower grades is ideal considering that the warm and humid climate doesn’t lend itself to the crisp temps needed to pull on tiny nubbins and slopers. The average year-round temperature is 80°F, and it only varies by plus or minus 10° in any given month. But thanks to a consistent, cool breeze, it never felt too hot, especially when climbing right on the beach.

The geology of Virgin Gorda is fascinating and complex, but the basic gist is that an enormous batholith, or large igneous intrusion, formed in the Earth’s crust, then cooled and cracked. The combination of various tectonic plates shifting, faults being created, and erosion led to these boulders (which used to be much bigger) being exposed about 20 million years ago. Mildly acidic rainwater then wore them down and helped to form incredible pits, pockmarks, and grooves. With cracks and crimps and jugs and curvy huecos, we quickly fell in love with the bomber rock and ran around frantically trying to climb everything we could. Top out, down climb to the ankle-saving sand, take your shoes off, and jump into the blissful ocean to rinse and repeat.
Island Vibes

We visited in May, which is essentially the very beginning of the tourist off-season for most of the Caribbean. May through July and the month of October are prime times to head down, as travel and lodging costs are cheaper and there are far fewer non-climbing tourists. August through September is the height of hurricane season, so while prices are still low, it’s somewhat risky and many local accommodations close down for this part of the year. November through April is extremely pleasant, but expect to pay more and be swarmed with folks asking you what that big backpack-looking thing is. (Our responses varied from “weight training for Everest” to “portable couch.”)
Other than the headache of planning the ferry rides, traveling to Virgin Gorda—so named by Christopher Columbus because he thought 1,370-foot Gorda Peak in the middle of the island resembled the protruding stomach of a fat woman—is straightforward compared to other international destinations. The official currency is the U.S. dollar, most places accept credit cards, there are no travel visas required, and you don’t even need a power outlet converter. Plus, the sand is so soft and cushy that you could easily go without a crashpad. Because it is a British territory, you drive on the left side of the road, but that’s a rite of passage for any American traveler—just watch out for the chickens and cows that openly roam the island.

While plane tickets are surprisingly inexpensive, the cost of lodging is depressingly expensive. There are limited places to stay on the island and no huge hotels, but we found the lovely and climber-friendly Grape Tree Villa, a two-bedroom house that is only a few minutes’ walk from several climbing areas, including Spring Bay, the Baths, Honeycomb Palace, and Guavaberry Resort. The owners provide crashpads to people staying at the villa, and folks not staying there can rent them for $5 per day. The best part? Grape Tree has numerous colossal boulders right in the backyard, with a few established problems and even a little potential for new (read: really hard) climbs. Every morning we would wake up, make breakfast and coffee in the kitchen, walk five minutes to our chosen climbing area, spend the day playing on rocks, then return home to cook a delicious meal of fish and veggies on the gas grill. Post-dinner time was filled with adult beverages (VG has an odd assortment of beer, ranging from America’s Yuengling lager to South Africa’s Savanna cider, which is highly recommended), hours of conversation, and messing around on the backyard boulders.
The Group
One vital lesson for international travel: The people you’re with can make or break the entire trip. Similar to glacier travel where you can only move as fast as your slowest party member, the group dynamic will rise and fall based on the mood of the lowest common denominator. Meaning if one person decides to be cranky and irritable, it will undoubtedly bring everybody else down. There were six of us on this island escapade, a group that would prove to be so perfectly matched and well-balanced it was hard to believe we hadn’t all been traveling and climbing together for half our lives.

Jimmy Webb and Matt Gentile were our resident pro climbers and crushers of the hardest, tallest boulders, both having such an insatiable appetite for establishing new problems that when the rest of us mere mortals collapsed after 12 hours of climbing and hunting for new lines in 80° heat, Jimmy and Matt were gearing up to go out again and “just check out a few more lines.” We would find ourselves following this duo through rock corridors for hours everyday—dripping with the type of sweat that only a muggy, jungle-like climate can provide—simply to witness these masters of rock in action. It truly was a sight to behold. Find a boulder, set to work cleaning loose rock and dirt, and keep trying hard until it went down. As individualistic as bouldering is, Jimmy and Matt established first ascents together like it was a team sport, without a trace of ego or possessiveness.

There was photographer extraordinaire Rich Crowder, who authored A Guide to Bouldering and Traveling in the Virgin Islands ($25, fixedpin.com; a must-have for any trip to VG) and came along to help show us around and provide comic relief. Strongwoman and world-class routesetter Jackie Hueftle brought her understanding of movement technique that makes her a champion at figuring out difficult sequences, and luckily for me, she helped balance out the male-to-female ratio. Last but not least was Alton Richardson, one of the hardest-working media makers out there, who regularly schleps around 50 pounds of video, camera, and climbing gear in a crashpad with nary a complaint. (He also happens to be my boyfriend.)
From sun up to sun down, the six of us were together, hiking around in the various boulder labyrinths, cooking and eating meals, gearing up for long hours of first ascent hunting, and decompressing afterward with cold beers and exhausted bodies. No one griped when four hours of searching for climbable rock in one area proved to be fruitless, leaving us each with a dozen new scrapes and bruises and a few pounds lost in sweat, and no one whined when hot temps that would make most high-end boulderers scoff repeatedly thwarted successful sends of hard first ascents. I couldn’t have hand-picked a more laid-back, hard-working, and psyched group of climbers that were just happy to be outside in such a dreamy place.

Setting Sail
Thanks to spectacular winds coming through the Sir Francis Drake Channel, the Virgin Islands are one of the most sought-after sailing destinations worldwide. With more than 60 islands, weaving through these small landmasses on a boat is the best way to see the sights, and we were fortunate enough to hook up with Captain Charles Hamel of Climb VI (climbvi.com), a company offering chartered sailing and climbing trips in the islands. Captain Charles is equal parts climber and sailor, spending part of the year sailing in the San Francisco Bay and climbing in the High Sierra, the rest of the year doing the same thing in the Virgin Islands.
We met up with him on our rest day in the middle of the week, with plans to explore deep water soloing potential on some of the rocky outcroppings near Virgin Gorda. Our initial objective, a freestanding spire a 45-minute sail from Virgin Gorda, was getting hammered by waves, and the water below proved too choppy and dangerous to risk falling into, so we moved on to another cove. Captain Charles anchored the boat about 100 yards from the rocky shoreline, and we all donned the provided snorkeling gear. After about an hour of swimming around with angelfish, yellowtail damselfish, and tarpon, we reached an enclosed amphitheatre surrounded by walls of questionable rock. We scrambled around on the loose rock, never getting very high, before swimming under a small archway and back into view of our majestic catamaran, the Pentesilea II. Here we were, lounging in the toasty sun after a morning of snorkeling while resting up for the leisurely swim back to the boat. I couldn’t believe this is how I was spending a rest day on a climbing trip.

Early the following morning we set sail again with Captain Charles and first mate Andrew, a veteran sailor originally from North Carolina. This time we were headed to the island of Fallen Jerusalem, 48 acres of bird sanctuary, dense vegetation, and rocks. Andrew moored the catamaran offshore then ferried us to the beach in a dinghy, making a few trips to accommodate our pads and other gear. After taking the dinghy back to the Pentesilea II, he swam back to us on the shore with a machete in his mouth in a true “Pirates of the Caribbean” moment.
The next hour of trying to get to the boulders on the far side of the island put a whole new meaning to the word bushwhacking. The plants weren’t tall or intimidating, but they were so unforgiving and sharp that it took all my energy to push through small patches of the waist-high flora, coming out on the other side covered in dozens of shallow but painful cat scratches. We forged on around the island, skirting the large area in the center that the birds have claimed as their own, and our temporary pain was forgotten when turning the last corner revealed the biggest pile of granitic boulders I’ve ever seen in one place. Like kids in a candy store, we immediately split up to run around and explore. Matt and Jimmy were on a mission to find unclimbed rock, and the rest of us had caught the bug too.
Running up easy slabs, commando crawling on our bellies through dark tunnels underneath the boulders, and getting on top of every summitable rock for a few hours provided us with several options for new lines, but some required too much cleaning or so many pads that we’d need to come back another day. Unfortunately that wasn’t in the books since Captain Charles had to return the boat, so we settled for repeating some of the classic moderates like Staff of Ra (V6) and Dumber Than a Chicken (V2). Jimmy managed to finish off a dyno problem that had denied previous climbing visitors, as well as add a sit start to Staff.
We loaded up our gear (plus Alton hauled out an extra crashpad stashed by previous climbing visitors that was heavy and soaking wet) and started the tricky “descent” back to the landing spot. The approach had felt easy that morning when psych and energy levels were high, but pulling 5.9 moves here and there with a weighty pad on my back in approach shoes over a 25-foot pit seemed a lot harder and more real when fatigue was starting to set in. There is zero human development on Fallen Jerusalem and no hospital on VG; the closest medical treatment center is a boat ride away at Road Town, Tortola, so we all narrowed our focus to the task at hand. We got back to the sandy beach without incident, save the dozens of cuts of various sizes that we had all accumulated after another exhausting bushwhacking session. While we hadn’t ticked the numerous first ascents we were hoping for, it proved to be a wild day of exploration and off-the-beaten-path fun.

Into the Black
On the afternoon of our first full day on Virgin Gorda, Matt and Jimmy discovered an incredible oblong boulder that jutted out horizontally, resembling a blimp. Located in the complicated maze of the Honeycomb Palace, the boulder was scooped out on the underside, forming shapely jugs and huecos in a roof that was about 15 to 20 feet over sharp and deadly talus. After climbing through the roof, the line went up the side of the boulder and into a huge hole that an adult male could easily fit in. After this brief rest, the problem traversed a horizontal crack with smeary, barely there feet, and then up into a 5.12 finger crack to top out after about 50 total feet of climbing. Anything after the first handful of moves was purely a no-fall zone, so the guys rigged a rope from the top, clipped a Grigri onto it (without clipping in themselves), climbed up into the roof with a harness on, then someone else would swing the rope and Grigri to them so they could safely clip in from a solid stance to work the problem.

As the light faded from the sky, Jimmy decided to go for it. He pulled on with an air of calm and focus that only a true professional possesses and quickly dispatched the roof sequence. He rested a beat and started into the sketchiest section and crux, a spot where a fall would result in pinging off a nearby boulder and being tossed wildly into the jagged rocks that were now 30 feet below. Moving seamlessly up into the hueco, he only stopped for a minute before continuing out into the traverse and the finishing crack. At that point I realized that the five of us watching him hadn’t breathed since he pulled on. He topped out to cheers of congratulations and a collective sigh of relief, later calling it Into the Black (V8).
Since it was almost dark, we decided to come back the next day so Matt, a climber from Flagstaff, Arizona, known for putting up daring highball first ascents, could give it a go. We returned at a similar time of day, and Matt worked the opening moves a few times, then decided to commit. He pulled on with the same quiet concentration and executed the opening moves perfectly. After sitting in the hueco for a few minutes, he moved out onto the traverse and performed a foot sequence that was drastically different than the beta he had figured out on toprope—the tension coming from the spectators was palpable when his feet danced around looking for any semblance of a decent foothold. He never lost his composure and was able to push through and top out about a minute later. It was one of the most impressive feats of climbing any of us had ever witnessed.

Saying Goodbye
On this trip, we found climbing that ranged from cruiser bouldering on the beach to bold first ascent pioneering and everything in between. As the group enjoyed our last breakfast together, I looked out over the ocean and savored the utter relaxation that comes from being in a tropical paradise for a week. The end of any vacation is depressing, particularly when the time away is filled with superior climbing, warm-water swimming, good company, and exciting adventure, but I had a wide grin plastered on my face because I got exactly what I needed. On this tiny speck of an island in the middle of the Caribbean, I had fallen in love with climbing all over again.
Beta
How to Get There

Fly into St. Thomas in the U.S. Virgin Islands, take a taxi to the ferry station, then a boat will deliver you to Spanish Town on Virgin Gorda. Some accommodations provide shuttle services from there, or you can take a taxi. We rented a car since we had so many people and a few pads. You can rent for the week or for 24 hours at a time from Mahogany Car Rentals; they’ll drop the car off and pick it up wherever is convenient for you. You can also fly directly to Virgin Gorda, but tickets start around $1,500.
Where to Stay
With free crashpads, Wi-Fi, beautiful decks and patios, a full kitchen, several backyard boulders, and a super-short walk to most of the climbing, Grape Tree Villa is by far the best spot for climbers. The awesome property manager Howard Levenson escorted us to the villa from the ferry station, showed us the best restaurants, and was a quick phone call away for every little question we had. Wherever you stay, bring earplugs because the roosters that wander around will try to wake you up every morning at 4 a.m.
Where to Eat/Drink
Save money by buying groceries at Bucks Market in the Virgin Gorda Yacht Harbour Marina and cooking at home. Restaurants on VG are really pricey, but the local grocery selection is about the same cost as it is in the U.S. If you do decide to go out, head up Gorda Peak to Hog Heaven, an open-air restaurant that offers delicious barbecue and unbeatable ocean views.
Where to Spend a Rest Day
Island life centers around water activities: scuba diving, snorkeling, sailing, kayaking, stand-up paddleboarding, etc. There’s plenty of hiking on Virgin Gorda, or spend a day at one of the other nearby islands.
Further Reading
- Video: Heaven on Earth—Jimmy Webb and Matt Gentile in Virgin Gorda
- Video: Virgin Gorda Beach Bouldering with Jimmy Webb and Matt Gentile
The post Is This the World’s Best Beach Bouldering Area? appeared first on Climbing.
]]>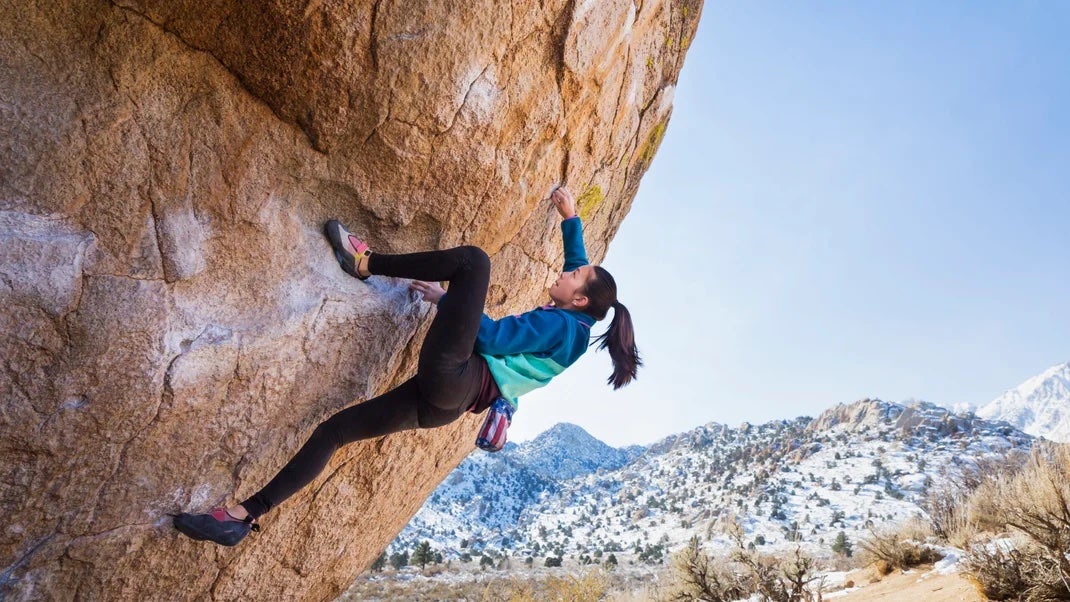
It seems simple in theory—throw your heel around a hold or feature to use those powerful leg muscles to pull you into the wall—but it’s much more nuanced in practice. Here's how to perfect it.
The post Heel Hooking Isn’t As Easy As You Think. Here’s How to Nail It. appeared first on Climbing.
]]>There are few moves in the canon of climbing techniques that are as advantageous and useful as the heel hook. It’s the type of move that can bump beginner climbers to intermediate, magically unlock the beta of a tricky crux, provide an incredible rest, and increase endurance on steep climbs—to name but a few. It seems simple in theory—throw your heel around a hold or feature to use those powerful leg muscles to pull you into the wall—but it’s much more nuanced in practice. Below we’ll outline tips and tricks to maximize heel hooks, including advice from pro climber Nina Williams, who relies on heel hooks to be one of the best in the world.
The Moves
The heel-hook position gives your leg a more direct pulling motion (instead of pushing), which holds your body in close to the wall and assists in maintaining overall body tension. Both are important for making difficult moves, particularly on overhanging terrain and bad holds, and they can help your upper body last longer. Essentially, it turns your leg into another arm. Having your extremely strong and powerful legs as an extra pulling tool is hugely beneficial because it also helps get the ever-important core involved, makes slopers and bad holds usable, adds a third point of reliable contact, takes weight off your arms, and can put you in a totally different body position that might help you reach faraway holds. One of the biggest secrets to successful heel hooking is confidence, especially when you’re just starting to add this move to your repertoire. It will feel foreign and insecure at first, but trusting it will help you rely on it more, which in turn will make it even better.
- If you are struggling on a certain move, particularly on steep terrain, think about how a heel hook will affect your body tension and positioning. Will it take weight off your arms, thus decreasing the strength needed to hold a crappy sloper? Will it move your body into a horizontal position so you can reach up farther with your hand? Don’t be afraid to throw a heel hook really high, as in head height or higher!
- Once you’ve decided to try a heel hook, examine where the heel should be placed to maximize surface contact, looking for dips or bumps to catch the heel. Accuracy is important, especially in finicky placements.
- Place your heel in the correct spot, keep your hips in close to the wall, and try to pull your heel toward your butt by engaging all the muscles in the leg.
- Point your toes to further activate the leg. When it feels like a solid placement, pull harder with the heel, and have confidence that it will hold while you look to the next move. Confidence is the key to making it stick.
- While moving upward, treat your heel and leg like an arm, continuing to pull in as your body goes up.
- Releasing a heel hook will reverse all the positive effects you had from it, meaning it can result in a drastic loss of body tension and could cause your feet to swing out from the wall. To mitigate this, try to find a solid hold for your other foot to act as a balancing point, and while keeping your core super-tight, very slowly release the heel to transfer the weight back to your other foot and hands.
Choosing the Right Shoes

You want shoes that have a decent amount of rubber in the heel, and some will have a dedicated heel cup that is a separate and distinct piece of rigid rubber that supports your heel. Some kicks will also have ridges or bumps in the heel to provide more purchase on divots and irregularities in the rock. These options are more a matter of personal preference; you might like the individual heel cup or you might like a soft, supple heel that offers a sensitive feel for wrapping subtle features. One thing is true across the board, though: Tighten laces or Velcro as much as possible to prevent your heel from slipping in the shoe. This small detail will lock your foot in place for all types of footwork.
High-Level Heel Hooks with Nina Williams
Save energy, gain reach

Heel hooks keep your body in place by acting as a stabilizer so moves can be made without swinging off the rock, but it can also help you reach something that seems too far away. It can leverage your body into a better position, closer to that one hold you need. I’m 5’3” and use heel hooks all the time to make up for reach. This move also saves a ton of energy by engaging the stronger hamstring muscle in addition to the core. Plus, heel hooks let you make big moves statically, as opposed to exerting an excessive amount of energy trying to do a dynamic move.
Beyond the basics
Take it a step further by improving the position of your toes. Ideally, they should be pointing downward and away from the heel, which causes the knee to turn outward. This rotation at the knee allows you to flex the calf and hamstring more, pulling you in or up, depending on the move. It is also important to place the heel well. Take time to look for the most surface area on a hold; it is possible to heel hook on even the smallest crimps if they have a lip to catch some shoe rubber.
Practice makes perfect
Since heel hooking is more a technique than a physical power, practice, as opposed to strength training, is the best way to improve. Make up heel hooks at all types of angles and on different features in the gym to get the feel of it down, then go outside and let Mother Nature and her infinite possibilities be the coach that tells you how to further focus your gym training. Of course, it does help to have strong calves and hamstrings, so don’t skip leg day when weightlifting, and always warm up and stretch the legs before heel hooking. Unfortunately they are the cause of many hamstring tears. Flexible hips are also crucial (male climbers especially!), so add some hip-opening stretches to your weekly training.
Want to learn more footwork skills from the pros? Checkout Paige Claassen’s insightful “Precision Footwork” course on Outside Learn! View the course HERE.
Also Read
- Hangboarding For Everyone
- That Time a Rogue Helicopter Pilot Bootied My Basecamp
- What Ever Happened to Katie Brown?
The post Heel Hooking Isn’t As Easy As You Think. Here’s How to Nail It. appeared first on Climbing.
]]>