Technique Archives - Climbing https://www.climbing.com/skills/technique/ Climbing.com is your first stop for news, photos, videos, and advice about bouldering, sport climbing, trad climbing and alpine climbing. Since 1970, Climbing magazine's mission is to inspire people to climb, seek new challenges, and climb better and safer. Thu, 02 Oct 2025 17:37:16 +0000 en-US hourly 1 https://wordpress.org/?v=6.7.1 https://cdn.climbing.com/wp-content/uploads/2021/03/cropped-climbing-32x32.png Technique Archives - Climbing https://www.climbing.com/skills/technique/ 32 32 “Nose Hooking” Broke My Partner’s Neck. Here’s How to Avoid This and More Freak Accidents. https://www.climbing.com/skills/technique/how-to-avoid-climbing-accidents/ Tue, 23 Sep 2025 10:00:57 +0000 https://www.climbing.com/?p=115859 “Nose Hooking” Broke My Partner’s Neck. Here’s How to Avoid This and More Freak Accidents.

After a disastrous fall at the Red River Gorge, I investigated the root cause of several seemingly unexpected accidents in our sport.

The post “Nose Hooking” Broke My Partner’s Neck. Here’s How to Avoid This and More Freak Accidents. appeared first on Climbing.

]]>
“Nose Hooking” Broke My Partner’s Neck. Here’s How to Avoid This and More Freak Accidents.

This spring, my partner Harrison was hanging from a jug after pulling through the crux of Fibrulator Direct (5.11d) in the Red River Gorge. He had been projecting this single-pitch crack for weeks, and had shaken out on that hold dozens of times. But this time, when he locked off to move up, the hold snapped and sent him airborne. His highest piece of protection, a 0.4 cam, ripped out of the wall. The carabiner attached to his next cam snapped in half (a result of “nose hooking”—more on that below). His lower pieces, two 0.3s equalized with an extended alpine draw, somehow unclipped from the rope. Harrison fell 40 feet to the ground.

Over the last four decades or so, climbing gear has become increasingly stronger, more reliable, and easier to use. But it’s not infallible. Pete Takeda, the editor of Accidents in North American Climbing, explained that when gear fails to perform its intended purpose, “there’s almost always an underlying error or environmental factor that has come into play.” He doesn’t like the term “gear failure” for this reason.

With Takeda’s help and a careful look at several years of accident reports, I’ve put together a list of common ways in which gear “fails.” Some might consider these instance “freak accidents,” but there are often reasons behind these failures—and ways we can do our best to prevent them.

Unclipping

On rare occasions, a carabiner can unclip from the rope or the bolt hanger to which it is attached. This type of failure leads to unexpectedly long falls.

How it happens

A carabiner can become unclipped from the rope in several ways, but back-clipping is the most common cause. When a climber falls from above a back-clipped draw, the rope can wrap around the gate of the carabiner, unclipping from the draw.

In 2024, a rope unclipped from mussy hooks at the top of a sport climb after a climber removed a carabiner above the hooks. It is unknown whether the rope accidentally unclipped or the climber unclipped them on purpose, but it is possible that the rope loaded the hooks incorrectly as the climber weighted the anchor, causing it to become unclipped.

In much rarer instances, during sideways or very long falls, quickdraws can become unclipped from the bolt hanger if the hanger-side carabiner twists/rotates inside the dogbone, causing the carabiner to be loaded against the hanger at the gate. This type of loading was the cause of two unclipping accidents in 2024.

Prevention

The most obvious way to prevent this kind of accident is by avoiding backclipping. If you’re not confident in this skill, seek qualified instruction.

On bolted routes, quickdraws should be clipped such that the gate of the carabiner is facing away from the direction of travel. On angled bolt hangers (common on expansion or mechanical-style bolts), clipping the draw toward the nut (from the opposite side) reduces the chances of levering the gate open.

Sling breakage

Slings used for permanent anchors can break after years of wear, causing long and sometimes fatal falls.

How it happens

Nylon webbing, common in “tat” anchors in the alpine, is weakened by UV exposure, freeze/thaw cycles, precipitation, and rockfall. When an anchor has many layers of webbing, it can be difficult to assess its quality. Worn-out slings can break under bodyweight or during a fall.

Prevention

Knowing how to assess the quality of nylon webbing—and taking the time to do so—can protect you from a fatal fall. Worn webbing might appear frayed or sun-bleached; be especially vigilant in alpine environments where webbing is exposed to direct sunlight and freezing. If you’re unsure of the webbing’s quality at first glance, spinning it around to look at the “backside” or inspecting the material at the knot might provide more information. If the material in these spots, which are subject to less wear, looks brighter or less weathered, the anchor may not be safe to use.

Be wary of white or gray nylon: webbing in these colors is sold, but it’s less common, and may indicate wear. Precipitation makes descending feel urgent, but wet webbing often appears brighter—be extra careful when inspecting webbing anchors in rainy or snowy conditions.

If you decide that an anchor is unreliable, you still need to find a way down. Fresh webbing and rappel rings are lightweight and inexpensive, and carrying them will allow you to replace worn anchors. A small knife should always be part of your kit on long routes—use it to remove old, worn-out webbing once you sub in your fresh piece. Doing so will help reduce the confusing “rat’s nest” of anchor material on popular climbs.

Protection pulling out

A perfectly placed cam in bullet rock can be as inspiring as a bolt. But gear placements are more often imperfect. Bad placements equals big falls.

How it happens

If a cam is tipped-out (too small for the crack it’s placed in), unevenly cammed (in a flaring crack), or making otherwise poor contact with the rock, it can pull out under relatively low loads. Similarly, if a nut has poor surface area contact or isn’t placed in a constriction, a fall can pull it out. This is especially true of smaller pieces, which present a much smaller margin for error. Remember: the bigger the fall, the more force on your gear, making it more likely to come out if it’s not a perfect placement.

If the rock around a piece of protection is crumbly or loose, it can break under force, pulling your piece from the wall and potentially endangering your belayer too.

Prevention

Practice placing gear with a mentor or guide who can give you specific, actionable feedback. Learn to assess rock quality and avoid placing “mental” pro—pieces that will likely rip out in a fall.

Make trad anchors redundant by placing three or more solid pieces of gear, and avoid placing all of your anchor pieces behind the same block, even if it looks completely attached. Inspect your cams regularly for evidence of trigger wire fraying or sling damage.

Bolt failure

In most popular climbing areas, bolts are replaced as needed by a climbers’ coalition or access group. But bolts and hangers can pull out of the wall, especially on less popular routes.

How it happens

On two-piece mechanical or expansion bolts, the nut and washer that secures the hanger to the threaded bolt shaft can become loose with repeated loading, loosening the hanger. Left unchecked, the hanger will eventually fall off of the bolt.

The modern bolting standard is one piece glue-in bolts: they fail far less regularly since they do not come apart and they are less likely to corrode. Unfortunately, older climbing areas are more likely to have been developed with mixed-metal coatings, and those bolts can rust in their holes. In these very rare situations, the hanger may look fine but the bolt in the rock might be completely corroded. This kind of corrosion was the source of a 2010 accident in Index, Washington.

Prevention

If climbing in an area with mechanical bolts (common nearly everywhere in the United States), carry a small crescent wrench—many nut tools have built-in wrenches. Tighten bolts if you feel the hangers spinning or twisting on their bolts. If you plan to climb in a less popular area, research forums about the area to find out which routes are commonly climbed and updated.

Carabiner breakage (levering, nose hooking)

Modern carabiners are very strong in most orientations. But when loaded incorrectly they can bend out of shape or break completely.

How it happens

When levered against an edge or loaded over the nose, carabiners can break. “Nose hooking,” which occurs when the rope runs over the “nose” of the carabiner (the point where the basket meets the gate), preventing the gate from completely closing and isolating the force of the fall at this weak point. The nose of a carabiner can also get stuck on a bolt hanger, stopper wire, or sling. When nose hooked, carabiners can fail at forces as low as 2 kN. Carabiners are also weakened when levered over an edge in the rock.

Prevention

If you see a nose hooked carabiner, reorient it immediately. Several carabiners have broken due to nose hooking, including my partner Harrison’s, but also because of less-obvious levering. Levering can occur when two carabiners are clipped into the same bolt hanger (if loaded, the top carabiner is more likely to break), or, more commonly, when placing protection the carabiners can lay awkwardly against protruding rock features. Extend pieces of protection as needed to prevent levering.

Toprope solo device failure

Toprope soloing has exploded in popularity for rehearsing highball boulders, climbing multi-pitches quickly, and getting pitches in without a partner. But climbing alone is inherently risky.

How it happens

All four toprope soloing accidents reported in the ANAC during the last three years occurred when climbers used only one progress capture device. When these devices are jammed or incorrectly loaded, they can become unclipped or fail to “grab” the rope. Without a backup, climbers can fall to the ground.

Two accidents involved the use of a Petzl SHUNT, a discontinued device designed to be a rappel back-up. When the rope above the device goes slack, the SHUNT can disconnect from the rope completely. If the SHUNT is used without a backup, a disconnection here means that the climber is now free soloing.

In a separate accident, a climber using a single Petzl Micro Traxion fell 30 feet to the ground after a sling jammed in the device, blocking its teeth and preventing it from “grabbing” the rope.

Prevention

In all of these accidents, a second progress capture device would have kept the climbers safe. Redundancy is a key part of any climbing system.

It’s also critical to follow manufacturers’s instructions when using a new piece of gear. Social media personalities are constantly introducing “innovative” and efficient-seeming ways to climb, but qualified guides and gear manufacturers are far more reliable. Petzl has repeatedly discouraged climbers from using any of their products as singular protection devices when toprope soloing, and heeding this instruction could have prevented several accidents.

***

After a few months to recover from spinal surgery, Harrison’s climbing hard again. But we’re both a bit more careful, whether we’re clipping bolts or plugging gear.

The post “Nose Hooking” Broke My Partner’s Neck. Here’s How to Avoid This and More Freak Accidents. appeared first on Climbing.

]]>
Your Complete Guide To Finger Injuries (And How To Recover!) https://www.climbing.com/skills/technique/complete-guide-healing-climbing-finger-injury/ Thu, 04 Sep 2025 22:00:22 +0000 https://www.climbing.com/2020/07/30/the-complete-pulley-injury-rehab-program-for-climbers/ Your Complete Guide To Finger Injuries (And How To Recover!)

Everything you need to know about pesky pulley injuries

The post Your Complete Guide To Finger Injuries (And How To Recover!) appeared first on Climbing.

]]>
Your Complete Guide To Finger Injuries (And How To Recover!)

If you’ve ever injured a finger pulley, you’re keenly aware of the structure. If you haven’t, you might not even know they exist. Finger pulleys are thick, fibrous bands of connective tissue that hold your finger flexor tendons tight along the finger bones and prevent “bowstringing” of the tendons while they are under load. Pulley injuries are common among climbers. Proper management of these injuries is crucial for a full return to sport and to decrease the chance of re-injury.

As a physical therapist of 31 years and climber of 42, I’ve treated hundreds of climbers. I wrote the following pulley rehab program to consolidate the evidence-based research and my own clinical knowledge into a comprehensive treatment plan for climbers. If you recently heard that alarming pop in your hand, or are feeling other signs of injury, here’s what to do.

Key points

  • Climbers most-often injure the A2 pulley in the ring finger. Other pulleys are susceptible to excessive forces as well with the middle finger being the next most-commonly injured digit
  • The A2 pulley is located at the base of your finger near the junction with your palm. The A1 pulley is more in the palm itself, over the MCP joint (metacarpal phalangeal joint)
  • Treatment for a mild-to-moderate injury requires a balance of protection, scar mitigation, and progressive loading of the injured tissues
  • More-severe injuries require medical evaluation, possible immobilization, and sometimes surgical intervention
  • If pain is very severe, swelling is significant, or you can see or feel “bowstringing” then you should seek medical attention. ER visits are usually not necessary but seek medical evaluation within the first 3-10 days

Signs of a pulley injury

  • Immediate onset of pain over the pulley that is often associated with an audible popping sound (there is not always a pop, so you can still have a pulley injury without the sound)
  • Pain is usually quite severe, especially with direct pressure over the pulley or when trying to crimp or pull with the affected digit. (Do not keep gripping holds and pulling to try to convince yourself that you are not actually injured!)
  • Swelling is often present over the affected pulley. Bruising can sometimes be present
  • Pain is typically localized over the pulley and tends to be worse along the sides of your finger. If you flex the injured finger then gently pull out on your fingertip you should feel pain along the pulley
  • If the pain radiates into your hand or wrist then it is probably not a pulley injury and may be an injury to one of the flexor tendons
  • Stiffness, swelling, and tenderness along the knuckles themselves (the PIP or DIP joints) is usually not a symptom of a pulley injury and can be due to a capsular strain, arthritis, collateral ligament strain, extensor hood injury, or other problems

Stages of healing

Tissue healing can be divided into three overlapping phases: acute/inflammatory, reparative, and remodeling.

Acute phase: Homeostasis and inflammation

(Days 1-5)

  • Blood vessels constrict, platelets stick together, coagulation occurs, and fibrin threads are formed to stop bleeding, seal the injury site, and create a scaffolding for the re-building process
  • Macrophages and white blood cells clean the area and secrete growth factors and cytokines to stimulate fibroblast proliferation
  • Inflammation is a necessary part of normal healing and is only a problem if the response is too aggressive or lasts too long. Ice is helpful to reduce pain and may help reduce inflammation, but has not been proven to improve the overall healing response. NSAIDs can also be helpful but only if the pain or swelling are excessive in the first few days

Repair and proliferation phase

(Days 3-21)

  • New blood vessels form and the body starts to rebuild the damaged tissue with type III collagen (scar tissue). This collagen is weak, disorganized, and easily re-injured. Pain free movement is crucial in this phase to help the new collagen align itself parallel with the normal forces placed on the tissue. Gentle massage and Wave Tool work can also be helpful in this stage. [Disclosure: The author is the co-founder of Wave Tools Therapy]

Remodeling and reorganization phase

(Days 21-2 years)

  • Type III collagen is replaced with stronger and better organized Type I collagen. It’s critical for this reorganization to occur so that the damaged pulley tissue is strong and healthy enough to handle the stresses of climbing. A very controlled and progressive loading program is crucial for this reorganization to occur. Wave Tool use with the edges can help stimulate a healthier healing response

Climber’s pulley injury complete rehabilitation program

Part 1: Overview

Part 2: H-taping

Part 3: Getting back to full strength

Treatment flowchart

None

During the inflammation phase:

  • Ice for pain control
  • Rest: No pressure or force through injured finger
  • Pain-free, passive motion
  • Pain-free, active motion
  • NSAIDs only if pain or swelling is excessive
  • Stimulate immune and healing response with healthy diet and exercise

During the remodeling and reorganization phase:

  • Begin tendon gliding exercises. (See videos above)
  • Begin stretches for entire kinetic chain (hand, wrist, elbow, shoulder, thoracic and cervical spine)
  • Gentle Wave Tool use with edges and massage surfaces for desensitization, blood flow, and waste removal. Use on all finger pulleys and along entire length of forearm and elbow flexors. (See videos above)
  • Begin the Progressive Loading Program. (See videos above and climbing program outline below)
  • Ice if needed for pain control
  • Heat is OK to add in for short duration (5-10 minutes) for comfort and blood flow
  • Limit use of NSAIDs

During the repair and proliferation phase:

  • Begin higher intensity muscle and tendon stretches
  • Increase intensity of Wave Tool with edges and massage surfaces to improve blood flow and to help stimulate collagen deposition in a more organized and uniform arrangement
  • Continue with Progressive Loading Program using resistance bands and no-hang finger training device (like the Tension Block, Tension Flash Board, or Metolius Wood Rock Rings). You can also start to work on regular hangboard with weight removed
  • Begin the Return to Climbing Progression. (See videos above and consult the detailed climbing program outline below)
  • Continue short duration heat applications for blood flow
  • H-taping recommended for all climbing or progressive loading exercises. (See video above)

All Injuries and people are different. Progress through the program at your own pace. Recognize that there is considerable overlap between the different phases of healing. If you are unsure how to proceed then you should seek qualified medical evaluation and guidance.

Pre-climbing resistance training

  • Begin this progression 5-10 days post injury
  • Only progress to the next training level when you can perform the prior level with minimal or no pain
  • Go slowly with all motions and progress through resistance levels carefully. If you are mildly sore for 30 minutes to 1 hour after a session that is fine. If soreness persists for several hours or into the next day then you must decrease intensity

Level 1: Isometric holds

5 x 5 x 5 program (see videos)

Using a flat edge such as the side of the table or counter edge, or use a no-hang device (see video). Open grip position only—NO CRIMPING. Using all four fingers, gently pull on the edge just to the point of feeling pain over the pulley. Now back the pressure off until no pain, or only very mild pain, is felt. This is where you will perform the hold. Pull for 5 seconds, 5 reps. Next pull with three fingers (index, middle, ring). 5 second hold, 5 reps. Now very carefully and gently pull with the injured finger and the finger next to it (middle and ring). 5 second hold, 5 reps. Perform up to 5 times in a day.

Follow a two days on, one day off cycle.

Level 2: Isometric holds using resistance band

5 x 5 x 5 program (see videos)

Use light resistance bands and a portable no-hang device. Make sure you can accurately reproduce the resistance during each session. Keep track of bands used, holds used, and your distance from the anchor point. A “keeper” sling around your wrist is recommended so that you can let go of the board if any pain is felt. (see video). Begin with the largest grip surface and all four fingers. Open grip positions only. With arm straight walk backwards until mild pain is produced over pulley, now step forward and ease resistance until no pain, or very mild pain, is felt. Hold 5 sec, 5 reps. Now repeat with three fingers (index, middle, ring) for 5 second holds, 5 reps. Now very carefully and gently repeat with two fingers (middle and ring). 5 second holds, 5 reps. Perform up to 5 times on your exercise days.

Continue performing these exercises two days on, one day off. You will progress faster if you have adequate recovery time.

Level 3: Resistance bands with climbing specific movements

(See videos)

Use your no-hang device attached to the bands. Open grip positions only. Start by careful pulling for the following three motions.

  1. Archer Position (pretend you’re pulling a bowstring back) using four fingers. 10 reps, 3 sets
  2.  Undercling position with four fingers. 10 reps, 3 sets
  3. Palm down pulls. Keep your palm facing the floor and pull straight back with four fingers. 10 reps, 3 sets

Perform twice per day, training one day on, one day off.

Progress to three fingers then two fingers with the same motions and reps—very carefully. It may take several days before you can advance. You can also advance to smaller grip surfaces if no pain is noted.

Remember: Every injury and every individual is different. Progress at your own pace and listen to your body.

Return to climbing progression

  • Begin the climbing progression 14-21 days post injury. You should be doing all resistance band exercises without pain prior to initiating the climbing plan
  • The climbing will be in addition to the resistance bands. Follow the frequency plan listed under each climbing level
  • Perform a minimum of four days of climbing at each level prior to proceeding to the next difficulty level. Advance only if pain levels are not increasing and workouts are done with a minimum of pain or strain
  • Resume rotator cuff and periscapular strengthening. Bands work great for this as well

Basic climbing

  • Toprope only. No bouldering. No leading
  • Climb no harder than three full number grades below your onsight level (i.e. a 12a onsight climber can work at a maximum difficulty of 5.9)
  • Work on balance, footwork, pushing with your legs, fall practice, breathing, and flexibility. Let go if any pain or twinge is felt
  • Climbing and resistance-band work will be on the same day. Two days on, one day off

Harder climbing

  • Toprope only. No bouldering. No leading
  • Climb one full number grade below your onsight level (i.e. a 12a onsight climber can work at a maximum difficulty of 11a)
  • Climbing and resistance-band work will be on the same day. Two days on, one day off

Lead climbing and bouldering

  • Approach all climbs like you would a project. Feel out moves and holds. Toprope first as necessary
  • Work on minimizing strain and climbing efficiently. Focus on technique: core tension, elbows in, scapulae engaged, etc.
  • Choose a different climb if you have pain on any of the individual holds. Lead only after you’re confident the movement and holds are OK for your injury
  • You can start to introduce full crimping with your resistance band workouts and slowly introduce full crimping to climbing routes
  • More rest is needed during this phase. Follow the schedule below to optimize recovery. Band work is still done on the same day as climbing

Each week should have a minimum of three climbing rest days total, with two rest days in a row. If you’re feeling sore or aren’t progressing, then you should take three rest days in a row to allow for tissue recovery and repair processes. Below is a sample 14 day training schedule. Adjustments to the schedule are fine, but it’s best to follow the rest requirements.

None

Redpoint/onsight training

Begin working towards harder onsight climbing, your project grades, and normal training routine.

  • Once you’re working back towards your project grade you may take less rest days and progress towards your pre-injury workout schedule. Keep in mind, however, that rest days are critical for preventing re-injury and chronic tissue break down, and to repair tissue micro-damage
  • Soft tissue injury healing is not always linear. You will have ebbs and flows in your rehabilitation progress. Look at the bigger patterns and look forward to the ultimate goal of getting back to climbing again

The post Your Complete Guide To Finger Injuries (And How To Recover!) appeared first on Climbing.

]]>
Never Had a Project Before? Here’s Where to Start. https://www.climbing.com/skills/technique/guide-projecting-climbs/ Tue, 26 Aug 2025 20:49:07 +0000 https://www.climbing.com/?p=93750 Never Had a Project Before? Here's Where to Start.

Projecting climbing routes isn’t widely taught, so how do you learn this complicated art? Here's our beginner's guide.

The post Never Had a Project Before? Here’s Where to Start. appeared first on Climbing.

]]>
Never Had a Project Before? Here's Where to Start.

I take climbing seriously. I’ve lived the dirtbag lifestyle, chased El Cap dreams, and been a gym rat. I’ve climbed many pitches of frozen waterfalls and embarked on remote alpine routes. I’ve prioritized climbing over relationships and put pebble wrestling above family. Yet I still don’t know how to project a route. Not only have I never memorized every move of a route and devoted weeks or months to its completion; I have never even had the motivation to work on a single route beyond a handful of tries. 

Frankly, I’m jealous of my grade-motivated peers who target certain routes and work them until they succeed; not only do they tend to progress faster through the sport, they seem to find more purpose in their climbing, which motivates them to put their heart and soul into each project. I meanwhile find it comfortable and easy to “train” by simply going into my local gym and climbing as hard as I can each session; but I’m frustrated by the plateau I’ve been stuck in for years. And I’d bet my #5 Camelot that most climbers are in the same boat. 

Which got me wondering: Why don’t I project? And why do so few climbers learn this specific skill? What’s the secret?

Is there a secret to projecting?

Nathan Hadley, a software developer, 5.14 climber, first ascensionist, and all-around crusher, understands why more climbers don’t take up projecting. 

“Being able to intuit how to read something is really rewarding,” he told me. He enjoys trying to onsight and flash routes, finding flow in climbing without rehearsing moves, and knowing that he can climb a wider variety of routes if he doesn’t spend as much time on an individual route—and he thinks that’s why most climbers don’t project much, myself included. (Why spend an inordinate amount of time on one route when there are so many routes to climb?!)  

But Hadley also recognizes that to climb his hardest, he needs to spend significant time on a route—honing the beta and muscle recruitment, and getting stronger by doing harder moves. “There is more potential to climb that upper limit [through projecting],” he said. 

Ally Cruz, the head routesetter at Edgeworks Climbing in Tacoma, Washington, has similar motivation for projecting routes. Climbing 5.12 was a barrier for her in the past, something that felt intimidating and out of reach. But the process of working harder routes made the grade feel more attainable over time, said Cruz. Now that she’s seen her effort pay off, she finds herself trying to convince her coworkers that trying harder things—and accepting that success won’t come easy—can change their climbing and adjust their sense of their own limits.

As a North American Ice Climbing Champion, rock climber, and elite dry tooler , Kevin Lindlau knows a lot about the art of projecting. For him it requires time, commitment, and a very analytical approach to climbing. Before he even touches rock, he tries to watch videos of other climbers sending his proj, giving him an idea of the movement and the possible cruxes of the route—a method that proved particularly useful when working his dream route, A Line Above the Sky (D15) in the Italian Dolomites, during a short trip from his hometown of Bozeman, Montana. (Some context: D16 is currently the world’s hardest dry tooling grade.)

When I asked him how I might start projecting, Lindlau told me to begin by thinking of a route that got me stoked. “Find something that inspires you,” he said, “so you don’t get burnt out or give up.” He also said it was important to find different goals, both long-term and short-term. “Find a dream route and then backtrack to find mini goals,” he said. “A lot of people go for their dream project [first] and get burnt out.”

Hone your process

Talking to each of these climbers, it became clear that, once you’ve identified a route that you’re psyched on, finding a process is essential. There is no right or wrong way to work a route, though there are common methods that projectors follow. Hadley likes to “give it a good [first] effort from the ground, even if I know I don’t have a chance,” while Lindlau likes to suss out the route and touch all the holds before he even starts to climb. After he gets comfortable with how the holds feel, Lindlau gets into the nitty gritty. “After figuring out where all the holds are, I’ll draw the whole route on paper with arrows on it with direction of pull.” He will then go bolt to bolt and try to physically do the moves. “I’ll stop at a crux and rest and then do another sequence. I’ll do that move three or four times.” After a day or two of going up the route and getting comfortable, he’ll take a rest day and then give it a redpoint try.

When he isn’t physically trying the route, he uses visualization tactics to memorize the sequence and get him in the right head space. “Once an hour I’ll go through the movement [in my head],” Lindlau said.

Hadley echoes the importance of learning a route. “You have to memorize the route. You don’t have an excuse not to,” Hadley said. He has seen too many climbers blow their send, not because they couldn’t do the moves, but because they forgot the beta.

Practice projecting in the gym

As a routesetter, Cruz has a daily pulse on the gym climbing scene. She finds that most members at her gym are “really here to just climb and not to send something.” Her observation resonates with me, as I find myself drawn to the gym for socializing or simply to blow off some steam from a busy workday. As a dedicated projector, Lindlau sees the gym as a place to hone his projecting skills. “Mini projects in the gym can be helpful. It gets you in the right headspace to find out what you need to do when you do go outside,” he said.

So why don’t people project more often?

Because it’s so damn hard. “Projecting is tough mentally because you are trying something at your limit. Each attempt is stressful,” Hadley said. But once you accept that it’s going to be hard, once you acknowledge that sending is not the only metric of success, it can be incredibly rewarding—as I myself have recently discovered.

That’s right: News flash! I found a project, and I’m totally stoked. 

Japanese Gardens (5.11+, 4 pitches) is located in Index, WA, and it felt impossible at first. The climb is sustained, very beta intensive, and involves a lot of precise smearing. After my first try, I almost gave up. I’ve climbed the grade before, but I’ve never put together that many hard pitches in one ground-up effort, which is my personal goal. But after speaking with Hadley, Cruz, and Lindlau, I felt ready to employ their tactics, and I’m hoping to discover the joy of really sticking with a route. 

I don’t fully know what I’m doing yet, and I’m still winging it, but I’m motivated and more excited about climbing than I’ve been in years. As a father of two kids under three years old, my time is limited, and I need to be focused to find moments to climb. I’m using methods like toprope soloing to work on my project when I have time, instead of relying on the schedules of my partners. I can do all the moves now, and that’s given me hope. I’m not sure I’m ready to call myself “a projector,” but I am smitten by this route, and I’ve discovered a new joy in this way of climbing. 

The only thing I’m left wondering; why did it take me so long?

Key Takeaways for the Aspiring Projector

  1. Pick a climbing project that you are 100% stoked on, not just something you think you should climb because it’s classic or the right grade. 
  2. Figure out a repeatable projecting process that works for you.
  3. Break down routes into sections and memorize cruxes rather than trying to remember the entire route. 
  4. If you are stuck in a plateau, projecting can help you break out and have fun climbing again. 
  5. Learn to try hard  without taking it too seriously; If it’s not fun, you aren’t doing it right! 

The post Never Had a Project Before? Here’s Where to Start. appeared first on Climbing.

]]>
What Type of Climber Are You: A Dancer or a Fighter? https://www.climbing.com/skills/technique/climb-better-archetypes/ Wed, 13 Aug 2025 09:48:53 +0000 https://www.climbing.com/?p=114790 What Type of Climber Are You: A Dancer or a Fighter?

Become a more balanced climber by understanding which climber type defines you, your Ego Grade, and what lies on the other side.

The post What Type of Climber Are You: A Dancer or a Fighter? appeared first on Climbing.

]]>
What Type of Climber Are You: A Dancer or a Fighter?

I have an issue with a particular grade in climbing. It’s not the hardest grade I climb, nor is it the easiest. The problem revolves around routes that I can do quickly, but are challenging enough to make me want to tick them on 8a.nu or Mountain Project.

I call this the “Ego Grade.” For me in sport climbing, that includes routes between 5.12a and 5.13a.  On a climbing trip last year, I realized that my relationship with an Ego Grade was holding me back from becoming a better, happier climber. While my Ego Grade has different numbers in sport climbing, bouldering, trad climbing, and in the gym—they all stem from the same concept.

the bell curve of ego grades
(Photo: Casey Elliott)

What’s an Ego Grade?

Simply put, an Ego Grade boosts your ego, or conversely, challenges your ego. It doesn’t necessarily contribute to your progression, and it may not even deepen your fulfillment from the sport.

Picture this: You walk into your local bouldering gym and at last, there is a fresh set on the wall. Before your shoes are even on, you lock onto the climb. It’s probably not the hardest problem you could try today, but it’s just hard enough for your ego to feast on. Honestly, how can a session feel satisfying if you don’t send one V“X”? Your ego eats it up like a fresh juicy burger from the Lander Bar after a long weekend in the Winds.

But the real question is: How many times do you need to do this before your ego is “full”? How many V”X”s of that style do you need to tick before you’re comfortable working your anti-style?

You might be unaware that your ego needs validation every time you climb. If this is true, you are not alone. Reworking this emotionally triggered mentality may bring more growth and satisfaction to your climbing.

Recognizing that you often partake in ego climbing and its performative satisfaction is no easy feat.

I struggled with my own Ego Grade for quite some time. My chest would puff up every time I climbed that idealistic, beautiful 5.13a grade. This mindset shaped my outdoor sport climbing for the better part of five years. Admittedly, there are silver linings: I got very good at sending my Ego Grade quickly. It helped me send stacked 5.12 multi-pitch climbs and get lots of volume on climbing trips.

(Photo: Dan Krauss)

Even with these successes, I truly believe prioritizing my Ego Grade has stunted my ability to progress to higher grades. Even worse, I became mentally uncomfortable struggling on almost any climb below 5.13. This robbed me of a significant amount of enjoyment I would have otherwise taken from the sport. At the end of the day, I still have so much to learn from climbs at a variety of grades.

Watch Casey Elliott climb past his Ego Grade as he explains the Dancer vs. Fighter binary

The Fighter and the Dancer

My friend Nicki is one of the most composed climbers I’ve ever seen—no grunts, no screams, not even a power peep. When we climb together, we feel the stark differences in our style. When I went for an onsight, I gave it my all every time, sometimes kicking and screaming. Nicki, on the other hand, had a habit that baffled me: While onsighting routes within her Ego Grade, she would often just … take.

It drove me nuts. “Why would you do that?” I’d ask. “You could’ve powered through and sent it. Then we could’ve moved on!” For years, I have been trying, mostly in jest, to coach her on how to try hard while onsighting. I assumed the reason she called “take” so often revolved around a fear of falling. It turned out I was completely wrong.

Nicki wasn’t afraid of falling, nor was she getting too pumped to continue climbing. What Nicki truly disliked was climbing through moves that felt unsure, awkward, or imprecise. She was a perfectionist. As a result, she eventually executed hard routes with grace and a deep understanding of the best movement. This type of approach requires time and does not lend itself to high-level onsighting. Her record shows that while she is more than capable of onsighting climbs closer to her redpoint grade, she often opts to sacrifice the onsight and work out the moves so she can climb it smoothly and confidently on a subsequent go.

In Nicki’s words: I know I’m physically capable of holding on longer and flailing my way up a harder route. While I can appreciate the sense of accomplishment that comes from sending something that way, it often feels at odds with how I approach most things in life. I prefer to act methodically and with precision, relying on preparation and a sense of predictability. Venturing into the unknown, both in climbing and in life, feels inherently challenging to me.

After our latest climbing trip together, we finally figured out how and why our approaches are so different.

The Fighter Mentality

On one end of the spectrum, there’s me, screaming through off-balance moves, pumped out of my mind, often successfully onsighting like an off-brand Sharma. I feel like I should send that grade quickly. So I send, regardless of how poor my movement is, because clipping chains justifies the effort. I call this the Fighter Mentality. 

Fight·er Men·tal·i·ty:

Noun: 75% try hard, 25% technique, likely to run out of quickdraws while climbing

The author fighting (Photo: Ben Neilson)

Signs that you might be a Fighter include:

  • You skip anti-style routes because you can’t visualize the beta quickly enough.
  • Your onsight/flash grade is very close to your project/redpoint grade (5.12c flash and 5.12d redpoint, for example).
  • You often send in a way that you don’t think you could repeat, or “black out” and have no idea what you did.
  • You struggle with or don’t spend time memorizing beta.
  • You are embarrassed if you can’t figure out the moves quickly.
  • There is a large gap between your style grades (e.g., V7 steep compression, but only V4 vertical crimping).
  • You give it 110% every time you get on a rope or a boulder problem, often sacrificing learning opportunities and putting yourself at risk for injury.

The Dancer Mentality

In sharp contrast to my Fighter tendencies, there’s Nicki. She rehearses every move, even if she looks totally in control. Onsight-averse, she usually repeats a route several times. Eventually, she climbs like a dancer performing a beautifully choreographed piece. She loves the feeling of climbing immaculately. So if there’s uncertainty in her beta, she won’t try nearly as hard, because imperfect execution may not yield the same level of satisfaction or achievement. I call this Dancer Mentality.

Danc·er Men·tal·i·ty:

Noun: 25% try hard, 75% technique, likely knows the route length and puts the exact number of quickdraws on the appropriate side of their harness.

Nicki dancing (Photo: Kieran Duncan @kieranjduncan)

Signs you might be a Dancer:

  • You take your time to dial in routes so that by the time you send, it feels like muscle memory.
  • It takes multiple attempts or sessions to send routes even below your redpoint grade.
  • Your onsight grade and redpoint grade are very far apart (5.11b and 5.13a, for example).
  • You don’t want others (or yourself) to see you climb with sloppy beta.
  • It is difficult to give maximum effort, even on a “send go.”
  • You don’t fall often and opt to take if you feel uncertain about a move.

Finding the balance

Ideally, you have a combination of the Fighter and the Dancer within you. For Nicki and I, that wasn’t the case. We were too far on the ends of this spectrum. Ultimately, we were serving our egos more than our growth.

While being a Fighter or a Dancer has benefits, you are likely missing out on becoming a more well-rounded climber.

What the Fighter is missing

The Fighter avoids learning opportunities on Ego Grades and loses the chance to refine their movement skills. They skip anti-style routes because their ego can’t handle projecting a lower grade they “should” flash. The Fighter relies heavily on intuition and can easily access near-maximal try-hard.

Their true potential, however, might lie beyond these tendencies. If they embraced precision and took more time to learn movements that are not intuitive, they could likely climb harder and more efficiently. Ultimately, they could become a more well-rounded climber.

What the Dancer is missing

The Dancer avoids discomfort and only sends when everything feels just right. This approach often leads to more refined ascents, resulting in a deep understanding of projecting tactics and skills. However, it often means slower progress and longer redpoint timelines. The Dancer may struggle to give 110% when a performance has not been perfected. It is important to remember that trying hard is a muscle. Just like hangboarding, you have to train it to effectively activate it.

The sweet spot between the Dancer and Fighter

As with most things, the ideal lies somewhere in the middle. A well-rounded climber can quiet the ego, accept imperfection, and approach every grade as a learning opportunity. They can try hard when it counts and embrace messy climbing to get the send, while also appreciating the value in rehearsing new movements and exploring different techniques. Over time, this balance will unlock the potential to send higher grades and increase efficient climbing at lower grades.

What does a balanced climber look like?

I have a simple rule of thumb that indicates a balanced climber: Their onsight grade is approximately one number grade below their redpoint grade, and their flash grade is about one letter grade above that.

  • For example, people who project 5.12a can often climb 5.11a first try, and probably 5.11b on a good day with good beta.
  • A 5.14b climber has likely practiced onsighting to the point that they can do 5.13a or 5.13b with the right beta spray, and maybe even 5.13b or 5.13c in the first few tries.
  • Even Adam Ondra fits relatively well into the rule— he has redpointed a 5.15d, onsighted 5.14+, and flashed 5.15a.

By this definition, I am not a well-balanced climber. I attribute that to spending too much time and mental energy on my Ego Grade. Last year, my max redpoint grade was 5.13b, my max flash grade was 5.13a/b, and my max onsight grade was 5.13a. I had climbed around 50 5.13- routes … talk about a flat pyramid!

This was a case of an overindulgence in the Fighter mentality. Once I had tried a route five to 10 times, I lost interest. Often, I couldn’t make the hard or uncomfortable moves feel doable quickly enough. Maybe to soothe my ego, I told myself that the route wasn’t worth my time. Perhaps low-hanging fruit within my style enticed me.

Ultimately, I discovered this was a deficiency I wanted to work on, so I put it to the test on a 5.13c called Pumped Puppets at Donner Pass, California. Rather than visualizing sending the route within five to 10 tries in an epic fight, I tried my best to be a Dancer and embrace a learning-focused long-term approach. I told myself there was always another day, and I didn’t want to send it if it felt like a fight.

My mantra became: Stoicism over hedonism. I delayed the gratification of a perfect send, foregoing the quick hit of sending fast and loose.

I wanted it to feel perfect, precise, and stripped of the Fighter try-hard. I believed that the only way I could convince myself that 5.14 is in my wheelhouse (the lifelong goal) was to climb 5.13c without having to fight for it.

In the end, I danced on the day I sent, and had plenty of gas left in the tank. I glimpsed into the future of climbing even harder routes. The battle was not won in a day, however. I constantly have to calm my ego to become more of a Dancer. It has been a beautiful process, and I have started to regain some of my love for climbing through removing my attachment to the ego grades.

For all of us, the real questions become: When is it important to use whatever it takes to try as hard as possible? When is it important to adopt a learner mindset? How do you access and toggle between these two mindsets? And how do you train both muscles?

(Photo: Peter Day @peterdayphoto)

How Dancers and Fighters can coach their egos

Two avenues exist when it comes to coaching a climber to balance the quick send with the precision send.

For both the Fighter and the Dancer, this will likely take some head game and ego work. Some of the work will overlap for the two approaches, while some will differ.

A commonality in working through both the Fighter and the Dancer mindsets is coming to terms with this:

Nobody really cares about your climbing.

You are most likely not a professional. This is not your net worth. There is always someone better than you. And people don’t judge you nearly as much as you judge yourself. So to retrain your ego, go make a fool of yourself! Get into the gym and make a silly try-hard noise. Jump at a hold and fall on your butt. Be goofy. And most importantly, teach your internal critic to be more compassionate.

Coaching the ego of the Dancer

The Dancer should focus on the idea that it is okay for people to watch you climb sloppily. During your next gym session, pick a route and either decide on the beta from the ground, or go in blind and embrace whatever happens. Do your best to execute the beta you set out for yourself, even if you hesitate and feel uncomfortable.

An even easier practice? Climb only until you fall, then come down. Cement the idea that you only get one attempt. Finally, climb on the anti-ego grade or anti-style climbs. If you love 5.12c or V7 vertical tech, work on 5.11 or V4 steep compression boulders.

Coaching the ego of the Fighter

The Fighter should go to the gym and be silent. No power screams, no jumping for holds, no pushing through fear or discomfort. Your goal is to stop whenever something feels awkward or uncomfortable. I would recommend toproping or climbing lowball boulders to dissuade poor climbing due to fear of falling.

Finally, climb on the anti-ego grade or anti-style climbs. If you like 5.12c steep jug hauls, hop on 5.11c vertical tech that makes you feel like an uncoordinated gorilla. Finally, take take take until you can dance your way up a climb.

Training drills for Dancers and Fighters

As you get your ego under control, there are also some exercises you can do at the crag to practice projecting, onsighting, and flashing climbs.

Similar to training, if you cut out parts of your plan because you don’t feel like doing them, you will progress more slowly. If you show up to the crag with a plan to onsight five routes, but only try one and decide to work your project instead, you won’t get better at onsighting. If you plan to project a route, but get distracted by a different climb closer to your flash grade, you won’t get better at projecting.

Once again, we need to find the balance. Here are two sets of drills to help you do that:

Get the Fighter Training Drills

Get the Dancer Training Drills

Final Thoughts

Whether you’re a Fighter clawing through every move or a Dancer perfecting every detail, your relationship with your Ego Grade shapes far more than just your tick list—it shapes your growth.

I wrote this advice through the lens of sport climbing because it easily accentuates these differences. The tactics and mindsets of sport climbing—stretched over dozens of moves—lend themselves to large observations. However, these same tendencies exist in bouldering, trad climbing, ice climbing, competition climbing, and interestingly enough, general life. Have you ever watched someone rapid-fire a boulder problem 30 times in 30 minutes with the same beta, then someone else send because they rested between go’s and tried a variety of beta? Have you ever observed fear accentuating these mentalities in trad climbing? (This is basically the entire premise of “headpointing.”) What do the egos of successful competition climbers have in common?

By identifying your default tendencies and deliberately exploring the opposite end of the spectrum, you begin to unlock new dimensions of learning, progression, and joy in climbing.

Remember: The real progress often begins when the send doesn’t matter as much as how you send. If you can toggle between trying hard and refining movement, between effort and elegance, you’ll not only climb harder, but you’ll climb better. And maybe, just maybe, you’ll discover that your proudest ascents aren’t the ones that fed your ego, but the ones that challenged it.

Special thanks to Nicki for bravely exposing her ego and mindset, and for sharing a perspective I once struggled to see.

The post What Type of Climber Are You: A Dancer or a Fighter? appeared first on Climbing.

]]>
The Best Way to Heel Hook? Probably Not How You Currently Do It. https://www.climbing.com/skills/technique/opinion-the-best-way-to-heel-hook-probably-not-how-you-currently-do-it/ Mon, 28 Jul 2025 15:00:21 +0000 https://www.climbing.com/?p=114363 The Best Way to Heel Hook? Probably Not How You Currently Do It.

An op-ed from a climber aspiring to master the heel hook as he lose power with age

The post The Best Way to Heel Hook? Probably Not How You Currently Do It. appeared first on Climbing.

]]>
The Best Way to Heel Hook? Probably Not How You Currently Do It.

When I was 18, I fell off gunning for the first bolt on Smith Rock’s Churning in the Wake (5.13a) on a hot October morning. My heel stayed hooked in a hueco and I fell onto my head, earning a concussion—and a lifelong aversion to hooking. However, as I’ve gotten older and needed better technique to compensate for lessening power, I’ve tried to become more of a hooking scientist.

I’ve also come to realize that most of us suck at heel hooking. We just plunk our heel on like a walrus flopping onto a ledge and carry on, hoping the heel sticks, exercising minimal intentionality. We might call this “old-school hooking” or “passive hooking.”

Back in the day, our slipshod approach to hooking was informed by both the newness of steep rock and our clunky shoes, which had slidey, insensitive heel cups and, with tension rands still rudimentary, little dialogue between the front and back of the shoe.

Case in point: Masters of Stone (1991), wherein the late Dan Osman climbs Slayer (5.14) at Cave Rock, Nevada, wearing the original Boreal Ace. Narrates Osman, “You’ve got to keep the opposition going … To keep the flow going in these moves, you’ve got to be constantly looking for these toe hooks, heel hooks, backsteps. Body English is extremely vital.” But then, from 16:30-16:50, he slaps his heel on blindly and just keeps climbing. This is not a knock on Osman, who was a superb climber; it’s just an observation of how incipient the technique was back then.

Contrast this with Benn Wheeler, whom Josh Horsley of The Testpiece Podcast has called a master of hooking, with off-the-charts ankle mobility, climbing the Rocky Mountain National Park problem The Phoenix (V14). From 5:40 to 6:40 in this video, Wheeler sends the compression arête, relying on multiple left heel hooks. He’s precise and intentional and dynamic, looking at his heel, placing it just so on tiny crystals, rotating over and around it, and squeezing hard with his leg muscles to create opposition. His heel becomes another hand—or a tail.

We might call this “new-school hooking” or “active hooking”—and it’s what we should all be doing. Our rock shoes and the collective knowledge have gotten so good; there’s no excuse for lazy hooking.

So next time you place a hook, study it, refine it, and activate it. Find the exact dimple or crystal where your heel locks in, and then play with the optimum angle of articulation in your ankle based on that hold and its position relative to your body—wiggle your foot around; flex your toes toward you or point them away. Once the heel is situated, fire up your leg muscles from your calf to your quadriceps to your hamstring to create opposition, and then drag your heel back toward you.

Now you’re heel hooking; now you’re on fire!

The post The Best Way to Heel Hook? Probably Not How You Currently Do It. appeared first on Climbing.

]]>
Suffering From Climbing Anxiety, I Took Hazel Findlay’s Mental Training Course. Here’s What I Learned. https://www.climbing.com/skills/technique/mental-training-plan-climbers-reviewed/ Thu, 13 Mar 2025 16:02:47 +0000 https://www.climbing.com/?p=111269 Suffering From Climbing Anxiety, I Took Hazel Findlay’s Mental Training Course. Here’s What I Learned.

Pro climbers and coaches Hazel Findlay and Angus Kille marketed “Strong Mind” as a way to manage my fears. And I had plenty.

The post Suffering From Climbing Anxiety, I Took Hazel Findlay’s Mental Training Course. Here’s What I Learned. appeared first on Climbing.

]]>
Suffering From Climbing Anxiety, I Took Hazel Findlay’s Mental Training Course. Here’s What I Learned.

The first time I led a trad climb, I placed a cam blindly and immediately took an uncontrolled, fearless, and absolutely exhilarating fall. I have great memories of that summer; 2019 was the season I began pushing myself on lead, ticked new grades, and fully dived into the climbing life. Crucially, I didn’t yet appreciate the consequences of climbing falls.

Fast forward six years and, thanks to a string of lower-body injuries, a bombardment of Weekend Whipper horror shows, and a few scary falls of my own, I now have a very different relationship to falling and risk. Nowadays, I am often stressed out about falling, and as a result I climb grades way below my physical limit. I also choose belayers very, very wisely. As my climbing-comfort plummeted, so has my self worth. Friends, strangers, and pro climbers all seem to be taking huge falls, pushing grades, and having fun while doing it. So why can’t I?

*

Hazel Findlay’s mental-training course, Strong Mind, is not a silver bullet. Strong Mind is mentally taxing, it strongly resembles therapy, and you will put yourself in situations you’ve been getting pretty clever at avoiding. The six-chapter course has 91 lessons, including “framing your mindset,” fear of falling/injury/exposure/failure, performance anxiety, and gives you actionable breathing and mindfulness tips. The depth of knowledge shared in the course is astounding—and is clearly created by two climbers with extensive experience pushing their own mental boundaries.

My favorite part of the course was doing a few practice falls at the crag, recording them, and getting analysis and feedback from Angus Kille. It was almost like the Strong Mind team was at the crag with me. In the video analysis, Kille pointed out that even taking small, clean falls made my body go very tense. And simple toprope bounces on the rope made me anxious—I was gripping my figure eight, a telltale sign I was uncomfortable.

I didn’t know how I felt about this information. I have the perception that I’m brave, that, as a trad and alpine climber, I like to take some amount of risk. Risk taking, I realized, was a big part of my identity, my sense of self. But do I actually like that risk? I began asking myself. Findlay addresses the nuanced fears (unrelated to climbing) that can affect your experience: failure, social comparisons, and performance.

Female climber wearing red helmet placing cam in crack on rock wall.
On the spicy Squamish classic Genesis (5.10a). (Photo: Anthony Walsh)

In the fourth chapter, I began to do some deep thinking about the roots of my insecurities, and I learned that my fear of falling is equal parts fear of failure and reinjury. Neither fear will be solved by physiotherapy or strength exercises; I need to positively reframe my relationship to climbing by repeatedly having positive experiences with people I trust. These issues haven’t been resolved, but the team at Strong Mind helped me do my first giant leap towards having a better relationship to climbing, and myself.

Each week, participants have the opportunity to share their experiences with each other. Eventually I mustered the courage to talk about my experience with injury and how it has completely reframed my outlook on falling. So many classmates identified with my discomfort and simply said “same.” I don’t think there is a more comforting response when speaking about your trauma or insecurities.

Of course, the roots of your fears or insecurities may be completely opposite to mine, and different chapters may resonate with you while they didn’t resonate with me. The 91 lessons dive into a range of topics, and it is totally worth your time to explore them all. Nothing worthwhile ever comes easy, right?

*

The Strong Mind course’s main downfall, in my opinion, is the mountain of content that’s shared in such a short timeframe. The course is meant to be completed in just eight weeks—including going out to the crag between classes and implementing its teachings—but after a few weeks of listening to videos online, participating in the asynchronous forums, and trying to join weekly Q&A sessions (which were always, it seemed, smack in the middle of my mountain-standard-time workday), it was all too much. I didn’t feel like I had enough time to go out and actually practice falling, and I certainly didn’t have time to reflect on what I learned before I started the next chapter. Just like my inability to take big, safe falls, I soon felt like I was failing at this course too.

The course’s frantic pace, paired with stressful life events, seemed like too much so I slowed my roll. After all, students have lifetime access and there was no point in rushing the learning process. I took my time with the course and finished it in the fall, when Canada’s all too brief summer ended and I had time to work the material at my own pace.

So I spent the better part of last autumn taking practice falls, breathing deeply above my gear, taking in the view at the top of the pitch, and remembering what it feels like to enjoy climbing. In my mind, it’s 2019 again, and I’m eating gummy bears in a comfy belay parka at my favorite crag. I’ve come down from sending a few hard-for-me pitches teary eyed from joy and, of course, the dopamine hit. I’m enjoying myself again.

Hazel and Angus warned that this is an ongoing process of unlearning and relearning—it’s not over! But I’m glad to now have the tools to cope.

The post Suffering From Climbing Anxiety, I Took Hazel Findlay’s Mental Training Course. Here’s What I Learned. appeared first on Climbing.

]]>
Can Climbing Chimneys Actually Be FUN? https://www.climbing.com/skills/technique/how-to-climb-chimneys/ Tue, 16 Apr 2024 16:45:52 +0000 https://www.climbing.com/2014/10/23/learn-this-conquer-chimneys-with-tips-from-rob-pizem/ Can Climbing Chimneys Actually Be FUN?

Chimneys can be strenuous, runout, and baffling. They can also take you to some pretty incredible places.

The post Can Climbing Chimneys Actually Be FUN? appeared first on Climbing.

]]>
Can Climbing Chimneys Actually Be FUN?

Royal Arches, Yosemite. Kor-Ingalls Route, Castleton Tower. Durrance Route, Devil’s Tower. What do these super-classic moderates have in common? They each have a physically demanding chimney. This term refers to any fissure that your body fits inside, ranging from a squeeze chimney (one to two feet wide) to much wider, where you must stem the gap with a foot and hand on each side. Each width requires its own set of unique movements, so we talked with wide-crack wizard Rob Pizem (who points out that this was one of the earliest climbing techniques) to break it down into a step-by-step process.

Movement

Squeeze

Zac Robinson, Mission to Moscow 5.11a,
Zac Robinson squeezes through Mission to Moscow (5.11a) in Little Cottonwood Canyon, Utah.

The tightest of the tight, where just breathing in can prevent you from moving upward. Remove any bulky gear (pack, shoes on harness, etc.), put it on a sling, and clip it to your belay loop so it hangs down. Choose a side to stick in first: If the crack gets tighter as it goes deeper, put your dominant hand inside for jamming, or if there are more edges on one side, face it so you can use them for holds. This style is “anything goes,” but every movement should be small and approached with patience. Look for narrower sections to wedge your feet with heel and toe smeared on opposite sides, like you’re standing. Try heel-toe cams, twisting your ankle so your foot cams sideways into place (Pizem’s favorite), or a T-shape (feet perpendicular, with the heel nested into the arch of the other foot). Hands should be doing anything: finding edges/crimps (including on the face next to the crack!), smearing with palms, and arm-barring or using a chicken-wing (palm on one side and upper arm on the other)—try elbow up and down. Inhaling may lock you into place, so exhaling might release you.

Froggy Style

Patrick Kingsbury, Scream & Slither 5.11
Patrick Kingsbury climbs the aptly named Scream & Slither (5.11) in Long Canyon, Moab, UT. (Photo: Andrew Burr)

This is required for chimneys that are just bigger than squeeze but not expansive enough to fully stem. Back on one side, knees pushing into the other. With the soles of your feet pressing into the back-side, push out with your palms—fingers pointing down or to the side—kept low for leverage. Lean your upper body slightly forward, and push down and out with your feet and hands so you can scoot your butt and lower back upward. It will be slow and steady, but push with everything to hold you in place while your upper legs lift your body. Repeat pushing to slide your legs up.

Stemming

Eric Hansen, Holdum 15 5.10, Mt. Rushmore.
Eric Hansen presses through Holdum 15 (5.10). (Photo: Andrew Burr)

For the widest chimneys out there, put your left foot and hand on one side with the right hand and foot on the other. Press and push your feet and hands outward, trying to maintain as much external pressure as possible. “Think about pushing through the wall,” Pizem says. “Most people slip because they are pushing down when the holds actually require them to push out.” Always be looking for edges, bumps, or slabbier sections to use as footholds. Pull down on holds above or palm the wall to get some downward force so you can move up one foot at a time.

Chimney Cheats (With Rob Pizem)

Gear

  • No tight, downturned shoes; think flat, stiff, and supportive.
  • Check belay loops, waistbelt, and leg loops for damage.
  • Use a webbing strap to move your chalkbag (side or front).
  • Pants, pants, pants! Protect your legs with jeans or canvas.
  • Put all pro on a sling. If the chimney gets tight, hang the gear down and out of the way by clipping it to the belay loop.
  • Tie your knot with a longer bight so it’s below your crotch.
  • Take your helmet off—just put it back on when it’s over!

Mental

I tell myself that the first ascensionist would have placed a bolt if it were really bad! The only reason you’ll fall is if you quit or go limp. Start on shorter chimneys to build endurance and technique, then attack the longer ones. Plan on being runout at times, but secure. Breathe and climb from rest to rest. This will keep you focused on the few feet in front of you.

Protection

Place when you can, not when you want to. That means taking everything you can get: small nuts, slinging blocks, or walking a huge cam up next to you. Look for spots on the face, too. Pro will be limited, but your position is surprisingly secure.

Rest

Find a way in which you are not applying external pressure but you still won’t slide down. Turn your upper body so your shoulders are wedged, or inhale to lodge your chest in place. In froggy style, lean forward so your chest is against the rock, or sit down on your wedged feet. Look for any holds, bumps, or edges to put your feet on. You have to rest your way up.

The post Can Climbing Chimneys Actually Be FUN? appeared first on Climbing.

]]>
10 Essential Yoga Poses for Climbers https://www.climbing.com/skills/technique/10-essential-yoga-poses-climbers/ Thu, 22 Feb 2024 17:33:43 +0000 https://www.climbing.com/?p=104347 10 Essential Yoga Poses for Climbers

Whether you're prepping for or recovering from a climb, this practice will bring much-needed focus and release

The post 10 Essential Yoga Poses for Climbers appeared first on Climbing.

]]>
10 Essential Yoga Poses for Climbers

Originally published on Yoga Journal

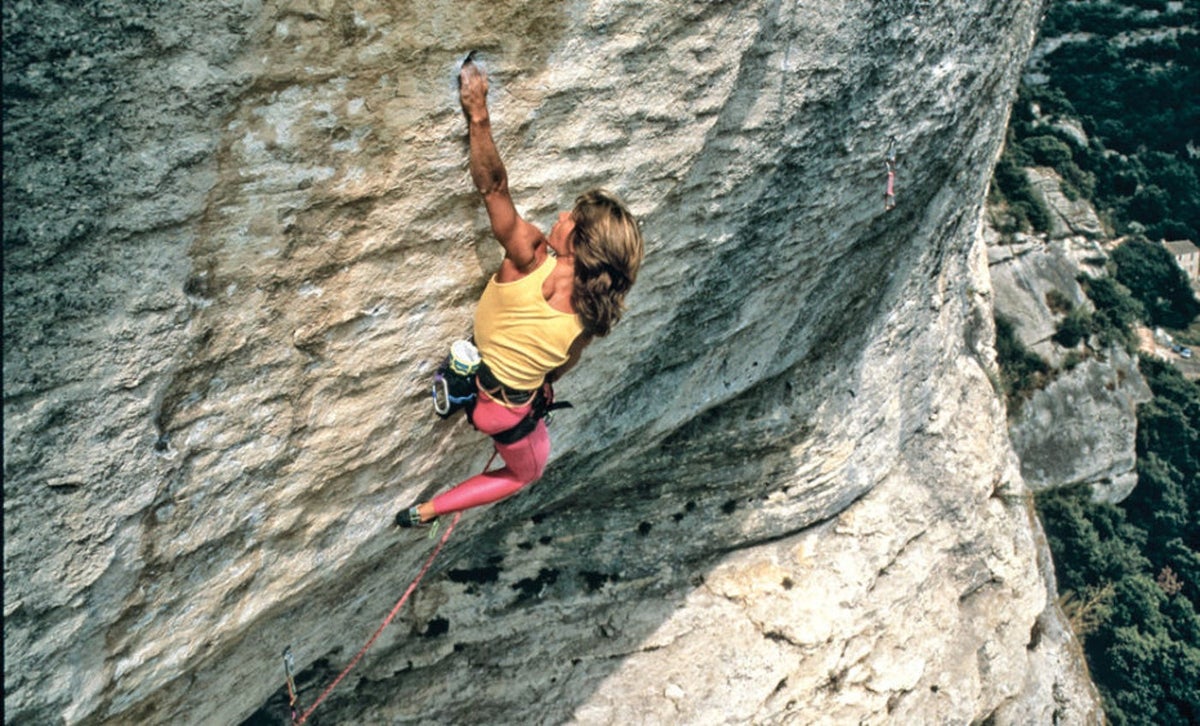
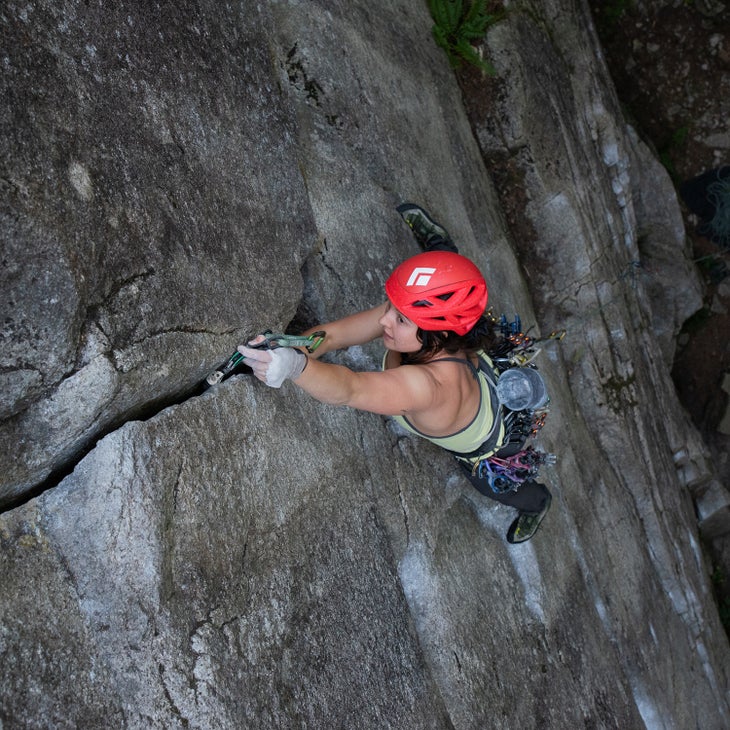
“Yoga has really challenged my ability to sit with uncomfortable situations,” explains New Jersey-based rock climber and yoga teacher Malka Abreu. Although that experience has been yoga’s most significant and lasting effect on her climbing and her life,  after years of practicing both, she’s found that incorporating yoga for climbers into her routine has a lot of other benefits. Namely, it’s increased her flexibility, steadiness, strength, and calm and has forced her to be exquisitely aware of her body.

Not unlike climbing, when you’re holding a yoga posee that feels unbearable, you have no choice but to focus on your body and breathe through the discomfort, says Abreu. Yoga trains you to concentrate on your breath and let everything else fade away. By doing so, your brain and body communicate on a different level to enhance your intuition.

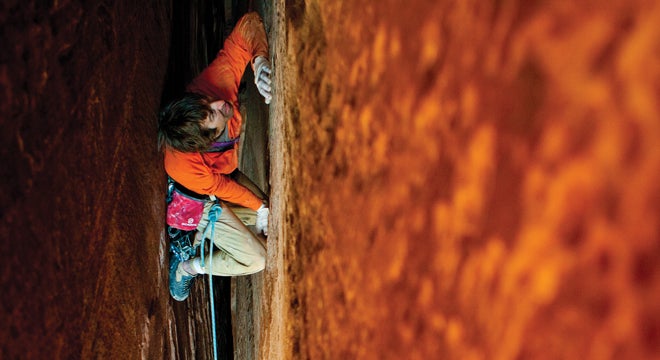
Yoga and rock climbing also force you out of your comfort zone to strengthen your awareness and your connection to movement, breathing, and mindfulness. They also demand that you put in the work, physically and mentally, each time you show up to practice.

“When you reach the crux of your climb and you feel like you can’t make it through or you just took a huge whip and don’t feel like moving forward, you must challenge yourself to be in that hard and uncomfortable situation and to learn how to breathe through it,” she explains. “Only then will you be able to truly make progress and reach that next hold.”

Yoga For Climbers

Abreu suggests the following yoga for climbers to target tight hips and hamstrings. Either practice them before your climb to stretch or afterward to help you find some release.
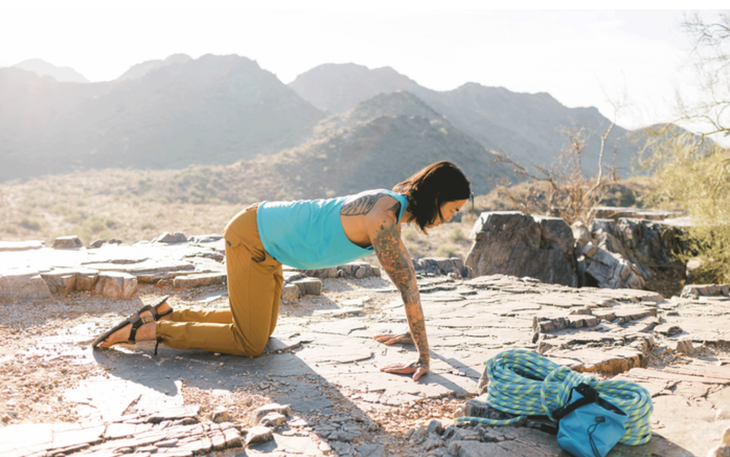
Hands and Knees

Why it’s great for climbers: This deceptively simple stretch lengthens and realigns your spine and both stretches and strengthens your wrists, forearms, and shoulders.

How to: Begin on all fours and place your hands beneath your shoulders and your knees beneath your hips. Slowly begin to rotate your hands to angle your fingers outward. Stay here for 10 breaths.

To intensify the stretch in your forearms, turn your fingers toward your knees. If you want to intensify the stretch even more, ease your hips back toward your heels. Stay here for 10 breaths.

Puppy Pose (Uttana Shishosana)

Why it’s great for climbers: This pose stretches your spine, shoulders, upper back, arms, and abdominal muscles.

How to: From hands and knees, rest the tops of your feet on the ground with your toes pointing straight back. Keep your hips stacked over your knees as you slowly walk your hands in front of you and lower your chest toward the ground. Release your forehead to the ground or a sweatshirt or bag. As you inhale, lengthen throughyour spine. As you exhale, let your chest release closer to the ground. Stay here for 10 breaths.

(Photo: Allie Jorde Creative)

Hero’s Pose (Virasana)

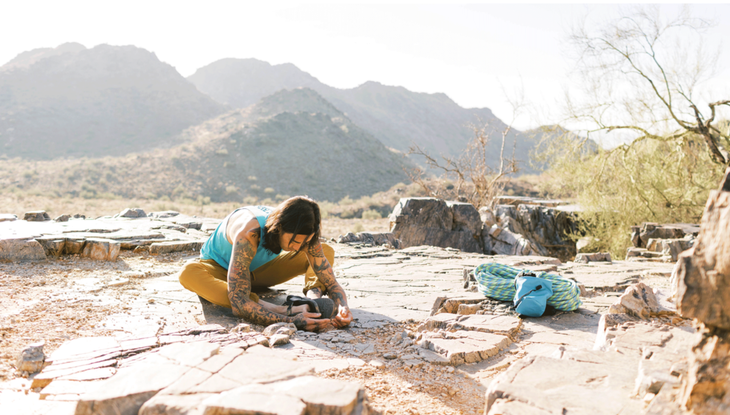
Why it’s great for climbers: This cringe-inducing pose is sometimes known as “toe killer.” It can feel intense but delivers an essential stretch to the arches and entire bottom of your feet. Practice it each time you extricate yourself from your shoes.

How to: From hands and knees, tuck your toes and walk your hands back toward your knees so you’re sitting upright on your heels. If the stretch is just too intense, bring your hands back to the ground in front of you to take some of the weight off your heels. Stay here for 10 breaths.

(Photo: Allie Jorde Creative)

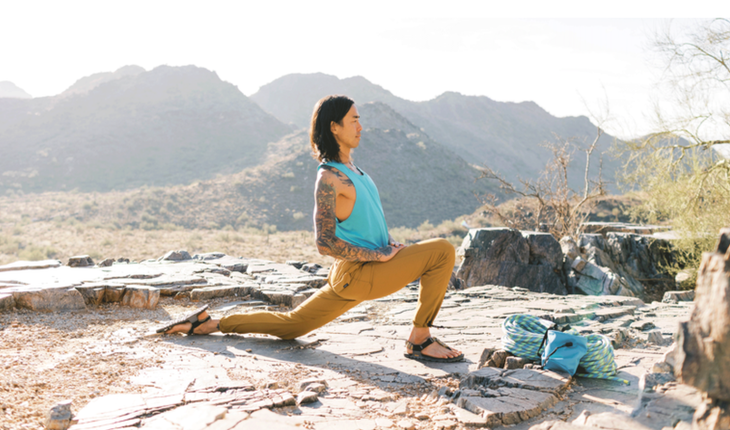
Low Lunge (Anjaneyasana)

Why it’s great for climbers: Low Lunge is probably the most familiar of any yoga for climbers poses. It stretches your quads, hip flexors, and hamstrings. It also delivers a slight backbend to help stretch across the chest.

How to: From hands and knees, step your right foot forward between your hands, bringing your right knee over your right ankle. Untuck your back toes and bring your hands to your right thigh, or if you feel stable, reach your arms alongside your head. Push your right heel into the ground to steady yourself. As you let your hips sink forward and down keep engaging your abs and lifting your chest to createa. slight backbend without collapsing in your lower back. Stay here for 10 breaths. Come back to Low Lunge and repeat on the other side.

(Photo: Allie Jorde Creative)

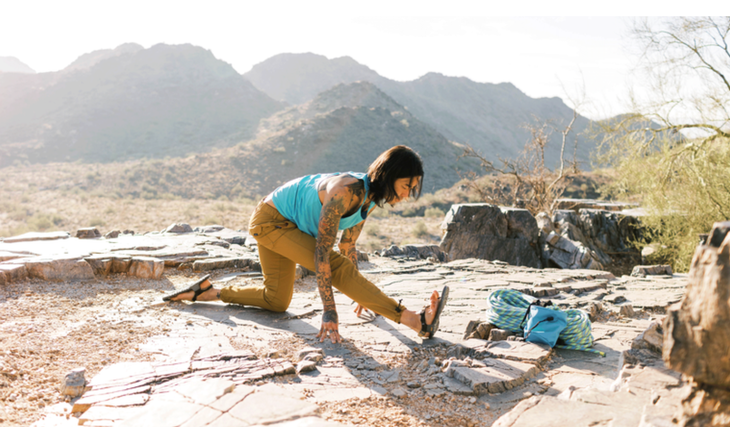
Half Monkey (Ardha Hanumanasana)

Why it’s great for climbers: A common runner’s stretch, this pose preps you for a good high foot by stretching your hip flexors and hamstrings.

How to: From Low Lunge, bring your hands to the ground on either side of your front foot, propping yourself on your fingertips. Take your time as you inhale and as you exhale begin to straighten your front leg by sliding your heel away from you. Keep your hips stacked over your back knee and flex your toes toward your face in Half Splits. Each time you inhale, find length in the spine. Each time you exhale, fold a little more deeply over your front leg. Breathe here for at least 60 seconds. Repeat on the other side.

(Photo: Allie Jorde Creative)

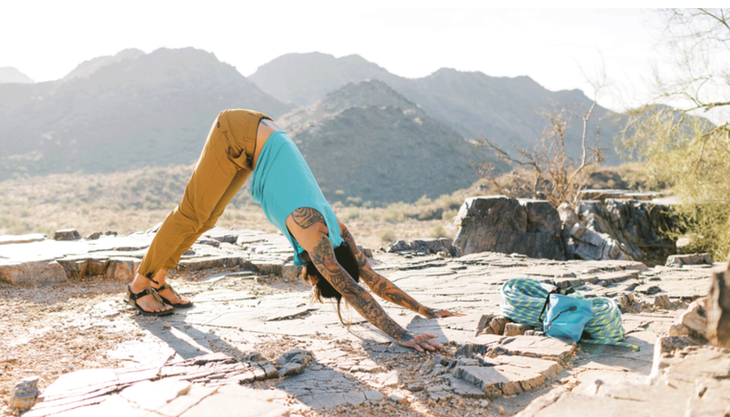
Downward-Facing Dog Pose with Crunches

Why it’s great for climbers: This foundational yoga pose strengthens your upper and lower body and delivers a back-body stretch from your head to your heels. Incorporating crunches helps strengthen your core and shoulders.

How to: From hands and knees, walk your hands slightly forward so your wrists are where your fingertips just were and are slightly in front of your shoulders. Tuck your toes, straighten your legs, and shift your hips up and back into Down Dog. Inhale and straighten your right leg up and back.

(Photo: Allie Jorde Creative)

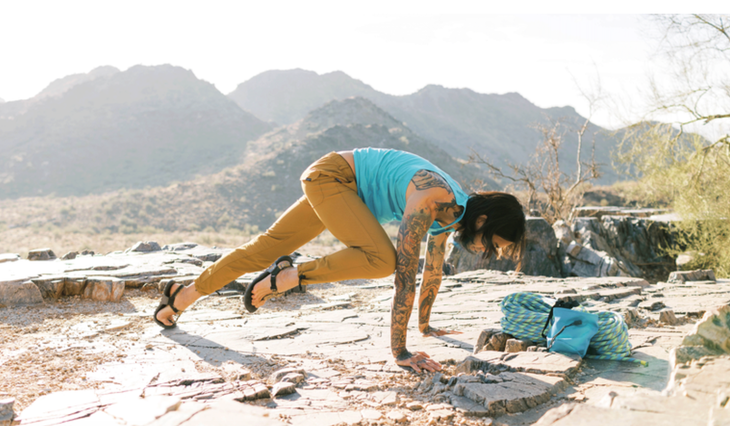
As you exhale, draw your knee toward your nose as you press your fingers into the ground, round your spine, and stack your shoulders over your wrists. Inhale and straighten your right leg up and back again. Exhale bring your knee outside your right elbow. Inhale straighten the left leg back and as you exhale bring the knee outside your left elbow. Switch legs and repeat on the other side. Repeat 3 times.

(Photo: Allie Jorde Creative)

Scorpion Stretch

Why it’s great for climbers: This untraditional pose stretches your shoulders as well as the muscles across your chest. It also releases the hip flexor muscles. It sounds confusing until you’ve done it once and then it quickly becomes intuitive.

How to: Begin lying on your belly. Extend your arms straight out from your shoulders forming a T with your palms facing down. Turn your head and bring your left cheek to the ground. Bend your right elbow and place that hand beneath your right shoulder. Bend your right knee and roll onto your left side as you step your right foot behind you, resting your toes or the sole of your foot on the ground. Continue to press your right palm or fingertips into the ground, feeling a stretch across your chest and shoulders as well as your right hip. Stay here for 10 breaths. Repeat on the other side.

(Photo: Allie Jorde Creative)

Pigeon Pose

Why it’s great for climbers: Pigeon Pose looks different in every person who practices it. What remains the same about the stretch is how it challenges your hips and glutes as well as your ability to breathe through discomfort.

How to: From hands and knees, bring your right knee behind your right wrist and angle your right shin in front of your body with your heel somewhere in front of your left hip. Extend your left leg straight behind you and sink your hips toward the ground. Untuck your back toes. Your tendency will be to roll onto your right hip and shift all your weight into that side. You want to counterbalance and distribute your weight equally. If your right glutes aren’t resting on the ground, place something like a sweatshirt beneath that side as support to level your hips. As you inhale, lift your chest and take a slight backbend.

(Photo: Allie Jorde Creative)

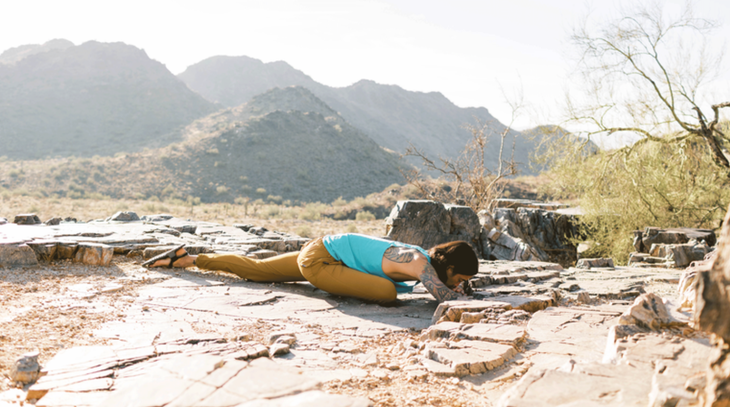
As you exhale, either stay upright or walk your hands forward and lower your forearms or your forehead to the ground in Pigeon Pose. Focus on releasing your shoulders and your right hip or at least breathing through the intensity. Stay here for 20 breaths. Switch sides.

(Photo: Allie Jorde Creative)

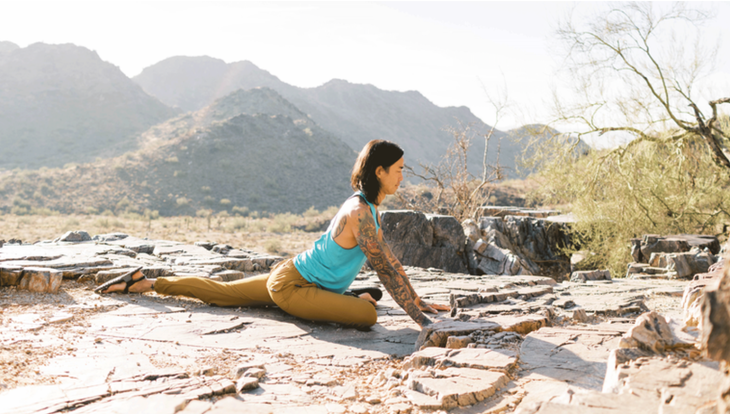
Ankle-to-Knee Pose (Agnistambasana)

Why it’s great for climbers: Not gonna lie—this pose is another intense stretch for your outer hips and glutes. Focus on your breath and, if you start to hold it, focus on lengthening your exhalations.

How to: Begin seated with your legs straight in front of you. Bend your left knee so your shin is parallel to your body. Do the same with your right leg and stack your right ankle on your left knee. Your shins will be stacked. Press your fingertips into the ground beside your hips and flex both of your feet. Reach your hips down as you lift up through your upper back. Stay here and breathe or explore resting your hands on your shins or walking your hands in front of you while and bending forward over your legs as you keep your back straight. Stay here for 20 breaths. Repeat on the other side.

(Photo: Allie Jorde Creative)

Bound Angle Pose (Baddha Konasana)

Why it’s great for climbers: This stretch for your your inner thighs and lower back can be practiced anytime and anywhere. Rather than drawing your legs toward what’s in front of you, you release them in the opposite direction.

How to: Begin seated with your legs straight in front of you. Then bend your knees and bring the soles of your feet together. Draw your heels a little toward you to form a diamond shape. Let your knees lower to the sides and allow the soles of your feet to peep apart in Bound Angle. As you inhale, sit taller and straighter.

yogi in a scenic valley
(Photo: Allie Jorde Creative)

As you exhale, either stay still or begin to fold forward at your hips. Release your neck and shoulders and rest your hands on your feet or at your side. Breathe here for at least 20 breaths. Remember, you’re not trying to force your body to hold the pose. You’re trying to let your body find release into the pose. If you find that your body starts to shift more forward after you’ve been here for a while, let it.
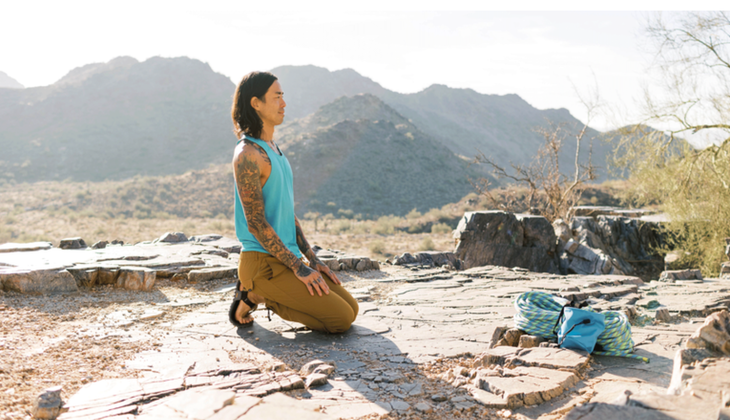
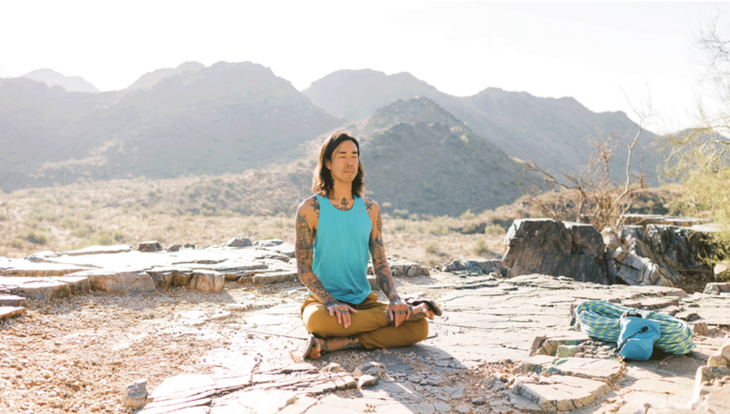
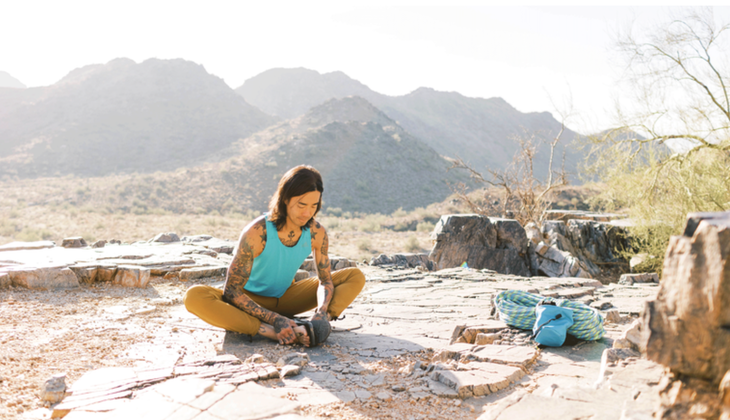
About Our Model
Ben Ko is a longtime student of yoga and all things related to the outdoors. He’s also a Phoenix-based hair stylist.

The post 10 Essential Yoga Poses for Climbers appeared first on Climbing.

]]>
Lynn Hill’s Tips For Dyno Success https://www.climbing.com/skills/technique/when-the-holds-get-far-apart-the-small-start-jumping/ Thu, 01 Feb 2024 21:00:30 +0000 https://www.climbing.com/?p=71334 Lynn Hill's Tips For Dyno Success

Think you're too short to make the move, then heed the advice from a world-class climber who stands just over five feet tall.

The post Lynn Hill’s Tips For Dyno Success appeared first on Climbing.

]]>
Lynn Hill's Tips For Dyno Success

Ever since I began to climb, I’ve had to figure out my own methods and sequences. Most of my climbing partners have been men who are much taller than I am and could reach past long blank sections of rock that I could not. At 5’1 and a half (I count every bit) inches, I have learned to compensate by looking for high footholds or small intermediate handholds that most people don’t even see. But sometimes the only way past has been a dyno.

Chouca (5.13c) in Buoux, France, a famous testpiece back in the mid-1980s, taught me a lot about dynoing. Most climbers with longer limbs had little trouble making a certain big dyno from one pocket to another without whipping off. For me as a smaller person with shorter limbs, the dyno was technical and powerful. However, my small size also meant that I had less weight to launch and control once I latched the hold, and that was a plus.

The trick for me was to generate enough power to travel upward and over to the side on this extremely overhanging wall. The biggest challenge was controlling the rotational movement of my body and limbs as they flew through the air. I had to coordinate the push-pull timing between my hand and footholds so that my body would arrive in the right position with respect to the hold and the angle of the wall. If I overshot, my body whipped off due to the excess momentum. If I tried to catch the hold before my body traveled to the correct position, I would also whip. When I hit the hold at the ideal moment of my upward trajectory, I had less momentum to control and was finally able to catch the hold. In the case of Chouca, on such overhanging terrain, that meant my arm and body were in a position nearly perpendicular to the wall.

Ironically, in the end I discovered that the “figure-four” technique was the perfect solution to this move, since I could wrap my fingers securely around a “finger bar” inside the pocket, wrap my leg around the arm, and gain the necessary height to reach the hold. When it came time for redpointing, I chose to use the figure-four instead of trying to stick such a low-percentage dyno move. Still, I’d had a seminal learning experience. Whether you happen to be a small person or you simply want to send your hardest routes or boulder problems, put dyno skills in your bag of tricks.

HOW TO DYNO

1. The first priority with a big dyno is to make sure your feet are in the best places to generate maximum leverage and power. The bigger the lunge, the higher your feet might need to be. Women may have an advantage here in terms of having the flexibility for high foot placements. Experiment with different foot combos to find what feels best.

2. Visualize the timing of when to initiate the push-pull snapping motion, and the position of your body at the moment of arriving at the apex or weightless “dead point” of upward momentum: that moment of stillness just before your weight begins to fall. Imagine catching the target hold as if it were a ball.

3. Extend your arms fully and then initiate a powerful push-pull motion simultaneously between your hands and feet. The timing of when you make a “snapping” motion with your arms will determine your trajectory. Sometimes it helps to test the movement, rocking up and down once or twice, before liftoff. This helps you coordinate the pushpull timing necessary for generating maximum power.

4. At the apex or dead point of your upward movement, give a final push off with your hands and catch the target hold.

5. Last, hold on! Sometimes, especially if you’ve doubted yourself or have tried many times, you can be so surprised to stick a hold that you forget to hang on. Follow through with your visual image of catching the hold like a ball.

[RELATED: Two Winter Workouts to Boost Your Endurance by Spring]

The post Lynn Hill’s Tips For Dyno Success appeared first on Climbing.

]]>
Test Your Problem-Solving Skills With These Rebus Puzzles https://www.climbing.com/skills/technique/rebus-puzzles-climbing/ Fri, 19 Jan 2024 15:00:42 +0000 https://www.climbing.com/?p=87002 Test Your Problem-Solving Skills With These Rebus Puzzles

See if your skills on the rock translate to these mental rock climbing mysteries.

The post Test Your Problem-Solving Skills With These Rebus Puzzles appeared first on Climbing.

]]>
Test Your Problem-Solving Skills With These Rebus Puzzles

A Rebus puzzle is a group of pictures and symbols that add up to a word or phrase. They can be about anything (see the example problems), but the batch of puzzles we have for you today are all about (surprise, surprise!) climbing! For even more, visit this interactive website by Daniel Kay, who created the Rebus puzzles you see here, and see his puzzles on Instagram.

Example Problems

(“Jack in the box” , “I’m in love” and “Think outside the box”)

Ok, get the gist? Now it’s time to see if your problem solving skills on the rock translate to these mental rock climbing mysteries.

Rock Climbing Rebus Puzzles

Also Read

The post Test Your Problem-Solving Skills With These Rebus Puzzles appeared first on Climbing.

]]>
Learn to Take Advantage of Your (Lack of) Height https://www.climbing.com/skills/technique/carlo-traversi-benefits-shorter-climber/ Mon, 25 Dec 2023 14:00:52 +0000 https://www.climbing.com/2020/09/21/adaptability-matters-the-challenges-and-benefits-of-being-a-shorter-climber/ Learn to Take Advantage of Your (Lack of) Height

Each climb presents different challenges for different bodies. The unique challenges you and your body face are also your best opportunities for growth.

The post Learn to Take Advantage of Your (Lack of) Height appeared first on Climbing.

]]>
Learn to Take Advantage of Your (Lack of) Height

Want to improve as a climber?  Sign up for Carlo Traversi’s Outside Learn course, Master Dynamic Movement. In only six short weeks, Carlo will take you from a slow, static slug to a pouncing gazelle who moves up the walls with dynamic efficiency. It’s free for Outside+ subscribers. 

“I can’t reach!” “That move is too big for me.” “This is a tall person’s route.”

As climbers, we’ve become accustomed to hearing these sentiments expressed on a daily basis, both at the crag and at the gym. While they sometimes hold merit, most of the time they can be chalked up as mere excuses we roll out when we aren’t willing to assess the complex nature of rock climbing—or the skills we’re either lacking or avoiding working on.

Short or tall, all climbers deal with difficulties relating to their physical attributes, height being chief among them. Statements like “He’s taller than me—look how easy that move was for him!” are less about overcoming our personal challenges and more about wallowing in this idea that others somehow have it easier. Generally speaking, we climb for the challenge, so it’s time to accept the fact that the unique challenges you face as a climber are also your best opportunities for growth.

At 5’ 7”, I’m considered a shorter climber for males. I recognized early on that my height could be a limiting factor in how I approached certain moves. This proved especially frustrating when I watched taller climbers reach through moves that I couldn’t. And particularly with indoor competitions, I found that course-setters oftentimes didn’t do the best job considering people of all heights—for example, making moves long to add difficulty and not putting enough footholds to make these reaches feasible for shorter climbers. It would have been easy to accept my fate early on and avoid situations where I felt I was at a disadvantage, but that would have been holding myself back. Instead, I opted to re-contextualize my relationship with climbing. I would focus on mastering climbing movement purely within the confines of my own physical attributes, without comparison to others. It would be a personal journey in which I’d open myself to the creativity allowed by my unique characteristics.

For me, the journey forward looked a little something like this:

1. Acceptance

I am shorter than some people, but taller than others. I am not going to grow anymore. My unique characteristics offer certain challenges when approaching climbing. These challenges are valuable because they offer the most opportunity for growth. They will always be with me, so I may as well face them head-on.

2. Identify the Challenges

Is there a specific move where I’m having trouble reaching the next hold? Have I exhausted all potential foot- and handhold options that could bring that distant target hold within reach?

3. Isolating Opportunities for Growth

The first and most obvious place to improve is with strength. However, strength takes a long time to gain and, if pursued too aggressively, can lead to injuries and other setbacks. I find that the next option—and usually the best option—is improving technique. Specifically with reach issues, one of the best techniques I’ve learned is moving more dynamically.

4. Understanding Dynamic Movement

This begins with relinquishing a bit of control. By moving more dynamically, I have opened myself up to a greater selection of holds and I also move more efficiently on the wall. But it’s important to start small: Hucking the biggest moves without control has always resulted in finding myself back on the mats or hanging on the end of the rope. Dynamic skill needs to be built incrementally.

5. Turn a Weakness into a Strength

Forcing myself to climb more dynamically has changed my entire style and approach to both boulders and routes. I can now alter my pace much more effectively, flowing quickly through strenuous positions, and using my momentum from one move to help carry myself through to the next.

As I’ve learned through my journey, climbing is enjoyable because of the massive variety of unique challenges it offers. As a climber, adaptability is king, and I’ve become far more adaptable with dynamic climbing techniques in my skill set. Short or tall, we all deal with moves that feel a little out of reach. Shorter climbers are at a bit of an advantage because they are forced to adapt to this issue earlier in their climbing progression, while taller climbers—though they have the innate reach advantage—will see gains from learning to climb dynamically as well. We can all stand to adapt. Dynamic climbing is the way forward.

Want more tips, tricks, and technical-movement wisdom like this from professional climber Carlo Traversi? Then sign up for Carlo’s new course, Master Dynamic Movement. In only six short weeks, Carlo will take you from a slow, static slug to a pouncing gazelle who moves up the walls with speed, style, and dynamic efficiency. It’s free for Outside+ subscribers. 

The post Learn to Take Advantage of Your (Lack of) Height appeared first on Climbing.

]]>
Michaela Kiersch: Five Tips for Tackling Dynos https://www.climbing.com/skills/technique/michaela-kiersch-how-to-dyno/ Mon, 02 May 2022 15:30:16 +0000 https://www.climbing.com/?p=71064 Michaela Kiersch: Five Tips for Tackling Dynos

At 5'1," the author, a leading American climber, took time to study and work hard on the best ways to jump.

The post Michaela Kiersch: Five Tips for Tackling Dynos appeared first on Climbing.

]]>
Michaela Kiersch: Five Tips for Tackling Dynos

Carlo Traversi says the best way to become a better climber is to master dynos. Now, you can learn from Carlo himself when you take Climbing’s Master Dynamic Movement course.

I have spent almost my entire life climbing in gyms and am very comfortable in that environment. Few things in a gym intimidate me—except maybe Band-Aids on the floor, birthday parties, and dynos.

I’ve had a complicated relationship with dynos. Officially, I reached my peak height of 5’ 1’’ in about sixth grade, and I never had the growth spurt people told me to expect. Those are probably the same people who said I could keep growing into my early 20s.

The combination of my size and natural competitiveness has led me to work hard on a few techniques for more successful dynoing. Here they are.

The author doing a double dyno in a world cup event.
The author at the Bouldering World Cup in Vail, 2018. Earlier in her career, she had to step back and study how to dyno.

1. Use your hips. 

In climbing gyms, we hear phrases like, “Stay close to the wall” or “Move your hips.” But why? My golden rule of climbing movement is that your hips should move in a linear fashion toward your intended hold. By moving your hips intentionally toward the target, you increase your likelihood of being in the correct position to stick it. To apply this rule to dynos, start by considering your choice of footholds.

2. Choose your feet. 

Select feet based on the direction you will be moving in and the distance that you must jump. When you are dynoing toward a hold to the right, it is important that the footholds allow for movement in this direction. Typically, the ideal choice will be either directly below your center of gravity or slightly to the left. Deciding on the right footholds lets you use your legs and propel your body toward the high handhold.

A common faux pas is choosing feet that are too high. Footholds that are too high may push your hips away from the wall instead of helping propel them upward. Conversely, too-low footholds may inhibit your ability to generate force. Choose feet that are somewhere in your mid-range of knee flexion/extension to optimize your power and keep your hips close to the wall.

Women boulderer does complicated dyno at a world cup event
Don’t just launch. Use the lower hand to push and guide you to the target hold. (Photo: Daniel Gajda/IFSC)

3. Push!

The next step is actually to attempt the dyno. After years of trying to improve my dyno technique, I realized that I was only half-dynoing. As I began to incorporate movement analysis into my training, I could see that my technique was mostly pull and very little push.

Most of climbing is pulling down as hard as possible, but in dynos it is important to remember to push. I realized that as soon as I yarded upward from the hold I was on, my hands were in the air and often short of the reach. My dynoing improved significantly when I began to push downward with my hands and complete the full movement. It was also important to implement the push technique in my lower body to ensure that I was maximizing the power in my legs and generating movement from the footholds.

The big takeaway is to follow through on the entire motion, pull and then push.

4. Control the swing. 

Once you reach the hold, the momentum you’ve generated many continue, with your body still traveling. To control the swing and stay on the hold, engage your core to bring your center of gravity back toward the wall. Pulling back inward enables you to find the next footholds and re-establish a base of support.

5. Use the visual arts.

My final secret to dyno success is to film and review your attempts. Sure, it’s easy to picture what dynoing should look like, but it’s hard to apply the concepts: to engage multiple muscle systems and techniques as well as orient yourself in space. When watching your dyno frame by frame, you can identify where your center of gravity is at each stage (using your hips as the landmark) and how to adjust the movement for more success.

Plus, if you’re filming when you stick the dyno you’ll have awesome content to show your friends!

The post Michaela Kiersch: Five Tips for Tackling Dynos appeared first on Climbing.

]]>