
Heading out the door? Read this article on the new Outside+ app available now on iOS devices for members! Download the app.
No matter how experienced a climber you are, one day, you will find yourself in a precarious situation. It could be a stuck rope, a dropped rappel device, ropes that won’t reach the next rappel, an injured leader, or any number of problematic situations. Elite climber Ian Nicholson has written Climbing Self-Rescue with this in mind, offering technical systems that follow patterns that are easy to remember and that can be applied to solve a wide range of problems.
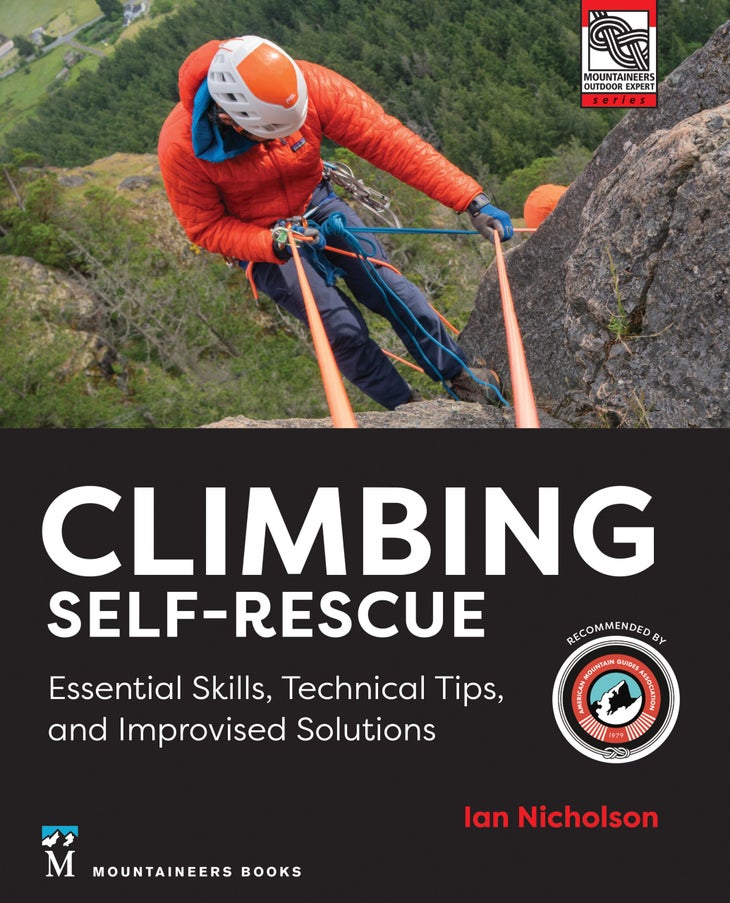
This lavishly illustrated guide teaches the skills a climbing team needs to execute a successful technical rescue on its own. Written for climbers with experience on multipitch routes, Climbing Self-Rescue addresses key skills including escaping the belay, lowering a climber, dealing with a stuck rope, improvising ascenders and using aid-climbing techniques in rescues, rescuing an injured leader, and so much more.
In the excerpts below, you’ll find a real-life scenario in which Zack “Bones” Smith and Aaron Martin get a bit over their heads in Alaska’s Ruth Gorge and wish that they knew the sorts of specialized rappelling techniques that Ian Nicholson describes in Chapter 4 of Climbing Self-Rescue.
The following is excerpted from Climbing Self-Rescue: Essential Skills, Technical Tips, and Improvised Solutions by Ian Nicholson (March 2024). Published by Mountaineers Books. All rights reserved. Reprinted with permission.
You can buy Climbing Self-Rescue here. You can see other articles by Ian Nicholson here—including his “How to Rappel Without a Belay Device”
Section divider
Too Fast, Too Furious
By Zack “Bones” Smith
In June 1999 at 21 years old, Aaron Martin and I ventured to the Ruth Gorge, Alaska, to see what the real mountains were like. We were both working in a warehouse for minimum wage and routinely sold our blood plasma to finance our first big trip. When the plane dropped us onto the Ruth Glacier for three weeks, I realized I had never actually snow camped. The pilot told us that when we wanted to leave, we should stamp out a runway and write a message in the snow. This would be our only communication with the outside world. He warned us to ration our food in case he couldn’t pick us up for “a while.”
We were the sole humans in the entire gorge, and the only hint of civilization was the occasional plane buzzing far above us. All we could see was white snow, gray rock, and blue sky. The never-ending silence was interrupted only by the cacophonous collapse of a serac or an avalanche. Several times our camp was sprayed by powder snow shedded from a peak miles away.
I had been scared before, but this was a new, deeper fear. Climbers with a lot more experience than me had died here.
We cautiously explored up and down the glacier on snowshoes and made several attempts at climbing something. Every time we tried a route, it would deteriorate into absolute kitty-litter choss and we would flee back to our snow prison. The snowshoes were a terrible mode of transportation compared to skis, so roped crevasse falls were an almost daily occurrence. We endured large stretches of bad weather and learned what the term “Ping Pong World” meant: the glacier would get so socked in with clouds that we couldn’t differentiate between the ground and the sky—it was like being trapped inside a giant ping-pong ball.
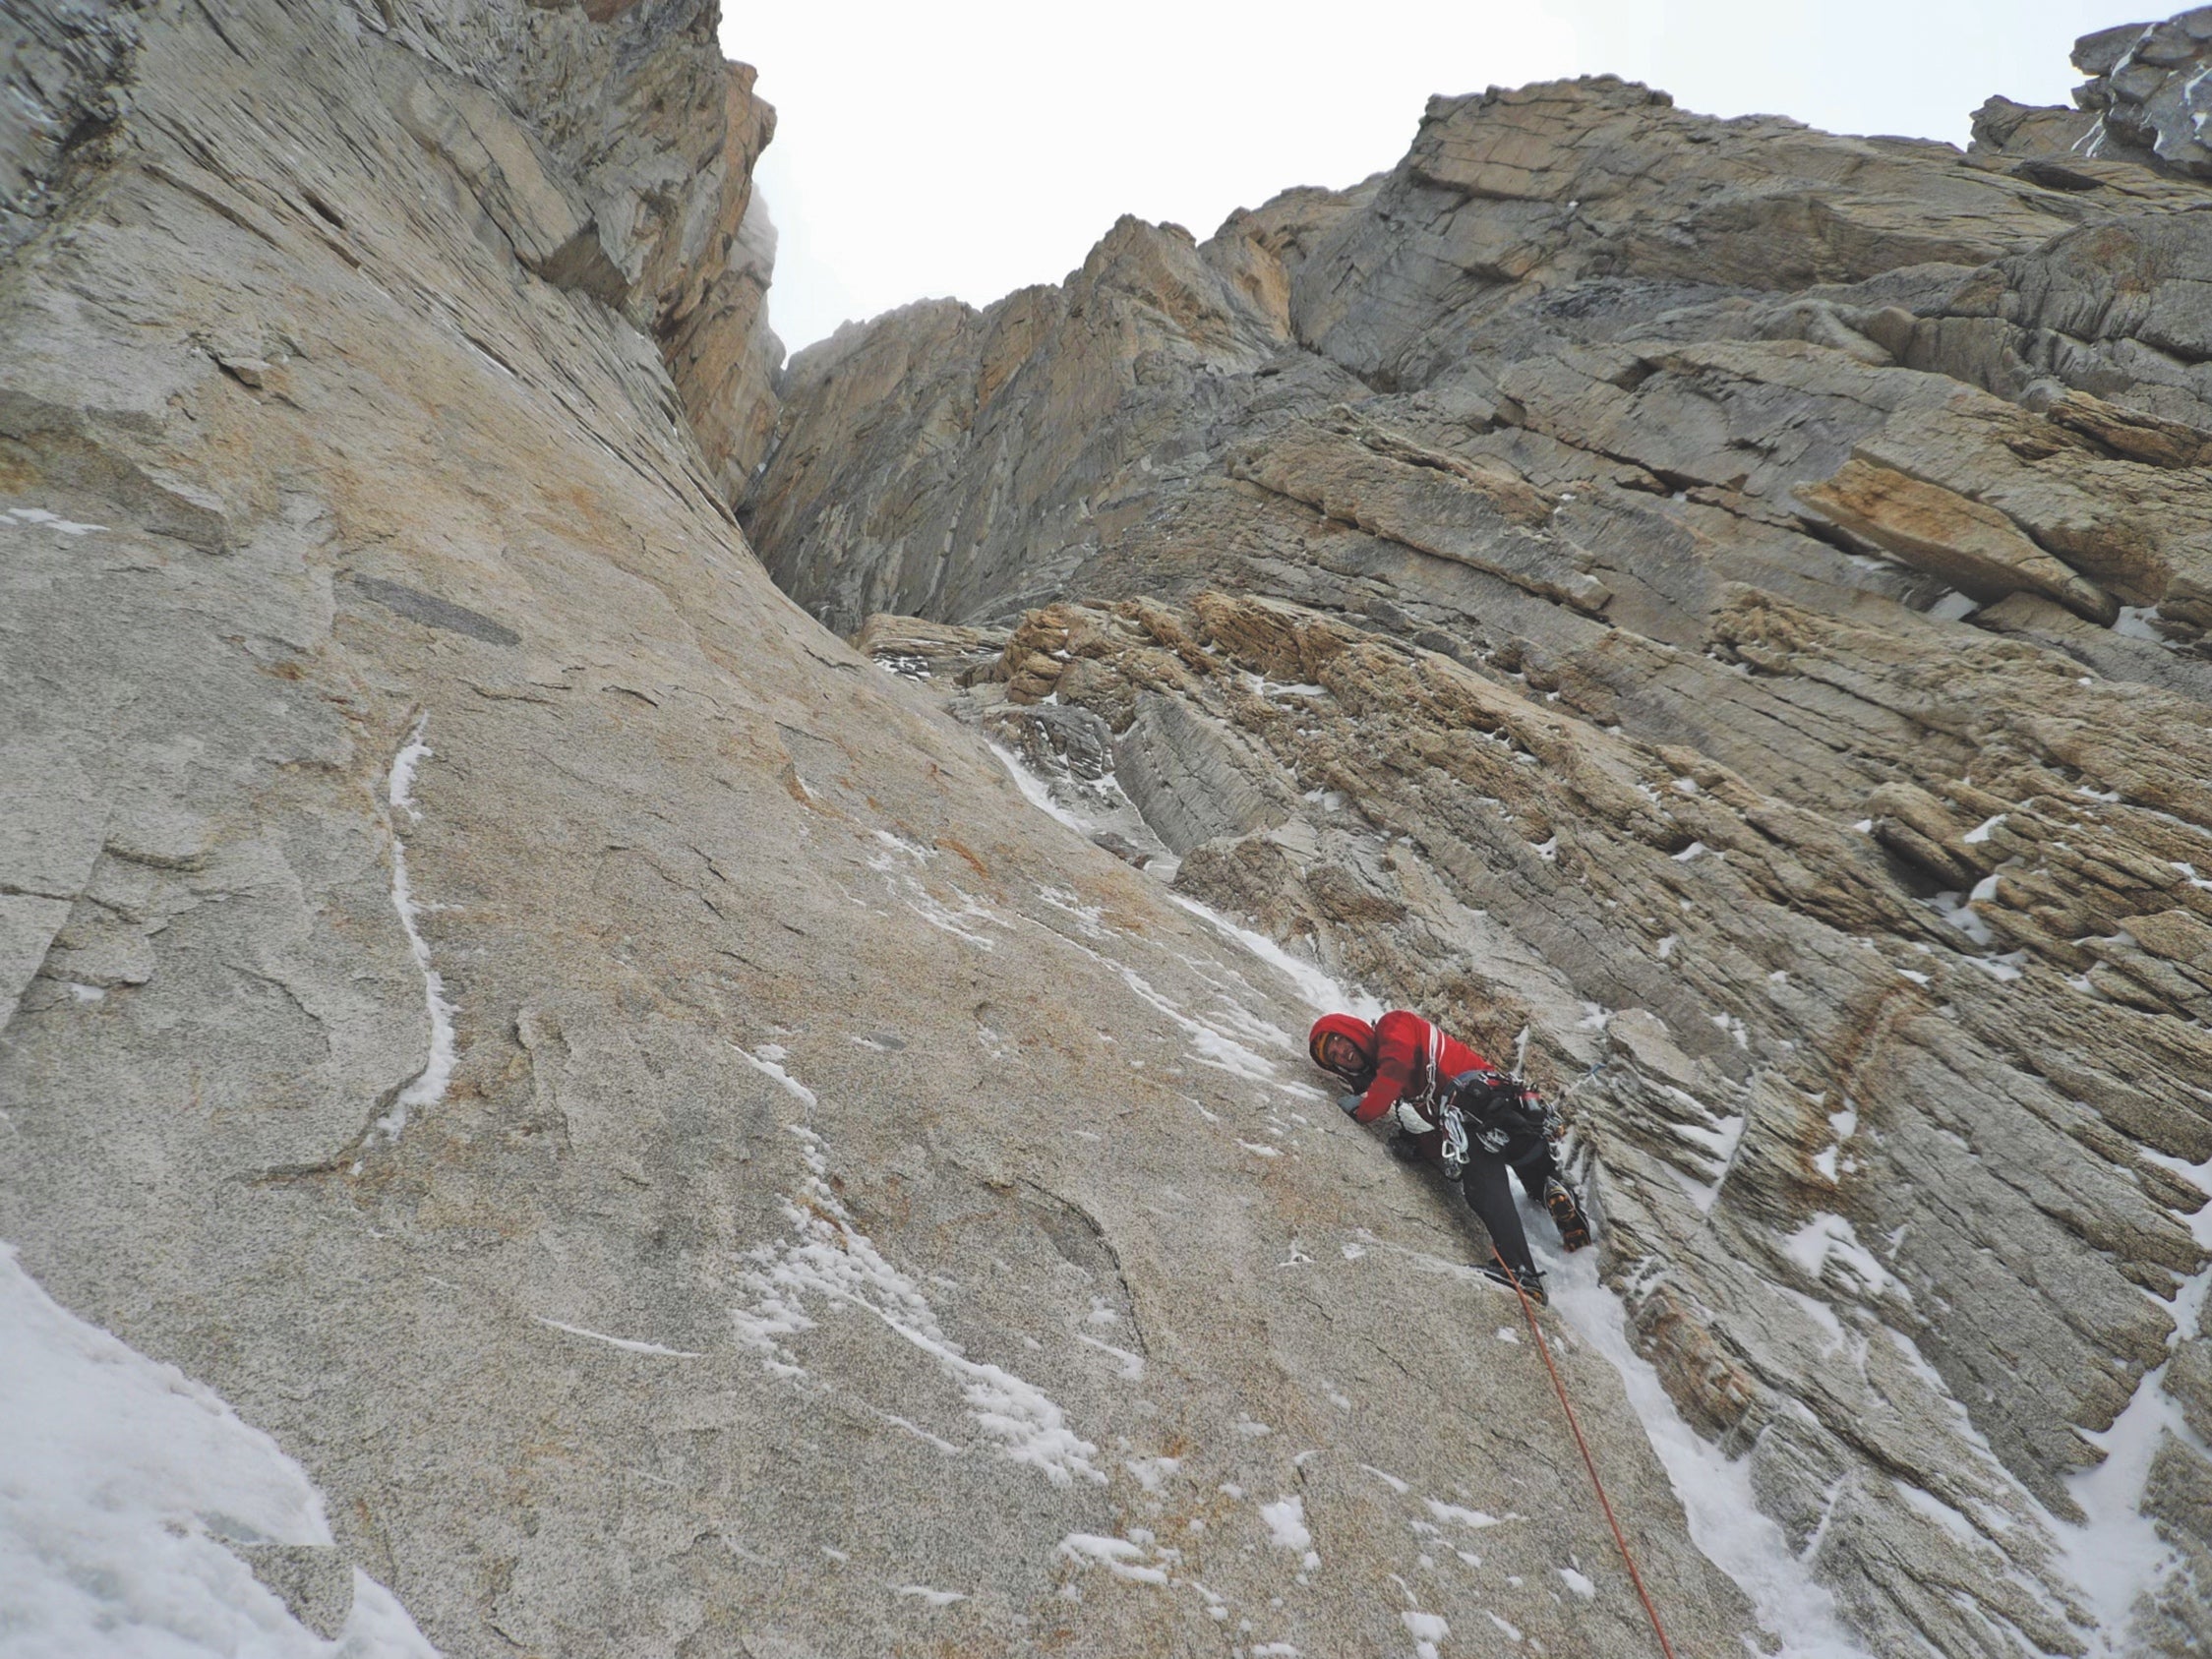
Despite our numerous failures on other peaks, we decided to attempt our main goal. The west face of the Eye Tooth shoots out of the glacier for 2,800 feet of nearly vertical granite. The line is obvious, a straight shot on a protruding prow leading to a spiked summit. When we penguin-waddled to the base on our snowshoes, we knew we had found what we were looking for. Both of us had learned how to climb in Yosemite Valley, and this route felt like the alpine version of El Capitan.
That spring in Yosemite National Park, the speed-climbing craze was in full effect. There was a major mental shift happening on the bigger climbs. If you didn’t bother bringing extraneous equipment like food, water, or shelter, you could rocket up a route in a morning that had traditionally taken several days. Icons like Dean Potter, Timmy O’Neill, Sean Leary, Rolando Garibotti, Jose Pereyra, Miles Smart, Hans Florine, Steve Schneider, and Russ Mitrovich were reinventing big wall climbing every week. Techniques like short-fixing and simul-climbing were shrinking the massive routes into mere outings. The aggressive, ballistic, and all-out style had its dangers. All the normal safety margins were shaved away to gain another minute. Close calls and huge whippers were always being discussed around campfires and picnic tables. Much like car racing, to be the fastest you had to be the closest to crashing.
Aaron and I were way too shy to actually discuss these techniques with our heroes, but we listened to the stories and scribbled notes on napkins when no one was looking. Slowly and quietly, we ticked off all the major features in the Valley in this new style. The freedom of moving up huge swaths of difficult terrain was like hard alcohol to us, and we gulped it down with little restraint.
So we had packed our bags full of gear and the confidence of youth and headed north to Alaska.
Three-quarters of the way into the 23-pitch route, everything was coming together. All the bad memories, terror, and struggle were washed away by pitch after pitch of perfect alpine granite. By using the techniques we had practiced in Yosemite, we were cruising up the peak.
Until the storm hit.
We either didn’t see it coming or ignored it. Within minutes, the rock was covered in verglas and the wind was ripping open the sky. It was clearly time to bail. On our first rappel, the rope got stuck and we didn’t have the technical skills yet to attempt to retrieve it. Instead of reascending the pitch, we panicked and cut the rope. No problem; we had two ropes. Just a rappel or two later, the second rope got stuck. This time we tried to go up and retrieve it, but we didn’t know a good system for it and quickly bailed on that possibility.
We were forced to cut the second rope. We stared down 2,000 feet of vertical, snow-covered granite and began rappelling with two 25-meter pieces of rope. The route is set up with rappel stations every 60 meters so we knew we would come up short every time.
Ahhhh, hindsight: if only we had known then what we know now . . . if only someone had told us what a Reepschnur rappel was, that would have made our lives a lot easier. . . .
As we continued down, the buildup of snow made us miss existing anchors on the moderate terrain on the lower-angled bottom of the face. The ropes snarled as we rappelled and got hung up every time. Saddlebagging? Not something that was on our minds.
We started changing our tactics: One of us would lower the other who would then set gear on the way down. Then the first person would belay the top person down, with that person cleaning the anchor and gear, essentially down-climbing on lead without leaving anything behind—we needed every piece. Our tiny rack dwindled. We used our ice hammer to smash Stoppers into cracks, a technique we called “Stopper heading.” We committed to several one-piece anchors in this way after the heavier person went first with a backup. At one point, the only option was to sling a horn for an anchor, but we were out of slings, so we chopped a section off the end of one of our ropes to leave behind.
The speed-climbing concoction that we had enjoyed on the sunny walls of California was tasting very bitter in the cold of Alaska. While the two areas might both feature large granite walls, this was a very different arena. It might sound “cool” to epic, but it wasn’t—it was just cold. Every rappel down, we just wanted to survive our experience. We wished we had known more options in order to ascend to retrieve a stuck rope; we wished we had known more efficient ways to lower; and we really wished we’d known about the Reepschnur rappel to deal with having chopped the rope. Even saddlebagging on the lower, snow-covered rock face would have made our situation far easier to deal with.
The bottom line is, as you get strong and attempt bolder and more committing routes, make sure your ability to deal with unforeseen issues increases at an equal rate.
Section divider
Specialized Rappel Techniques
From Chapter 4: Rappelling and Descending of Climbing Self-Rescue by Ian Nicholson
Reepschnur Rappel
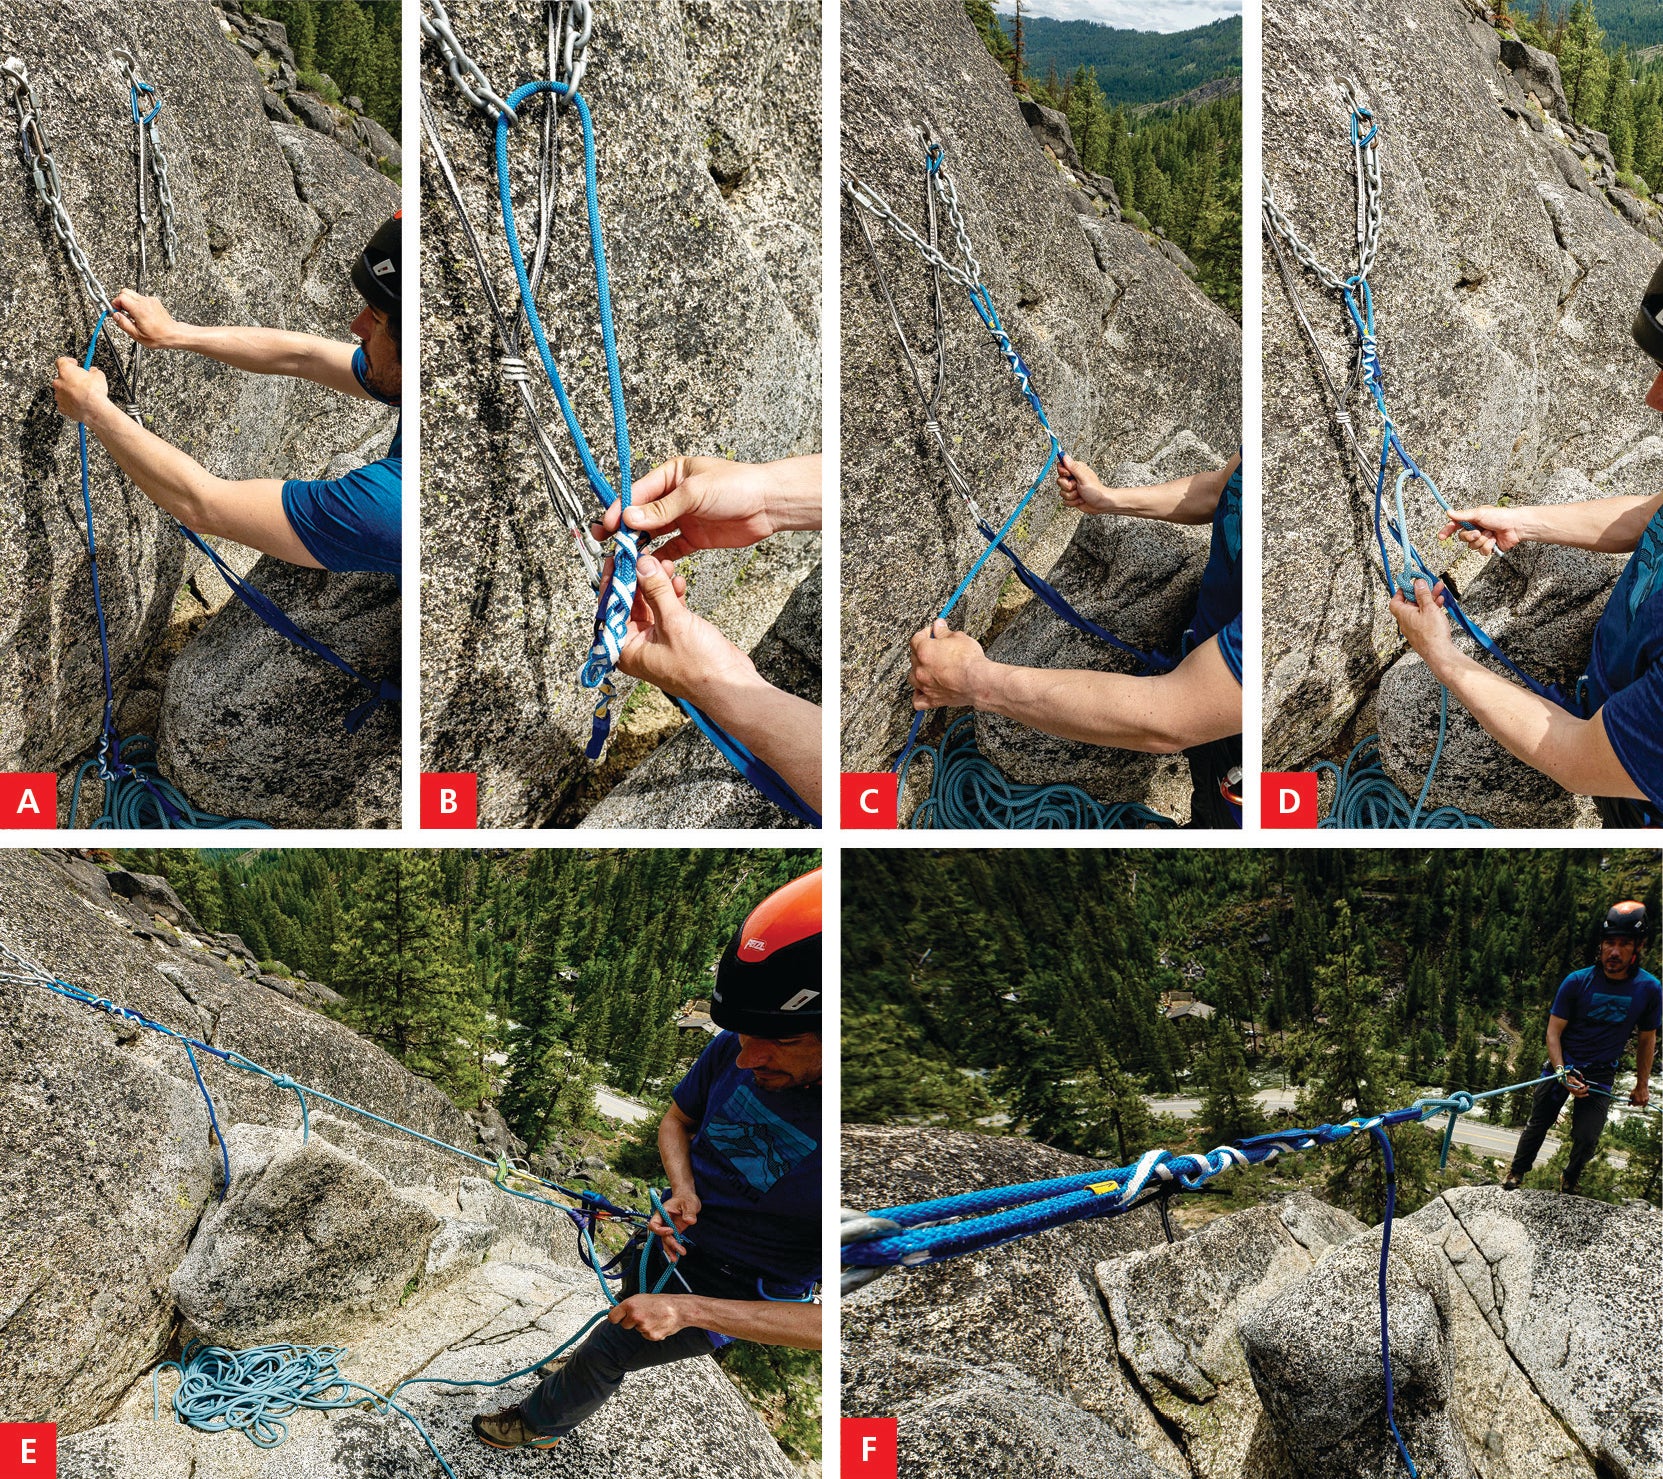
The Reepschnur rappel has countless applications. It is a way to use a blocking knot to rappel farther than half a rope length and still be able to retrieve your rope. When setting up a Reepschnur, you need to either know how far you have to go or lower the first person to determine the exact length of the rappel (see chapter 5 of Climbing Self-Rescue for details on lowering). Here’s how to set up the Reepschnur rappel:
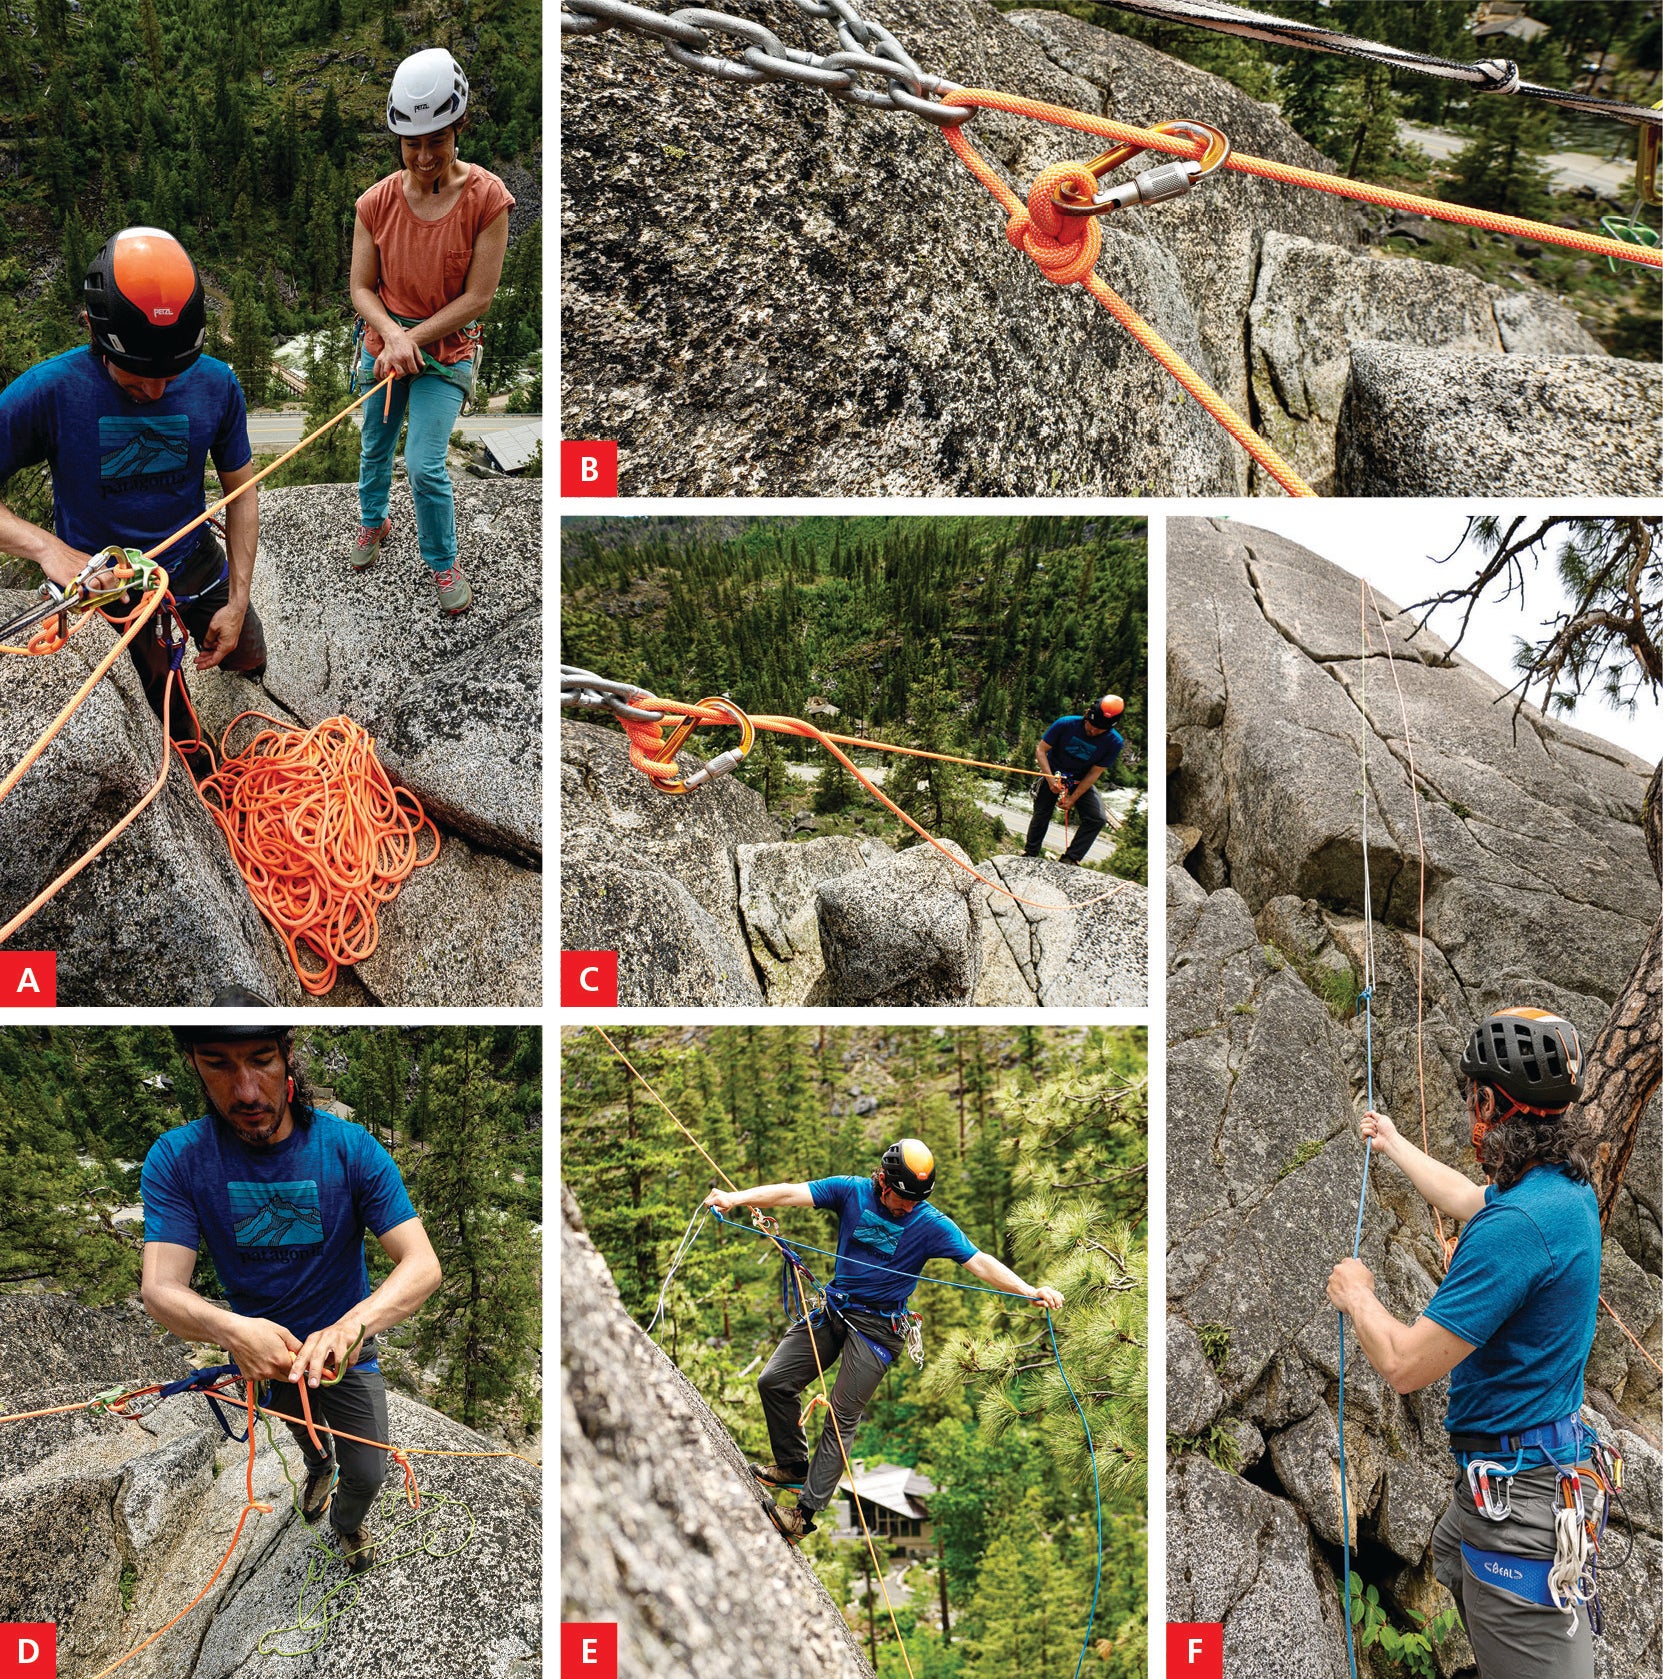
- Lower the first climber or otherwise figure out the exact length of the rappel (fig. 4-15a).
- Tie a knot (most commonly an alpine butterfly) on the shorter of the two strands of rope threaded through the anchor (not the longer side that the climber was lowered on), then clip the knot to the other (longer) strand of rope with a locking carabiner (fig. 4-15b). The lower the profile in this setup, the better.
- Set up a single-strand rappel on the long strand of rope and begin your rappel, keeping both strands of rope close to you (fig. 4-15c). It is better to rappel on the side of rope that the alpine butterfly is clipped to rather than the strand it’s tied with, so you get the benefit of the knot jamming against the rappel anchor. It is imperative that you not lose control of the short end of the rope; it is an excellent idea to clip this pull side directly to yourself since unlike in a normal rappel, in which both strands are running through your belay device, it is easy for the short strand to get hung up on a ledge or otherwise creep out of your control.
- When the short strand comes tight on your harness as you rappel down the long end, remove the short strand and start tying things to it that will allow you to “pull” it from lower down (fig. 4-15d). Use longer items first, such as cordelette or long slings, but anything goes—even cams and nuts “chained” together.
- Rappel all the way to the ground or the next anchor on the longer strand (fig. 4-15e), then retrieve the rope by pulling down on the slings, cams, cordelette, et cetera (fig. 4-15f). When you pull the “chained-together” side of the rope, you will see the importance of putting the alpine butterfly on this side of the rope, as it (as well as the items attached to the short end) would not be able to pass through the rappel rings.
Beal Escaper
The Beal Escaper is a unique product that has gained a lot of popularity since it was first released. Made up of an elastic cord connected to Dyneema webbing, the latter woven in a configuration similar to a VT prusik, the Escaper facilitates relatively long single-strand rappels plus rope retrieval. The elastic cord lets the hitch creep when the rope is unweighted at the end of the rappel, enabling you to pull your rope.
While this device might seem sketchy, it is actually quite robust, but its bigger problem is that it can introduce too much friction into the system if the rappel is too low-angle; in that situation, the elastic cord is not able to spring upward and allow the Dyneema sling to slowly creep off. Also be cautious of super-long rappels (greater than 40 meters), as the Escaper’s “spring” action is lessened, making it more difficult to release the rope.
The Beal Escaper isn’t a tool to use if you know you will have to make a number of double-rope rappels, but it can help you get through a few longer rappels that you might not have seen coming. It can also minimize how much equipment you have to leave behind in an emergency if you need to retreat down a rarely rappelled section of terrain.
- Start by passing the Escaper through the anchor (fig. 4-16a).
- Follow several arrows that show where the device’s tapered rope is threaded through webbing (fig. 4-16b) until the tapered rope is completely through (fig. 4-16c).
- Pass the climbing rope through the Escaper’s “eye” (fig. 4-16d).
- Tie it directly to the Escaper with a secure knot like a rewoven figure 8 or rewoven overhand. Now you’re ready to rappel (fig. 4-16e).
While this device appears like it will pull through easily after the rappel, it is surprisingly difficult to get the rope to release. For moderate-length rappels, expect more than 20 pulls to get it to release (fig. 4-16f).
Related: Why I Lied About Rappelling Off the End of My Rope
About the author: Ian Nicholson is an IFMGA/UIAGM mountain guide and has been guiding around the world for nearly 20 years. He is particularly passionate about self-rescue and has earned two Denali Pro Pin Awards for helping to save other climbers. Ian works on the National Instructor Team for both the AMGA and AIARE and is the author of SUPERTOPO: Washington Pass Climbing, as well as a regular contributor to OutdoorGearLab.com and WildSnow.com.
About the contributor: Zack “Bones” Smith learned how to climb in Yosemite with his dad using hip belays and swami belts. Single-push technical terrain in alpine environments like Alaska and Patagonia is his forte, but he also enjoys casual afternoon bouldering sessions with friends.